Intense Espresso Brownies – Rich Chocolate Indulgence
Espresso brownies are more than just a dessert; they’re a decadent invitation to indulge. Imagine this: the rich, fudgy embrace of chocolate, elevated by the bold, aromatic whisper of freshly brewed espresso. It’s a pairing that’s pure magic, a symphony for your taste buds. We all crave that perfect brownie – the one that’s intensely chocolatey, with just the right amount of chewiness and a glorious, crackly top. But what truly sets these Espresso Brownies apart is the transformative power of coffee. It doesn’t just add a flavor; it deepens and intensifies the chocolate, creating a complexity that’s utterly irresistible. Whether you’re a die-hard coffee lover or simply appreciate a sophisticated twist on a classic, these espresso brownies are guaranteed to become your new obsession. Get ready for a truly unforgettable chocolate experience!
Espresso Brownies: A Rich and Intense Chocolate Indulgence
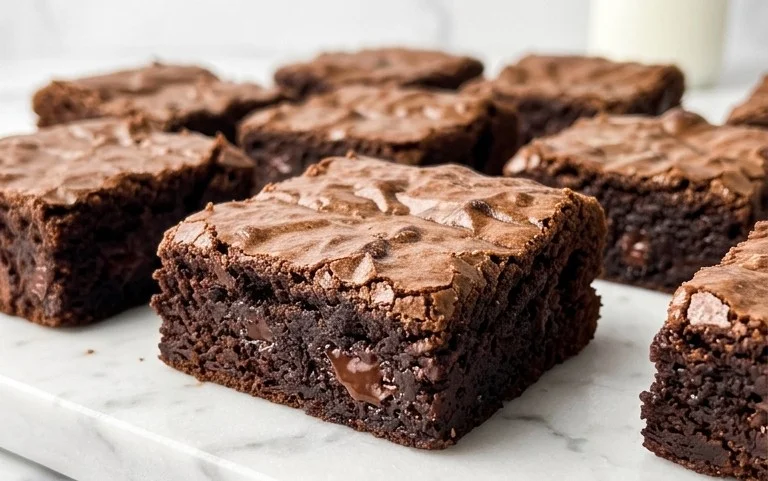
There are brownies, and then there are *espresso brownies*. These aren’t your average fudgy squares. Infused with the deep, complex notes of espresso, these brownies offer an intensely chocolatey experience with a sophisticated edge. The espresso powder doesn’t just add a coffee flavor; it amplifies the chocolate, creating a richer, more profound taste that will have you reaching for another bite. Whether you’re a dedicated coffee lover or simply appreciate a truly decadent dessert, this recipe is sure to become a favorite. I’ve found that the key to their incredible depth of flavor lies in the quality of the ingredients and a few simple techniques that ensure a perfectly dense and chewy texture. Get ready to elevate your brownie game.
Ingredients:
- 1 cup unsalted butter (cold)
- 1 cup + 2 tablespoons semi-sweet chocolate chips
- 1 cup all-purpose flour
- 3 tablespoons dark cocoa powder
- 2 tablespoons espresso powder
- 1/2 teaspoon salt
- 1 1/4 cups granulated sugar
- 3 large eggs
- 1/2 tablespoon vanilla extract
Crafting Your Espresso Brownies
The magic of these brownies starts with melting the chocolate and butter together. This creates a rich, liquid base that is essential for that signature fudgy texture. Don’t rush this step; a gentle melt ensures a smooth, emulsified mixture.
1. Melt the Chocolate and Butter: Begin by placing the cold unsalted butter and 1 cup of the semi-sweet chocolate chips into a heatproof bowl. You can do this in a few ways, but my preferred method is using a double boiler. Set a saucepan filled with about an inch of water over medium-low heat. Once the water is simmering gently, place the bowl of butter and chocolate on top, ensuring the bottom of the bowl doesn’t touch the water. Stir occasionally until everything is completely melted and smooth. Alternatively, you can melt them in the microwave in 30-second intervals, stirring well between each, until fully combined. Be careful not to overheat the chocolate, as it can seize. Once melted, remove the bowl from the heat and let it cool slightly for about 5-10 minutes. This slight cooling is important so it doesn’t scramble the eggs when you add them later.
2. Combine Dry Ingredients: While your chocolate mixture is cooling, it’s time to prepare the dry ingredients. In a separate medium-sized bowl, whisk together the all-purpose flour, dark cocoa powder, espresso powder, and salt. Whisking these together thoroughly helps to distribute the cocoa and espresso powder evenly throughout the batter, preventing any pockets of intense flavor and ensuring a uniform taste in every bite. The espresso powder is the star here, so make sure it’s fully incorporated.
3. Whip Eggs and Sugar: In a large mixing bowl, combine the granulated sugar and the 3 large eggs. Using a whisk or an electric mixer on medium-high speed, beat the eggs and sugar together for about 2-3 minutes. You’re looking for the mixture to become pale and slightly thickened, almost ribbon-like when you lift the whisk. This process incorporates air, which contributes to the brownie’s texture, giving them a slight lift while maintaining that dense chewiness. Don’t skimp on this step; it’s crucial for achieving the right consistency. After the eggs and sugar are well combined and have lightened in color, stir in the vanilla extract.
4. Incorporate Chocolate Mixture and Dry Ingredients: Now, gently pour the slightly cooled melted chocolate and butter mixture into the egg and sugar mixture. Stir with a spatula or whisk until just combined. Be careful not to overmix at this stage; you just want to incorporate the liquids. Next, gradually add the dry ingredients to the wet ingredients. Fold them in gently with a spatula until there are no visible streaks of flour. Again, the key here is to mix until *just combined*. Overmixing can develop the gluten in the flour, leading to tougher brownies, which is the opposite of what we want. Stop mixing as soon as the last traces of flour disappear. Finally, gently fold in the remaining 2 tablespoons of semi-sweet chocolate chips. These will provide little pockets of melted chocolate goodness within the brownie.
5. Bake and Cool: Preheat your oven to 350 degrees Fahrenheit (175 degrees Celsius). Line an 8×8 inch baking pan with parchment paper, leaving some overhang on the sides. This makes it incredibly easy to lift the brownies out of the pan once they are baked. Pour the batter evenly into the prepared pan, spreading it with your spatula. Bake for 25-30 minutes, or until a toothpick inserted into the center comes out with moist crumbs attached, but not wet batter. You want them to be set around the edges. Once baked, let the brownies cool completely in the pan on a wire rack. This is a crucial step for texture; cutting into them while warm will result in a messier, less fudgy brownie. Patience here is key! Once fully cooled, use the parchment paper overhang to lift the entire block of brownies out of the pan. You can then cut them into squares. For the cleanest cuts, use a sharp knife and wipe it clean between slices, especially if your brownies are very fudgy.
Enjoy these intensely flavored Espresso Brownies! They are best served at room temperature, perhaps with a dusting of powdered sugar or a dollop of whipped cream. The depth of flavor from the espresso and dark cocoa is truly something special.
Conclusion:
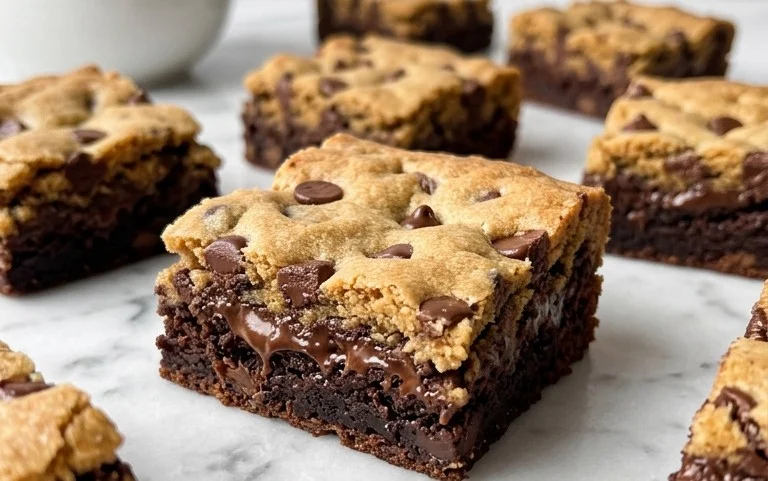
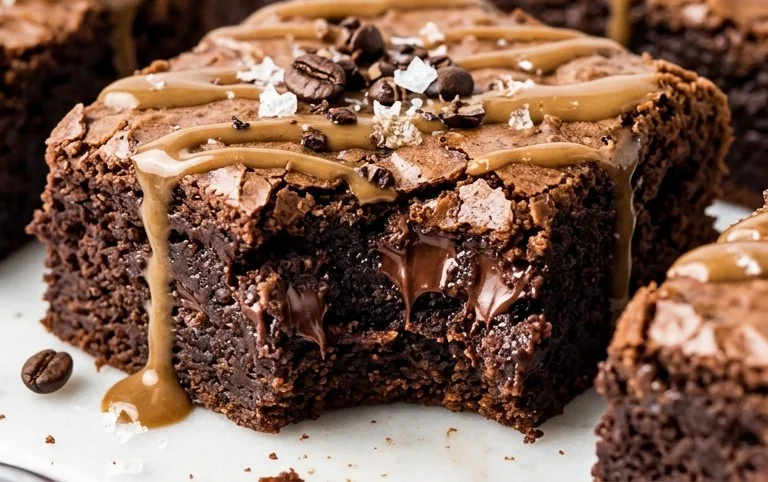
There you have it – the ultimate guide to creating deeply satisfying, intensely flavorful Espresso Brownies! These aren’t just any brownies; they’re a sophisticated treat that elevates the classic chocolate experience with the rich, complex notes of espresso. The slight bitterness of the coffee beautifully balances the sweetness of the chocolate, creating a truly decadent dessert that’s surprisingly easy to whip up. Whether you’re a seasoned baker or a beginner, this recipe promises a fudgy, chewy interior and a perfectly crackled top that will have everyone asking for seconds.
These Espresso Brownies are incredibly versatile. They are divine on their own, perhaps dusted with a little powdered sugar. For an extra special touch, serve them warm with a scoop of vanilla bean ice cream – the contrast of warm brownie and cold ice cream is simply heavenly. A dollop of freshly whipped cream or a drizzle of extra chocolate ganache also works wonders. Feeling adventurous? Consider adding a sprinkle of sea salt on top before baking to enhance the chocolate flavor, or fold in some chopped nuts like walnuts or pecans for added texture.
I truly encourage you to give this recipe a try. The aroma alone as they bake is non-intoxicating, and the resulting taste is pure bliss. Don’t be intimidated by the espresso; it’s what makes these brownies so special!
Frequently Asked Questions:
Can I use instant coffee instead of espresso?
Absolutely! If you don’t have espresso powder or strongly brewed espresso, you can substitute with instant coffee granules dissolved in the hot water called for in the recipe. Start with a tablespoon and adjust to your taste preference; you’re looking for a strong coffee flavor that complements the chocolate.
How do I store these Espresso Brownies?
Once cooled, store your Espresso Brownies in an airtight container at room temperature for up to 3-4 days. They actually tend to get even fudgier and more flavorful after a day or two!
What if I don’t like coffee?
While the espresso is key to the unique flavor profile, you can omit it. In this case, simply replace the espresso liquid with an equal amount of hot water or hot milk. You’ll still have delicious chocolate brownies, but they won’t have that signature espresso kick.
Espresso Brownies
Rich and fudgy brownies infused with the deep flavor of espresso, creating a decadent chocolate experience.
Ingredients
-
1 cup unsalted butter, cold
-
1 cup + 2 tbsp semi-sweet chocolate chips
-
1 cup all-purpose flour
-
3 tbsp dark cocoa powder
-
2 tbsp espresso powder
-
1/2 tsp salt
-
1 1/4 cups granulated sugar
-
3 large eggs
-
1/2 tbsp vanilla extract
Instructions
-
Step 1
Preheat oven to 350°F (175°C). Line an 8×8 inch baking pan with parchment paper, leaving an overhang on the sides. -
Step 2
In a heatproof bowl set over a saucepan of simmering water (or in the microwave in 30-second intervals), melt the unsalted butter and 1 cup of the semi-sweet chocolate chips. Stir until smooth. Remove from heat and let cool slightly. -
Step 3
In a separate medium bowl, whisk together the all-purpose flour, dark cocoa powder, espresso powder, and salt. -
Step 4
In a large bowl, whisk together the granulated sugar and eggs until well combined. Stir in the vanilla extract and the slightly cooled chocolate-butter mixture until smooth. -
Step 5
Gradually add the dry ingredients to the wet ingredients, mixing until just combined. Do not overmix. -
Step 6
Fold in the remaining 2 tbsp of semi-sweet chocolate chips. -
Step 7
Pour the batter into the prepared baking pan and spread evenly. -
Step 8
Bake for 25-30 minutes, or until a toothpick inserted into the center comes out with moist crumbs attached (not wet batter). -
Step 9
Let the brownies cool completely in the pan before lifting them out using the parchment paper overhang. Cut into squares and serve.
Important Information
Nutrition Facts (Per Serving)
It is important to consider this information as approximate and not to use it as definitive health advice.
Allergy Information
Please check ingredients for potential allergens and consult a health professional if in doubt.