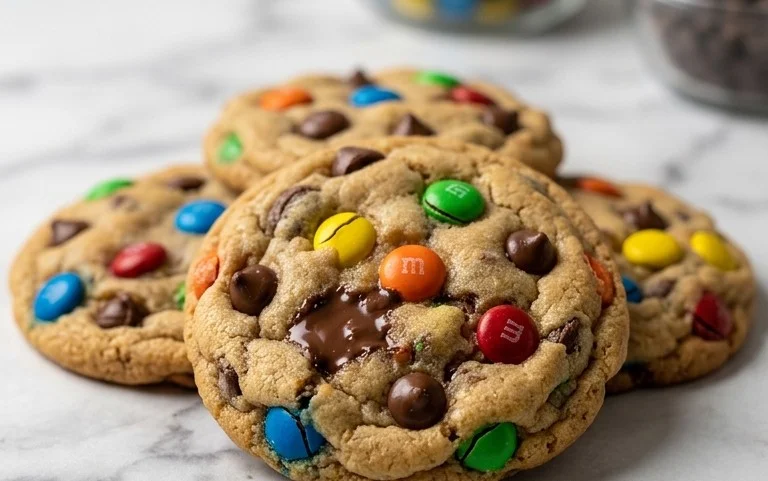
Ultimate Brookie Recipe- Cookie Brownie Bar
Brookie: The Ultimate Dessert Hybrid You Need to Make Today!
Are you ready for a dessert that defies expectations and delivers double the delight?
My friends, the brookie is here to revolutionize your sweet tooth. This magical creation, a harmonious marriage of a chewy chocolate chip cookie and a fudgy brownie, is more than just a dessert; it’s an experience. It’s for those moments when you can’t quite decide between two iconic treats, and frankly, why should you have to? The brookie answers that craving with an irresistible combination of textures and flavors. Imagine the satisfying crumble of a perfect cookie giving way to the rich, decadent chew of a brownie, all in one bite. This isn’t just a trend; it’s a celebration of all things chocolatey and comforting, making the brookie a guaranteed crowd-pleaser and a personal favorite in my kitchen.
Why You’ll Fall in Love
People adore the brookie because it offers the best of both worlds. It’s the ultimate indulgence for anyone who loves chocolate chip cookies and brownies equally. What makes this brookie so special is the perfect balance achieved between the two distinct layers, ensuring you get the characteristic chew of the cookie and the dense, fudgy goodness of the brownie in every single bite. It’s a testament to culinary creativity, proving that sometimes, two great desserts are better than one!
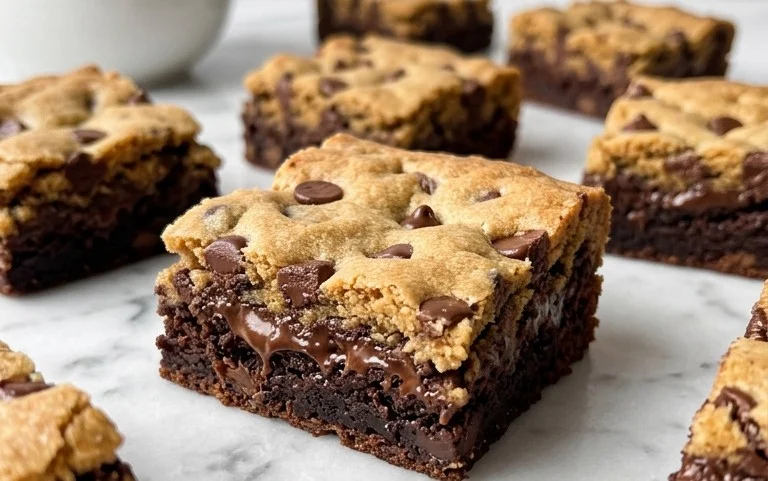
Brookie: The Ultimate Chocolate Chip Cookie and Brownie Bar
Prepare yourselves for a dessert experience that’s truly the best of both worlds. We’re talking about the brookie, a magical creation that marries the gooey, fudgy interior of a classic brownie with the sweet, chewy texture of a chocolate chip cookie. This isn’t just a dessert; it’s a decadent masterpiece that will satisfy even the most discerning sweet tooth. Forget choosing between a cookie or a brownie – with this recipe, you get both, layered and baked to perfection in one irresistible bar. The beauty of the brookie lies in its simplicity and its ability to deliver a double dose of chocolatey goodness. It’s perfect for potlucks, parties, or simply when you’re craving something extraordinary.
Ingredients:
- 3/4 cup Butter (softened)
- 1 cup Sugar
- 1/3 cup Brown Sugar
- 2 large Eggs
- 1 teaspoon Vanilla
- 1/2 cup Unsweetened Cocoa Powder
- 1 cup Flour
- 1/2 teaspoon Baking Soda
- 1/4 teaspoon Salt
- 1/2 cup Chocolate Chips (optional, for the brownie layer)
- 1/2 cup Butter (softened)
- 3/4 cup Brown Sugar
- 1/4 cup Sugar
- 1 large Egg
- 1 teaspoon Vanilla
- 1/2 cup Chocolate Chips (for the cookie layer)
Making the Magic Happen: The Brownie Layer
Let’s start by crafting the rich, chocolatey foundation of our brookie. This brownie layer is designed to be fudgy and intensely chocolatey, providing a decadent base for our cookie topping.
1. Prepare Your Pan and Preheat Oven: Before we get too deep into mixing, it’s crucial to get your baking pan ready. You’ll need an 8×8 inch baking pan. Grease it well and then line it with parchment paper, leaving some overhang on the sides. This parchment paper “sling” will make lifting the baked brookies out of the pan a breeze, preventing any sticky situations and making cleanup much easier. Once your pan is prepped, preheat your oven to 350°F (175°C). This consistent heat is essential for even baking, ensuring your brookies are cooked through without being dry.
2. Melt and Mix the Brownie Base: In a medium-sized saucepan, melt the 3/4 cup of softened butter over low heat. Once melted, remove it from the heat and whisk in the 1 cup of sugar and 1/3 cup of brown sugar until well combined. Don’t worry if the mixture looks a little grainy at this stage. Next, you’ll add the two large eggs, one at a time, whisking well after each addition until the mixture is smooth and glossy. Stir in the 1 teaspoon of vanilla extract. Now comes the chocolate! Sift in the 1/2 cup of unsweetened cocoa powder and mix until there are no dry streaks of cocoa visible. This step is important to ensure a smooth, consistent chocolate flavor throughout the brownie layer. Finally, gently fold in the 1/2 cup of chocolate chips if you’re using them for an extra chocolatey kick.
3. Spread the Brownie Batter: Pour or spoon this luscious brownie batter into your prepared 8×8 inch baking pan. Use a spatula to spread it evenly across the bottom of the pan, ensuring it reaches all the corners. This even distribution is key for a uniform brownie layer. Don’t overwork the batter; just aim for a smooth, even surface.
Crafting the Perfect Cookie Topping
Now for the star of the show – the chocolate chip cookie layer that will crown our fudgy brownie base. This cookie dough is designed to be slightly chewy and perfectly sweet.
4. Cream the Cookie Dough Ingredients: In a separate medium bowl, cream together the 1/2 cup of softened butter, 3/4 cup of brown sugar, and 1/4 cup of sugar. Use an electric mixer or a sturdy whisk and beat until the mixture is light and fluffy, and the sugars are well incorporated. This creaming process incorporates air into the dough, which contributes to the cookie’s texture. Beat in the 1 large egg and the 1 teaspoon of vanilla extract until thoroughly combined. Gradually add the 1 cup of flour, 1/2 teaspoon of baking soda, and 1/4 teaspoon of salt. Mix until just combined. Be careful not to overmix at this stage, as it can lead to tough cookies. Finally, gently stir in the 1/2 cup of chocolate chips for that classic chocolate chip cookie flavor.
5. Layer and Bake Your Brookies: Carefully spoon the cookie dough mixture over the brownie batter in the baking pan. Using a spatula or the back of a spoon, gently spread the cookie dough to cover the brownie layer as evenly as possible. You don’t need to press it down too firmly; a gentle spreading will do. Don’t worry if it’s not perfectly smooth; some rustic swirls will look beautiful when baked. Place the pan in your preheated 350°F (175°C) oven. Bake for 25-30 minutes, or until the edges of the brownie layer are set and slightly pulling away from the sides of the pan, and the cookie layer is golden brown and appears cooked through. You can test for doneness by inserting a toothpick into the center; it should come out with moist crumbs attached, not wet batter.
Cooling and Serving Your Masterpiece
The hardest part is waiting, but patience is a virtue when it comes to brookies.
6. Cool Completely and Cut: Once baked, remove the brookies from the oven and let them cool completely in the pan on a wire rack. This is a critical step. Cutting into them while they’re still warm will result in a messy, unmanageable situation. As they cool, the brownie and cookie layers will set up and meld together beautifully. Once completely cooled, use the parchment paper overhang to lift the entire brookie slab out of the pan. Place it on a cutting board and use a sharp knife to cut them into squares or bars. For a truly indulgent experience, serve them warm with a scoop of vanilla ice cream or a dollop of whipped cream. Enjoy this incredible fusion of two beloved desserts!
Conclusion:
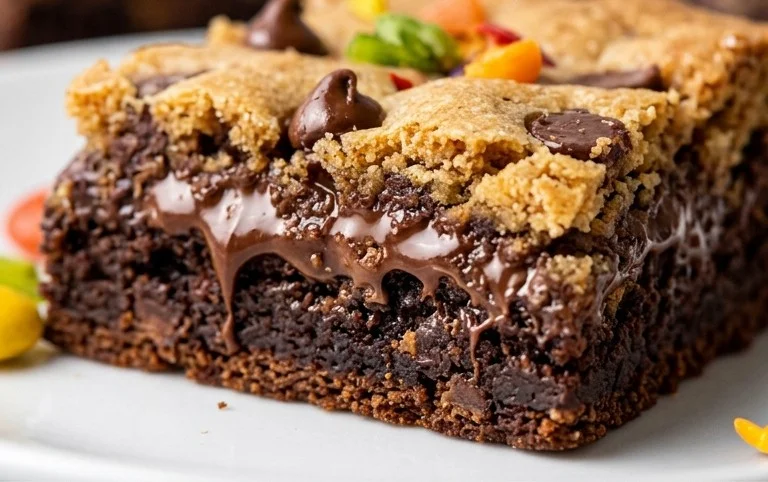
So there you have it – the ultimate guide to creating the irresistible Brookie bar! This recipe truly is a winner because it combines the best of both worlds: the chewy, classic comfort of a chocolate chip cookie and the rich, fudgy decadence of a brownie, all in one perfect bite. It’s the ultimate crowd-pleaser, guaranteed to satisfy any sweet tooth. I love cutting them into generous squares and serving them slightly warm, maybe with a scoop of vanilla ice cream for an extra special treat. They’re also fantastic at room temperature, making them perfect for bake sales, potlucks, or just enjoying with a glass of milk. Don’t be afraid to get creative with variations! Try adding chopped nuts to the cookie layer, a swirl of peanut butter between the layers, or even some caramel bits for an added layer of flavor. I truly encourage you to give this amazing Brookie recipe a try – I promise you won’t regret it!
Frequently Asked Questions:
Q: Can I make these Brookie bars ahead of time?
Absolutely! Brookies are fantastic for making a day or two in advance. Once cooled completely, store them in an airtight container at room temperature. They actually tend to develop even more flavor overnight!
Q: My Brookie layers are mixing together. What did I do wrong?
This is a common issue! To ensure distinct layers, it’s best to slightly underbake your cookie dough base before dolloping on the brownie batter. This allows the cookie dough to firm up just enough so the brownie batter doesn’t completely sink into it. Also, ensure your brownie batter isn’t too thin.
Q: Can I freeze leftover Brookies?
Yes, you can! Once completely cooled, wrap individual Brookie bars tightly in plastic wrap, then place them in a freezer-safe bag or container. They should stay fresh in the freezer for up to 2-3 months. Thaw them at room temperature or gently warm them in the oven or microwave.
Brookie (Chocolate Chip Cookie and Brownie Bar)
A decadent bar combining the best of a chocolate chip cookie and a fudgy brownie.
Ingredients
-
3/4 cup Butter ((softened))
-
1 cup Sugar
-
1/3 cup Brown Sugar
-
2 large Eggs
-
1 teaspoon Vanilla
-
1/2 cup Unsweetened Cocoa Powder
-
1 cup Flour
-
1/2 teaspoon Baking Soda
-
1/4 teaspoon Salt
-
1/2 cup Chocolate Chips ((optional))
-
1/2 cup Butter ((softened))
-
3/4 cup Brown Sugar
-
1/4 cup Sugar
-
1 large Egg
-
1 teaspoon Vanilla
Instructions
-
Step 1
Preheat oven to 350°F (175°C). Grease and flour a 9×13 inch baking pan. -
Step 2
In a large bowl, cream together the first 3/4 cup softened butter, 1 cup sugar, and 1/3 cup brown sugar until light and fluffy. -
Step 3
Beat in the 2 large eggs one at a time, then stir in the 1 teaspoon vanilla. -
Step 4
In a separate bowl, whisk together the unsweetened cocoa powder, flour, baking soda, and salt. -
Step 5
Gradually add the dry ingredients to the wet ingredients, mixing until just combined. Stir in the 1/2 cup chocolate chips if using. Spread this brownie batter evenly in the prepared pan. -
Step 6
In a medium bowl, cream together the second 1/2 cup softened butter, 3/4 cup brown sugar, and 1/4 cup sugar until smooth. -
Step 7
Beat in the 1 large egg and the second 1 teaspoon vanilla until well combined. -
Step 8
Drop spoonfuls of the cookie dough batter over the brownie batter. Use a knife or spatula to gently swirl the doughs together, creating marbled layers. -
Step 9
Bake for 30-35 minutes, or until a toothpick inserted into the center comes out with moist crumbs. -
Step 10
Let cool completely in the pan before cutting into bars.
Important Information
Nutrition Facts (Per Serving)
It is important to consider this information as approximate and not to use it as definitive health advice.
Allergy Information
Please check ingredients for potential allergens and consult a health professional if in doubt.