Simple Butter Cookies Classic Recipe
Butter Cookies Recipe are a simple joy. They’re the kind of cookie that tastes like pure comfort, buttery and sweet with a satisfying crumb. When I make them, the whole kitchen fills with that wonderful aroma of vanilla and butter baking. They’re perfect for tea time, a simple afternoon treat, or even for decorating if you’re feeling fancy. The beauty of this recipe is its simplicity; it relies on just a few good ingredients to create something truly delicious. You can whip these up with minimal fuss, and they store so well, making them an excellent choice for having homemade treats on hand. Ingredients: 2¼ cups all-purpose flour ¼ teaspoon salt 1 cup unsalted butter softened ¾ cup granulated sugar 2 teaspoons vanilla extract 1 large egg room temperature 2-3 teaspoons milk if needed white chocolate chips (optional) semi-sweet chocolate chips (optional) coconut oil (optional) sprinkles Making the Dough The foundation of a great butter cookie is the creaming of the butter and sugar. This process incorporates air into the mixture, which helps create a tender cookie. Make sure your butter is truly softened, not melted. You should be able to press your finger into it easily, leaving an indent. If it’s too cold, it won’t cream properly, and if it’s too warm, your cookies might spread too much. Start by whisking together the all-purpose flour and salt in a medium bowl. This ensures the salt is evenly distributed throughout the dry ingredients, so you don’t get any sal
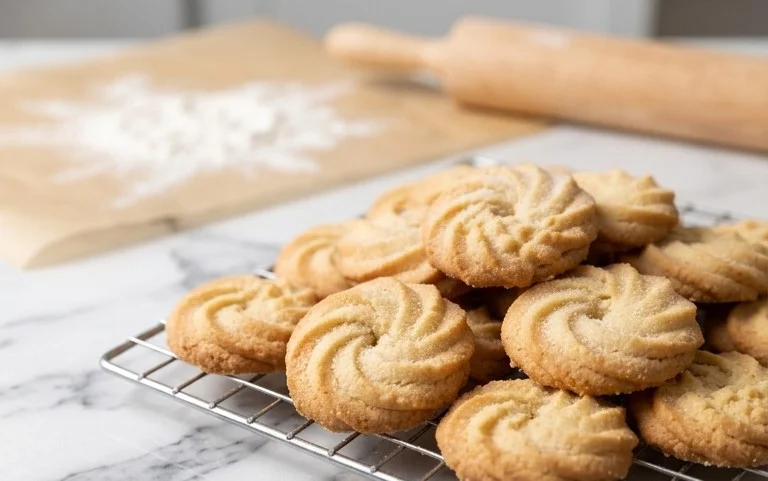
Butter Cookies Recipe
Butter cookies are a simple joy. They’re the kind of cookie that tastes like pure comfort, buttery and sweet with a satisfying crumb. When I make them, the whole kitchen fills with that wonderful aroma of vanilla and butter baking. They’re perfect for tea time, a simple afternoon treat, or even for decorating if you’re feeling fancy. The beauty of this recipe is its simplicity; it relies on just a few good ingredients to create something truly delicious. You can whip these up with minimal fuss, and they store so well, making them an excellent choice for having homemade treats on hand.
Ingredients:
- 2¼ cups all-purpose flour
- ¼ teaspoon salt
- 1 cup unsalted butter softened
- ¾ cup granulated sugar
- 2 teaspoons vanilla extract
- 1 large egg room temperature
- 2-3 teaspoons milk if needed
- white chocolate chips (optional)
- semi-sweet chocolate chips (optional)
- coconut oil (optional)
- sprinkles
Making the Dough
The foundation of a great butter cookie is the creaming of the butter and sugar. This process incorporates air into the mixture, which helps create a tender cookie. Make sure your butter is truly softened, not melted. You should be able to press your finger into it easily, leaving an indent. If it’s too cold, it won’t cream properly, and if it’s too warm, your cookies might spread too much.
Start by whisking together the all-purpose flour and salt in a medium bowl. This ensures the salt is evenly distributed throughout the dry ingredients, so you don’t get any salty pockets in your finished cookies. Set this aside for now.
In a large bowl, using an electric mixer or a stand mixer with the paddle attachment, cream together the softened unsalted butter and granulated sugar. Beat them on medium-high speed for about 3 to 5 minutes. You’re looking for a light and fluffy mixture. It should be pale yellow and significantly increased in volume. This is a key step for texture, so don’t rush it. Scrape down the sides of the bowl occasionally to ensure everything is getting mixed in.
Next, add the vanilla extract and the room-temperature large egg. Mix on low speed until just combined, then increase the speed to medium and beat for another minute. Again, scraping down the sides of the bowl is your friend here. The mixture should look smooth and emulsified.
Now it’s time to gradually add the dry ingredients to the wet ingredients. With the mixer on low speed, add about a third of the flour mixture at a time, mixing until just incorporated before adding the next batch. Be careful not to overmix at this stage. Overmixing can develop the gluten in the flour too much, leading to tough cookies. Stop mixing as soon as you no longer see streaks of dry flour.
Adjusting Consistency and Adding Optional Mix-ins
At this point, the dough might seem a little stiff, which is perfectly normal. If it feels excessively dry or crumbly and isn’t coming together easily, that’s when you’ll add the milk. Start with 2 teaspoons of milk and mix on low speed until it just comes together. If it still feels too dry, add the third teaspoon. You want a cohesive dough that holds together when you press it, but not one that is sticky. The amount of milk needed can vary slightly depending on the humidity and the specific flour you use.
If you’re adding white chocolate chips or semi-sweet chocolate chips, this is the time to fold them in. Gently fold them in using a spatula or by pulsing the mixer on its lowest setting a few times. You don’t want to break up the chips too much. For an extra touch of flavor and a richer texture, you could also stir in a tablespoon or two of melted coconut oil into the dough along with the chips. It adds a subtle coconut note and can make the cookies a bit more tender.
Chilling and Shaping the Dough
Once the dough is ready, it’s a good idea to chill it. This makes it easier to handle and prevents the cookies from spreading too much during baking. You can do this in a couple of ways. For ease of scooping later, you can divide the dough into two equal portions, shape each portion into a disk, wrap them tightly in plastic wrap, and refrigerate for at least 30 minutes. Alternatively, you can gather the dough into a ball, wrap it, and chill it as one piece. If you plan to roll and cut the cookies, chilling the entire disc for at least an hour will be beneficial.
If you’re going for a more rustic, free-form cookie, you can scoop portions of the dough directly from the refrigerator. Use a tablespoon or a small cookie scoop to drop rounded spoonfuls of dough onto your prepared baking sheets. Leave about 2 inches of space between each cookie to allow for spreading. If you want to flatten them slightly, you can gently press down on each cookie with the palm of your hand or the bottom of a glass.
Baking to Golden Perfection
Preheat your oven to 350 degrees Fahrenheit (175 degrees Celsius). Line your baking sheets with parchment paper or silicone baking mats. This prevents sticking and makes cleanup a breeze.
Bake the cookies for 10 to 12 minutes, or until the edges are lightly golden brown and the centers look set. The exact baking time will depend on your oven and the size of your cookies. Keep an eye on them towards the end of the baking period. It’s better to pull them out a minute too early than a minute too late, as they will continue to cook slightly on the hot baking sheet.
Once baked, let the cookies cool on the baking sheet for 5 minutes before carefully transferring them to a wire rack to cool completely. This resting period on the baking sheet allows them to firm up.
Finishing Touches and Storage
While the cookies are still warm, you can add some fun decorations. If you have sprinkles, now is the perfect time to press them gently onto the tops of the cookies. You could also drizzle them with melted chocolate or even dip half of the cooled cookie in melted chocolate.
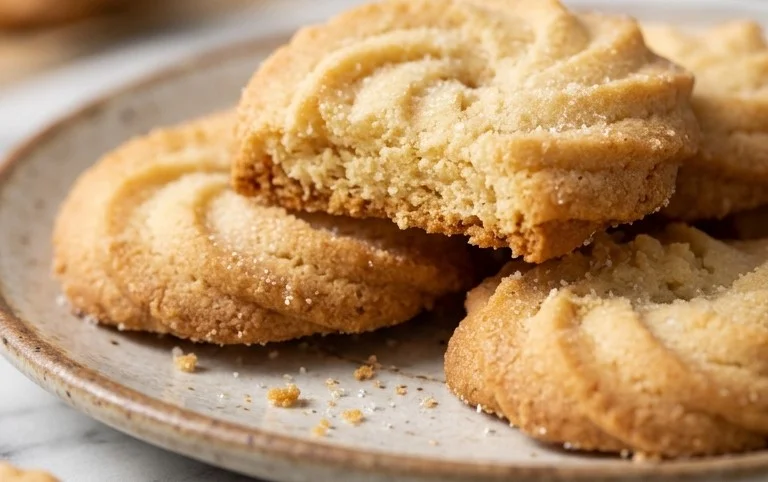
Once completely cooled, store your butter cookies in an airtight container at room temperature. They will stay fresh and delicious for about 5 to 7 days. They’re so good, though, I doubt they’ll last that long! Enjoy them with a glass of milk, a cup of coffee, or your favorite tea.
Conclusion:
This Butter Cookies Recipe truly delivers on classic comfort. The ease of making them, combined with the rich, buttery flavor and delicate texture, makes them a standout. They’re the kind of cookie that disappears fast, but they store wonderfully, so you can enjoy them for days. I love making a batch whenever I need a little pick-me-up or a simple, homemade gift. They are fantastic on their own, but also pair beautifully with a cup of tea or coffee. For variations, consider adding a touch of almond extract along with the vanilla, or dipping the cooled cookies in melted chocolate. You can also roll the dough into a log and slice it, or press it into a tart pan for a different presentation. Don’t be afraid to experiment with mix-ins like finely chopped nuts or dried fruit.
Frequently Asked Questions:
Can I use salted butter instead of unsalted butter?
Yes, you can use salted butter. Just omit the salt called for in the recipe. You might want to taste your butter to gauge its saltiness and adjust if necessary. Different brands have different salt levels, so it’s best to err on the side of caution to avoid overly salty cookies.
How do I prevent my butter cookies from spreading too much?
Make sure your butter is properly softened, not melted or too cold. Over-creaming the butter and sugar can also incorporate too much air, leading to spread. Chilling the dough for at least 30 minutes before baking is another effective way to help prevent spreading. Also, ensure your oven is preheated to the correct temperature; a too-hot oven can cause cookies to spread before they set.
Butter Cookies Recipe
A classic and simple butter cookie recipe, perfect for any occasion. These cookies are tender, buttery, and easily customizable with your favorite additions.
Ingredients
-
2¼ cups all-purpose flour
-
¼ teaspoon salt
-
1 cup unsalted butter softened
-
¾ cup granulated sugar
-
2 teaspoons vanilla extract
-
1 large egg room temperature
-
2-3 teaspoons milk if needed
-
white chocolate chips (optional)
-
semi-sweet chocolate chips (optional)
-
coconut oil (optional)
-
sprinkles
Instructions
-
Step 1
In a medium bowl, whisk together the all-purpose flour and salt. -
Step 2
In a large bowl, cream together the softened unsalted butter and granulated sugar until light and fluffy. -
Step 3
Beat in the vanilla extract and the room temperature egg until well combined. -
Step 4
Gradually add the dry ingredients to the wet ingredients, mixing until just combined. If the dough seems too stiff, add 2-3 teaspoons of milk. -
Step 5
Stir in any optional additions like white chocolate chips, semi-sweet chocolate chips, or coconut oil. -
Step 6
Shape the dough into balls or logs, then flatten them slightly. You can also roll the dough and use cookie cutters. -
Step 7
Place the cookies on a baking sheet lined with parchment paper. -
Step 8
Bake in a preheated oven at 350°F (175°C) for 8-12 minutes, or until the edges are lightly golden. -
Step 9
Let the cookies cool on the baking sheet for a few minutes before transferring them to a wire rack to cool completely. Decorate with sprinkles if desired.
Important Information
Nutrition Facts (Per Serving)
It is important to consider this information as approximate and not to use it as definitive health advice.
Allergy Information
Please check ingredients for potential allergens and consult a health professional if in doubt.