Easy Mini Cheesecakes Creamy Graham Cracker Crust
These mini cheesecakes are my go-to for parties or just when I’m craving something sweet. They’re surprisingly simple to make, and the individual portions mean less fuss and more enjoyment. The texture is wonderfully creamy, and the graham cracker crust provides that perfect buttery crunch. Making the crust for these mini cheesecakes is a straightforward process. You’ll start with 1 cup of graham cracker crumbs, which you can buy pre-made or make yourself by pulsing graham crackers in a food processor until they look like coarse sand. Then, melt 4 tablespoons of unsalted butter until it’s fully liquid and mix it with the crumbs. The mixture should feel like wet sand when you stir it together. Press this crumb mixture evenly into the bottoms of your mini cheesecake pans or mini muffin tins. You want a firm, even layer for a good base. Use the flat bottom of a small glass or your fingers to really pack it down. This step is key to a crust that holds its shape after baking and makes for a delightful mini cheesecake every time. The cream cheese filling is where the magic happens.
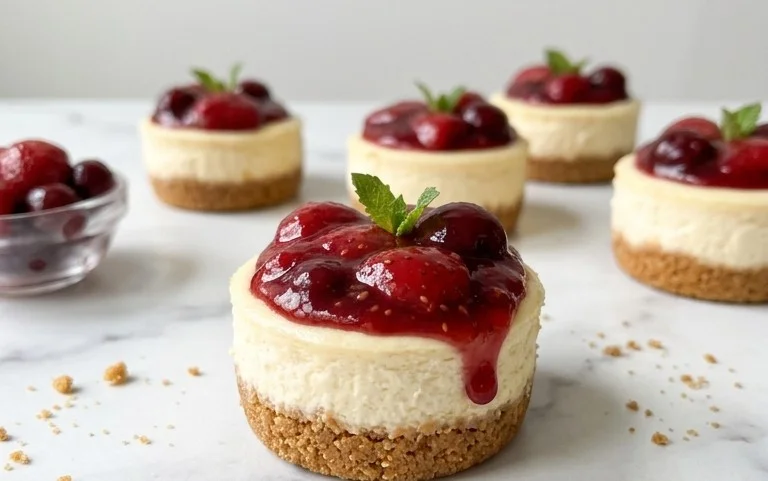
Easy Mini Cheesecake Recipe
These mini cheesecakes are my go-to for parties or just when I’m craving something sweet. They’re surprisingly simple to make, and the individual portions mean less fuss and more enjoyment. The texture is wonderfully creamy, and the graham cracker crust provides that perfect buttery crunch.
Ingredients:
- 1 cup (113g) graham cracker crumbs
- 4 Tbsp unsalted butter (melted)
- 16 oz full fat cream cheese (softened to room temperature)
- ½ cup (99g) granulated sugar
- 1 tsp vanilla extract
- 2 large eggs
- whipped cream
- fresh fruit
Making the Crust
The base of any good cheesecake starts with a solid crust. For these mini cheesecakes, we’re using a classic graham cracker crumb base. You’ll want to start with 1 cup of graham cracker crumbs. You can buy them pre-made, or if you have whole graham crackers, just break them up and pulse them in a food processor until they resemble coarse sand. Measure out 4 tablespoons of unsalted butter and melt it in a small saucepan or in the microwave. You want the butter to be fully liquid. In a small bowl, combine the graham cracker crumbs and the melted butter. Stir them together thoroughly until all the crumbs are moistened. This mixture should feel like wet sand.
Now, we need to get these crumbs into our mini cheesecake pans. If you’re using a standard mini muffin tin (for truly mini cheesecakes) or a mini cheesecake pan with removable bottoms, you’ll want to divide the crumb mixture evenly among the cups. I usually press the crumbs down firmly into the bottom of each cup using the back of a spoon or a small measuring cup. Getting a good, compact crust is important because it helps hold the cheesecake together and gives you that satisfying texture contrast. You don’t want a crumbly crust that falls apart when you pick up the cheesecake. A little extra pressure goes a long way here. If you’re using muffin tins, you might need to bake the crusts for a few minutes before adding the filling to help them set. For this recipe, I recommend chilling the crusts while you prepare the filling instead of pre-baking, as it’s often not necessary for mini versions and helps keep things simple.
Preparing the Cheesecake Filling
This is where the magic happens. You’ll need 16 ounces of full-fat cream cheese. It’s absolutely vital that your cream cheese is softened to room temperature. This means taking it out of the refrigerator at least an hour, or even two, before you plan to start mixing. Cold cream cheese will lead to a lumpy filling, and nobody wants that. You can test if it’s soft enough by gently pressing on it with your finger; it should yield easily.
In a large bowl, beat the softened cream cheese until it’s completely smooth and creamy. A hand mixer or a stand mixer with a paddle attachment works best for this. Scrape down the sides of the bowl often to ensure everything is incorporated evenly. Once the cream cheese is smooth, add ½ cup of granulated sugar and 1 teaspoon of vanilla extract. Beat again until the sugar is fully dissolved and the mixture is light and fluffy. This is where you can start to smell that classic cheesecake aroma developing.
Next, it’s time to add the eggs. You’ll need 2 large eggs. Add them one at a time, beating well after each addition until just combined. Overbeating the eggs can incorporate too much air, which can cause the cheesecakes to crack as they bake. So, mix until the yellow of the egg is just incorporated into the batter, and then stop. Be sure to scrape down the sides of the bowl one last time to make sure there are no pockets of unmixed cream cheese or egg. The batter should be smooth, thick, and pale yellow.
Baking the Mini Cheesecakes
Now that your filling is ready, carefully spoon or pour it over the prepared graham cracker crusts in your mini cheesecake pans or muffin tins. Fill each cup about two-thirds to three-quarters full. Avoid overfilling, as the cheesecakes will puff up slightly as they bake.
Preheat your oven to 325°F (160°C). Place the filled pans on a baking sheet. This makes them easier to transfer in and out of the oven and catches any potential drips. Bake for 18 to 22 minutes, or until the edges of the cheesecakes are set and the centers are still slightly jiggly when you gently tap the pan. They shouldn’t look liquidy, but they shouldn’t be completely firm either. The residual heat will continue to cook them as they cool.
Cooling and Serving
Once baked, carefully remove the cheesecakes from the oven. Let them cool in the pans on a wire rack for about 10 to 15 minutes. This initial cooling period allows them to set up a bit more before you attempt to remove them. After this, if you’re using mini cheesecake pans with removable bottoms, carefully remove the sides of the pans. If you used a muffin tin, you might want to run a thin knife or offset spatula around the edges to loosen them before attempting to lift them out. Place them back on the wire rack to cool completely.
For the best texture and flavor, it’s ideal to chill the mini cheesecakes in the refrigerator for at least 2 hours, or even better, overnight. Chilling allows the flavors to meld and the texture to become perfectly firm and creamy. Before serving, top each mini cheesecake with a dollop of whipped cream and some fresh fruit. Berries, sliced peaches, or even a drizzle of raspberry sauce are fantastic choices. These little treats are best enjoyed cold. Store any leftovers in an airtight container in the refrigerator for up to 3 days.
Conclusion:
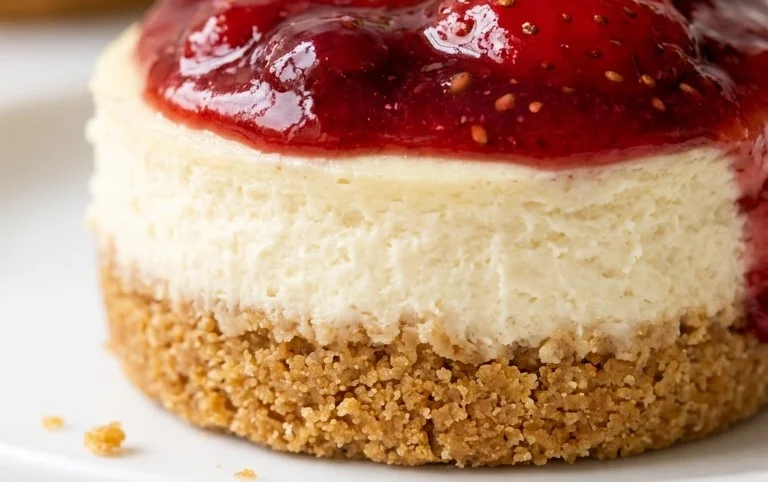
These mini cheesecakes are a fantastic dessert that’s both impressive and incredibly simple. The individual portions are perfect for serving a crowd, and they always disappear quickly. They have that wonderfully creamy texture with a buttery graham cracker crust that everyone loves. You can prepare them ahead of time, making them a stress-free option for any gathering. For variations, try adding a swirl of fruit puree to the batter before baking, or top the finished cheesecakes with chocolate ganache, caramel, or a dollop of whipped cream and fresh berries. Don’t be afraid to experiment with different crusts too – an oreo crust or a gingersnap crust can add a fun twist.
Frequently Asked Questions
Can I make these mini cheesecakes without a mini cheesecake pan?
Yes, you absolutely can. A standard mini muffin tin works very well. You might want to line the muffin tin with paper liners for easier removal, although they aren’t strictly necessary if you grease the tin well. The texture and taste will be the same, just the shape will be slightly different.
How do I store leftover mini cheesecakes?
Store any leftover mini cheesecakes in an airtight container in the refrigerator. They will stay fresh for up to 3-4 days. It’s best to add toppings like whipped cream or fresh fruit just before serving to prevent them from getting soggy.
Why are my mini cheesecakes cracking?
Cracking often happens due to overbaking or rapid temperature changes. Make sure not to overmix the filling once the eggs are added, and bake just until the edges are set but the center still has a slight wobble. Letting them cool gradually in the oven with the door ajar can also help prevent cracking. For mini cheesecakes, this is less of an issue than for full-sized ones, but it’s still good practice.
Easy Mini Cheesecake Recipe
A simple and delicious recipe for individual mini cheesecakes, perfect for any occasion.
Ingredients
-
1 cup (113g) graham cracker crumbs
-
4 Tbsp unsalted butter (melted)
-
16 oz full fat cream cheese (softened to room temperature)
-
½ cup (99g) granulated sugar
-
1 tsp vanilla extract
-
2 large eggs
-
whipped cream (for topping)
-
fresh fruit (for topping)
Instructions
-
Step 1
Preheat oven to 350°F (175°C). Line a 12-cup muffin tin with paper liners. -
Step 2
In a small bowl, combine graham cracker crumbs and melted butter. Press mixture evenly into the bottom of each muffin liner. -
Step 3
In a large bowl, beat cream cheese and granulated sugar until smooth and creamy. -
Step 4
Beat in vanilla extract, then add eggs one at a time, mixing until just combined after each addition. -
Step 5
Pour the cream cheese mixture evenly over the graham cracker crusts in the muffin tin. -
Step 6
Bake for 18-20 minutes, or until the edges are set and the centers are slightly jiggly. -
Step 7
Let cool in the muffin tin for 10 minutes, then transfer to a wire rack to cool completely. Chill in the refrigerator for at least 2 hours. -
Step 8
Top with whipped cream and fresh fruit before serving.
Important Information
Nutrition Facts (Per Serving)
It is important to consider this information as approximate and not to use it as definitive health advice.
Allergy Information
Please check ingredients for potential allergens and consult a health professional if in doubt.