DIY Frozen Pinecones with Epsom Salt
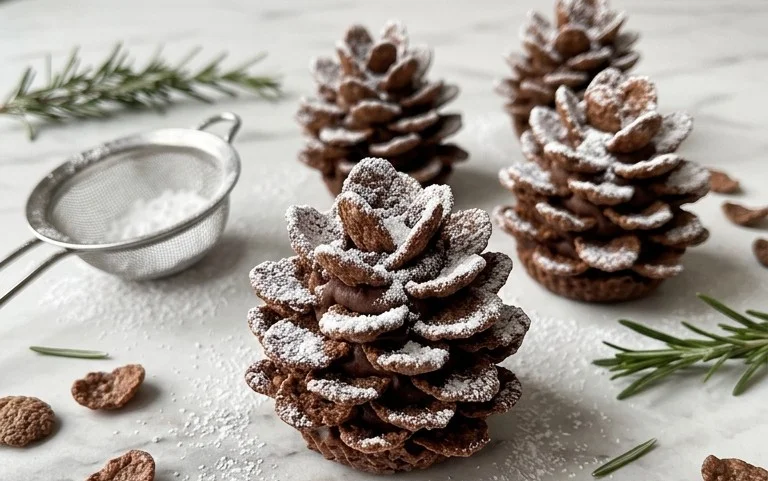
Easy Frozen Ice Crystal Pinecones look like they’ve been plucked straight from a snow-covered forest, sparkling with an ethereal frost. They are incredibly simple to make, requiring just a few basic supplies and a little patience. The process itself is quite relaxing, a bit like a mindful craft session. Gathering pinecones in the crisp autumn air or during a winter walk always brings a sense of cozy satisfaction. Bringing that natural beauty indoors, especially with a touch of frosty magic, is even better. These frozen pinecones are a simple yet stunning way to bring a touch of winter wonderland to your home. They are a beautiful natural decoration for your fireplace mantel, a side table, or even as part of a larger holiday display. The Epsom salt crystals mimic real frost, giving them an authentic, icy appearance without any of the cold. This project is wonderful for all ages, making it a great family activity during the colder months when outdoor play might be limited.
Easy Frozen Ice Crystal Pinecones
Gathering pinecones in the crisp autumn air or during a winter walk always brings a sense of cozy satisfaction. Bringing that natural beauty indoors, especially with a touch of frosty magic, is even better. These Easy Frozen Ice Crystal Pinecones are a simple yet stunning way to bring a touch of winter wonderland to your home. They look like they’ve been plucked straight from a snow-covered forest, sparkling with an ethereal frost. They are incredibly easy to make, requiring just a few basic supplies and a little patience. The process itself is quite relaxing, a bit like a mindful craft session.
Ingredients:
- Pinecones
- Epsom salt
- Water
- Glitter (optional, for that extra sparkle)
- String (for hanging)
Preparing Your Pinecones
Before we start creating our frosty decorations, it’s important to prepare your pinecones. If you’ve collected them from outdoors, they might have some lingering critters or debris. A good first step is to brush off any loose dirt or needles. You can use an old toothbrush or a stiff brush for this. If you’re concerned about insects, you can bake them at a low temperature (around 200°F or 93°C) for about 30 minutes. This will kill any bugs and help to open up the pinecone scales a bit more, which makes them look even better for decorating. Make sure they cool completely before proceeding. You want to ensure they are thoroughly dry.
Making the Crystal Solution
The magic behind these ice crystal pinecones comes from a simple Epsom salt solution. Think of it like creating your own miniature winter wonderland in a pot. The Epsom salt, when dissolved in water and allowed to cool and crystallize, mimics the look of natural frost or ice.
- In a saucepan, combine 1 cup of water for every 1 cup of Epsom salt. So, if you’re making a larger batch, maintain this ratio. For example, 2 cups of water to 2 cups of Epsom salt.
- Heat the mixture over medium heat, stirring constantly. You’re aiming to dissolve all the Epsom salt. Keep stirring until you no longer see any undissolved salt crystals at the bottom of the pan. It should look like clear saltwater. Don’t let it boil vigorously, just a gentle simmer is fine to ensure complete dissolution.
Creating the Frosty Effect
Once your Epsom salt solution is ready and all the salt is dissolved, it’s time to create the “frozen” effect. This is where the pinecones start to transform into icy beauties.
- Carefully remove the saucepan from the heat. If you are using glitter, this is the time to add it to your hot Epsom salt solution. Stir in a tablespoon or two of glitter for a subtle shimmer, or more if you want them to be truly dazzling. Mix it in well so the glitter is evenly distributed.
- Allow the solution to cool slightly. You don’t want it to be boiling hot, but it should still be quite warm. This warmth helps the Epsom salt to begin crystallizing as it cools.
- Now, take your prepared pinecones and submerge them one by one into the warm Epsom salt solution. You can use tongs or a slotted spoon to help you with this. Make sure the entire pinecone is coated. You’ll see the scales start to absorb the solution.
- Let the pinecones soak in the warm solution for about 5-10 minutes. The longer they soak, the more pronounced the crystal formation will be. You might see tiny crystals starting to form on the surface of the water and the pinecone itself as it cools.
- After soaking, carefully remove each pinecone from the solution using your tongs or slotted spoon. Let any excess solution drip back into the pan for a minute or two. Place the pinecones on a tray or a piece of parchment paper to dry. This drying process is where the magic really happens. As the water evaporates, the dissolved Epsom salt will crystallize on the pinecone, creating that beautiful ice-like texture.
Drying and Finishing
The drying stage is critical for achieving the best frosty effect. Patience is key here.
- Leave the pinecones to air dry completely. This can take anywhere from 24 to 48 hours, depending on the humidity and temperature in your home. You’ll notice the white crystals forming more and more as they dry. You might even see a fine powder of Epsom salt left on your drying surface – that’s a good sign!
- Once fully dry, you can give them a gentle shake to remove any loose crystals. If you want more sparkle or if some areas didn’t get as frosty as you’d like, you can repeat the soaking and drying process, or even just dip specific parts of the pinecone into the cooled solution and let them dry again.
- To hang your creations, tie a piece of string securely around the top of the pinecone, near the stem. Ensure the knot is tight enough that it won’t slip off. You can then hang these on your Christmas tree, drape them along a mantelpiece, or use them in other holiday decorations.
These frozen ice crystal pinecones are a delightful, natural, and budget-friendly decoration. They bring the beauty of winter indoors without any of the cold. Enjoy your sparkling creations!
Conclusion:
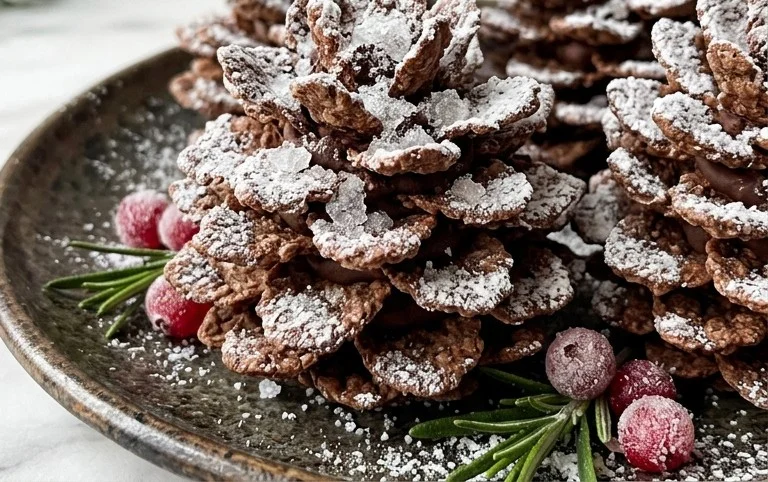
These Easy Frozen Ice Crystal Pinecones are a fantastic way to bring a touch of winter’s magic into your home without any fuss. They’re a beautiful, natural decoration that adds a frosty sparkle to any space. Making them is a calming process, and the result is something truly special that looks store-bought but is entirely homemade. Imagine them scattered on a mantelpiece, clustered in a bowl, or hanging from a Christmas tree. You can even tie them onto gifts for an extra festive touch.
Variations and Serving Suggestions:
For an extra bit of sparkle, add fine glitter to the Epsom salt mixture before dipping the pinecones. You could also use different shades of glitter, like iridescent or silver, to enhance the icy look. If you don’t have Epsom salt, coarse sea salt can work, though the crystals won’t be as defined. You can also dye the water a very pale blue or white for a subtle color effect, but be careful not to use too much dye, as it can affect the crystal formation. Once dry, these pinecones can be displayed indoors for weeks, bringing a touch of winter cheer throughout the season. They make a lovely, inexpensive decoration for holiday parties or winter gatherings.
Frequently Asked Questions:
How do I make the Epsom salt solution stick better?
Ensure your pinecones are completely dry after preparation. Dip them into the warm Epsom salt solution and then let the excess drip off. Rolling them gently in more dry Epsom salt immediately after dipping can also help create a thicker, more textured coating. Allow them to dry thoroughly on a protected surface.
Can I use these outdoors?
These are best for indoor display. Moisture from the outdoors can cause the Epsom salt crystals to dissolve or clump, ruining the frosty effect. Keep them in a dry, indoor environment to maintain their sparkle.
How long do they last?
With proper drying and indoor display, your frozen pinecones can last for several weeks, looking beautiful all season long.
Easy Frozen Ice Crystal Pinecones
Create beautiful, frosty pinecones reminiscent of ice crystals, perfect for winter decorating. A simple and elegant craft for all ages.
Ingredients
-
Pinecones
-
Epsom salt
-
Water
-
Glitter (optional)
-
String
Instructions
-
Step 1
Gather clean, dry pinecones. Ensure they are free of debris and insects. -
Step 2
In a large bowl, dissolve a generous amount of Epsom salt into hot water until no more salt will dissolve. Let it cool slightly. -
Step 3
Submerge the pinecones completely in the Epsom salt solution. Ensure all surfaces are coated. -
Step 4
Allow the pinecones to soak for at least 12-24 hours, or until a visible crystal layer has formed. -
Step 5
Carefully remove the pinecones from the solution and place them on a rack or paper towels to dry. This may take several hours. -
Step 6
Once dry, if desired, sprinkle with glitter for extra sparkle while the crystals are still slightly tacky. -
Step 7
Tie a piece of string around the top of each pinecone for hanging.
Important Information
Nutrition Facts (Per Serving)
It is important to consider this information as approximate and not to use it as definitive health advice.
Allergy Information
Please check ingredients for potential allergens and consult a health professional if in doubt.