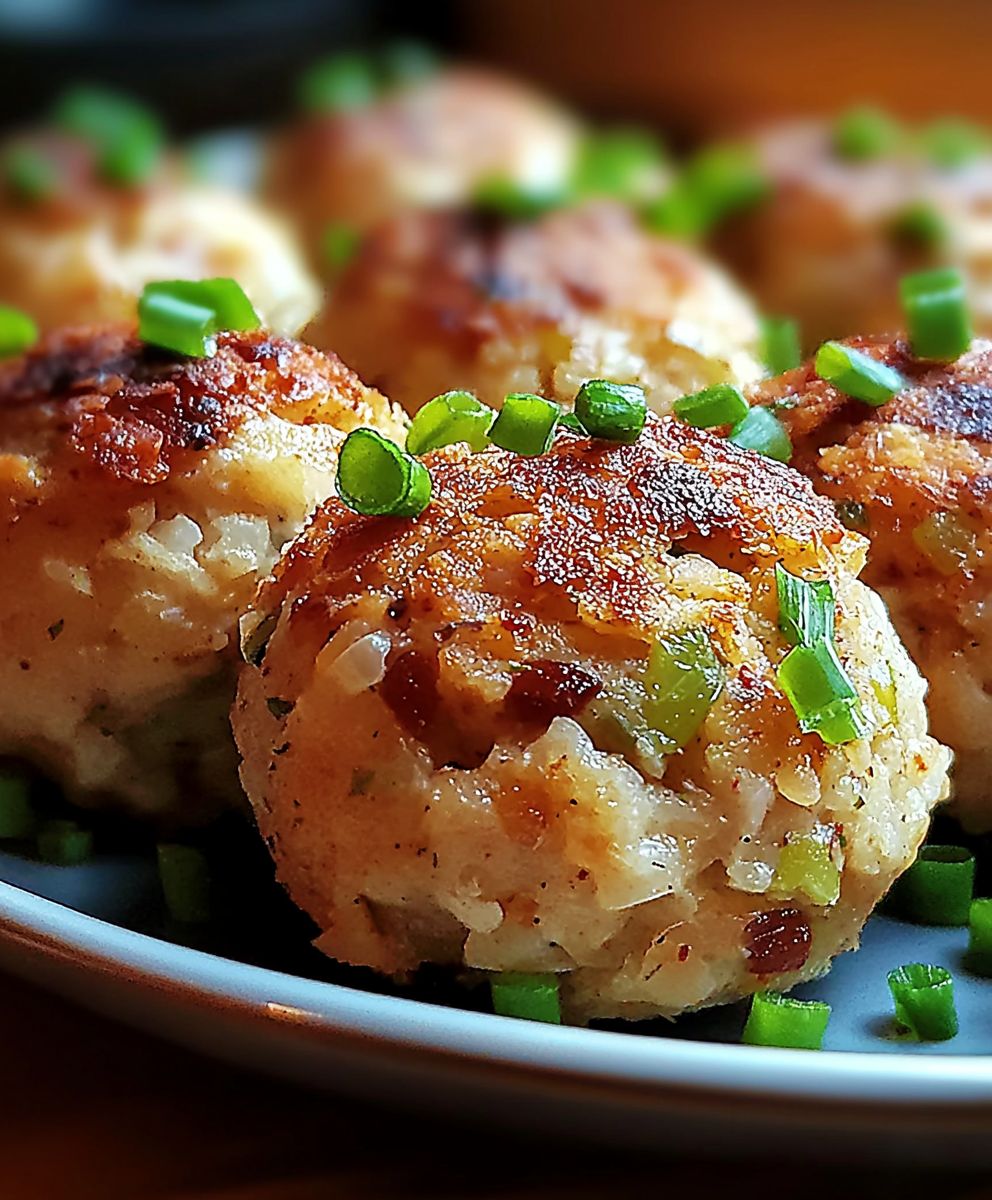
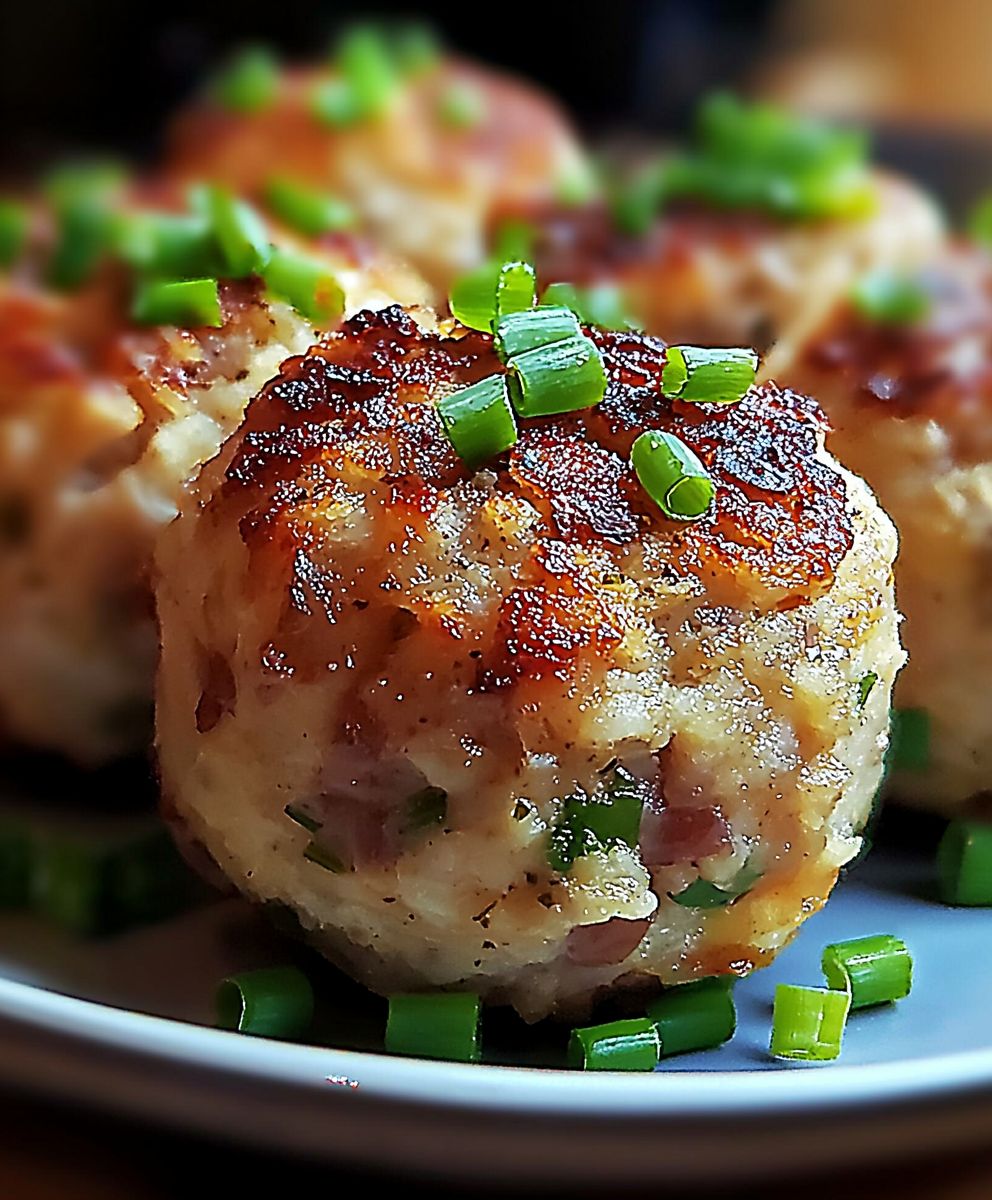
Turkey stuffing balls: bite-sized bliss that will revolutionize your holiday appetizer game! Forget dry, crumbly stuffing on the side we’re talking perfectly portioned spheres of savory goodness, crispy on the outside and delightfully moist within. Imagine popping one of these into your mouth and experiencing the quintessential Thanksgiving flavors in a single, satisfying bite.
Stuffing, in its various forms, has been a Thanksgiving staple for centuries. Its origins can be traced back to ancient Roman times, where birds were stuffed with herbs, vegetables, and nuts. Over time, the tradition evolved, incorporating regional ingredients and culinary preferences. In America, stuffing became synonymous with Thanksgiving, a comforting and flavorful accompaniment to the roasted turkey. But let’s be honest, sometimes the stuffing can be a bit underwhelming. That’s where these turkey stuffing balls come in!
People adore this dish for several reasons. First, the texture is incredible the crispy exterior gives way to a soft, flavorful interior. Second, they are incredibly convenient. No more struggling to scoop out the perfect portion of stuffing from a large dish. These little balls are ready to grab and go! Finally, and perhaps most importantly, they taste amazing! The combination of savory herbs, bread, and turkey (or broth) creates a symphony of flavors that will leave you wanting more. Get ready to impress your guests with this fun and delicious twist on a classic!
Ingredients:
- 1 pound ground turkey
- 1 cup seasoned bread crumbs
- 1/2 cup finely diced celery
- 1/2 cup finely diced onion
- 1/4 cup chopped fresh parsley
- 1 large egg, lightly beaten
- 1/4 cup chicken broth
- 1 teaspoon dried sage
- 1/2 teaspoon dried thyme
- 1/4 teaspoon garlic powder
- 1/4 teaspoon onion powder
- Salt and pepper to taste
- 1/4 cup melted butter, for brushing (optional)
- 1 cup cranberry sauce, for serving
- 1 cup gravy, for serving (optional)
- Cooking spray
Preparing the Turkey Mixture:
- In a large bowl, gently combine the ground turkey, seasoned bread crumbs, diced celery, diced onion, and chopped fresh parsley. I like to use my hands for this, but be careful not to overmix, as this can make the turkey balls tough.
- In a separate small bowl, whisk together the lightly beaten egg, chicken broth, dried sage, dried thyme, garlic powder, and onion powder. This mixture will help bind the ingredients together and add a ton of flavor.
- Pour the wet ingredients over the dry ingredients in the large bowl. Season with salt and pepper to taste. Remember, you can always add more seasoning later, so start with a little and adjust as needed.
- Using your hands or a spoon, gently mix all the ingredients together until just combined. Again, be careful not to overmix. You want the mixture to hold together, but you don’t want it to be dense.
- Cover the bowl with plastic wrap and refrigerate the turkey mixture for at least 30 minutes. This will allow the flavors to meld together and will also make the mixture easier to handle when forming the balls. I find that chilling it for an hour or even longer is even better!
Forming the Turkey Balls:
- Preheat your oven to 375°F (190°C). While the oven is preheating, line a baking sheet with parchment paper. This will prevent the turkey balls from sticking and make cleanup a breeze.
- Remove the turkey mixture from the refrigerator. Using a spoon or your hands, scoop out about 1-2 tablespoons of the mixture at a time.
- Gently roll the mixture between your palms to form a ball. Aim for a uniform size so that the turkey balls cook evenly. I usually make mine about 1.5 inches in diameter.
- Place the formed turkey balls onto the prepared baking sheet, leaving a little space between each one. This will allow for even cooking.
- Repeat steps 2-4 until all of the turkey mixture has been used.
Baking the Turkey Balls:
- Once all the turkey balls are on the baking sheet, brush them with melted butter, if desired. This will give them a nice golden-brown color and add a little extra flavor. If you’re watching your fat intake, you can skip this step.
- Place the baking sheet in the preheated oven and bake for 20-25 minutes, or until the turkey balls are cooked through and golden brown. The internal temperature should reach 165°F (74°C). I always use a meat thermometer to be sure.
- Halfway through the baking time, you can gently flip the turkey balls to ensure even browning on all sides.
- Remove the baking sheet from the oven and let the turkey balls cool slightly before serving.
Serving Suggestions:
- Serve the turkey balls warm with cranberry sauce and gravy for dipping. They’re also delicious served over mashed potatoes or stuffing.
- These turkey balls are a great appetizer for Thanksgiving or Christmas, or they can be served as a main course.
- Leftover turkey balls can be stored in an airtight container in the refrigerator for up to 3 days. Reheat them in the microwave or oven before serving.
Tips and Variations:
- Add some spice: For a little kick, add a pinch of red pepper flakes to the turkey mixture.
- Use different herbs: Experiment with different herbs, such as rosemary or oregano, to customize the flavor.
- Add vegetables: Finely diced carrots or mushrooms can be added to the turkey mixture for extra flavor and nutrients.
- Make them gluten-free: Use gluten-free bread crumbs to make this recipe gluten-free.
- Air Fryer Option: You can also cook these in an air fryer! Preheat your air fryer to 375°F (190°C). Place the turkey balls in the air fryer basket in a single layer, being careful not to overcrowd them. Cook for 12-15 minutes, flipping halfway through, until cooked through and golden brown.
- Make Ahead: You can prepare the turkey mixture ahead of time and store it in the refrigerator for up to 24 hours. Form the balls and bake them just before serving.
- Freezing Instructions: These turkey balls freeze beautifully! After baking, let them cool completely. Then, place them in a single layer on a baking sheet and freeze for about 2 hours, or until solid. Transfer the frozen turkey balls to a freezer bag or airtight container and store them in the freezer for up to 3 months. To reheat, bake them in a preheated oven at 350°F (175°C) for about 20-25 minutes, or until heated through.
- Stuffing Variation: For a true “stuffing ball” experience, incorporate cooked stuffing into the mixture. Reduce the breadcrumbs by half and add 1/2 cup of your favorite cooked stuffing. This adds extra flavor and texture!
Troubleshooting:
- Turkey balls are too dry: Add a little more chicken broth to the turkey mixture.
- Turkey balls are falling apart: Add a little more bread crumbs to the turkey mixture. Make sure you’re not overmixing.
- Turkey balls are not browning: Brush them with melted butter before baking. You can also broil them for a minute or two at the end of the baking time, but watch them carefully to prevent burning.
Nutritional Information (Approximate):
(Note: Nutritional information is an estimate and may vary based on specific ingredients and portion sizes.)
- Calories: Approximately 150-200 per serving (3-4 turkey balls)
- Fat: 8-12 grams
- Saturated Fat: 3-5 grams
- Cholesterol: 60-80 mg
- Sodium: 200-300 mg
- Carbohydrates: 10-15 grams
- Fiber: 1-2 grams
- Sugar: 2-4 grams
- Protein: 10-15 grams
Enjoy your delicious Turkey Stuffing Balls!
Conclusion:
And there you have it! These aren’t just any old appetizers; these Turkey Stuffing Balls are a bite-sized explosion of Thanksgiving flavor that you can enjoy any time of year. Seriously, what’s not to love? We’ve taken the best parts of the holiday feast the savory turkey, the aromatic stuffing, and that craveable cranberry sauce and transformed them into perfectly poppable treats. But why are these a must-try? Well, beyond the incredible taste, they’re incredibly versatile. Need a crowd-pleasing appetizer for your next party? These are it. Looking for a fun and easy snack for game day? Look no further. Want to add a little Thanksgiving cheer to a weeknight dinner? These little balls of joy are the answer. Plus, they’re a fantastic way to use up leftover turkey and stuffing after the big day, minimizing waste and maximizing deliciousness. I’ve found that serving them with a dollop of cranberry sauce is the classic choice, but don’t be afraid to get creative! A drizzle of gravy adds a rich, savory element. A spicy aioli can kick things up a notch. Or, for a lighter option, try serving them with a simple yogurt dip seasoned with herbs. And speaking of variations, the possibilities are endless! If you’re a fan of sausage stuffing, feel free to incorporate some cooked sausage into the mixture. For a vegetarian version, substitute the turkey with finely chopped mushrooms or lentils. You can also experiment with different types of bread for the stuffing sourdough, cornbread, or even gluten-free bread all work beautifully. And don’t forget about the herbs! Sage, thyme, rosemary let your taste buds be your guide. These Turkey Stuffing Balls are also surprisingly freezer-friendly. Simply prepare them according to the recipe, then freeze them on a baking sheet until solid. Once frozen, transfer them to a freezer bag or container. When you’re ready to enjoy them, just bake them from frozen, adding a few extra minutes to the cooking time. This makes them perfect for meal prepping or for having a quick and easy appetizer on hand whenever you need it. I truly believe that this recipe is a winner. It’s easy to follow, customizable to your preferences, and guaranteed to be a hit with everyone who tries them. So, what are you waiting for? Gather your ingredients, preheat your oven, and get ready to experience the magic of these bite-sized Thanksgiving delights. I’m so excited for you to try this recipe! And I’d absolutely love to hear about your experience. Did you make any variations? What did you serve them with? What did your friends and family think? Please, share your thoughts and photos in the comments below. Your feedback is invaluable, and it helps me to continue creating recipes that you’ll love. Happy cooking! I can’t wait to hear all about your Turkey Stuffing Balls adventures! Print
Turkey Stuffing Balls: The Ultimate Guide to Delicious Holiday Appetizers
- Total Time: 60 minutes
- Yield: 20–24 turkey balls 1x
Description
Savory and flavorful turkey balls, seasoned with classic herbs and spices, perfect as an appetizer or main course. Serve with cranberry sauce and gravy for a festive touch!
Ingredients
- 1 pound ground turkey
- 1 cup seasoned bread crumbs
- 1/2 cup finely diced celery
- 1/2 cup finely diced onion
- 1/4 cup chopped fresh parsley
- 1 large egg, lightly beaten
- 1/4 cup chicken broth
- 1 teaspoon dried sage
- 1/2 teaspoon dried thyme
- 1/4 teaspoon garlic powder
- 1/4 teaspoon onion powder
- Salt and pepper to taste
- 1/4 cup melted butter, for brushing (optional)
- 1 cup cranberry sauce, for serving
- 1 cup gravy, for serving (optional)
- Cooking spray
Instructions
- In a large bowl, gently combine the ground turkey, seasoned bread crumbs, diced celery, diced onion, and chopped fresh parsley.
- In a separate small bowl, whisk together the lightly beaten egg, chicken broth, dried sage, dried thyme, garlic powder, and onion powder.
- Pour the wet ingredients over the dry ingredients in the large bowl. Season with salt and pepper to taste.
- Gently mix all the ingredients together until just combined. Do not overmix.
- Cover the bowl with plastic wrap and refrigerate the turkey mixture for at least 30 minutes (or up to 1 hour or longer).
- Preheat oven to 375°F (190°C). Line a baking sheet with parchment paper.
- Remove the turkey mixture from the refrigerator. Using a spoon or your hands, scoop out about 1-2 tablespoons of the mixture at a time.
- Gently roll the mixture between your palms to form a ball (about 1.5 inches in diameter).
- Place the formed turkey balls onto the prepared baking sheet, leaving a little space between each one.
- Repeat steps 7-9 until all of the turkey mixture has been used.
- Brush the turkey balls with melted butter, if desired.
- Place the baking sheet in the preheated oven and bake for 20-25 minutes, or until the turkey balls are cooked through and golden brown (internal temperature should reach 165°F/74°C).
- Halfway through the baking time, gently flip the turkey balls to ensure even browning.
- Remove the baking sheet from the oven and let the turkey balls cool slightly before serving.
- Serve warm with cranberry sauce and gravy for dipping.
Notes
- Add some spice: For a little kick, add a pinch of red pepper flakes to the turkey mixture.
- Use different herbs: Experiment with different herbs, such as rosemary or oregano, to customize the flavor.
- Add vegetables: Finely diced carrots or mushrooms can be added to the turkey mixture for extra flavor and nutrients.
- Make them gluten-free: Use gluten-free bread crumbs to make this recipe gluten-free.
- Air Fryer Option: Preheat your air fryer to 375°F (190°C). Place the turkey balls in the air fryer basket in a single layer, being careful not to overcrowd them. Cook for 12-15 minutes, flipping halfway through, until cooked through and golden brown.
- Make Ahead: You can prepare the turkey mixture ahead of time and store it in the refrigerator for up to 24 hours. Form the balls and bake them just before serving.
- Freezing Instructions: After baking, let them cool completely. Then, place them in a single layer on a baking sheet and freeze for about 2 hours, or until solid. Transfer the frozen turkey balls to a freezer bag or airtight container and store them in the freezer for up to 3 months. To reheat, bake them in a preheated oven at 350°F (175°C) for about 20-25 minutes, or until heated through.
- Stuffing Variation: For a true “stuffing ball” experience, incorporate cooked stuffing into the mixture. Reduce the breadcrumbs by half and add 1/2 cup of your favorite cooked stuffing. This adds extra flavor and texture!
- Turkey balls are too dry: Add a little more chicken broth to the turkey mixture.
- Turkey balls are falling apart: Add a little more bread crumbs to the turkey mixture. Make sure you’re not overmixing.
- Turkey balls are not browning: Brush them with melted butter before baking. You can also broil them for a minute or two at the end of the baking time, but watch them carefully to prevent burning.
- Prep Time: 20 minutes
- Cook Time: 20-25 minutes