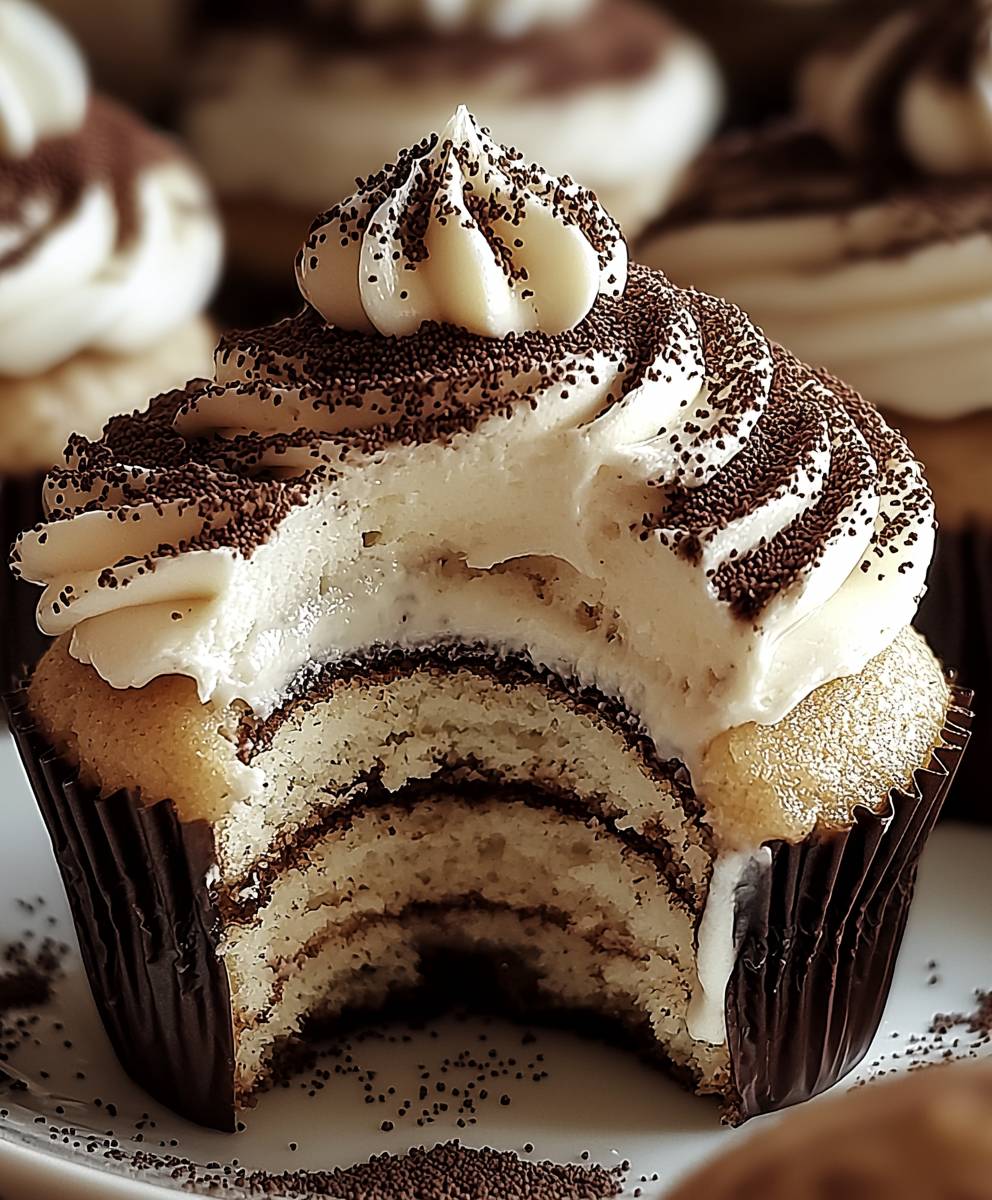
Tiramisu Cupcakes: Prepare to be transported to a charming Italian café with every single bite! Imagine the rich, coffee-soaked ladyfingers of classic tiramisu, but now perfectly portioned and adorably presented in cupcake form. These aren’t just cupcakes; they’re a sophisticated dessert experience that’s surprisingly easy to create.
Tiramisu, meaning “pick me up” or “cheer me up” in Italian, has a relatively recent history, believed to have originated in the Veneto region of Italy in the latter half of the 20th century. It quickly became a global phenomenon, celebrated for its layered textures and the delightful contrast of bitter coffee and sweet mascarpone cream. But what if we could take all that beloved flavor and transform it into something even more convenient and fun?
That’s where these Tiramisu Cupcakes come in! People adore tiramisu for its complex yet comforting flavors, the creamy smoothness of the mascarpone, and the satisfying kick of coffee. These cupcakes capture all of that magic in a handheld treat. They’re perfect for parties, potlucks, or simply indulging in a little bit of Italian luxury at home. Get ready to impress your friends and family with this delightful twist on a classic dessert!
Ingredients:
- For the Espresso-Soaked Ladyfingers:
- 24 Ladyfingers (Savoiardi biscuits)
- 1 cup Strong Brewed Espresso, cooled
- 2 tablespoons Coffee Liqueur (such as Kahlua or Tia Maria), optional
- For the Mascarpone Cream:
- 8 ounces Mascarpone Cheese, softened
- 1 cup Heavy Cream, cold
- 1/2 cup Powdered Sugar, sifted
- 1 teaspoon Vanilla Extract
- Pinch of Salt
- For the Chocolate Ganache:
- 4 ounces Semi-Sweet Chocolate, finely chopped
- 1/4 cup Heavy Cream
- For Dusting:
- Cocoa Powder, for dusting
Preparing the Espresso-Soaked Ladyfingers:
- Brew the Espresso: Start by brewing a cup of strong espresso. I like to use a dark roast for a richer flavor, but any good quality espresso will do. Let it cool completely before moving on to the next step. This is crucial because hot espresso will make the ladyfingers too soggy.
- Prepare the Espresso Mixture: In a shallow dish, combine the cooled espresso with the coffee liqueur (if using). The liqueur adds a nice depth of flavor, but it’s perfectly fine to skip it if you prefer a non-alcoholic version.
- Soak the Ladyfingers: Briefly dip each ladyfinger into the espresso mixture. Don’t soak them for too long just a quick dip on each side is enough. You want them to be moistened but not falling apart. I usually count to two on each side.
- Cut and Arrange: Cut the soaked ladyfingers into smaller pieces that will fit nicely into the bottom of your cupcake liners. I usually cut each ladyfinger into about 4-6 pieces, depending on the size of my liners. Place a layer of these soaked ladyfinger pieces into the bottom of each cupcake liner. This forms the base of our tiramisu cupcakes.
Making the Mascarpone Cream:
- Soften the Mascarpone: Make sure your mascarpone cheese is softened to room temperature before you start. This will ensure a smooth and creamy texture. If it’s too cold, it will be difficult to incorporate the other ingredients.
- Whip the Heavy Cream: In a large bowl (or the bowl of your stand mixer), whip the heavy cream until stiff peaks form. This is a key step for creating a light and airy cream. Be careful not to overwhip, or you’ll end up with butter! I usually start on low speed and gradually increase to high.
- Combine Mascarpone and Sugar: In a separate bowl, gently beat the softened mascarpone cheese with the sifted powdered sugar until smooth and well combined. Sifting the powdered sugar is important to prevent any lumps in your cream.
- Add Vanilla and Salt: Stir in the vanilla extract and a pinch of salt. The vanilla enhances the flavor, and the salt balances the sweetness.
- Fold in the Whipped Cream: Gently fold the whipped cream into the mascarpone mixture in two or three additions. Be careful not to deflate the whipped cream; you want to maintain its airy texture. Use a spatula and fold from the bottom up until just combined.
- Chill the Cream: Cover the mascarpone cream and refrigerate it for at least 30 minutes. This will help it firm up and make it easier to pipe onto the cupcakes.
Preparing the Chocolate Ganache:
- Chop the Chocolate: Finely chop the semi-sweet chocolate. This will help it melt evenly. I prefer using a serrated knife for this.
- Heat the Cream: In a small saucepan, heat the heavy cream over medium heat until it just begins to simmer. Do not let it boil.
- Pour over Chocolate: Pour the hot cream over the chopped chocolate in a heatproof bowl.
- Let it Sit: Let the mixture sit for about a minute to allow the heat to melt the chocolate.
- Stir Until Smooth: Gently stir the mixture until the chocolate is completely melted and the ganache is smooth and glossy. If there are any stubborn pieces of chocolate, you can microwave the mixture in 15-second intervals, stirring in between, until smooth.
- Cool Slightly: Let the ganache cool slightly before using it. It should be thick enough to drizzle but still pourable.
Assembling the Tiramisu Cupcakes:
- Pipe the Mascarpone Cream: Once the mascarpone cream has chilled, transfer it to a piping bag fitted with a large round tip or a star tip. Pipe a generous swirl of mascarpone cream on top of the ladyfinger base in each cupcake liner.
- Drizzle with Ganache: Drizzle the cooled chocolate ganache over the mascarpone cream. You can use a spoon or a piping bag with a small tip for this. I like to create a nice, even drizzle.
- Dust with Cocoa Powder: Dust the tops of the cupcakes generously with cocoa powder. This adds a classic tiramisu flavor and a beautiful finishing touch. I use a fine-mesh sieve to ensure an even dusting.
- Chill Before Serving: Refrigerate the tiramisu cupcakes for at least 1 hour before serving. This allows the flavors to meld together and the cream to set properly. I find they taste even better after a few hours in the fridge!
Tips for Success:
- Don’t Over-Soak the Ladyfingers: This is the most important tip! Soggy ladyfingers will ruin the texture of your cupcakes. A quick dip is all you need.
- Use High-Quality Ingredients: The better the ingredients, the better the final product. Use good quality espresso, mascarpone cheese, and chocolate.
- Chill Everything: Chilling the mascarpone cream and the assembled cupcakes is essential for achieving the right texture and flavor.
- Get Creative with Garnishes: While cocoa powder is the classic topping, you can also add chocolate shavings, espresso beans, or a dusting of cinnamon for extra flair.
Variations:
- Alcohol-Free: Omit the coffee liqueur for a kid-friendly version. You can substitute it with a teaspoon of vanilla extract or a splash of coffee extract.
- Different Liqueurs: Experiment with different liqueurs, such as amaretto or rum, for a unique flavor twist.
- Chocolate Ladyfingers: Use chocolate-flavored ladyfingers for an extra chocolatey treat.
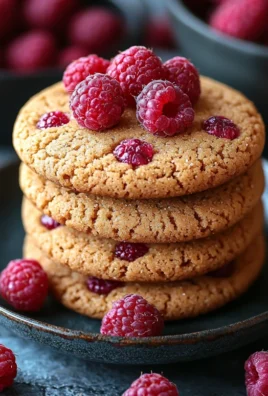
- Add Berries: Incorporate fresh berries, such as raspberries or strawberries, for a fruity twist. Layer them between the ladyfingers and the mascarpone cream.
Conclusion:
And there you have it! These Tiramisu Cupcakes are truly a must-try for any dessert lover, and I’m confident they’ll become a new favorite in your baking repertoire. The delicate balance of coffee-soaked sponge, creamy mascarpone filling, and dusting of cocoa powder creates an irresistible symphony of flavors and textures that perfectly captures the essence of classic tiramisu, but in a fun, portable cupcake form. What makes these cupcakes so special? It’s the ease of preparation combined with the impressive results. You get all the deliciousness of a traditional tiramisu without the fuss of layering and chilling for hours. Plus, the individual cupcake format makes them ideal for parties, potlucks, or simply a delightful treat to enjoy any time you crave a little indulgence. But the best part? They’re incredibly versatile! Feel free to experiment with different variations to suit your taste. For a boozier kick, add a tablespoon of coffee liqueur, such as Kahlua or Tia Maria, to the coffee mixture used to soak the cupcakes. You could also try using a different type of liqueur in the mascarpone filling, like Amaretto for a nutty almond flavor. If you’re looking for a non-alcoholic option, try adding a dash of almond extract to the coffee mixture for a similar flavor profile. For a richer, more decadent experience, consider adding a layer of chocolate ganache between the cupcake and the mascarpone filling. Or, for a lighter, fruitier twist, top the cupcakes with fresh berries like raspberries or strawberries. Serving suggestions are endless! These Tiramisu Cupcakes are perfect on their own, but they also pair beautifully with a scoop of vanilla ice cream or a dollop of whipped cream. Serve them with a cup of freshly brewed coffee or espresso for the ultimate Italian-inspired dessert experience. They also make a wonderful addition to a dessert platter or a gift for friends and family. I truly believe that these cupcakes are a winner. They’re easy to make, incredibly delicious, and endlessly adaptable. They’re the perfect way to satisfy your sweet tooth and impress your guests. So, what are you waiting for? I highly encourage you to give this recipe a try. I’ve poured my heart into perfecting it, and I’m confident that you’ll love the results. Don’t be afraid to get creative and experiment with different variations to make them your own. Once you’ve baked these delightful Tiramisu Cupcakes, I’d absolutely love to hear about your experience! Share your photos and stories with me in the comments below. Let me know what variations you tried, what you thought of the recipe, and any tips or tricks you discovered along the way. I’m always eager to learn from my readers and see how you’re making my recipes your own. Happy baking, and enjoy every delicious bite! I can’t wait to hear how much you loved this Tiramisu Cupcakes recipe! Print
Tiramisu Cupcakes: The Ultimate Recipe for Coffee Lovers
- Total Time: 95 minutes
- Yield: 12 cupcakes 1x
Description
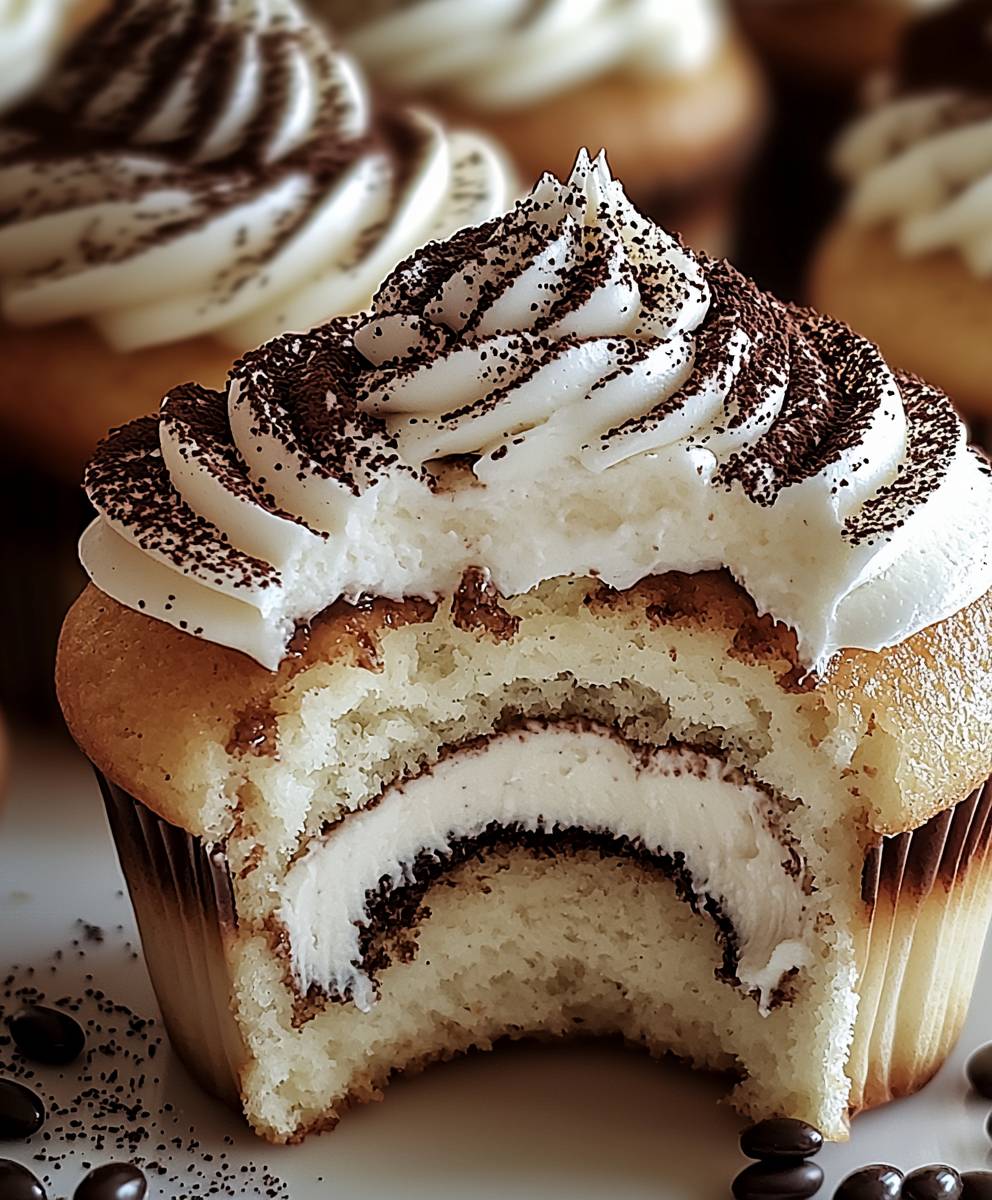
Individual tiramisu cupcakes with espresso-soaked ladyfingers, creamy mascarpone filling, and a rich chocolate ganache, dusted with cocoa powder.
Ingredients
- 24 Ladyfingers (Savoiardi biscuits)
- 1 cup Strong Brewed Espresso, cooled
- 2 tablespoons Coffee Liqueur (such as Kahlua or Tia Maria), optional
- 8 ounces Mascarpone Cheese, softened
- 1 cup Heavy Cream, cold
- 1/2 cup Powdered Sugar, sifted
- 1 teaspoon Vanilla Extract
- Pinch of Salt
- 4 ounces Semi-Sweet Chocolate, finely chopped
- 1/4 cup Heavy Cream
- Cocoa Powder, for dusting
Instructions
- Brew the Espresso: Start by brewing a cup of strong espresso. Let it cool completely.
- Prepare the Espresso Mixture: In a shallow dish, combine the cooled espresso with the coffee liqueur (if using).
- Soak the Ladyfingers: Briefly dip each ladyfinger into the espresso mixture (about 2 seconds per side).
- Cut and Arrange: Cut the soaked ladyfingers into smaller pieces and place a layer into the bottom of each cupcake liner.
- Soften the Mascarpone: Make sure your mascarpone cheese is softened to room temperature before you start.
- Whip the Heavy Cream: In a large bowl, whip the heavy cream until stiff peaks form.
- Combine Mascarpone and Sugar: In a separate bowl, gently beat the softened mascarpone cheese with the sifted powdered sugar until smooth and well combined.
- Add Vanilla and Salt: Stir in the vanilla extract and a pinch of salt.
- Fold in the Whipped Cream: Gently fold the whipped cream into the mascarpone mixture in two or three additions.
- Chill the Cream: Cover the mascarpone cream and refrigerate it for at least 30 minutes.
- Chop the Chocolate: Finely chop the semi-sweet chocolate.
- Heat the Cream: In a small saucepan, heat the heavy cream over medium heat until it just begins to simmer. Do not let it boil.
- Pour over Chocolate: Pour the hot cream over the chopped chocolate in a heatproof bowl.
- Let it Sit: Let the mixture sit for about a minute to allow the heat to melt the chocolate.
- Stir Until Smooth: Gently stir the mixture until the chocolate is completely melted and the ganache is smooth and glossy.
- Cool Slightly: Let the ganache cool slightly before using it. It should be thick enough to drizzle but still pourable.
- Pipe the Mascarpone Cream: Once the mascarpone cream has chilled, transfer it to a piping bag fitted with a large round tip or a star tip. Pipe a generous swirl of mascarpone cream on top of the ladyfinger base in each cupcake liner.
- Drizzle with Ganache: Drizzle the cooled chocolate ganache over the mascarpone cream.
- Dust with Cocoa Powder: Dust the tops of the cupcakes generously with cocoa powder.
- Chill Before Serving: Refrigerate the tiramisu cupcakes for at least 1 hour before serving.
Notes
- Don’t over-soak the ladyfingers. A quick dip is all you need.
- Use high-quality ingredients for the best flavor.
- Chilling the mascarpone cream and assembled cupcakes is essential.
- For an alcohol-free version, omit the coffee liqueur.
- Experiment with different liqueurs like amaretto or rum.
- Use chocolate-flavored ladyfingers for an extra chocolatey treat.
- Incorporate fresh berries for a fruity twist.
- Prep Time: 30 minutes
- Cook Time: 5 minutes