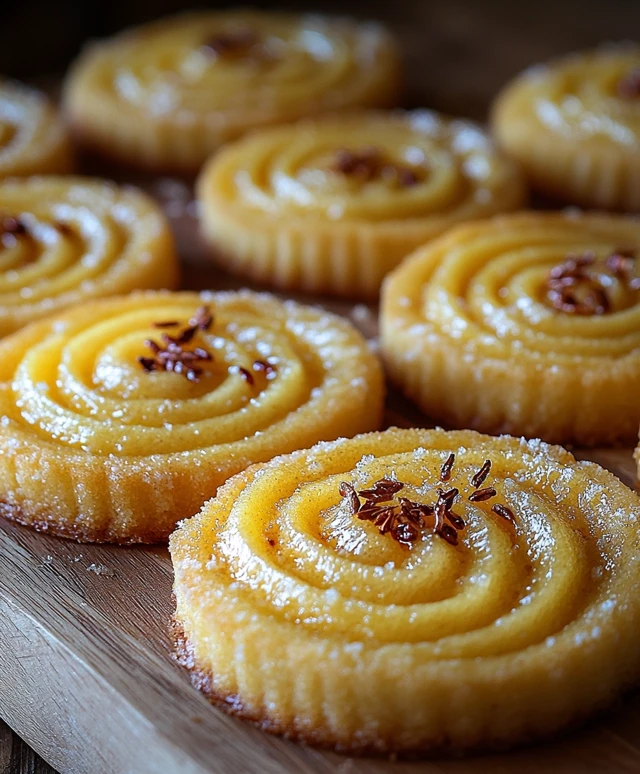
Swirl Butter Cookies are a delightful treat that brings a touch of elegance to any occasion. These cookies are not just a simple dessert; they are a celebration of flavors and textures that have been cherished for generations. Originating from traditional baking practices, these cookies combine rich butter with a swirl of vibrant colors, making them as visually appealing as they are delicious. I love how the buttery goodness melts in your mouth, while the contrasting flavors create a delightful surprise with every bite.
People adore Swirl Butter Cookies for their perfect balance of sweetness and buttery richness, making them an irresistible snack for both kids and adults alike. Plus, they are incredibly easy to make, allowing you to whip up a batch in no time for unexpected guests or a cozy family gathering. Whether enjoyed with a cup of tea or as a sweet treat after dinner, these cookies are sure to become a favorite in your home. Join me as we dive into the world of Swirl Butter Cookies and discover how to create this delightful recipe!

Ingredients:
- 1 cup unsalted butter, softened
- 1 cup granulated sugar
- 1 large egg
- 1 teaspoon vanilla extract
- 2 cups all-purpose flour
- 1/2 teaspoon baking powder
- 1/4 teaspoon salt
- 1/2 cup cocoa powder
- 1 tablespoon milk (optional, for consistency)
Preparing the Dough
Lets get started on making these delightful swirl butter cookies! First, we need to prepare our dough. Follow these steps:
- In a large mixing bowl, add the softened butter and granulated sugar. Using an electric mixer, beat them together on medium speed until the mixture is light and fluffy. This should take about 3-4 minutes. Make sure to scrape down the sides of the bowl occasionally to ensure everything is well combined.
- Next, add the egg and vanilla extract to the butter-sugar mixture. Continue to beat on medium speed until fully incorporated. The mixture should be smooth and creamy.
- In a separate bowl, whisk together the all-purpose flour, baking powder, and salt. Gradually add this dry mixture to the wet ingredients, mixing on low speed until just combined. Be careful not to overmix, as this can lead to tough cookies.
- Once the dough is combined, divide it into two equal portions. In one portion, add the cocoa powder and mix until fully incorporated. If the chocolate dough seems too dry, you can add a tablespoon of milk to achieve the desired consistency. The other portion will remain plain.
Chilling the Dough
Now that we have our two doughs ready, its time to chill them. Chilling helps the cookies maintain their shape while baking.
- Wrap each portion of dough in plastic wrap and flatten them into discs. This will make it easier to roll out later. Place the wrapped dough in the refrigerator for at least 30 minutes. If youre short on time, you can chill them in the freezer for about 15 minutes.
Rolling and Swirling the Dough
Once the dough is chilled, we can start rolling and creating those beautiful swirls!
- Preheat your oven to 350°F (175°C) and line two baking sheets with parchment paper.
- Take the plain dough out of the refrigerator and place it on a lightly floured surface. Roll it out into a rectangle, about 1/4 inch thick.
- Next, take the chocolate dough and do the sameroll it out into a rectangle of the same size as the plain dough.
- Now, carefully place the chocolate dough on top of the plain dough. Make sure the edges align perfectly.
- Starting from one end, gently roll the dough into a log, making sure to keep it tight but not too tight that it squishes the dough. Once you reach the end, pinch the seam to seal it.
- Wrap the log in plastic wrap and refrigerate for another 15-20 minutes. This will help the cookies hold their shape when we slice them.
Slicing and Baking the Cookies
Now that our dough log is chilled, its time to slice and bake these cookies!
- Remove the log from the refrigerator and unwrap it. Using a sharp knife, slice the log into 1/4 inch thick rounds. You should see the beautiful swirl pattern in each slice!
- Place the sliced cookies on the prepared baking sheets, leaving about 2 inches of space between each cookie to allow for spreading.
- Bake in the preheated oven for 10-12 minutes, or until the edges are lightly golden. The centers may look slightly underbaked, but they will continue to firm up as they cool.
- Once baked, remove the cookies from the oven and let them cool on the baking sheets for about 5 minutes. Then, transfer them to a wire rack to cool completely.
Storing the Cookies
After all that hard work, youll want to make sure your cookies
Conclusion:
In summary, these Swirl Butter Cookies are an absolute must-try for anyone looking to indulge in a delightful treat that combines rich flavors and a beautiful presentation. The buttery texture, paired with the sweet swirls of chocolate or jam, creates a cookie experience that is both satisfying and visually appealing. Whether youre baking for a special occasion, a holiday gathering, or simply to enjoy with a cup of tea, these cookies are sure to impress. For serving suggestions, consider pairing these cookies with a scoop of vanilla ice cream for an indulgent dessert or serving them alongside a warm cup of coffee or tea for a cozy afternoon snack. You can also experiment with different flavor variations by incorporating nuts, spices, or even different types of chocolate to suit your taste preferences. The possibilities are endless! I encourage you to give this Swirl Butter Cookies recipe a try and share your experience with friends and family. I would love to hear how they turn out for you and any creative twists you might add. Happy baking, and enjoy every delicious bite! Print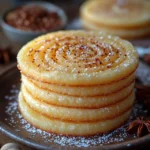
Swirl Butter Cookies: The Ultimate Recipe for Irresistible Treats
- Total Time: 60 minutes
- Yield: 24 cookies 1x
Description
These swirl butter cookies feature a delightful combination of rich chocolate and buttery vanilla flavors, making them a beautiful and delicious treat perfect for any occasion. Easy to make and store, they can be enjoyed fresh or frozen for later.
Ingredients
- 1 cup unsalted butter, softened
- 1 cup granulated sugar
- 1 large egg
- 1 teaspoon vanilla extract
- 2 cups all-purpose flour
- 1/2 teaspoon baking powder
- 1/4 teaspoon salt
- 1/2 cup cocoa powder
- 1 tablespoon milk (optional, for consistency)
Instructions
- In a large mixing bowl, add the softened butter and granulated sugar. Using an electric mixer, beat them together on medium speed until the mixture is light and fluffy (about 3-4 minutes). Scrape down the sides of the bowl occasionally.
- Add the egg and vanilla extract to the butter-sugar mixture and continue to beat until fully incorporated.
- In a separate bowl, whisk together the all-purpose flour, baking powder, and salt. Gradually add this dry mixture to the wet ingredients, mixing on low speed until just combined.
- Divide the dough into two equal portions. In one portion, add the cocoa powder and mix until fully incorporated. If the chocolate dough seems too dry, add a tablespoon of milk.
- Wrap each portion of dough in plastic wrap and flatten them into discs. Chill in the refrigerator for at least 30 minutes (or 15 minutes in the freezer).
- Preheat your oven to 350°F (175°C) and line two baking sheets with parchment paper.
- Roll out the plain dough into a rectangle about 1/4 inch thick. Roll out the chocolate dough into a rectangle of the same size.
- Place the chocolate dough on top of the plain dough, aligning the edges. Roll the dough into a log, pinching the seam to seal it.
- Wrap the log in plastic wrap and refrigerate for another 15-20 minutes.
- Slice the log into 1/4 inch thick rounds and place them on the prepared baking sheets, leaving space between each cookie.
- Bake for 10-12 minutes, or until the edges are lightly golden. Let cool on the baking sheets for 5 minutes before transferring to a wire rack to cool completely.
Notes
- Ensure the butter is softened to room temperature for easy mixing.
- Do not overmix the dough to avoid tough cookies.
- Adjust the amount of milk in the chocolate dough based on desired consistency.
- Store cookies in an airtight container for up to a week or freeze for up to 3 months.
- Prep Time: 30 minutes
- Cook Time: 12 minutes