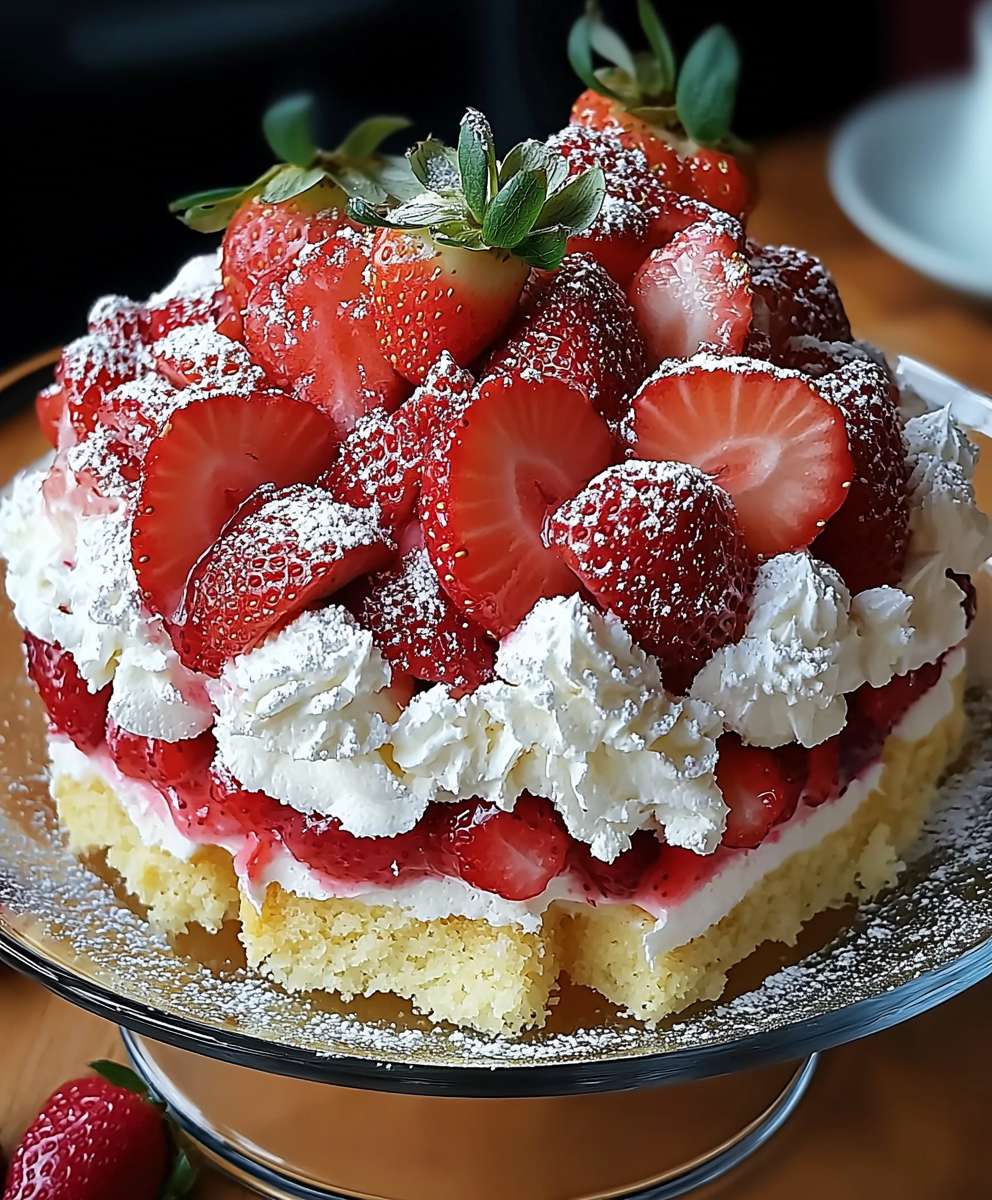
Strawberry Heaven Cake: Just the name alone conjures images of fluffy clouds, sweet berries, and pure dessert bliss, doesn’t it? Well, prepare to have your expectations exceeded! This isn’t just another cake; it’s a slice of sunshine on a plate, a guaranteed crowd-pleaser, and a recipe that will quickly become a family favorite.
While the exact origins of the Strawberry Heaven Cake are shrouded in a bit of mystery (perhaps a closely guarded family secret passed down through generations!), the concept of pairing strawberries with creamy, light textures has been a culinary delight for centuries. Think of the classic strawberry shortcake, a beloved dessert in many cultures, or the elegant French fraisier cake. This recipe builds upon that timeless combination, elevating it to new heights of deliciousness.
So, what makes this cake so irresistible? It’s the perfect balance of flavors and textures. The moist, tender cake layers provide a delightful base for the luscious strawberry filling and the light-as-air whipped cream topping. The sweetness of the strawberries is perfectly complemented by the subtle tang of the cream, creating a symphony of flavors that dance on your palate. Plus, it’s surprisingly easy to make! Whether you’re a seasoned baker or a kitchen novice, you’ll find this recipe straightforward and rewarding. Get ready to experience a taste of heaven with every bite!

Ingredients:
- For the Vanilla Cake Layers:
- 2 ½ cups (300g) all-purpose flour
- 1 tablespoon baking powder
- ½ teaspoon baking soda
- ½ teaspoon salt
- 1 cup (2 sticks or 226g) unsalted butter, softened
- 1 ¾ cups (350g) granulated sugar
- 2 large eggs
- 1 teaspoon vanilla extract
- 1 ¼ cups (300ml) buttermilk
- For the Strawberry Filling:
- 2 pounds (900g) fresh strawberries, hulled and sliced
- ½ cup (100g) granulated sugar
- 2 tablespoons lemon juice
- 1 tablespoon cornstarch
- For the Swiss Meringue Buttercream:
- 6 large egg whites
- 1 ½ cups (300g) granulated sugar
- 1 ½ cups (3 sticks or 340g) unsalted butter, softened
- 1 teaspoon vanilla extract
- Pinch of salt
- For Decoration (Optional):
- Fresh strawberries
- Edible flowers
- Strawberry jam (for crumb coat)
Preparing the Vanilla Cake Layers:
- Preheat and Prepare: First things first, preheat your oven to 350°F (175°C). Grease and flour three 8-inch round cake pans. You can also line the bottoms with parchment paper rounds for extra insurance against sticking. This step is crucial for easy cake removal later!
- Combine Dry Ingredients: In a large bowl, whisk together the flour, baking powder, baking soda, and salt. Make sure everything is evenly distributed. This ensures a consistent rise and texture in your cakes.
- Cream Butter and Sugar: In a separate large bowl (or the bowl of your stand mixer), cream together the softened butter and granulated sugar until light and fluffy. This usually takes about 3-5 minutes. The mixture should be noticeably lighter in color and texture.
- Add Eggs and Vanilla: Beat in the eggs one at a time, then stir in the vanilla extract. Make sure each egg is fully incorporated before adding the next.
- Alternate Wet and Dry Ingredients: Gradually add the dry ingredients to the wet ingredients, alternating with the buttermilk. Begin and end with the dry ingredients. So, add about one-third of the dry ingredients, then half of the buttermilk, then another third of the dry ingredients, the remaining buttermilk, and finally the last third of the dry ingredients. Mix until just combined. Be careful not to overmix! Overmixing can lead to a tough cake.
- Divide and Bake: Divide the batter evenly among the prepared cake pans. Bake for 25-30 minutes, or until a wooden skewer inserted into the center comes out clean.
- Cool the Cakes: Let the cakes cool in the pans for 10 minutes before inverting them onto a wire rack to cool completely. Make sure they are completely cool before frosting.
Making the Strawberry Filling:
- Prepare the Strawberries: In a medium saucepan, combine the sliced strawberries, granulated sugar, and lemon juice.
- Cook the Strawberries: Cook over medium heat, stirring occasionally, until the strawberries release their juices and the mixture begins to simmer. This usually takes about 5-7 minutes.
- Thicken the Filling: In a small bowl, whisk together the cornstarch and 2 tablespoons of cold water to form a slurry. Pour the slurry into the strawberry mixture and stir constantly until the filling thickens. This should only take a minute or two.
- Cool the Filling: Remove from heat and let the strawberry filling cool completely before using. Cooling prevents the filling from melting the buttercream.
Preparing the Swiss Meringue Buttercream:
- Combine Egg Whites and Sugar: In a heatproof bowl (such as stainless steel or glass) set over a saucepan of simmering water (double boiler), combine the egg whites and granulated sugar. Make sure the bottom of the bowl doesn’t touch the water.
- Heat and Whisk: Whisk constantly until the sugar is completely dissolved and the mixture is hot to the touch. You should not feel any sugar granules when you rub a small amount between your fingers. This is crucial for a smooth buttercream.
- Whip to Stiff Peaks: Remove the bowl from the heat and transfer the mixture to the bowl of your stand mixer fitted with the whisk attachment. Whip on high speed until stiff, glossy peaks form and the bowl is cool to the touch. This can take 5-10 minutes. The meringue should be very stable and hold its shape.
- Add Butter Gradually: With the mixer on medium speed, add the softened butter one tablespoon at a time, waiting until each piece is fully incorporated before adding the next. The mixture may look curdled at first, but keep mixing! It will eventually come together.
- Add Vanilla and Salt: Once all the butter is added, stir in the vanilla extract and a pinch of salt.
- Whip Until Smooth: Continue to whip the buttercream on medium-high speed until it is smooth, light, and fluffy. This may take another 2-3 minutes.
Assembling the Strawberry Heaven Cake:
- Level the Cakes (Optional): If your cake layers are uneven, use a serrated knife to level them. This will ensure a perfectly stacked cake.
- Crumb Coat: Place one cake layer on a cake stand or serving plate. Spread a thin layer of strawberry jam over the top. This will help the buttercream adhere and add extra strawberry flavor.
- Add Buttercream and Filling: Spread a layer of Swiss meringue buttercream over the jam. Then, spread a generous layer of the cooled strawberry filling over the buttercream.
- Repeat Layers: Place the second cake layer on top of the strawberry filling. Repeat the buttercream and strawberry filling layers.
- Top Layer: Place the final cake layer on top.
- Crumb Coat the Entire Cake: Spread a thin layer of Swiss meringue buttercream over the entire cake to seal in any crumbs. This is your crumb coat. Chill the cake in the refrigerator for at least 30 minutes to allow the crumb coat to set.
- Final Frosting: Once the crumb coat is set, spread a final, thicker layer of Swiss meringue buttercream over the entire cake. Smooth the frosting with an offset spatula or cake smoother.
- Decorate: Decorate the cake with fresh strawberries, edible flowers, or any other decorations you like. Get creative!
- Chill and Serve: Chill the cake in the refrigerator for at least 30 minutes before serving. This will help the frosting set and make it easier to slice.
Conclusion:
This Strawberry Heaven Cake isn’t just a dessert; it’s an experience, a burst of summer sunshine in every bite. From the light and airy sponge to the luscious strawberry cream and the vibrant fresh berries, every element works in perfect harmony to create a truly unforgettable treat. I know, I know, I might be biased, but trust me on this one you absolutely *have* to try it! Why is it a must-try? Well, beyond the obvious deliciousness, it’s surprisingly simple to make. I’ve broken down each step to be as clear and straightforward as possible, so even if you’re not a seasoned baker, you can confidently whip up this showstopper. Plus, the fresh strawberry flavor is just unbeatable. It’s the kind of cake that will have everyone asking for seconds (and the recipe!). Its the perfect centerpiece for a birthday celebration, a delightful addition to a summer picnic, or simply a sweet reward for yourself after a long day. But the best part? It’s incredibly versatile! Feel free to get creative and put your own spin on it. For a richer flavor, try using mascarpone cheese in the cream filling instead of whipped cream. Or, if you’re feeling adventurous, add a layer of strawberry jam between the sponge layers for an extra burst of fruity goodness. You could even incorporate other berries like raspberries or blueberries for a mixed berry sensation. Here are a few serving suggestions to elevate your Strawberry Heaven Cake experience: * A dollop of whipped cream: A classic pairing that never fails. * A scoop of vanilla ice cream: The cold ice cream complements the warm cake perfectly. * A drizzle of chocolate sauce: For a decadent twist, add a touch of chocolate. * A sprinkle of chopped nuts: Almonds or pistachios would add a lovely crunch. * A dusting of powdered sugar: For a simple yet elegant finish. Don’t be afraid to experiment and find your favorite combination! The possibilities are endless. I truly believe this Strawberry Heaven Cake will become a new favorite in your household. It’s the perfect balance of sweet, tart, and creamy, and it’s guaranteed to impress your family and friends. It’s a cake that speaks of sunshine, happiness, and the simple joys of life. So, what are you waiting for? Gather your ingredients, preheat your oven, and get ready to embark on a baking adventure. I promise you won’t regret it! And most importantly, have fun! Baking should be a joyful experience, so relax, put on some music, and enjoy the process. Once you’ve made this delightful cake, I would absolutely love to hear about your experience! Share your photos and stories on social media using #StrawberryHeavenCake or tag me in your posts. I can’t wait to see your creations and hear what you think. Did you make any variations? What were your favorite serving suggestions? Let me know! Your feedback is invaluable and helps me continue to create recipes that you’ll love. Happy baking! I hope this Strawberry Heaven Cake brings as much joy to your table as it has to mine. Print
Strawberry Heaven Cake: Recipe, Tips, and Delicious Variations
- Total Time: 240 minutes
- Yield: 12–16 servings 1x
Description
Moist vanilla cake layers with homemade strawberry filling and silky Swiss meringue buttercream. Perfect for celebrations!
Ingredients
- 2 ½ cups (300g) all-purpose flour
- 1 tablespoon baking powder
- ½ teaspoon baking soda
- ½ teaspoon salt
- 1 cup (2 sticks or 226g) unsalted butter, softened
- 1 ¾ cups (350g) granulated sugar
- 2 large eggs
- 1 teaspoon vanilla extract
- 1 ¼ cups (300ml) buttermilk
- 2 pounds (900g) fresh strawberries, hulled and sliced
- ½ cup (100g) granulated sugar
- 2 tablespoons lemon juice
- 1 tablespoon cornstarch
- 6 large egg whites
- 1 ½ cups (300g) granulated sugar
- 1 ½ cups (3 sticks or 340g) unsalted butter, softened
- 1 teaspoon vanilla extract
- Pinch of salt
- Fresh strawberries
- Edible flowers
- Strawberry jam (for crumb coat)
Instructions
- Preheat and Prepare: Preheat your oven to 350°F (175°C). Grease and flour three 8-inch round cake pans. You can also line the bottoms with parchment paper rounds for extra insurance against sticking.
- Combine Dry Ingredients: In a large bowl, whisk together the flour, baking powder, baking soda, and salt.
- Cream Butter and Sugar: In a separate large bowl (or the bowl of your stand mixer), cream together the softened butter and granulated sugar until light and fluffy (3-5 minutes).
- Add Eggs and Vanilla: Beat in the eggs one at a time, then stir in the vanilla extract.
- Alternate Wet and Dry Ingredients: Gradually add the dry ingredients to the wet ingredients, alternating with the buttermilk. Begin and end with the dry ingredients. Mix until just combined. Be careful not to overmix!
- Divide and Bake: Divide the batter evenly among the prepared cake pans. Bake for 25-30 minutes, or until a wooden skewer inserted into the center comes out clean.
- Cool the Cakes: Let the cakes cool in the pans for 10 minutes before inverting them onto a wire rack to cool completely. Make sure they are completely cool before frosting.
- Prepare the Strawberries: In a medium saucepan, combine the sliced strawberries, granulated sugar, and lemon juice.
- Cook the Strawberries: Cook over medium heat, stirring occasionally, until the strawberries release their juices and the mixture begins to simmer (5-7 minutes).
- Thicken the Filling: In a small bowl, whisk together the cornstarch and 2 tablespoons of cold water to form a slurry. Pour the slurry into the strawberry mixture and stir constantly until the filling thickens (1-2 minutes).
- Cool the Filling: Remove from heat and let the strawberry filling cool completely before using.
- Combine Egg Whites and Sugar: In a heatproof bowl set over a saucepan of simmering water (double boiler), combine the egg whites and granulated sugar. Make sure the bottom of the bowl doesn’t touch the water.
- Heat and Whisk: Whisk constantly until the sugar is completely dissolved and the mixture is hot to the touch. You should not feel any sugar granules when you rub a small amount between your fingers.
- Whip to Stiff Peaks: Remove the bowl from the heat and transfer the mixture to the bowl of your stand mixer fitted with the whisk attachment. Whip on high speed until stiff, glossy peaks form and the bowl is cool to the touch (5-10 minutes).
- Add Butter Gradually: With the mixer on medium speed, add the softened butter one tablespoon at a time, waiting until each piece is fully incorporated before adding the next. The mixture may look curdled at first, but keep mixing! It will eventually come together.
- Add Vanilla and Salt: Once all the butter is added, stir in the vanilla extract and a pinch of salt.
- Whip Until Smooth: Continue to whip the buttercream on medium-high speed until it is smooth, light, and fluffy (2-3 minutes).
- Level the Cakes (Optional): If your cake layers are uneven, use a serrated knife to level them.
- Crumb Coat: Place one cake layer on a cake stand or serving plate. Spread a thin layer of strawberry jam over the top.
- Add Buttercream and Filling: Spread a layer of Swiss meringue buttercream over the jam. Then, spread a generous layer of the cooled strawberry filling over the buttercream.
- Repeat Layers: Place the second cake layer on top of the strawberry filling. Repeat the buttercream and strawberry filling layers.
- Top Layer: Place the final cake layer on top.
- Crumb Coat the Entire Cake: Spread a thin layer of Swiss meringue buttercream over the entire cake to seal in any crumbs. Chill the cake in the refrigerator for at least 30 minutes to allow the crumb coat to set.
- Final Frosting: Once the crumb coat is set, spread a final, thicker layer of Swiss meringue buttercream over the entire cake. Smooth the frosting with an offset spatula or cake smoother.
- Decorate: Decorate the cake with fresh strawberries, edible flowers, or any other decorations you like.
- Chill and Serve: Chill the cake in the refrigerator for at least 30 minutes before serving.
Notes
- Make sure all ingredients are at room temperature unless otherwise specified. This helps with even mixing and a better cake texture.
- Don’t overmix the cake batter, as this can lead to a tough cake. Mix until just combined.
- Cool the cake layers completely before frosting to prevent the buttercream from melting.
- The Swiss meringue buttercream may look curdled at first when adding the butter, but keep mixing, and it will come together.
- Chilling the cake before serving helps the frosting set and makes it easier to slice.
- Prep Time: 1 hour
- Cook Time: 45 minutes