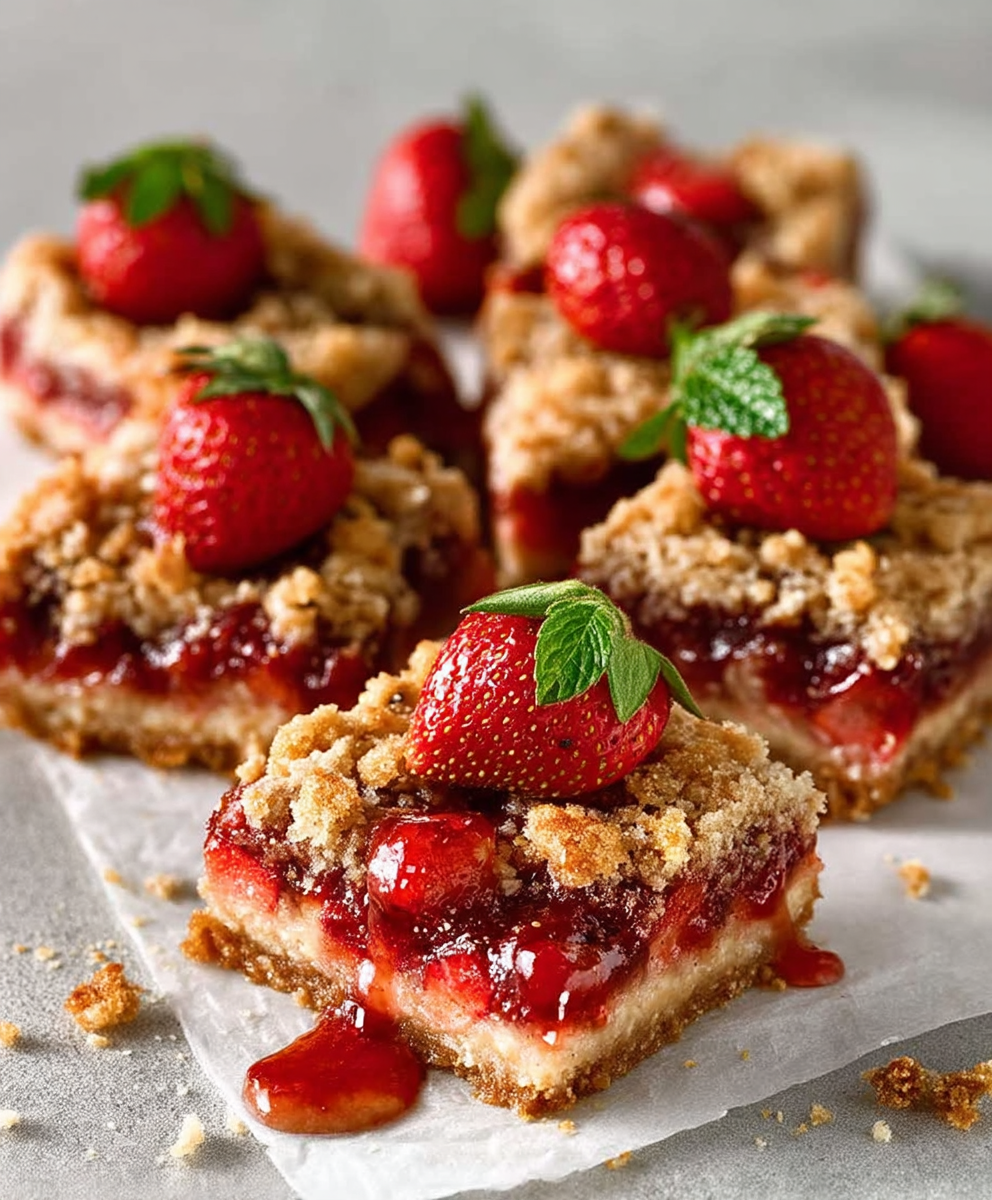
Strawberry Bars: Prepare to be captivated by a dessert that perfectly marries the tangy sweetness of fresh strawberries with a buttery, crumbly crust. These aren’t just any bars; they’re a slice of sunshine on a plate, a delightful treat that evokes memories of warm summer days and carefree picnics.
While the exact origins of fruit bars are somewhat hazy, the concept of baking fruit within a pastry crust has been around for centuries. Think of the classic fruit pies and tarts that have graced tables across cultures. Strawberry Bars, in particular, represent a modern, convenient twist on this timeless tradition. They offer all the deliciousness of a strawberry pie but in a portable, shareable form.
What makes these bars so irresistible? It’s the symphony of textures and flavors. The juicy, slightly tart strawberries contrast beautifully with the rich, buttery shortbread crust. The crumb topping adds another layer of delightful crunch. But beyond the taste and texture, people adore Strawberry Bars because they’re relatively easy to make and perfect for any occasion. Whether you’re hosting a summer barbecue, need a potluck dessert, or simply craving a sweet treat, these bars are always a crowd-pleaser. So, let’s get baking and create some strawberry magic!

Ingredients:
- For the Crust:
- 1 ½ cups all-purpose flour
- ½ cup (1 stick) cold unsalted butter, cut into cubes
- ½ cup powdered sugar
- ¼ teaspoon salt
- 1 large egg yolk
- 2-3 tablespoons ice water
- For the Strawberry Filling:
- 4 cups fresh strawberries, hulled and sliced
- ¾ cup granulated sugar
- 3 tablespoons cornstarch
- 1 tablespoon lemon juice
- ¼ teaspoon almond extract (optional, but highly recommended!)
- For the Crumble Topping:
- ½ cup all-purpose flour
- ¼ cup packed light brown sugar
- ¼ cup rolled oats
- ¼ teaspoon ground cinnamon
- ¼ cup (½ stick) cold unsalted butter, cut into cubes
- Optional:
- Powdered sugar, for dusting
Preparing the Crust:
Okay, let’s get started with the crust. This is the foundation of our delicious strawberry bars, so we want to make sure it’s nice and tender.
- Combine Dry Ingredients: In a large bowl, whisk together the flour, powdered sugar, and salt. This ensures that the powdered sugar is evenly distributed, which is key for a smooth crust.
- Cut in the Butter: Add the cold, cubed butter to the flour mixture. Using a pastry blender or your fingertips (work quickly to keep the butter cold!), cut the butter into the flour until the mixture resembles coarse crumbs. You should still see small pieces of butter throughout these are what create those flaky layers we all love.
- Add the Egg Yolk and Water: In a small bowl, whisk together the egg yolk and 2 tablespoons of ice water. Pour this mixture over the flour and butter mixture.
- Mix Until Just Combined: Gently mix the ingredients together until a dough just begins to form. If the dough seems too dry, add the remaining tablespoon of ice water, one teaspoon at a time, until it comes together. Be careful not to overmix, as this will develop the gluten in the flour and result in a tough crust.
- Form the Dough into a Disc: Turn the dough out onto a lightly floured surface and gently form it into a disc. Wrap the disc tightly in plastic wrap and refrigerate for at least 30 minutes. This chilling time is crucial because it allows the gluten to relax and the butter to firm up, which will prevent the crust from shrinking during baking.
- Preheat Oven and Prepare Pan: While the dough is chilling, preheat your oven to 375°F (190°C). Grease and flour an 8×8 inch baking pan. You can also line the pan with parchment paper, leaving an overhang on the sides, for easy removal of the bars after baking.
- Press the Dough into the Pan: Once the dough has chilled, remove it from the refrigerator. On a lightly floured surface, roll out the dough to fit the bottom of the prepared pan. Carefully transfer the dough to the pan and press it evenly into the bottom and slightly up the sides. You can use the bottom of a measuring cup to help press the dough evenly.
- Pre-bake the Crust: Prick the bottom of the crust several times with a fork. This will prevent the crust from puffing up during baking. Bake the crust for 15-20 minutes, or until it is lightly golden brown. Remove the crust from the oven and let it cool slightly while you prepare the strawberry filling.
Making the Strawberry Filling:
Now for the star of the show the strawberry filling! We want a vibrant, juicy filling that perfectly complements the buttery crust.
- Prepare the Strawberries: In a large bowl, combine the sliced strawberries, granulated sugar, cornstarch, lemon juice, and almond extract (if using). Gently toss the ingredients together until the strawberries are evenly coated. The cornstarch will help to thicken the filling as it bakes, and the lemon juice will brighten the flavors and prevent the strawberries from becoming too sweet.
- Let the Strawberries Macerate: Let the strawberry mixture sit for about 10-15 minutes, allowing the strawberries to release some of their juices. This will create a more flavorful and saucy filling.
Preparing the Crumble Topping:
A little crumble topping adds the perfect textural contrast to these bars. It’s quick and easy to make!
- Combine Dry Ingredients: In a medium bowl, combine the flour, brown sugar, rolled oats, and cinnamon.
- Cut in the Butter: Add the cold, cubed butter to the flour mixture. Using a pastry blender or your fingertips, cut the butter into the flour until the mixture resembles coarse crumbs.
Assembling and Baking the Strawberry Bars:
We’re in the home stretch! Time to put everything together and bake these beauties.
- Pour the Strawberry Filling into the Crust: Pour the strawberry filling evenly over the pre-baked crust.
- Sprinkle the Crumble Topping: Sprinkle the crumble topping evenly over the strawberry filling.
- Bake the Bars: Bake the bars in the preheated oven for 30-35 minutes, or until the crumble topping is golden brown and the strawberry filling is bubbly. If the crumble topping starts to brown too quickly, you can tent the bars with aluminum foil for the last 10-15 minutes of baking.
- Cool Completely: Remove the bars from the oven and let them cool completely in the pan before cutting into squares. This is important because the filling will continue to thicken as it cools. If you try to cut the bars while they are still warm, the filling will be runny.
- Dust with Powdered Sugar (Optional): Once the bars have cooled completely, dust them with powdered sugar, if desired. This adds a touch of sweetness and makes them look even more appealing.
Tips for Success:
- Use Cold Butter: Using cold butter is crucial for both the crust and the crumble topping. Cold butter creates flaky layers in the crust and a crumbly texture in the topping.
- Don’t Overmix the Dough: Overmixing the dough will develop the gluten in the flour and result in a tough crust. Mix the dough until it just comes together.
- Chill the Dough: Chilling the dough allows the gluten to relax and the butter to firm up, which will prevent the crust from shrinking during baking.
- Let the Strawberries Macerate: Letting the strawberries macerate allows them to release some of their juices, which creates a more flavorful and saucy filling.
- Cool Completely Before Cutting: Cooling the bars completely allows the filling to thicken, which makes them easier to cut and prevents them from being runny.
Variations:
- Other Berries: Feel free to substitute other berries for the strawberries, such as raspberries, blueberries, or blackberries.
- Different Extracts: Experiment with different extracts, such as vanilla extract or lemon extract, in the strawberry filling.
- Nuts: Add chopped nuts, such as pecans or walnuts, to the crumble topping for extra flavor and texture.
- Gluten-Free: To make these bars gluten-free, use a gluten-free all-purpose flour blend in the crust and crumble topping.
Enjoy your homemade strawberry bars! They’re perfect for a summer picnic, a potluck, or just a sweet treat any time of year.
Conclusion:
And there you have it! These Strawberry Bars are more than just a dessert; they’re a burst of sunshine in every bite, a comforting hug on a plate, and a guaranteed crowd-pleaser. Seriously, if you’re looking for a recipe that’s easy to make, uses simple ingredients, and delivers maximum flavor, then look no further. This is it!
Why is this recipe a must-try? Well, let me count the ways. First, the combination of the buttery, crumbly crust with the sweet and slightly tart strawberry filling is simply divine. It’s a textural masterpiece, offering a delightful contrast that will keep you coming back for more. Second, it’s incredibly versatile. Whether you’re baking for a summer picnic, a potluck, or just a cozy night in, these bars fit the bill perfectly. And third, it’s a recipe that even beginner bakers can master. The steps are straightforward, the ingredients are readily available, and the results are consistently delicious.
But the fun doesn’t stop there! Feel free to get creative with your serving suggestions and variations. For a classic touch, serve these bars chilled with a dollop of whipped cream or a scoop of vanilla ice cream. The cool creaminess perfectly complements the warm, fruity filling. Or, if you’re feeling fancy, dust them with powdered sugar for an elegant presentation.
Looking for variations? Oh, the possibilities are endless! Try adding a sprinkle of chopped almonds or pecans to the crust for extra crunch and nutty flavor. Or, for a richer, more decadent treat, drizzle melted white chocolate over the cooled bars. You could even experiment with different fruits! Imagine these bars with raspberries, blueberries, or a mix of berries. The key is to use fruits that hold their shape well during baking and that complement the buttery crust. Another fun twist is to add a hint of lemon zest to the strawberry filling for a brighter, more vibrant flavor. A little lemon juice can also enhance the strawberry’s natural sweetness.
For a truly special occasion, consider making a large batch of these Strawberry Bars and arranging them on a tiered dessert stand. They’ll look absolutely stunning and are sure to impress your guests. You can also cut them into smaller squares or triangles for bite-sized treats that are perfect for parties or afternoon tea.
I’m so confident that you’ll love this recipe that I urge you to give it a try. Don’t be intimidated by baking; this recipe is truly foolproof. Gather your ingredients, preheat your oven, and get ready to create something amazing. And most importantly, have fun! Baking should be a joyful experience, so relax, put on some music, and enjoy the process.
Once you’ve made these bars, I’d love to hear about your experience! Did you make any variations? What did your family and friends think? Share your photos and stories in the comments below. Your feedback is invaluable and helps me to continue creating recipes that you’ll love. So go ahead, bake up a batch of these irresistible Strawberry Bars and let me know what you think. Happy baking!
Strawberry Bars: The Ultimate Guide to Baking Perfect Treats
Buttery shortbread crust topped with a sweet and juicy strawberry filling and a crisp crumble topping. The perfect summer treat!
Ingredients
- 1 ½ cups all-purpose flour
- ½ cup (1 stick) cold unsalted butter, cut into cubes
- ½ cup powdered sugar
- ¼ teaspoon salt
- 1 large egg yolk
- 2-3 tablespoons ice water
- 4 cups fresh strawberries, hulled and sliced
- ¾ cup granulated sugar
- 3 tablespoons cornstarch
- 1 tablespoon lemon juice
- ¼ teaspoon almond extract (optional)
- ½ cup all-purpose flour
- ¼ cup packed light brown sugar
- ¼ cup rolled oats
- ¼ teaspoon ground cinnamon
- ¼ cup (½ stick) cold unsalted butter, cut into cubes
- Powdered sugar, for dusting
Instructions
- Prepare the Crust: In a large bowl, whisk together the flour, powdered sugar, and salt. Cut in the cold butter using a pastry blender or your fingertips until the mixture resembles coarse crumbs. Whisk together the egg yolk and 2 tablespoons of ice water. Pour this mixture over the flour and butter mixture. Gently mix until a dough just begins to form, adding the remaining tablespoon of ice water if needed. Form the dough into a disc, wrap in plastic wrap, and refrigerate for at least 30 minutes.
- Preheat oven to 375°F (190°C). Grease and flour an 8×8 inch baking pan.
- Roll out the chilled dough on a lightly floured surface to fit the bottom of the prepared pan. Transfer to the pan and press evenly into the bottom and slightly up the sides. Prick the bottom of the crust several times with a fork.
- Pre-bake the crust for 15-20 minutes, or until lightly golden brown. Remove from oven and let cool slightly.
- Make the Strawberry Filling: In a large bowl, combine the sliced strawberries, granulated sugar, cornstarch, lemon juice, and almond extract (if using). Gently toss to coat. Let the mixture sit for 10-15 minutes to macerate.
- Prepare the Crumble Topping: In a medium bowl, combine the flour, brown sugar, rolled oats, and cinnamon. Cut in the cold butter using a pastry blender or your fingertips until the mixture resembles coarse crumbs.
- Assemble and Bake: Pour the strawberry filling evenly over the pre-baked crust. Sprinkle the crumble topping evenly over the strawberry filling.
- Bake in the preheated oven for 30-35 minutes, or until the crumble topping is golden brown and the strawberry filling is bubbly. If the topping browns too quickly, tent with foil for the last 10-15 minutes.
- Cool completely in the pan before cutting into squares. Dust with powdered sugar, if desired.
Notes
- Use cold butter for both the crust and crumble.
- Don’t overmix the crust dough.
- Chilling the dough is essential.
- Let the strawberries macerate for a saucier filling.
- Cool completely before cutting to allow the filling to set.
- Variations: Substitute other berries, experiment with different extracts, add chopped nuts to the crumble, or use gluten-free flour for a gluten-free version.