Spritz cookies easy bake the very words conjure up images of festive gatherings, twinkling lights, and the delightful aroma of buttery sweetness wafting through the air. Have you ever wondered how these charming little cookies, pressed into whimsical shapes, became a holiday staple? Their history stretches back to Germany, where “spritzen” means “to squirt,” referring to the method of pressing the dough through a cookie press or pastry bag.
These aren’t just any cookies; they’re a tradition, a symbol of celebration passed down through generations. But what makes spritz cookies easy bake so universally loved? It’s a delightful combination of factors. Their delicate, melt-in-your-mouth texture is simply irresistible. The subtle sweetness, often enhanced with a hint of almond or vanilla, is perfectly balanced. And let’s not forget the fun factor! Shaping them into stars, trees, or wreaths adds a playful touch that appeals to both young and old.
Beyond their delicious taste and charming appearance, spritz cookies are surprisingly simple to make. This recipe is designed to be approachable for bakers of all skill levels, ensuring that you can create a batch of these delightful treats with ease. So, gather your ingredients, preheat your oven, and let’s embark on a baking adventure that will fill your home with warmth and the irresistible scent of freshly baked cookies!

Ingredients:
- 1 cup (2 sticks) unsalted butter, softened
- ¾ cup granulated sugar
- 1 large egg
- 1 teaspoon vanilla extract
- ¼ teaspoon almond extract (optional, but highly recommended!)
- 2 ¼ cups all-purpose flour
- ½ teaspoon baking powder
- ¼ teaspoon salt
- Food coloring (gel or liquid, your choice of colors)
- Sprinkles, for decorating (optional, but encouraged!)
Preparing the Dough: The Foundation of Spritz Perfection
- Cream the butter and sugar: In a large bowl (or the bowl of your stand mixer), cream together the softened butter and granulated sugar until light and fluffy. This usually takes about 3-5 minutes. Don’t rush this step! A well-creamed mixture is key to a tender cookie. You’ll know it’s ready when the mixture is noticeably lighter in color and has a smooth, almost whipped texture. Scrape down the sides of the bowl occasionally to ensure everything is evenly incorporated.
- Incorporate the egg and extracts: Beat in the egg until fully combined. Then, stir in the vanilla extract and almond extract (if using). The almond extract adds a lovely subtle flavor that complements the vanilla beautifully, but it’s perfectly fine to omit it if you prefer a pure vanilla flavor. Make sure to mix until everything is homogenous.
- Combine dry ingredients: In a separate medium bowl, whisk together the all-purpose flour, baking powder, and salt. Whisking ensures that the baking powder and salt are evenly distributed throughout the flour, which is important for proper leavening and flavor.
- Gradually add dry ingredients to wet ingredients: Gradually add the dry ingredients to the wet ingredients, mixing on low speed until just combined. Be careful not to overmix! Overmixing can develop the gluten in the flour, resulting in tough cookies. Mix until the flour is just incorporated, and then stop. A few streaks of flour are okay at this point.
- Divide and color the dough (optional): If you want to make different colored cookies, divide the dough into separate bowls (one for each color). Add a few drops of food coloring to each bowl and mix until the color is evenly distributed. I prefer using gel food coloring because it’s more concentrated and doesn’t add as much liquid to the dough, but liquid food coloring works too. Just be mindful of how much you add, as too much liquid can change the consistency of the dough. Remember, you can always add more color, but you can’t take it away!
- Chill the dough: Wrap the dough (or each colored portion of dough) tightly in plastic wrap and chill in the refrigerator for at least 30 minutes. This is a crucial step! Chilling the dough allows the butter to firm up, which prevents the cookies from spreading too much during baking. It also makes the dough easier to handle and pipe. You can chill the dough for longer, even overnight, if needed. If chilling overnight, let the dough sit at room temperature for a few minutes before piping to soften it slightly.
The Cookie Press: Mastering the Spritz Technique
- Preheat the oven: Preheat your oven to 375°F (190°C). Make sure your oven rack is in the center position for even baking.
- Prepare baking sheets: Line baking sheets with parchment paper or silicone baking mats. This will prevent the cookies from sticking and make cleanup a breeze. Do not grease the baking sheets directly, as this can cause the cookies to spread.
- Load the cookie press: Remove one portion of chilled dough from the refrigerator. Fit your cookie press with your desired disc shape. Pack the dough into the cookie press, making sure to eliminate any air pockets. Air pockets can cause the cookies to break or not form properly.
- Press the cookies: Hold the cookie press directly onto the ungreased baking sheet. Press the handle of the cookie press to release the dough. Lift the press straight up. If the dough sticks to the press, try chilling the dough for a bit longer or adding a little more flour. If the dough is too hard to press, let it sit at room temperature for a few minutes to soften slightly. Aim for consistent spacing between the cookies.
- Decorate (optional): If desired, decorate the cookies with sprinkles before baking. Gently press the sprinkles into the dough so they adhere well.
- Repeat: Repeat steps 3-5 with the remaining dough, using different disc shapes and colors as desired.
Baking and Cooling: The Final Touches
- Bake the cookies: Bake the cookies for 6-8 minutes, or until the edges are lightly golden brown. Keep a close eye on them, as they can burn easily. The baking time will vary depending on your oven and the size of the cookies.
- Cool the cookies: Remove the baking sheets from the oven and let the cookies cool on the baking sheets for a few minutes before transferring them to a wire rack to cool completely. This allows the cookies to firm up slightly and prevents them from breaking when you move them.
- Decorate further (optional): Once the cookies are completely cool, you can decorate them further with melted chocolate, icing, or more sprinkles. Get creative and have fun!
- Store the cookies: Store the cooled cookies in an airtight container at room temperature for up to a week. They also freeze well for longer storage.
Tips for Spritz Cookie Success:
- Use softened butter: Make sure your butter is properly softened before creaming it with the sugar. The butter should be soft enough to easily press your finger into, but not melted.
- Don’t overmix the dough: Overmixing can develop the gluten in the flour, resulting in tough cookies. Mix until the flour is just incorporated.
- Chill the dough: Chilling the dough is essential for preventing the cookies from spreading too much during baking.
- Use ungreased baking sheets: Greasing the baking sheets can cause the cookies to spread. Use parchment paper or silicone baking mats instead.
- Experiment with flavors: Feel free to experiment with different extracts and spices to create your own unique spritz cookie flavors. Lemon zest, orange zest, or cardamom would all be delicious additions.
- Troubleshooting: If your dough is too dry, add a teaspoon of milk or water at a time until it reaches the desired consistency. If your dough is too wet, add a tablespoon of flour at a time until it firms up. If your cookies are spreading too much, chill the dough for a longer period of time. If your cookies are sticking to the cookie press, try chilling the dough for a bit longer or adding a little more flour.
Conclusion:
And there you have it! This Spritz Cookies Easy Bake recipe is truly a must-try, and I’m not just saying that because I wrote it. The combination of the buttery, melt-in-your-mouth texture with the festive shapes and colors makes these cookies an instant crowd-pleaser. They’re surprisingly simple to make, even for beginner bakers, and the results are absolutely stunning. Forget store-bought cookies this holiday season; these homemade Spritz cookies will be the star of your dessert table.
But why are these cookies so special? It’s the perfect balance of simplicity and elegance. The dough comes together quickly, and the cookie press does all the hard work of shaping them. Plus, the flavor is incredibly versatile. You can customize them with different extracts, food coloring, and sprinkles to create a truly unique batch every time.
Beyond the basic recipe, there are so many ways to make these Spritz cookies your own. For a richer flavor, try adding a teaspoon of almond extract or lemon zest to the dough. If you’re feeling adventurous, you could even experiment with different types of flour, like almond flour or gluten-free flour blend.
When it comes to serving suggestions, the possibilities are endless. These cookies are perfect on their own with a cup of coffee or tea. They also make a beautiful addition to a holiday cookie platter. For a more decadent treat, try dipping them in melted chocolate or sandwiching them with a layer of buttercream frosting.
Here are a few more ideas to get your creative juices flowing:
Serving & Variation Ideas:
* Chocolate Dipped: Dip cooled cookies halfway in melted dark, milk, or white chocolate. Sprinkle with chopped nuts or sprinkles before the chocolate sets.
* Sandwich Cookies: Spread a thin layer of buttercream frosting or raspberry jam between two cookies.
* Citrus Burst: Add the zest of one lemon or orange to the dough for a bright, citrusy flavor.
* Spice It Up: Incorporate a pinch of cinnamon, nutmeg, or cardamom into the dough for a warm, festive twist.
* Gluten-Free Option: Use a gluten-free flour blend to make these cookies suitable for those with gluten sensitivities. Be sure to add a binder like xanthan gum if your flour blend doesn’t already contain it.
* Iced Spritz: After baking and cooling, create a simple icing with powdered sugar and milk and drizzle over the cookies. Add sprinkles before the icing sets.
I truly believe that this Spritz Cookies Easy Bake recipe will become a new family favorite. It’s a fun and rewarding baking project that’s perfect for getting the whole family involved. Imagine the smiles on your loved ones’ faces when they see these beautiful, homemade cookies.
So, what are you waiting for? Gather your ingredients, dust off your cookie press, and get baking! I’m confident that you’ll be thrilled with the results. And most importantly, don’t forget to have fun! Baking should be a joyful experience, so relax, put on some music, and enjoy the process.
I can’t wait to hear about your baking adventures! Please, share your photos and stories in the comments below. Let me know what variations you tried and how they turned out. Your feedback is invaluable, and I love seeing your creations. Happy baking, and may your holidays be filled with delicious Spritz cookies! Let me know if you have any questions, and I’ll do my best to help. I’m excited to see your Spritz cookie masterpieces!
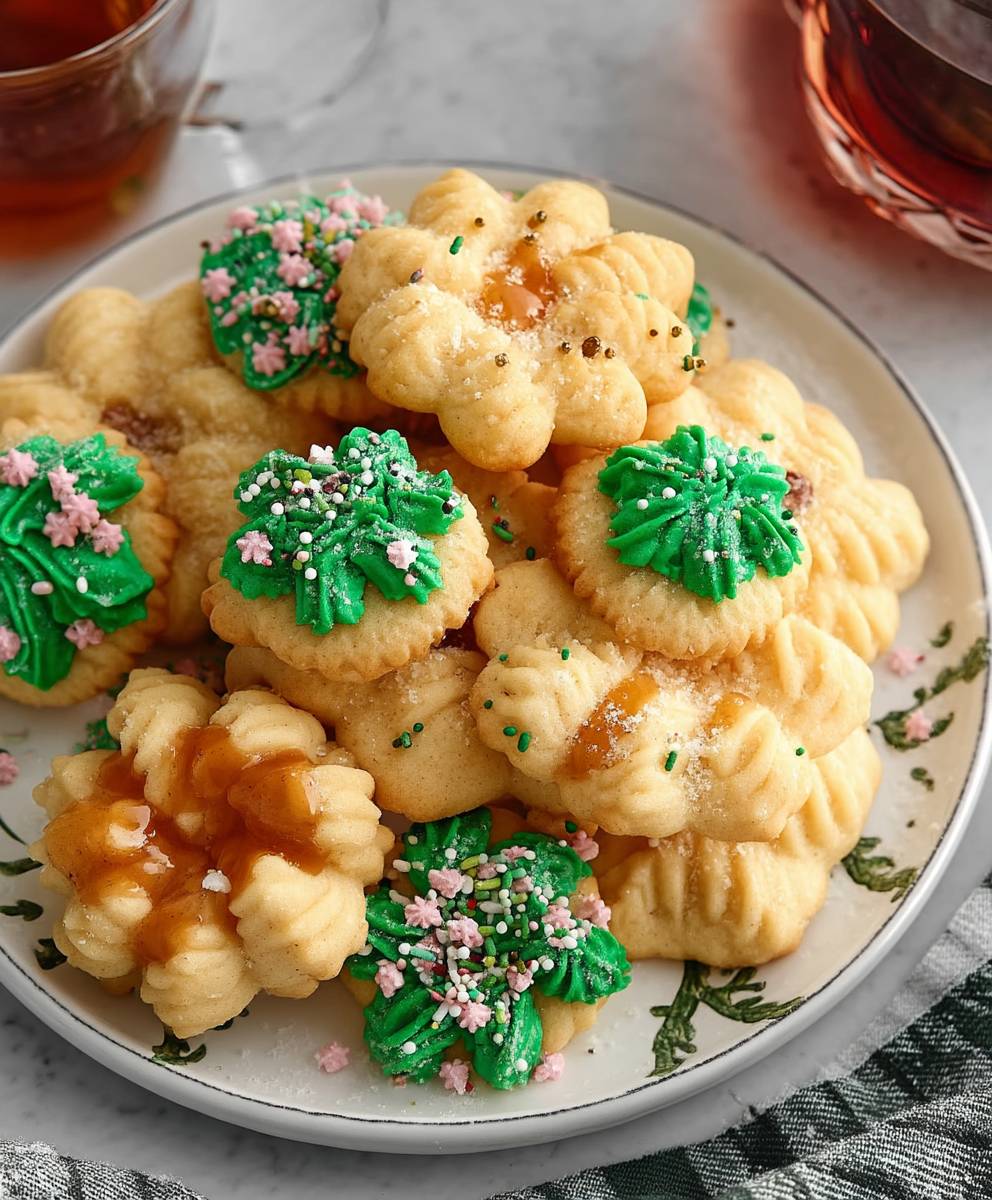
Spritz Cookies Easy Bake: Your Guide to Perfect Holiday Treats
Classic Spritz cookies made with a cookie press. Buttery and tender, perfect for holidays. Customize with colors, sprinkles, and extracts!
Ingredients
- 1 cup (2 sticks) unsalted butter, softened
- ¾ cup granulated sugar
- 1 large egg
- 1 teaspoon vanilla extract
- ¼ teaspoon almond extract (optional, but highly recommended!)
- 2 ¼ cups all-purpose flour
- ½ teaspoon baking powder
- ¼ teaspoon salt
- Food coloring (gel or liquid, your choice of colors)
- Sprinkles, for decorating (optional, but encouraged!)
Instructions
- Cream the butter and sugar: In a large bowl (or the bowl of your stand mixer), cream together the softened butter and granulated sugar until light and fluffy (3-5 minutes). Scrape down the sides of the bowl occasionally.
- Incorporate the egg and extracts: Beat in the egg until fully combined. Then, stir in the vanilla extract and almond extract (if using). Mix until homogenous.
- Combine dry ingredients: In a separate medium bowl, whisk together the all-purpose flour, baking powder, and salt.
- Gradually add dry ingredients to wet ingredients: Gradually add the dry ingredients to the wet ingredients, mixing on low speed until just combined. Be careful not to overmix! A few streaks of flour are okay at this point.
- Divide and color the dough (optional): If you want to make different colored cookies, divide the dough into separate bowls (one for each color). Add a few drops of food coloring to each bowl and mix until the color is evenly distributed.
- Chill the dough: Wrap the dough (or each colored portion of dough) tightly in plastic wrap and chill in the refrigerator for at least 30 minutes.
- Preheat the oven: Preheat your oven to 375°F (190°C). Make sure your oven rack is in the center position for even baking.
- Prepare baking sheets: Line baking sheets with parchment paper or silicone baking mats. Do not grease the baking sheets directly, as this can cause the cookies to spread.
- Load the cookie press: Remove one portion of chilled dough from the refrigerator. Fit your cookie press with your desired disc shape. Pack the dough into the cookie press, making sure to eliminate any air pockets.
- Press the cookies: Hold the cookie press directly onto the ungreased baking sheet. Press the handle of the cookie press to release the dough. Lift the press straight up. Aim for consistent spacing between the cookies.
- Decorate (optional): If desired, decorate the cookies with sprinkles before baking. Gently press the sprinkles into the dough so they adhere well.
- Repeat: Repeat steps 3-5 with the remaining dough, using different disc shapes and colors as desired.
- Bake the cookies: Bake the cookies for 6-8 minutes, or until the edges are lightly golden brown. Keep a close eye on them, as they can burn easily. The baking time will vary depending on your oven and the size of the cookies.
- Cool the cookies: Remove the baking sheets from the oven and let the cookies cool on the baking sheets for a few minutes before transferring them to a wire rack to cool completely.
- Decorate further (optional): Once the cookies are completely cool, you can decorate them further with melted chocolate, icing, or more sprinkles. Get creative and have fun!
- Store the cookies: Store the cooled cookies in an airtight container at room temperature for up to a week. They also freeze well for longer storage.
Notes
- Use softened butter for best results.
- Don’t overmix the dough.
- Chilling the dough is essential.
- Use ungreased baking sheets.
- Experiment with flavors by adding lemon zest, orange zest, or cardamom.
- If your dough is too dry, add a teaspoon of milk or water at a time. If your dough is too wet, add a tablespoon of flour at a time. If your cookies are spreading too much, chill the dough for a longer period of time. If your cookies are sticking to the cookie press, try chilling the dough for a bit longer or adding a little more flour.