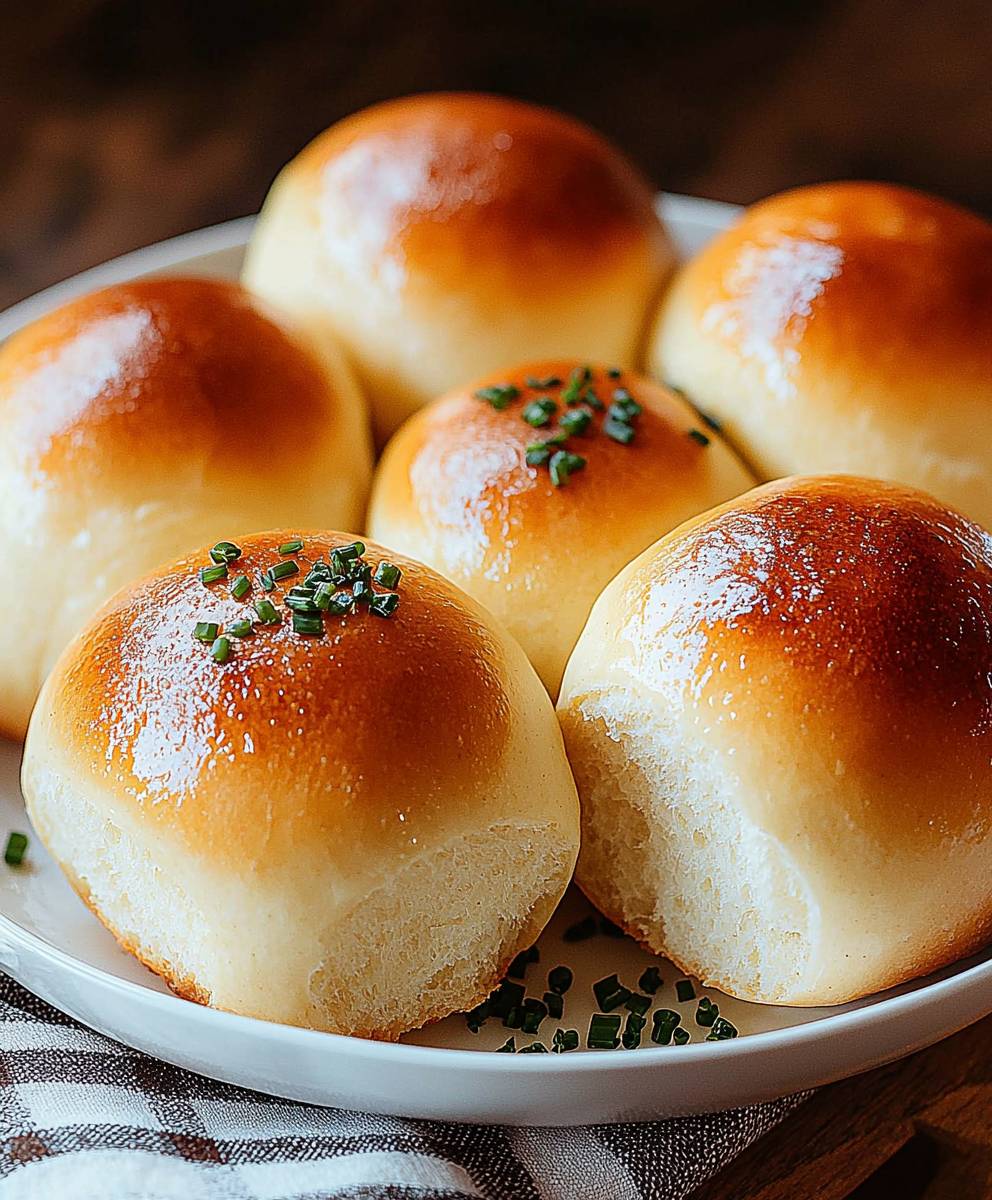
Sourdough Dinner Rolls: Is there anything quite as comforting as the aroma of freshly baked bread wafting through your home? Imagine that, but amplified tenfold with the tangy, complex flavor of sourdough! These aren’t just any rolls; they’re a culinary experience, a delightful dance between chewy crust and soft, airy interior that will elevate any meal from ordinary to extraordinary.
Sourdough, with its ancient roots tracing back to early civilizations, has always been more than just a bread-making method. It’s a connection to the past, a testament to the power of natural fermentation. For generations, families have nurtured their sourdough starters, passing down the knowledge and the unique flavor profiles from one to the next. And now, you can join that tradition with this easy-to-follow recipe.
People adore sourdough dinner rolls for a multitude of reasons. The subtle tang of the sourdough starter adds a depth of flavor that you simply can’t achieve with commercial yeast. The texture is divine a satisfying chewiness that gives way to a pillowy soft center. Plus, the slightly crusty exterior provides the perfect contrast. Whether you’re serving them alongside a hearty stew, using them for mini sandwiches, or simply enjoying them warm with a pat of butter, these rolls are guaranteed to be a crowd-pleaser. Get ready to impress your family and friends with these homemade delights!

Ingredients:
- 1 cup (240ml) active sourdough starter (100% hydration)
- 1 ½ cups (360ml) warm milk (about 105-115°F or 40-46°C)
- ¼ cup (50g) granulated sugar
- 2 large eggs, lightly beaten
- 6 tablespoons (85g) unsalted butter, melted and slightly cooled
- 5 cups (625g) all-purpose flour, plus more for dusting
- 2 teaspoons salt
- Optional: 2 tablespoons softened butter, for brushing the tops of the rolls after baking
Preparing the Dough:
- In a large bowl, or the bowl of your stand mixer, combine the warm milk, sugar, and active sourdough starter. Whisk until the sugar is dissolved and the starter is well incorporated. It should look bubbly and active. This step is crucial for ensuring the yeast is awake and ready to work its magic!
- Add the lightly beaten eggs and melted (but cooled!) butter to the mixture. Whisk again until everything is well combined. Make sure the butter isn’t too hot, or it could cook the eggs!
- In a separate bowl, whisk together the flour and salt. This ensures the salt is evenly distributed throughout the dough, which is important for flavor and gluten development.
- Gradually add the dry ingredients to the wet ingredients, mixing on low speed with the dough hook attachment (or by hand with a sturdy spoon) until a shaggy dough forms. Be patient and add the flour in stages, allowing it to incorporate fully before adding more. This prevents clumps and ensures a smooth dough.
- Once the dough comes together, increase the speed to medium-low and knead for 8-10 minutes, or until the dough is smooth, elastic, and slightly tacky but not sticky. If you’re kneading by hand, turn the dough out onto a lightly floured surface and knead for 10-12 minutes. The dough should pass the windowpane test meaning you can stretch a small piece of dough thin enough to see light through it without it tearing. If the dough is too sticky, add a tablespoon of flour at a time until it reaches the desired consistency.
First Proofing (Bulk Fermentation):
- Lightly grease a large bowl with oil or cooking spray. Place the dough in the bowl, turning to coat all sides. This prevents the dough from drying out during the proofing process.
- Cover the bowl tightly with plastic wrap or a damp kitchen towel. Let the dough rise in a warm place for 4-6 hours, or until doubled in size. The exact time will depend on the temperature of your kitchen and the activity of your starter. A warmer environment will speed up the process, while a cooler environment will slow it down. Look for signs of significant growth and air bubbles throughout the dough.
- Tip: For a more complex flavor, you can retard the dough in the refrigerator overnight (or up to 24 hours) after the initial rise. This slow fermentation process develops deeper, more nuanced flavors. Just be sure to bring the dough back to room temperature for about an hour before shaping.
Shaping the Rolls:
- Gently punch down the dough to release the air. Turn the dough out onto a lightly floured surface.
- Divide the dough into 12 equal pieces. The easiest way to do this is to use a kitchen scale to weigh the entire dough and then divide that weight by 12. This ensures that all your rolls are the same size and bake evenly.
- Shape each piece of dough into a smooth, round ball. To do this, gently stretch the top of the dough down and around to the bottom, pinching the seams together. Then, roll the ball under your cupped hand on the counter until it’s smooth and round.
- Grease a 9×13 inch baking dish with butter or cooking spray. Arrange the rolls in the dish, leaving a little space between each roll. They will expand during the second proof.
Second Proofing:
- Cover the baking dish loosely with plastic wrap or a damp kitchen towel. Let the rolls rise in a warm place for 1-2 hours, or until they have nearly doubled in size and are puffy. Again, the exact time will depend on the temperature of your kitchen.
- Preheat your oven to 375°F (190°C) about 30 minutes before the end of the second proof. This ensures the oven is fully heated and ready to bake the rolls evenly.
Baking the Rolls:
- Once the rolls have finished their second proof, remove the plastic wrap or towel.
- Bake for 20-25 minutes, or until the rolls are golden brown on top and sound hollow when tapped. Keep a close eye on them, as ovens can vary. If the tops are browning too quickly, you can tent the dish with foil for the last few minutes of baking.
- Remove the rolls from the oven and immediately brush the tops with melted butter (optional). This adds a beautiful shine and extra flavor.
- Let the rolls cool in the baking dish for a few minutes before serving. They are best enjoyed warm!
Tips and Variations:
- Starter Activity: The success of this recipe depends on having an active and bubbly sourdough starter. If your starter isn’t active, the rolls won’t rise properly. Make sure to feed your starter regularly and use it when it has doubled in size after feeding.
- Flour Type: While all-purpose flour works well, you can also use bread flour for a chewier texture.
- Sweetness: Adjust the amount of sugar to your liking. You can also use honey or maple syrup instead of granulated sugar.
- Flavor Variations: Add herbs, cheese, or spices to the dough for different flavor profiles. Some popular additions include rosemary, garlic, cheddar cheese, or everything bagel seasoning.
- Freezing: These rolls freeze well. Let them cool completely, then wrap them tightly in plastic wrap and foil. To reheat, thaw them overnight in the refrigerator and then warm them in a low oven (300°F or 150°C) for about 10-15 minutes.
- Overnight Proofing: For a more complex flavor, you can let the shaped rolls proof in the refrigerator overnight. Just be sure to bring them back to room temperature for about an hour before baking.
- Egg Wash: For a shinier crust, brush the rolls with an egg wash (1 egg beaten with 1 tablespoon of water) before baking.
Troubleshooting:
- Rolls are not rising: This could be due to an inactive starter, cold kitchen temperature, or not enough kneading. Make sure your starter is active, find a warmer place for proofing, and knead the dough thoroughly.
- Rolls are too dense: This could be due to over-kneading or not enough proofing. Be careful not to over-knead the dough, and allow it to rise fully during both proofing stages.
- Rolls are browning too quickly: Tent the dish with foil for the last few minutes of baking.
- Rolls are sticking to the pan: Make sure to grease the baking dish thoroughly.
Enjoy your homemade sourdough dinner rolls! They’re perfect for holidays, special occasions, or any time you want to impress your family and friends with a delicious and comforting treat.
Conclusion:
And there you have it! These Sourdough Dinner Rolls are more than just bread; they’re an experience. From the tangy aroma that fills your kitchen as they bake to the soft, chewy texture that melts in your mouth, every bite is a testament to the magic of sourdough. I truly believe this recipe is a must-try for anyone who appreciates the simple pleasures of homemade bread, and especially for those who are already captivated by the world of sourdough baking.
But why are these rolls so special? It’s the perfect balance of tanginess and sweetness, the incredible rise and airy crumb, and the satisfying crust that gives way with a gentle squeeze. They’re incredibly versatile too! Serve them warm with a generous slather of butter for a classic comfort food experience. Or, get creative and use them as the base for mini sliders with pulled pork or shredded chicken. They’re also fantastic alongside a hearty soup or stew, perfect for soaking up every last drop of delicious broth.
Looking for variations? Try adding a sprinkle of everything bagel seasoning before baking for an extra layer of flavor and texture. Or, incorporate some chopped fresh herbs like rosemary or thyme into the dough for an aromatic twist. For a sweeter treat, brush the tops with melted butter and a sprinkle of cinnamon sugar after baking. The possibilities are truly endless! You could even experiment with different flours, like whole wheat or rye, to create your own unique sourdough dinner roll masterpiece.
These Sourdough Dinner Rolls are not just a recipe; they’re an invitation to slow down, savor the process, and enjoy the simple act of creating something delicious with your own two hands. The active sourdough starter is what makes these rolls so special, so make sure yours is active and bubbly before starting the recipe.
I know that sourdough baking can sometimes seem intimidating, but I promise you, this recipe is surprisingly straightforward. With a little patience and attention to detail, you’ll be rewarded with the most incredible dinner rolls you’ve ever tasted. Don’t be afraid to experiment and adjust the recipe to suit your own preferences. That’s the beauty of sourdough it’s a living, breathing thing that responds to your touch and your environment.
So, what are you waiting for? Gather your ingredients, preheat your oven, and get ready to embark on a sourdough adventure. I’m confident that you’ll absolutely love these Sourdough Dinner Rolls.
I’m so excited for you to try this recipe and experience the joy of baking your own sourdough dinner rolls. Once you do, I would absolutely love to hear about your experience! Share your photos and stories on social media using [Your Hashtag Here] or leave a comment below. Let me know what variations you tried, what you served them with, and any tips or tricks you discovered along the way. Your feedback is invaluable, and it helps me continue to create and share recipes that you’ll love. Happy baking!
Sourdough Dinner Rolls: The Ultimate Guide to Baking Soft & Tangy Rolls
Fluffy and flavorful sourdough dinner rolls, perfect for any occasion. Made with active sourdough starter for a delightful tangy taste and soft texture.
Ingredients
- 1 cup (240ml) active sourdough starter (100% hydration)
- 1 ½ cups (360ml) warm milk (about 105-115°F or 40-46°C)
- ¼ cup (50g) granulated sugar
- 2 large eggs, lightly beaten
- 6 tablespoons (85g) unsalted butter, melted and slightly cooled
- 5 cups (625g) all-purpose flour, plus more for dusting
- 2 teaspoons salt
- Optional: 2 tablespoons softened butter, for brushing the tops of the rolls after baking
Instructions
- In a large bowl, or the bowl of your stand mixer, combine the warm milk, sugar, and active sourdough starter. Whisk until the sugar is dissolved and the starter is well incorporated.
- Add the lightly beaten eggs and melted (but cooled!) butter to the mixture. Whisk again until everything is well combined.
- In a separate bowl, whisk together the flour and salt.
- Gradually add the dry ingredients to the wet ingredients, mixing on low speed with the dough hook attachment (or by hand with a sturdy spoon) until a shaggy dough forms.
- Once the dough comes together, increase the speed to medium-low and knead for 8-10 minutes, or until the dough is smooth, elastic, and slightly tacky but not sticky. If kneading by hand, knead for 10-12 minutes on a lightly floured surface. The dough should pass the windowpane test. If the dough is too sticky, add a tablespoon of flour at a time until it reaches the desired consistency.
- Lightly grease a large bowl with oil or cooking spray. Place the dough in the bowl, turning to coat all sides.
- Cover the bowl tightly with plastic wrap or a damp kitchen towel. Let the dough rise in a warm place for 4-6 hours, or until doubled in size.
- Gently punch down the dough to release the air. Turn the dough out onto a lightly floured surface.
- Divide the dough into 12 equal pieces.
- Shape each piece of dough into a smooth, round ball.
- Grease a 9×13 inch baking dish with butter or cooking spray. Arrange the rolls in the dish, leaving a little space between each roll.
- Cover the baking dish loosely with plastic wrap or a damp kitchen towel. Let the rolls rise in a warm place for 1-2 hours, or until they have nearly doubled in size and are puffy.
- Preheat your oven to 375°F (190°C) about 30 minutes before the end of the second proof.
- Once the rolls have finished their second proof, remove the plastic wrap or towel.
- Bake for 20-25 minutes, or until the rolls are golden brown on top and sound hollow when tapped. If the tops are browning too quickly, you can tent the dish with foil for the last few minutes of baking.
- Remove the rolls from the oven and immediately brush the tops with melted butter (optional).
- Let the rolls cool in the baking dish for a few minutes before serving. They are best enjoyed warm!
Notes
- The success of this recipe depends on having an active and bubbly sourdough starter.
- For a more complex flavor, you can retard the dough in the refrigerator overnight (or up to 24 hours) after the initial rise or after shaping the rolls.
- Adjust the amount of sugar to your liking. You can also use honey or maple syrup instead of granulated sugar.
- Add herbs, cheese, or spices to the dough for different flavor profiles.
- For a shinier crust, brush the rolls with an egg wash (1 egg beaten with 1 tablespoon of water) before baking.
- These rolls freeze well. Let them cool completely, then wrap them tightly in plastic wrap and foil. To reheat, thaw them overnight in the refrigerator and then warm them in a low oven (300°F or 150°C) for about 10-15 minutes.