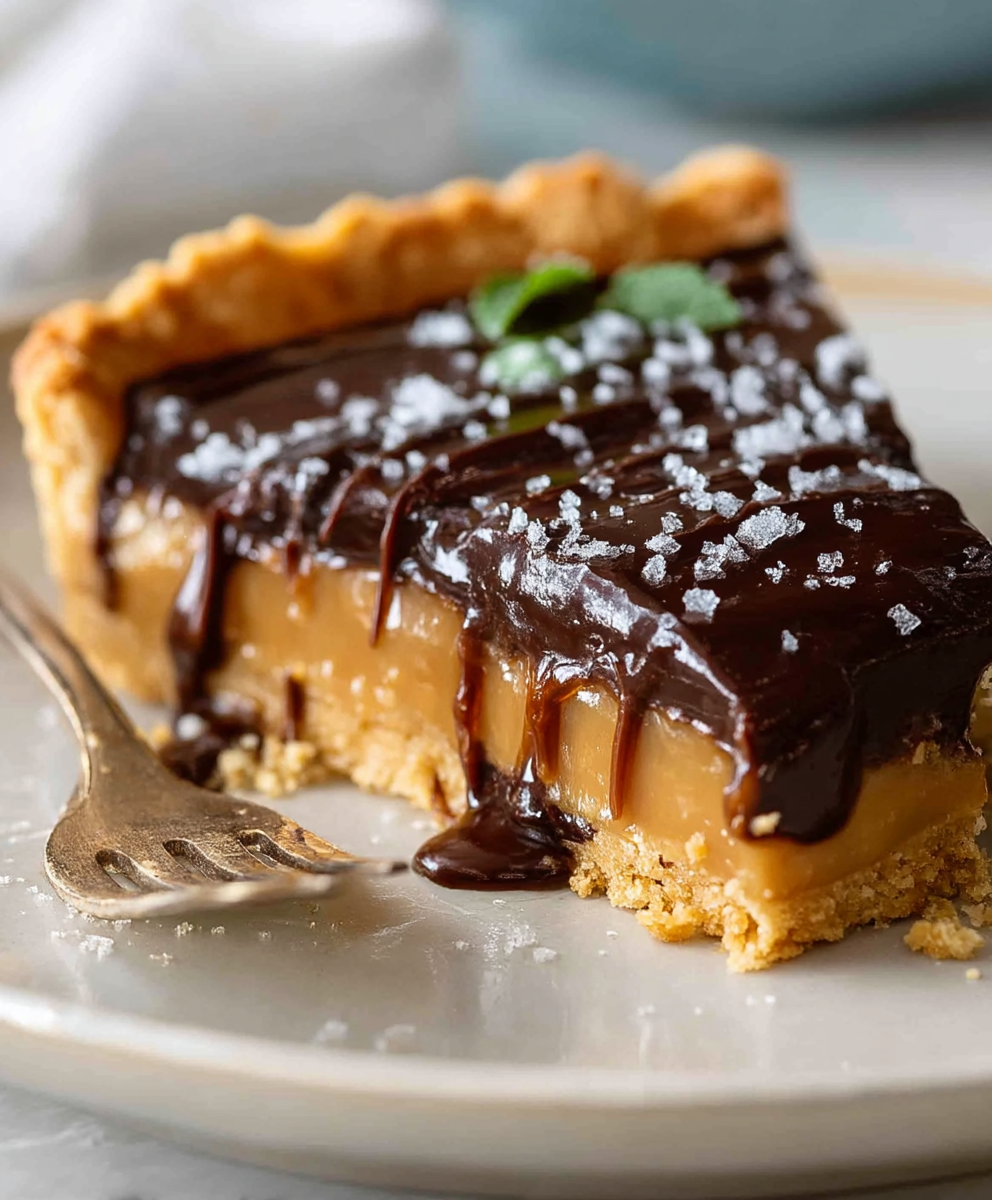
Salted Caramel Tart: Prepare to be utterly captivated! Imagine a symphony of sweet and salty, a dance of textures, all culminating in a dessert that’s both elegant and deeply comforting. This isn’t just a tart; it’s an experience, a journey for your taste buds that you won’t soon forget.
While the exact origins of salted caramel are debated, its modern resurgence can be traced back to French pastry chefs who daringly combined the seemingly opposing flavors. This innovative twist on classic caramel quickly gained popularity, spreading like wildfire across the culinary world. The beauty of the Salted Caramel Tart lies in its perfect balance. The rich, buttery caramel, with its deep, almost burnt sugar notes, is beautifully offset by the subtle saltiness, preventing it from becoming cloying.
People adore this dessert for so many reasons. The crisp, buttery crust provides the perfect foundation for the smooth, decadent filling. The contrasting textures the snap of the pastry against the creamy caramel are simply irresistible. And let’s not forget the convenience! While it looks impressive, a Salted Caramel Tart is surprisingly straightforward to make, making it ideal for both special occasions and weeknight indulgences. So, are you ready to embark on this delicious adventure with me? Let’s get baking!

Ingredients:
- For the Sweet Pastry Crust:
- 250g (2 cups) all-purpose flour, plus extra for dusting
- 125g (1/2 cup) cold unsalted butter, cubed
- 50g (1/4 cup) powdered sugar
- 1 large egg yolk
- 2-4 tablespoons ice water
- Pinch of salt
- For the Salted Caramel Filling:
- 200g (1 cup) granulated sugar
- 80ml (1/3 cup) water
- 120ml (1/2 cup) heavy cream, warmed
- 85g (6 tablespoons) unsalted butter, cubed
- 1-2 teaspoons sea salt flakes, or to taste
- For the Chocolate Ganache Topping (Optional):
- 150g (5.3 oz) dark chocolate, finely chopped
- 120ml (1/2 cup) heavy cream
- 1 tablespoon unsalted butter
- For Decoration (Optional):
- Sea salt flakes
- Chocolate shavings
Preparing the Sweet Pastry Crust:
- Combine Dry Ingredients: In a large bowl, whisk together the flour, powdered sugar, and salt. This ensures the powdered sugar is evenly distributed, preventing lumps in your crust.
- Cut in the Butter: Add the cold, cubed butter to the flour mixture. Using a pastry blender or your fingertips, cut the butter into the flour until the mixture resembles coarse crumbs. The key here is to work quickly so the butter stays cold. Cold butter equals a flaky crust!
- Add the Egg Yolk: Make a well in the center of the flour mixture and add the egg yolk. Gently mix the egg yolk into the flour mixture.
- Add Ice Water: Gradually add the ice water, one tablespoon at a time, mixing until the dough just comes together. Be careful not to overmix! Overmixing develops the gluten in the flour, resulting in a tough crust. You want a tender, melt-in-your-mouth crust.
- Form the Dough: Gently form the dough into a disc. Wrap it tightly in plastic wrap and refrigerate for at least 1 hour, or preferably 2 hours. This allows the gluten to relax and the butter to firm up, making the dough easier to roll out.
- Roll Out the Dough: On a lightly floured surface, roll out the dough into a circle about 12 inches in diameter. The dough should be about 1/8 inch thick.
- Transfer to Tart Pan: Carefully transfer the dough to a 9-inch tart pan with a removable bottom. Gently press the dough into the bottom and up the sides of the pan.
- Trim and Crimp the Edges: Trim any excess dough from the edges of the pan. You can use a rolling pin to roll over the top of the pan to cleanly trim the edges. Then, crimp the edges of the crust using your fingers or a fork for a decorative finish.
- Chill the Crust: Place the tart pan in the freezer for 15-20 minutes. This helps prevent the crust from shrinking during baking.
- Pre-bake the Crust: Preheat your oven to 375°F (190°C). Line the chilled tart crust with parchment paper and fill it with pie weights or dried beans. This prevents the crust from puffing up during baking.
- Bake the Crust: Bake for 20 minutes. Then, remove the parchment paper and pie weights and bake for another 10-15 minutes, or until the crust is golden brown. Keep a close eye on it to prevent burning.
- Cool the Crust: Let the crust cool completely in the tart pan on a wire rack before filling.
Making the Salted Caramel Filling:
- Combine Sugar and Water: In a medium saucepan, combine the granulated sugar and water. Stir to moisten the sugar.
- Cook the Sugar: Place the saucepan over medium heat and bring the mixture to a boil. Do not stir the mixture after it starts boiling! Stirring can cause the sugar to crystallize. Let the mixture cook until it turns a deep amber color. This usually takes about 8-10 minutes. Watch it carefully, as it can burn quickly.
- Add the Warm Cream: Once the sugar has reached a deep amber color, carefully remove the saucepan from the heat. Slowly pour in the warm heavy cream. Be careful, as the mixture will bubble vigorously.
- Stir in the Butter: Add the cubed butter to the saucepan and stir until the butter is melted and the caramel is smooth.
- Add the Salt: Stir in the sea salt flakes to taste. Start with 1 teaspoon and add more to your liking. Remember, you can always add more salt, but you can’t take it away!
- Cool Slightly: Let the caramel cool slightly for about 5-10 minutes before pouring it into the pre-baked tart crust. This will help prevent the crust from becoming soggy.
- Pour into Crust: Pour the salted caramel filling into the cooled tart crust.
- Chill the Tart: Refrigerate the tart for at least 2 hours, or preferably overnight, to allow the caramel to set completely.
Preparing the Chocolate Ganache Topping (Optional):
- Chop the Chocolate: Finely chop the dark chocolate and place it in a heatproof bowl.
- Heat the Cream: In a small saucepan, heat the heavy cream over medium heat until it just comes to a simmer. Do not boil the cream.
- Pour Cream over Chocolate: Pour the hot cream over the chopped chocolate. Let it sit for 1 minute to allow the heat to melt the chocolate.
- Stir Until Smooth: Gently stir the mixture until the chocolate is completely melted and the ganache is smooth and glossy.
- Add Butter: Stir in the butter until it is melted and incorporated into the ganache. This will add extra shine and richness.
- Cool Slightly: Let the ganache cool slightly for about 5-10 minutes before pouring it over the caramel filling.
- Pour over Caramel: Pour the chocolate ganache over the chilled salted caramel filling.
- Chill Again: Refrigerate the tart for another 30 minutes to 1 hour to allow the ganache to set.
Decorating the Tart (Optional):
- Sprinkle with Sea Salt: Before serving, sprinkle the tart with sea salt flakes for an extra burst of salty flavor.
- Add Chocolate Shavings: You can also add chocolate shavings for a more elegant presentation. Use a vegetable peeler to create chocolate shavings from a block of dark chocolate.
Serving and Storage:
To serve, carefully remove the tart from the tart pan by pushing up on the removable bottom. Slice the tart into wedges and serve chilled. This Salted Caramel Tart is best enjoyed within 2-3 days. Store any leftovers in the refrigerator in an airtight container.
Tips for Success:
- Use Cold Butter: Cold butter is essential for a flaky pastry crust. Make sure your butter is very cold before you start.
- Don’t Overmix the Dough: Overmixing the dough will develop the gluten and result in a tough crust. Mix only until the dough just comes together.
- Warm the Cream: Warming the heavy cream before adding it to the caramel helps prevent the caramel from seizing up.
- Watch the Caramel Carefully: Caramel can burn quickly, so keep a close eye on it while it’s cooking.
- Adjust Salt to Taste: The amount of salt in the caramel is a matter of personal preference. Start with 1 teaspoon and add more to your liking.
Conclusion:
This Salted Caramel Tart isn’t just a dessert; it’s an experience. From the satisfying crunch of the buttery crust to the smooth, decadent salted caramel filling, every bite is a symphony of textures and flavors that will leave you wanting more. I truly believe this recipe is a must-try for anyone who appreciates a sophisticated treat that’s surprisingly easy to make at home. The balance of sweet and salty is absolutely perfect, and the rich caramel is simply irresistible.
But don’t just take my word for it! The beauty of this recipe lies in its versatility. Feel free to experiment with different crust variations. A chocolate crust would add another layer of richness, or a gingersnap crust could provide a delightful spicy kick. For the caramel filling, consider adding a splash of bourbon or a hint of vanilla extract to deepen the flavor profile. If you’re feeling adventurous, you could even swirl in some dark chocolate ganache for an extra indulgent touch.
Serving suggestions are endless! A simple dollop of whipped cream or a scoop of vanilla ice cream complements the tart perfectly. For a more elegant presentation, garnish with a sprinkle of sea salt, a drizzle of melted chocolate, or a few chopped pecans. This tart is also fantastic served with a cup of strong coffee or a glass of dessert wine. It’s the perfect ending to a special meal or a delightful treat to share with friends and family.
I know that making caramel can sometimes seem intimidating, but I promise you, this recipe is foolproof. I’ve included detailed instructions and helpful tips to guide you through every step of the process. Just follow the directions carefully, and you’ll be rewarded with a stunning and delicious Salted Caramel Tart that will impress everyone who tries it.
The key to a truly exceptional salted caramel is using high-quality ingredients. Opt for real butter, heavy cream, and pure vanilla extract. And don’t be afraid to experiment with different types of salt. A flaky sea salt, like Maldon, adds a wonderful textural element and enhances the salty-sweet contrast.
I’m so excited for you to try this recipe! I truly believe it will become a new favorite in your household. Once you’ve made your own Salted Caramel Tart, I would absolutely love to hear about your experience. Did you make any variations? What did you think of the flavor? What did your friends and family say? Please share your photos and comments in the comments section below. Your feedback is invaluable, and it helps me to continue creating recipes that you’ll love. So go ahead, give this recipe a try, and prepare to be amazed! Happy baking! I can’t wait to hear all about your salted caramel adventures!
Salted Caramel Tart: The Ultimate Guide to Baking Perfection
Decadent Salted Caramel Tart with a buttery sweet pastry crust and rich homemade salted caramel filling. Optional dark chocolate ganache topping. A perfect sweet and salty balance!
Ingredients
- 250g (2 cups) all-purpose flour, plus extra for dusting
- 125g (1/2 cup) cold unsalted butter, cubed
- 50g (1/4 cup) powdered sugar
- 1 large egg yolk
- 2-4 tablespoons ice water
- Pinch of salt
- 200g (1 cup) granulated sugar
- 80ml (1/3 cup) water
- 120ml (1/2 cup) heavy cream, warmed
- 85g (6 tablespoons) unsalted butter, cubed
- 1-2 teaspoons sea salt flakes, or to taste
- 150g (5.3 oz) dark chocolate, finely chopped
- 120ml (1/2 cup) heavy cream
- 1 tablespoon unsalted butter
- Sea salt flakes
- Chocolate shavings
Instructions
- In a large bowl, whisk together the flour, powdered sugar, and salt.
- Add the cold, cubed butter to the flour mixture. Using a pastry blender or your fingertips, cut the butter into the flour until the mixture resembles coarse crumbs.
- Make a well in the center of the flour mixture and add the egg yolk. Gently mix the egg yolk into the flour mixture.
- Gradually add the ice water, one tablespoon at a time, mixing until the dough just comes together.
- Gently form the dough into a disc. Wrap it tightly in plastic wrap and refrigerate for at least 1 hour, or preferably 2 hours.
- On a lightly floured surface, roll out the dough into a circle about 12 inches in diameter. The dough should be about 1/8 inch thick.
- Carefully transfer the dough to a 9-inch tart pan with a removable bottom. Gently press the dough into the bottom and up the sides of the pan.
- Trim any excess dough from the edges of the pan. Crimp the edges of the crust using your fingers or a fork for a decorative finish.
- Place the tart pan in the freezer for 15-20 minutes.
- Preheat your oven to 375°F (190°C). Line the chilled tart crust with parchment paper and fill it with pie weights or dried beans.
- Bake for 20 minutes. Then, remove the parchment paper and pie weights and bake for another 10-15 minutes, or until the crust is golden brown.
- Let the crust cool completely in the tart pan on a wire rack before filling.
- In a medium saucepan, combine the granulated sugar and water. Stir to moisten the sugar.
- Place the saucepan over medium heat and bring the mixture to a boil. Do not stir the mixture after it starts boiling! Let the mixture cook until it turns a deep amber color (8-10 minutes).
- Once the sugar has reached a deep amber color, carefully remove the saucepan from the heat. Slowly pour in the warm heavy cream. Be careful, as the mixture will bubble vigorously.
- Add the cubed butter to the saucepan and stir until the butter is melted and the caramel is smooth.
- Stir in the sea salt flakes to taste. Start with 1 teaspoon and add more to your liking.
- Let the caramel cool slightly for about 5-10 minutes before pouring it into the pre-baked tart crust.
- Pour the salted caramel filling into the cooled tart crust.
- Refrigerate the tart for at least 2 hours, or preferably overnight, to allow the caramel to set completely.
- Finely chop the dark chocolate and place it in a heatproof bowl.
- In a small saucepan, heat the heavy cream over medium heat until it just comes to a simmer. Do not boil the cream.
- Pour the hot cream over the chopped chocolate. Let it sit for 1 minute to allow the heat to melt the chocolate.
- Gently stir the mixture until the chocolate is completely melted and the ganache is smooth and glossy.
- Stir in the butter until it is melted and incorporated into the ganache.
- Let the ganache cool slightly for about 5-10 minutes before pouring it over the caramel filling.
- Pour the chocolate ganache over the chilled salted caramel filling.
- Refrigerate the tart for another 30 minutes to 1 hour to allow the ganache to set.
- Before serving, sprinkle the tart with sea salt flakes for an extra burst of salty flavor.
- You can also add chocolate shavings for a more elegant presentation.
Notes
- Use Cold Butter: Cold butter is essential for a flaky pastry crust. Make sure your butter is very cold before you start.
- Don’t Overmix the Dough: Overmixing the dough will develop the gluten and result in a tough crust. Mix only until the dough just comes together.
- Warm the Cream: Warming the heavy cream before adding it to the caramel helps prevent the caramel from seizing up.
- Watch the Caramel Carefully: Caramel can burn quickly, so keep a close eye on it while it’s cooking.
- Adjust Salt to Taste: The amount of salt in the caramel is a matter of personal preference. Start with 1 teaspoon and add more to your liking.
- Serving and Storage: To serve, carefully remove the tart from the tart pan by pushing up on the removable bottom. Slice the tart into wedges and serve chilled. This Salted Caramel Tart is best enjoyed within 2-3 days. Store any leftovers in the refrigerator in an airtight container.