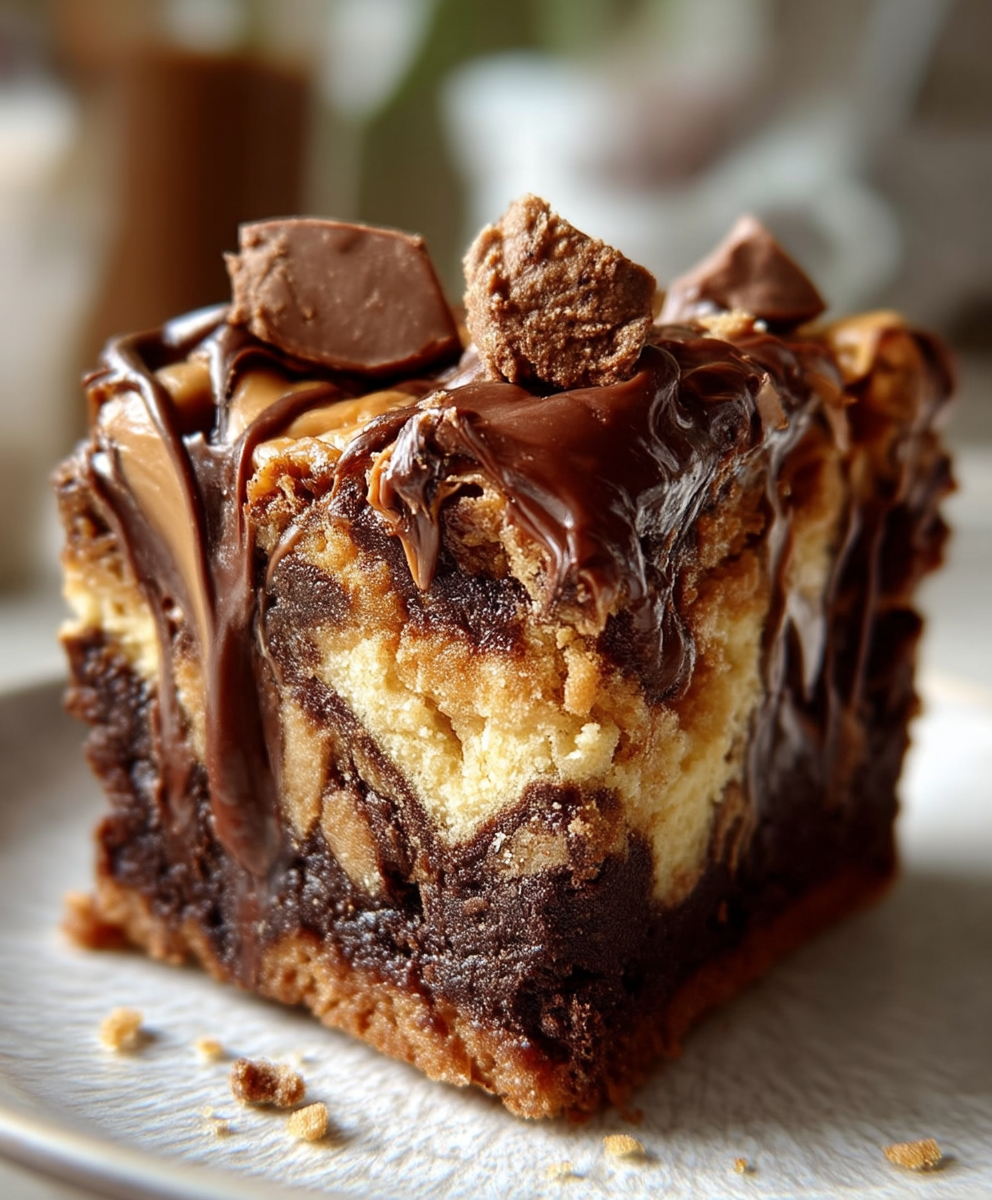
Reeses Peanut Butter Earthquake Cake: Prepare to have your dessert world rocked! Imagine a decadent chocolate cake, riddled with pockets of creamy peanut butter, all topped with a luscious, melt-in-your-mouth frosting. This isn’t just cake; it’s an experience, a symphony of flavors and textures that will leave you craving more.
While the exact origins of Earthquake Cake are shrouded in mystery, its popularity exploded thanks to its incredibly easy preparation and unforgettable taste. Some believe it’s a modern twist on classic poke cakes, where fillings are added after baking to create moist and flavorful desserts. Regardless of its history, this cake has earned its place as a beloved treat in homes across the country.
What makes this Reeses Peanut Butter Earthquake Cake so irresistible? It’s the perfect balance of rich chocolate, salty peanut butter, and sweet frosting. The “earthquake” effect, created by the sinking peanut butter pockets, adds a delightful textural contrast to the soft, moist cake. Plus, it’s incredibly simple to make, even for novice bakers. This recipe is a guaranteed crowd-pleaser, perfect for potlucks, birthdays, or simply satisfying your sweet tooth. Get ready to bake a cake that’s as fun to make as it is to eat!

Ingredients:
- 1 box (18.25 ounces) chocolate cake mix, plus ingredients called for on the box (usually eggs, oil, and water)
- 1 cup creamy peanut butter
- 8 ounces cream cheese, softened
- 1 cup powdered sugar
- 1/2 cup milk
- 1 teaspoon vanilla extract
- 1 jar (12 ounces) hot fudge topping, warmed
- 1 cup Reese’s Peanut Butter Cups, chopped (about 15-20 cups)
Preparing the Cake Batter
Okay, let’s get started with the foundation of our Reese’s Peanut Butter Earthquake Cake the chocolate cake! This part is super simple, thanks to the convenience of a boxed cake mix. But don’t worry, we’re going to doctor it up later to make it extra special.
- Preheat your oven to 350°F (175°C). This is crucial! You want the oven nice and hot before the cake batter even thinks about going in.
- Grease and flour a 9×13 inch baking pan. Trust me on this one. You don’t want your beautiful cake sticking to the pan. You can also use baking spray with flour if you prefer. Make sure you get into all the corners!
- Prepare the chocolate cake mix according to the package directions. This usually involves combining the cake mix with eggs, oil, and water. Follow the instructions precisely for the best results. Don’t overmix the batter; just mix until everything is combined. Overmixing can lead to a tough cake.
- Pour the cake batter into the prepared baking pan. Spread it evenly so it bakes uniformly.
Making the Peanut Butter Cream Cheese Filling
Now for the star of the show the peanut butter cream cheese filling! This is what gives the cake its “earthquake” effect and that irresistible peanut butter flavor. This part is so good, you might be tempted to eat it straight from the bowl (I won’t judge!).
- In a large bowl, beat together the softened cream cheese and peanut butter until smooth and creamy. Make sure your cream cheese is truly softened, or you’ll end up with lumps. A stand mixer or an electric hand mixer works best for this, but you can also do it by hand if you’re feeling ambitious.
- Gradually add the powdered sugar, beating until well combined. Add the powdered sugar a little at a time to prevent a cloud of sugar from exploding in your face.
- Slowly pour in the milk and vanilla extract, beating until the mixture is smooth and creamy. The milk helps to thin out the filling and make it easier to pour over the cake. The vanilla extract adds a touch of warmth and enhances the other flavors.
Creating the Earthquake Effect
This is where the magic happens! We’re going to create those signature cracks and crevices that give this cake its name. It’s a fun and easy process, and the results are always impressive.
- Pour the peanut butter cream cheese filling evenly over the chocolate cake batter. Don’t worry about being too precise; the filling will spread out as it bakes.
- Using a knife, swirl the peanut butter cream cheese filling into the chocolate cake batter. Create a marbled effect by dragging the knife through the filling and batter. Don’t over-swirl; you want to see distinct pockets of peanut butter and chocolate. The more you swirl, the less dramatic the “earthquake” effect will be.
Baking the Cake
Time to bake our masterpiece! The baking time is crucial for ensuring the cake is cooked through but still moist and fudgy. Keep a close eye on it!
- Bake in the preheated oven for 35-40 minutes, or until a wooden skewer inserted into the center comes out with moist crumbs. The baking time may vary depending on your oven, so start checking for doneness around 35 minutes. The cake should be set around the edges, but the center may still be slightly jiggly.
- Let the cake cool completely in the pan before frosting. This is important! If you try to frost the cake while it’s still warm, the frosting will melt and slide right off. Be patient; it’s worth the wait.
Frosting and Finishing Touches
Now for the final flourish! We’re going to top our earthquake cake with warm hot fudge and chopped Reese’s Peanut Butter Cups. This is the part where you can really let your creativity shine!
- Warm the hot fudge topping according to the jar instructions. You can warm it in the microwave or in a saucepan on the stovetop. Just be careful not to overheat it, or it will become too thin.
- Pour the warm hot fudge topping evenly over the cooled cake. Spread it out so that every bite is covered in chocolatey goodness.
- Sprinkle the chopped Reese’s Peanut Butter Cups over the hot fudge topping. Don’t be shy! The more peanut butter cups, the better. You can also add a drizzle of melted peanut butter for an extra touch of peanut butter flavor.
- Let the cake sit for a few minutes to allow the hot fudge to set slightly. This will prevent the peanut butter cups from sliding off when you cut the cake.
- Cut into squares and serve. Enjoy your delicious Reese’s Peanut Butter Earthquake Cake!
Tips and Variations
- For a richer chocolate flavor, use a dark chocolate cake mix.
- If you don’t have Reese’s Peanut Butter Cups, you can use other chopped peanut butter candies or even just a sprinkle of chopped peanuts.
- To make the cake even more decadent, add a layer of peanut butter frosting under the hot fudge topping.
- For a gluten-free version, use a gluten-free chocolate cake mix.
- Store leftover cake in an airtight container at room temperature for up to 3 days.
Enjoy!
Conclusion:
And there you have it! Our Reese’s Peanut Butter Earthquake Cake is more than just a dessert; it’s an experience. It’s a symphony of textures and flavors that will leave you and your loved ones craving more. The gooey, fudgy base, the creamy peanut butter swirls, and the decadent chocolate chips all come together in perfect harmony to create a truly unforgettable treat. I truly believe this is a must-try recipe for anyone who loves peanut butter and chocolate (and let’s be honest, who doesn’t?).
Why is this cake a must-try? Because it’s incredibly easy to make, requires minimal effort, and delivers maximum flavor. Forget spending hours in the kitchen perfecting a complicated dessert. This recipe is foolproof, even for beginner bakers. Plus, the “earthquake” effect, with its cracks and crevices filled with peanut butter goodness, makes it visually stunning and a guaranteed conversation starter. It’s the perfect dessert to bring to potlucks, family gatherings, or simply enjoy on a cozy night in.
But the best part? It’s endlessly customizable!
Serving Suggestions and Variations:
* Warm with Ice Cream: Serve a warm slice of this Reese’s Peanut Butter Earthquake Cake with a scoop of vanilla ice cream for an extra indulgent treat. The contrast between the warm cake and the cold ice cream is simply divine.
* Dust with Powdered Sugar: A light dusting of powdered sugar adds a touch of elegance and sweetness.
* Chocolate Ganache Drizzle: Drizzle a rich chocolate ganache over the top for an even more decadent chocolate experience.
* Peanut Butter Cup Topping: Chop up some mini Reese’s Peanut Butter Cups and sprinkle them on top for an extra peanut butter boost.
* Add a Caramel Swirl: Swirl in some caramel sauce before baking for a salty-sweet twist.
* Espresso Powder: Add a teaspoon of espresso powder to the cake batter to enhance the chocolate flavor.
* Different Chocolate Chips: Experiment with different types of chocolate chips, such as dark chocolate, white chocolate, or even butterscotch chips.
* Nuts: Add chopped peanuts, pecans, or walnuts to the batter for added crunch and flavor.
* Gluten-Free Option: Substitute the all-purpose flour with a gluten-free blend for a gluten-free version of this delicious cake.
I’m so excited for you to try this recipe! I know you’re going to love it as much as I do. It’s the perfect way to satisfy your sweet tooth and impress your friends and family. The combination of chocolate and peanut butter is a classic for a reason, and this Reese’s Peanut Butter Earthquake Cake takes it to a whole new level.
So, what are you waiting for? Grab your ingredients, preheat your oven, and get ready to bake up a storm! I promise you won’t regret it.
And most importantly, I want to hear about your experience! Did you try any of the variations? Did you add your own special touch? Share your photos and stories in the comments below. I can’t wait to see your creations and hear what you think of this amazing Reese’s Peanut Butter Earthquake Cake. Happy baking!
Reeses Peanut Butter Earthquake Cake: A Delicious & Easy Recipe
Chocolate cake with peanut butter swirl, hot fudge, and Reese's. A showstopper dessert with rich flavor and cracked appearance.
Ingredients
- 1 box (18.25 ounces) chocolate cake mix, plus ingredients called for on the box (usually eggs, oil, and water)
- 1 cup creamy peanut butter
- 8 ounces cream cheese, softened
- 1 cup powdered sugar
- 1/2 cup milk
- 1 teaspoon vanilla extract
- 1 jar (12 ounces) hot fudge topping, warmed
- 1 cup Reese’s Peanut Butter Cups, chopped (about 15-20 cups)
Instructions
- Preheat: Preheat your oven to 350°F (175°C). Grease and flour a 9×13 inch baking pan.
- Cake Batter: Prepare the chocolate cake mix according to the package directions. Pour the batter into the prepared pan and spread evenly.
- Peanut Butter Filling: In a large bowl, beat together the softened cream cheese and peanut butter until smooth. Gradually add the powdered sugar, beating until combined. Slowly pour in the milk and vanilla extract, beating until smooth and creamy.
- Earthquake Effect: Pour the peanut butter cream cheese filling evenly over the chocolate cake batter. Using a knife, swirl the filling into the batter to create a marbled effect.
- Bake: Bake in the preheated oven for 35-40 minutes, or until a wooden skewer inserted into the center comes out with moist crumbs.
- Cool: Let the cake cool completely in the pan before frosting.
- Frost: Warm the hot fudge topping according to the jar instructions. Pour the warm hot fudge topping evenly over the cooled cake.
- Top: Sprinkle the chopped Reese’s Peanut Butter Cups over the hot fudge topping.
- Set: Let the cake sit for a few minutes to allow the hot fudge to set slightly.
- Serve: Cut into squares and serve.
Notes
- For a richer chocolate flavor, use a dark chocolate cake mix.
- If you don’t have Reese’s Peanut Butter Cups, you can use other chopped peanut butter candies or even just a sprinkle of chopped peanuts.
- To make the cake even more decadent, add a layer of peanut butter frosting under the hot fudge topping.
- For a gluten-free version, use a gluten-free chocolate cake mix.
- Store leftover cake in an airtight container at room temperature for up to 3 days.