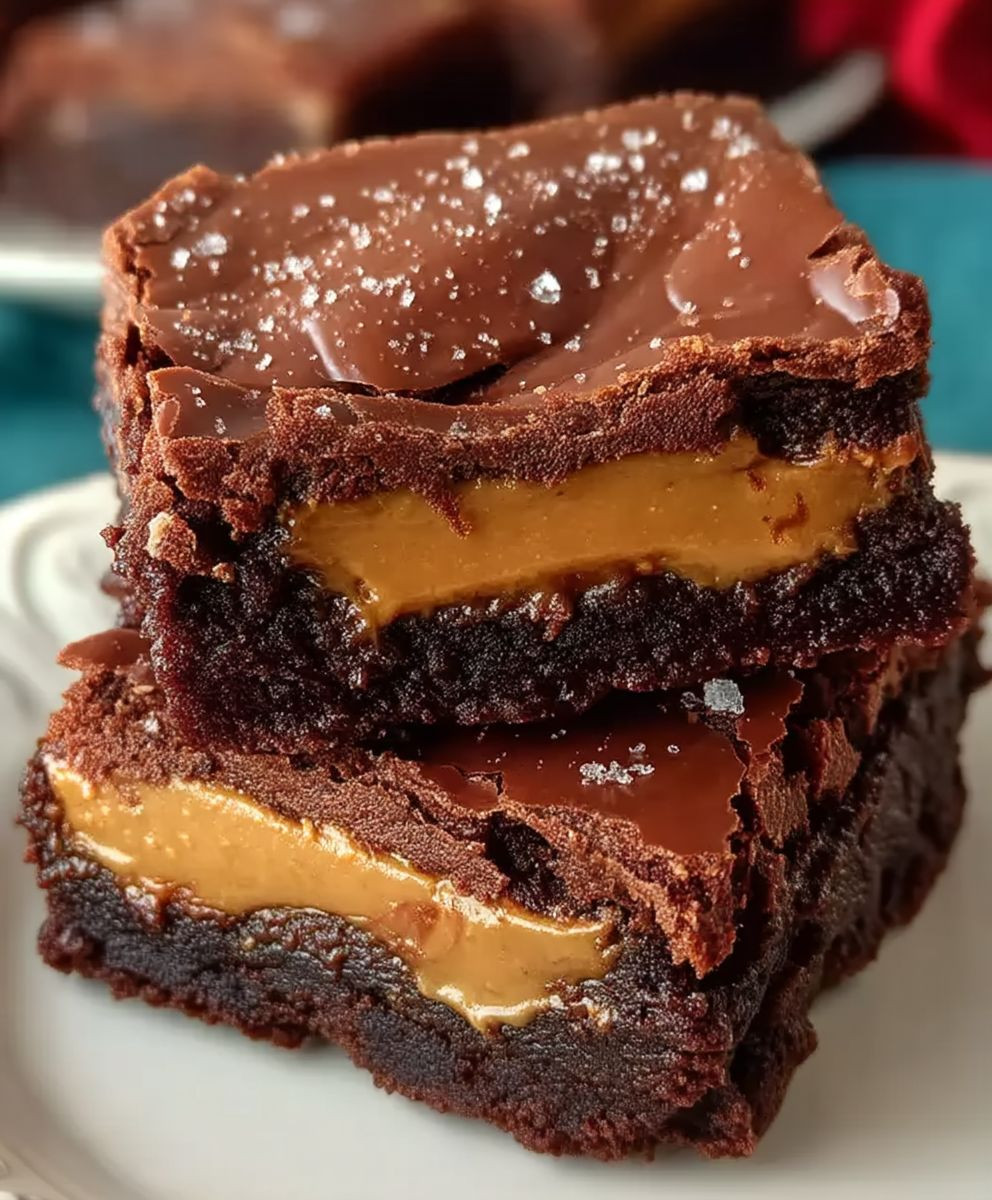
Reeses Cup Brownies: Prepare to enter a chocolate and peanut butter paradise! Imagine sinking your teeth into a fudgy, decadent brownie, only to be met with the creamy, melt-in-your-mouth goodness of a Reese’s Peanut Butter Cup. It’s a match made in dessert heaven, and I’m thrilled to share my foolproof recipe with you.
While the exact origins of combining chocolate and peanut butter are debated, the Reese’s Peanut Butter Cup, invented by H.B. Reese in 1928, undeniably cemented this flavor pairing in our collective consciousness. Since then, countless variations have emerged, each celebrating this iconic duo. But there’s something truly special about incorporating these beloved cups into a rich, homemade brownie.
What makes Reeses Cup Brownies so irresistible? It’s the perfect balance of textures and flavors. The fudgy brownie provides a satisfying chew, while the Reese’s Cups offer a burst of creamy peanut butter and a delightful textural contrast. Plus, let’s be honest, who can resist the convenience of transforming a classic candy into an even more indulgent dessert? Whether you’re baking for a special occasion or simply craving a sweet treat, these brownies are guaranteed to be a crowd-pleaser. Get ready to experience pure bliss with every bite!

Ingredients:
- 1 cup (2 sticks) unsalted butter, melted
- 2 cups granulated sugar
- 1 cup unsweetened cocoa powder
- 1 teaspoon salt
- 1 teaspoon baking powder
- 1 tablespoon vanilla extract
- 4 large eggs
- 1 cup all-purpose flour
- 1 cup semi-sweet chocolate chips
- 1 ½ cups Reese’s Peanut Butter Cups, coarsely chopped (about 20 regular-sized cups)
- ½ cup peanut butter chips (optional, for extra peanut butter flavor)
Preparing the Brownie Batter:
Okay, let’s get started! First things first, we need to create the base for our decadent Reese’s Cup Brownies. This part is super important, so pay close attention!
- Melt the Butter: In a large, microwave-safe bowl, melt the butter completely. You can do this in 30-second intervals, stirring in between, to prevent it from splattering everywhere. Alternatively, you can melt it in a saucepan over low heat. Just make sure it’s fully melted and smooth.
- Combine Butter and Sugar: Once the butter is melted, add the granulated sugar to the bowl. Whisk the butter and sugar together vigorously until they are well combined and the mixture starts to look a little lighter in color. This step is crucial for creating that fudgy texture we all crave in a good brownie.
- Add Cocoa Powder, Salt, and Baking Powder: Now, sift in the unsweetened cocoa powder, salt, and baking powder. Sifting helps to prevent any lumps and ensures that the cocoa powder is evenly distributed throughout the batter. Gently fold these dry ingredients into the wet ingredients until just combined. Be careful not to overmix at this stage, as overmixing can lead to tough brownies.
- Incorporate Vanilla Extract: Stir in the vanilla extract. The vanilla extract enhances the chocolate flavor and adds a lovely aroma to the brownies.
- Add the Eggs: Crack in the eggs one at a time, mixing well after each addition. Make sure each egg is fully incorporated into the batter before adding the next one. This step is important for creating a smooth and emulsified batter. The eggs provide structure and richness to the brownies.
- Fold in the Flour: Gradually add the all-purpose flour to the batter, folding it in gently until just combined. Again, be very careful not to overmix. Overmixing will develop the gluten in the flour, resulting in tough, chewy brownies instead of the fudgy, melt-in-your-mouth texture we’re aiming for.
- Add Chocolate Chips: Stir in the semi-sweet chocolate chips. These add an extra layer of chocolatey goodness to the brownies and create little pockets of melted chocolate throughout.
Incorporating the Reese’s Peanut Butter Cups:
This is where the magic happens! The Reese’s Peanut Butter Cups are the star of the show, and adding them correctly is key to achieving that perfect peanut butter cup brownie experience.
- Prepare the Reese’s Cups: Coarsely chop the Reese’s Peanut Butter Cups. You can use a sharp knife or a food processor to do this. I prefer to chop them into relatively large pieces so that you get distinct chunks of peanut butter cup in each bite.
- Fold in the Reese’s Cups: Gently fold the chopped Reese’s Peanut Butter Cups into the brownie batter. Be careful not to overmix, as you want to keep the peanut butter cups intact and not completely blended into the batter.
- Add Peanut Butter Chips (Optional): If you’re a peanut butter fanatic like me, you can also add ½ cup of peanut butter chips to the batter. This will intensify the peanut butter flavor and create even more peanut butter goodness in every bite.
Baking the Brownies:
Now that our batter is ready, it’s time to bake these beauties! Proper baking is crucial for achieving the perfect texture fudgy in the middle and slightly crispy around the edges.
- Preheat the Oven: Preheat your oven to 350°F (175°C). Make sure your oven is properly preheated before you put the brownies in, as this will ensure even baking.
- Prepare the Baking Pan: Grease and flour a 9×13 inch baking pan. You can also line the pan with parchment paper, leaving an overhang on the sides. This will make it easier to lift the brownies out of the pan after they’ve cooled.
- Pour the Batter: Pour the brownie batter into the prepared baking pan and spread it evenly.
- Bake the Brownies: Bake for 30-35 minutes, or until a toothpick inserted into the center comes out with moist crumbs attached. Be careful not to overbake the brownies, as this will make them dry and crumbly. The center should still be slightly soft and fudgy.
- Cool the Brownies: Remove the brownies from the oven and let them cool completely in the pan before cutting. This is important because the brownies will continue to set as they cool. If you try to cut them while they’re still warm, they will be too soft and messy.
Cutting and Serving:
The final step! Once the brownies are cooled, it’s time to cut them and enjoy the fruits of your labor. Here are a few tips for cutting perfect brownies:
- Use a Sharp Knife: Use a sharp knife to cut the brownies. A dull knife will tear the brownies and make them look messy.
- Clean the Knife: Clean the knife after each cut. This will prevent the brownies from sticking to the knife and ensure clean, even cuts. You can also dip the knife in warm water between cuts for even cleaner slices.
- Cut into Squares: Cut the brownies into squares. The size of the squares is up to you, but I usually cut them into 2-inch squares.
- Serve and Enjoy: Serve the brownies and enjoy! These Reese’s Cup Brownies are delicious on their own, but they’re also great with a scoop of vanilla ice cream or a dollop of whipped cream. You can also drizzle them with melted chocolate or peanut butter for an extra touch of decadence.
Tips for Success:
- Don’t Overmix: I can’t stress this enough! Overmixing is the enemy of fudgy brownies. Mix the batter until just combined to avoid tough brownies.
- Use Quality Ingredients: Using high-quality ingredients, especially cocoa powder and chocolate chips, will make a big difference in the flavor of your brownies.
- Adjust Baking Time: Baking times may vary depending on your oven. Keep an eye on the brownies and adjust the baking time as needed.
- Let Them Cool: Patience is key! Letting the brownies cool completely before cutting is essential for achieving that perfect fudgy texture.
Storage Instructions:
Store leftover brownies in an airtight container at room temperature for up to 3 days, or in the refrigerator for up to a week. You can also freeze the brownies for up to 2 months. To freeze, wrap the brownies individually in plastic wrap and then place them in a freezer-safe bag or container.
Variations:
- Add Nuts: Add chopped walnuts, pecans, or almonds to the batter for a nutty twist.
- Use Different Chocolate: Experiment with different types of chocolate chips, such as milk chocolate, dark chocolate, or white chocolate.
- Add Caramel: Drizzle caramel sauce over the brownies before baking for a caramel-chocolate-peanut butter explosion.
- Make it Gluten-Free: Substitute the all-purpose flour with a gluten-free all-purpose flour blend.
Conclusion:
And there you have it! These Reese’s Cup Brownies are truly something special, and I wholeheartedly believe they deserve a spot in your regular baking rotation. Why? Because they’re the perfect marriage of fudgy, intensely chocolatey brownie goodness and the irresistible peanut butter cup flavor we all know and love. It’s a decadent treat that’s surprisingly easy to make, requiring minimal effort for maximum reward. Trust me, the aroma alone wafting through your kitchen as these bake is enough to make your mouth water!
But beyond the incredible taste, these brownies are a must-try because they’re incredibly versatile. They’re perfect for any occasion, from a casual weeknight dessert to a special celebration. Imagine serving these warm with a scoop of vanilla ice cream at your next dinner party your guests will be raving about them for days! Or, package them up individually as a thoughtful homemade gift for friends and family. They’re guaranteed to bring a smile to anyone’s face.
Serving Suggestions and Variations:
Looking for ways to elevate your Reese’s Cup Brownies even further? Here are a few ideas to get you started:
* Go Nuts! Add a handful of chopped peanuts or walnuts to the brownie batter for extra crunch and nutty flavor.
* Salted Caramel Swirl: Drizzle a generous amount of salted caramel sauce over the batter before baking for a sweet and salty twist.
* Espresso Boost: Add a teaspoon of instant espresso powder to the brownie batter to enhance the chocolate flavor and give them a subtle coffee kick.
* Peanut Butter Drizzle: Melt some extra peanut butter and drizzle it over the cooled brownies for an extra layer of peanut butter goodness.
* Ice Cream Sundae Brownies: Warm a brownie, top it with your favorite ice cream (vanilla, chocolate, or peanut butter are all great choices!), whipped cream, chocolate sauce, and a cherry on top.
* Reese’s Pieces Explosion: Instead of just Reese’s Cups, sprinkle a generous amount of Reese’s Pieces on top of the brownies before baking for added color and peanut butter flavor.
* Blondie Variation: If you’re more of a blondie person, you can easily adapt this recipe by using a blondie base instead of a brownie base. The combination of peanut butter cups and a buttery blondie is simply divine!
I’m confident that once you try this recipe, you’ll be hooked. The combination of rich chocolate and creamy peanut butter is simply irresistible. Plus, the ease of preparation makes it a perfect recipe for both experienced bakers and beginners alike.
So, what are you waiting for? Gather your ingredients, preheat your oven, and get ready to bake up a batch of these incredible Reese’s Cup Brownies. I promise you won’t regret it!
And most importantly, I’d love to hear about your experience! Did you try any of the variations I suggested? Did you add your own unique twist? Share your photos and comments with me I can’t wait to see your creations! Happy baking!
Reeses Cup Brownies: The Ultimate Chocolate Peanut Butter Dessert
Decadent, fudgy brownies loaded with Reese's Peanut Butter Cups and chocolate chips. A peanut butter lover's dream!
Ingredients
- 1 cup (2 sticks) unsalted butter, melted
- 2 cups granulated sugar
- 1 cup unsweetened cocoa powder
- 1 teaspoon salt
- 1 teaspoon baking powder
- 1 tablespoon vanilla extract
- 4 large eggs
- 1 cup all-purpose flour
- 1 cup semi-sweet chocolate chips
- 1 ½ cups Reese’s Peanut Butter Cups, coarsely chopped (about 20 regular-sized cups)
- ½ cup peanut butter chips (optional, for extra peanut butter flavor)
Instructions
- Melt the Butter: In a large, microwave-safe bowl, melt the butter completely. You can do this in 30-second intervals, stirring in between, to prevent it from splattering everywhere. Alternatively, you can melt it in a saucepan over low heat. Just make sure it’s fully melted and smooth.
- Combine Butter and Sugar: Once the butter is melted, add the granulated sugar to the bowl. Whisk the butter and sugar together vigorously until they are well combined and the mixture starts to look a little lighter in color.
- Add Cocoa Powder, Salt, and Baking Powder: Now, sift in the unsweetened cocoa powder, salt, and baking powder. Gently fold these dry ingredients into the wet ingredients until just combined. Be careful not to overmix.
- Incorporate Vanilla Extract: Stir in the vanilla extract.
- Add the Eggs: Crack in the eggs one at a time, mixing well after each addition. Make sure each egg is fully incorporated into the batter before adding the next one.
- Fold in the Flour: Gradually add the all-purpose flour to the batter, folding it in gently until just combined. Again, be very careful not to overmix.
- Add Chocolate Chips: Stir in the semi-sweet chocolate chips.
- Prepare the Reese’s Cups: Coarsely chop the Reese’s Peanut Butter Cups.
- Fold in the Reese’s Cups: Gently fold the chopped Reese’s Peanut Butter Cups into the brownie batter. Be careful not to overmix.
- Add Peanut Butter Chips (Optional): If using, add the peanut butter chips to the batter.
- Preheat the Oven: Preheat your oven to 350°F (175°C).
- Prepare the Baking Pan: Grease and flour a 9×13 inch baking pan. You can also line the pan with parchment paper.
- Pour the Batter: Pour the brownie batter into the prepared baking pan and spread it evenly.
- Bake the Brownies: Bake for 30-35 minutes, or until a toothpick inserted into the center comes out with moist crumbs attached. Be careful not to overbake the brownies.
- Cool the Brownies: Remove the brownies from the oven and let them cool completely in the pan before cutting.
- Cut and Serve: Use a sharp knife to cut the brownies into squares. Clean the knife after each cut. Serve and enjoy!
Notes
- Don’t Overmix: Overmixing is the enemy of fudgy brownies. Mix the batter until just combined to avoid tough brownies.
- Use Quality Ingredients: Using high-quality ingredients, especially cocoa powder and chocolate chips, will make a big difference in the flavor of your brownies.
- Adjust Baking Time: Baking times may vary depending on your oven. Keep an eye on the brownies and adjust the baking time as needed.
- Let Them Cool: Patience is key! Letting the brownies cool completely before cutting is essential for achieving that perfect fudgy texture.
- Storage Instructions: Store leftover brownies in an airtight container at room temperature for up to 3 days, or in the refrigerator for up to a week. You can also freeze the brownies for up to 2 months. To freeze, wrap the brownies individually in plastic wrap and then place them in a freezer-safe bag or container.
- Variations:
- Add chopped walnuts, pecans, or almonds to the batter for a nutty twist.
- Experiment with different types of chocolate chips, such as milk chocolate, dark chocolate, or white chocolate.
- Drizzle caramel sauce over the brownies before baking for a caramel-chocolate-peanut butter explosion.
- Substitute the all-purpose flour with a gluten-free all-purpose flour blend.