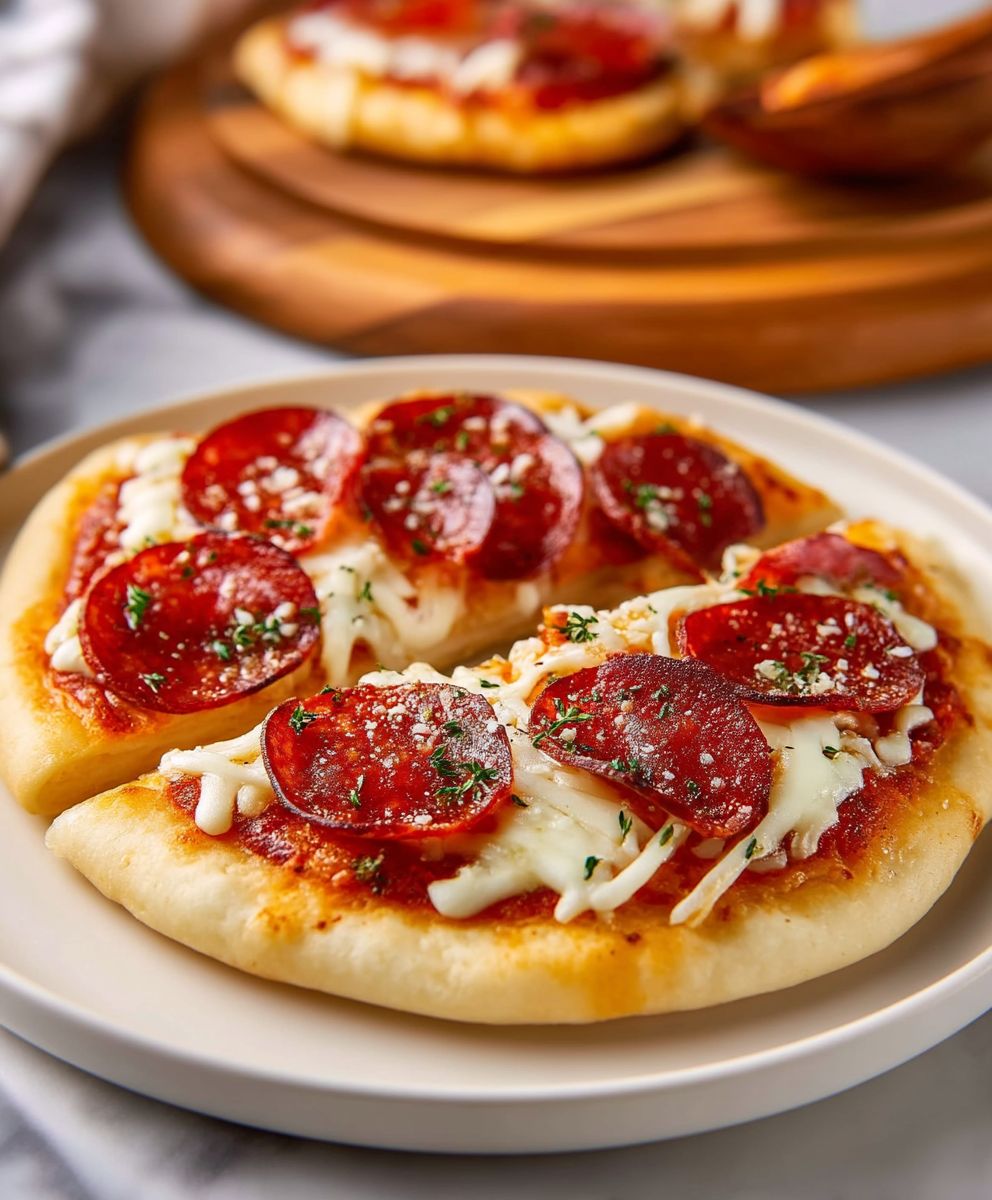
Pita Pizza: the weeknight dinner hero you didn’t know you needed! Are you tired of the same old pizza routine? Do you crave a quick, customizable, and utterly delicious meal that even the pickiest eaters will devour? Then prepare to be amazed! This isn’t just another pizza recipe; it’s a culinary shortcut to happiness, ready in mere minutes.
While pizza’s origins trace back to ancient flatbreads, the Pita Pizza is a modern marvel, born from the desire for speed and convenience. It cleverly utilizes pre-made pita bread as the perfect crispy-yet-chewy base, transforming a simple pantry staple into a satisfying meal. Think of it as the ultimate fusion food, blending the ease of a sandwich with the comforting flavors of pizza.
People adore Pita Pizza for its incredible versatility and speed. The crispiness of the pita, combined with the gooey melted cheese and your favorite toppings, creates a delightful textural experience. Plus, it’s incredibly customizable! Whether you’re a pepperoni purist, a veggie enthusiast, or an adventurous foodie, you can tailor your pita pizza to your exact cravings. And the best part? Clean-up is a breeze! So, ditch the delivery menus and get ready to experience the joy of homemade pizza, simplified.
Ingredients:
- 4 whole wheat pita breads
- 1 cup pizza sauce (store-bought or homemade)
- 2 cups shredded mozzarella cheese
- 1/2 cup sliced pepperoni (optional)
- 1/4 cup chopped green bell pepper
- 1/4 cup sliced black olives
- 1/4 cup chopped red onion
- 1/4 cup sliced mushrooms
- 1 tablespoon olive oil
- 1 teaspoon dried oregano
- 1/2 teaspoon garlic powder
- 1/4 teaspoon red pepper flakes (optional)
- Fresh basil leaves for garnish (optional)
Preparing the Pita Bases:
Before we start piling on the toppings, let’s get our pita bases ready. This step is crucial for preventing soggy pizzas and ensuring a crispy crust. Trust me, nobody likes a soggy pizza!
- Preheat your oven to 400°F (200°C). This temperature is perfect for getting the pita bread nice and crispy without burning the toppings.
- Lightly brush each pita bread with olive oil. Use about 1/4 tablespoon of olive oil per pita. This will help them crisp up in the oven and add a lovely flavor. Make sure to spread the oil evenly across the surface.
- Place the pita breads on a baking sheet lined with parchment paper. Parchment paper is your best friend when it comes to easy cleanup! It also prevents the pita breads from sticking to the baking sheet.
- Bake the pita breads for 5-7 minutes, or until they are lightly golden brown and slightly crispy. Keep a close eye on them, as they can burn quickly. You want them to be firm enough to hold the toppings without becoming too hard.
- Remove the pita breads from the oven and let them cool slightly. This will make them easier to handle when you’re adding the sauce and toppings.
Assembling the Pita Pizzas:
Now comes the fun part building our pita pizzas! This is where you can get creative and customize your pizzas with your favorite toppings. Don’t be afraid to experiment!
- Spread pizza sauce evenly over each pita bread. Use about 1/4 cup of sauce per pita. Be careful not to use too much sauce, as this can make the pita bread soggy. Leave a small border around the edge of each pita.
- Sprinkle each pita pizza with mozzarella cheese. Use about 1/2 cup of cheese per pita. Make sure to cover the sauce completely with cheese.
- Add your desired toppings. This is where you can get creative! Here are some ideas:
- Pepperoni
- Green bell pepper
- Black olives
- Red onion
- Mushrooms
Feel free to add any other toppings you like, such as sausage, ham, pineapple, or spinach. Just make sure not to overload the pizzas, as this can make them difficult to cook evenly.
- Sprinkle with dried oregano, garlic powder, and red pepper flakes (if using). These spices will add a delicious flavor to your pizzas.
Baking the Pita Pizzas:
Almost there! Now it’s time to bake our assembled pita pizzas to cheesy, melty perfection. The baking time is short, so keep a watchful eye.
- Return the pita pizzas to the baking sheet lined with parchment paper. This will prevent them from sticking to the baking sheet.
- Bake the pita pizzas for 8-10 minutes, or until the cheese is melted and bubbly and the toppings are heated through. The exact baking time will depend on your oven, so keep a close eye on them. You want the cheese to be nicely melted and slightly browned.
- Remove the pita pizzas from the oven and let them cool slightly. This will make them easier to handle.
Serving and Enjoying:
The moment we’ve all been waiting for! Time to slice, garnish, and devour our delicious homemade pita pizzas. Get ready for a flavor explosion!
- Garnish with fresh basil leaves (optional). Fresh basil adds a lovely aroma and a pop of color to the pizzas.
- Slice each pita pizza into wedges. You can use a pizza cutter or a sharp knife.
- Serve immediately and enjoy! These pita pizzas are best served hot and fresh. They’re perfect for a quick and easy weeknight meal, a party appetizer, or a fun snack.
Tips and Variations:
Here are a few extra tips and variations to help you customize your pita pizzas to your liking:
- Use different types of cheese. Instead of mozzarella, try using cheddar, provolone, or a blend of cheeses.
- Add a drizzle of balsamic glaze after baking. This will add a touch of sweetness and acidity to the pizzas.
- Make vegetarian pita pizzas. Omit the pepperoni and add more vegetables, such as mushrooms, onions, peppers, and spinach.
- Use different types of sauce. Instead of pizza sauce, try using pesto, barbecue sauce, or Alfredo sauce.
- Grill the pita breads instead of baking them. This will give them a smoky flavor.
- Make mini pita pizzas. Use smaller pita breads or cut regular pita breads into smaller circles.
- Add a sprinkle of Parmesan cheese after baking. This will add a salty and savory flavor.
- Experiment with different herbs and spices. Try adding Italian seasoning, garlic salt, or onion powder.
- Use whole wheat pita breads for a healthier option.
- Add a side salad for a complete meal.
Storing Leftovers:
If you happen to have any leftover pita pizzas (which is unlikely!), here’s how to store them:
- Let the pita pizzas cool completely.
- Place the pita pizzas in an airtight container.
- Store in the refrigerator for up to 3 days.
To reheat the pita pizzas, you can bake them in the oven at 350°F (175°C) for 5-10 minutes, or until heated through. You can also microwave them, but they may become a bit soggy.
Nutritional Information (Approximate per Pita Pizza):
Please note that the nutritional information is an estimate and may vary depending on the specific ingredients you use.
- Calories: 350-450
- Protein: 15-20g
- Fat: 15-25g
- Carbohydrates: 40-50g
- Fiber: 5-7g
Enjoy your delicious and easy homemade pita pizzas! I hope you and your family love them as much as I do.
Conclusion:
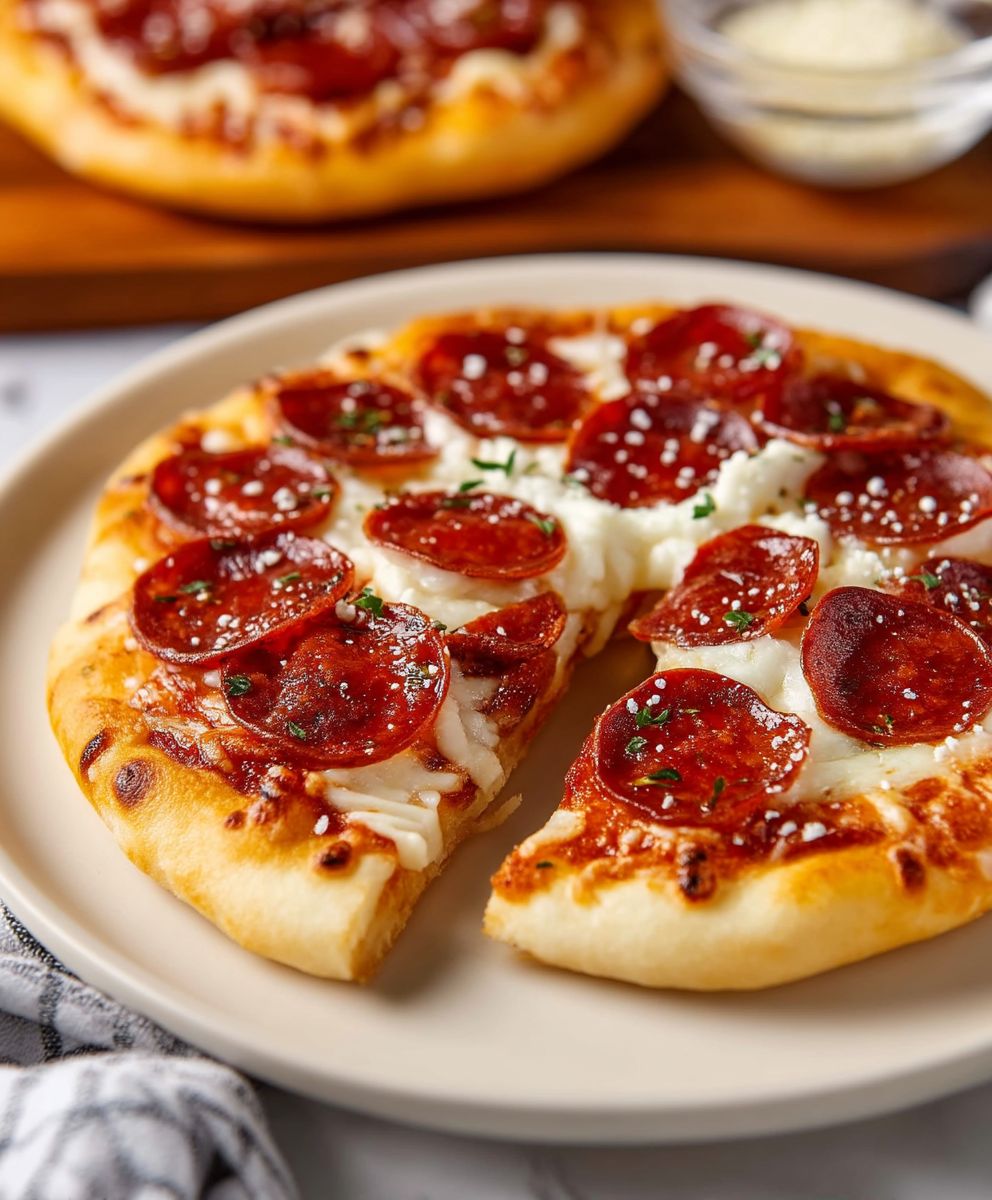
And there you have it! This Pita Pizza recipe is more than just a quick meal; it’s a gateway to endless culinary creativity and a guaranteed crowd-pleaser. I truly believe this is a must-try recipe for anyone looking for a fast, customizable, and utterly delicious pizza experience. The crispy pita bread provides the perfect base, offering a satisfying crunch that complements the gooey cheese and flavorful toppings. Forget ordering takeout this is faster, healthier, and infinitely more fun!
Why is it a must-try? Because it’s incredibly versatile! You can adapt it to suit any dietary needs or preferences. Vegetarian? Load it up with roasted vegetables like bell peppers, zucchini, and mushrooms. Meat lover? Add pepperoni, sausage, or even shredded chicken. Gluten-free? Simply use gluten-free pita bread! The possibilities are truly endless. Plus, it’s a fantastic way to use up leftover ingredients in your fridge, minimizing food waste and maximizing flavor.
Looking for serving suggestions? These Pita Pizzas are perfect as a quick lunch, a satisfying snack, or even a fun dinner option. Serve them with a side salad for a complete and balanced meal. For a party, cut them into smaller wedges and arrange them on a platter for easy snacking. And don’t forget the dipping sauces! Ranch dressing, marinara sauce, or even a spicy sriracha mayo would be fantastic accompaniments.
But the fun doesn’t stop there! Let’s talk variations. Want to add a touch of sweetness? Try drizzling a balsamic glaze over the finished pizza. Craving something spicy? Sprinkle some red pepper flakes or add a few slices of jalapeño. For a Mediterranean twist, top your pita pizza with feta cheese, olives, and sun-dried tomatoes. You could even create a dessert pita pizza with Nutella, marshmallows, and strawberries! The only limit is your imagination.
I’m so excited for you to try this recipe and discover your own favorite combinations. I know you’ll love how easy and delicious it is. It’s the perfect recipe for busy weeknights, lazy weekends, or any time you’re craving a quick and satisfying pizza fix.
So, what are you waiting for? Head to your kitchen, gather your ingredients, and get ready to create some amazing Pita Pizzas! I’m confident that this will become a staple in your recipe repertoire.
And now for the most important part: I want to hear about your experience! Did you try the recipe? What toppings did you use? What variations did you create? Share your photos and stories in the comments below. I can’t wait to see what you come up with! Your feedback is invaluable, and it helps me create even better recipes for you in the future. Happy cooking!
Pita Pizza: Quick, Easy & Delicious Recipe
Quick and easy pita pizzas! Crispy whole wheat pita bread topped with pizza sauce, mozzarella, and your favorite toppings. A perfect weeknight meal or fun snack.
Ingredients
- 4 whole wheat pita breads
- 1 cup pizza sauce (store-bought or homemade)
- 2 cups shredded mozzarella cheese
- 1/2 cup sliced pepperoni (optional)
- 1/4 cup chopped green bell pepper
- 1/4 cup sliced black olives
- 1/4 cup chopped red onion
- 1/4 cup sliced mushrooms
- 1 tablespoon olive oil
- 1 teaspoon dried oregano
- 1/2 teaspoon garlic powder
- 1/4 teaspoon red pepper flakes (optional)
- Fresh basil leaves for garnish (optional)
Instructions
- Preheat: Preheat your oven to 400°F (200°C).
- Prepare Pita Bases: Lightly brush each pita bread with about 1/4 tablespoon of olive oil. Place on a baking sheet lined with parchment paper.
- Bake Pita Bases: Bake for 5-7 minutes, or until lightly golden brown and slightly crispy. Remove from oven and let cool slightly.
- Assemble Pizzas: Spread about 1/4 cup of pizza sauce evenly over each pita bread, leaving a small border.
- Add Cheese: Sprinkle about 1/2 cup of mozzarella cheese over the sauce on each pita.
- Add Toppings: Add your desired toppings (pepperoni, green bell pepper, black olives, red onion, mushrooms, etc.).
- Season: Sprinkle with dried oregano, garlic powder, and red pepper flakes (if using).
- Bake Pizzas: Return the pita pizzas to the baking sheet lined with parchment paper.
- Bake Until Melted: Bake for 8-10 minutes, or until the cheese is melted and bubbly and the toppings are heated through.
- Cool and Serve: Remove from the oven and let cool slightly. Garnish with fresh basil leaves (optional). Slice into wedges and serve immediately.
Notes
- Crispy Crust: Brushing the pita with olive oil and pre-baking it is key to preventing a soggy pizza.
- Topping Variations: Get creative with your toppings! Sausage, ham, pineapple, spinach, or any other favorites work well.
- Cheese Options: Experiment with different cheeses like cheddar, provolone, or a blend.
- Sauce Alternatives: Try pesto, barbecue sauce, or Alfredo sauce instead of pizza sauce.
- Spice It Up: Add a drizzle of balsamic glaze after baking for a touch of sweetness.
- Vegetarian Option: Omit the pepperoni and load up on vegetables.
- Grilling Option: Grill the pita breads instead of baking for a smoky flavor.
- Storage: Store leftovers in an airtight container in the refrigerator for up to 3 days. Reheat in the oven at 350°F (175°C) for 5-10 minutes or microwave (may become soggy).

