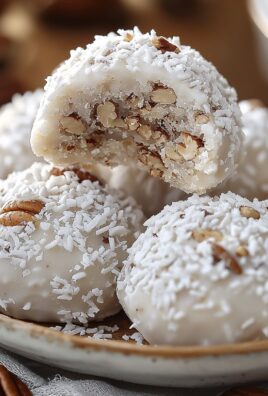
Peppermint Oreo Truffles: Prepare to be amazed by the easiest, most decadent holiday treat you’ll make this year! These aren’t just any truffles; they’re a delightful explosion of creamy, minty, chocolatey goodness that will have everyone begging for the recipe. Imagine the classic Oreo cookie, pulverized and blended with cream cheese, then infused with the refreshing coolness of peppermint, all enrobed in a rich, dark chocolate shell. Sounds divine, right?
While the exact origins of the truffle are debated, these particular Peppermint Oreo Truffles are a modern twist on a classic confection. Truffles, traditionally made with chocolate ganache, have long been associated with luxury and indulgence. This Oreo version brings that same feeling of decadence to your kitchen with a fraction of the effort. They’re perfect for holiday parties, potlucks, or even just a cozy night in by the fire.
What makes these truffles so irresistible? It’s the perfect balance of textures and flavors. The creamy, slightly tangy filling contrasts beautifully with the crisp, chocolatey coating. The peppermint adds a festive touch and a refreshing counterpoint to the richness of the chocolate. Plus, they’re incredibly easy to make no baking required! Who doesn’t love a simple, impressive dessert that’s ready in minutes? Get ready to impress your friends and family with these addictive little bites of heaven!

Ingredients:
- 1 package (14.3 ounces) Peppermint Oreo cookies
- 4 ounces cream cheese, softened
- 16 ounces white chocolate, chopped
- 1 tablespoon vegetable shortening
- Crushed peppermint candies, for garnish (optional)
Preparing the Oreo Truffle Base
Okay, let’s get started! The base of these truffles is super simple, but it’s the foundation for all that pepperminty goodness. We’re basically turning Oreos and cream cheese into a delicious, fudgy dough.
- Crush the Peppermint Oreos: This is where a food processor comes in handy. If you have one, toss the entire package of Peppermint Oreos (filling and all!) into the food processor and pulse until you have fine crumbs. You want them to be pretty finely ground so that the truffles have a smooth texture. If you don’t have a food processor, no worries! You can put the Oreos in a large zip-top bag, seal it tightly, and then use a rolling pin or meat mallet to crush them into crumbs. This might take a little more elbow grease, but it works just as well. Make sure to get all the big chunks out!
- Combine Oreo Crumbs and Cream Cheese: In a large mixing bowl, combine the crushed Oreo crumbs and the softened cream cheese. Make sure your cream cheese is truly softened this will make it much easier to mix everything together. If it’s still cold and firm, it will be difficult to get a smooth, even mixture. You can soften cream cheese by leaving it out at room temperature for about 30 minutes to an hour, or by microwaving it in 15-second intervals, checking after each interval, until it’s soft.
- Mix Until Well Combined: Use an electric mixer (either a stand mixer or a hand mixer) to beat the Oreo crumbs and cream cheese together until they are completely combined. You want a smooth, uniform mixture with no streaks of cream cheese. If you don’t have an electric mixer, you can use a sturdy spoon, but it will take a bit more effort. Just keep mixing until everything is evenly distributed. The mixture should resemble a soft dough.
- Chill the Oreo Mixture: This is a crucial step! Once the Oreo crumbs and cream cheese are combined, cover the bowl with plastic wrap and refrigerate the mixture for at least 30 minutes. This chilling time allows the mixture to firm up, making it much easier to roll into balls. If you skip this step, the mixture will be too sticky and difficult to handle. You can chill it for longer than 30 minutes if you need to, even overnight.
Forming the Truffle Balls
Now for the fun part rolling the chilled Oreo mixture into truffle balls! This is where your hands get a little messy, but it’s totally worth it.
- Scoop and Roll: Remove the chilled Oreo mixture from the refrigerator. Use a small cookie scoop or a spoon to scoop out portions of the mixture. I usually aim for about 1 tablespoon per truffle, but you can adjust the size to your preference. Roll each portion between your palms to form a smooth, round ball. Don’t worry if they’re not perfectly round they’ll still taste amazing!
- Place on Baking Sheet: As you roll each truffle, place it on a baking sheet lined with parchment paper or wax paper. This will prevent the truffles from sticking to the baking sheet and make it easier to transfer them later.
- Chill Again: Once all the truffles are rolled, place the baking sheet in the freezer for another 15-20 minutes. This second chilling helps the truffles firm up even more, which will make them easier to dip in the melted chocolate. This step is important, especially if your kitchen is warm.
Melting the White Chocolate
Time to melt the white chocolate! This can be a little tricky, as white chocolate is prone to seizing if it gets too hot. But don’t worry, I’ll walk you through it.
- Prepare the White Chocolate: Chop the white chocolate into small, even pieces. This will help it melt more evenly. Place the chopped white chocolate in a heat-safe bowl.
- Melt Using a Double Boiler or Microwave: There are two ways to melt the white chocolate: using a double boiler or using the microwave.
- Double Boiler Method: Fill a saucepan with about an inch of water and bring it to a simmer over medium heat. Place the heat-safe bowl with the chopped white chocolate on top of the saucepan, making sure the bottom of the bowl doesn’t touch the water. Stir the chocolate constantly until it is completely melted and smooth. Be careful not to let any water get into the chocolate, as this can cause it to seize.
- Microwave Method: Microwave the chopped white chocolate in 30-second intervals, stirring after each interval, until it is completely melted and smooth. Be very careful not to overheat the chocolate, as this can also cause it to seize. If the chocolate starts to look clumpy or grainy, it’s probably overheated.
- Add Vegetable Shortening: Once the white chocolate is melted, stir in the vegetable shortening. This will help thin out the chocolate and give it a smoother, glossier finish. It also makes the chocolate easier to dip the truffles in.
Dipping and Decorating the Truffles
Almost there! Now for the final step dipping the truffles in the melted white chocolate and adding the peppermint candy garnish.
- Prepare Your Dipping Station: Set up your dipping station. You’ll need the bowl of melted white chocolate, the baking sheet with the chilled truffle balls, and a plate or bowl with the crushed peppermint candies (if using).
- Dip the Truffles: Remove the baking sheet with the truffle balls from the freezer. Use a fork or dipping tools to carefully dip each truffle into the melted white chocolate, making sure it is completely coated. Gently tap off any excess chocolate.
- Decorate with Crushed Peppermint: Immediately after dipping each truffle, sprinkle it with crushed peppermint candies (if using). The chocolate will set quickly, so you need to add the garnish right away.
- Place on Baking Sheet to Set: Place the dipped and decorated truffles back on the baking sheet lined with parchment paper or wax paper.
- Chill to Set: Place the baking sheet in the refrigerator for about 15-20 minutes, or until the chocolate is completely set. This will help the truffles firm up and prevent them from melting.
Storing the Peppermint Oreo Truffles
Once the chocolate is set, your Peppermint Oreo Truffles are ready to enjoy! Store them in an airtight container in the refrigerator for up to a week. They’re best served cold, so take them out of the fridge a few minutes before serving. You can also freeze them for longer storage. Just wrap them tightly in plastic wrap and then place them in a freezer-safe container. They’ll keep in the freezer for up to 2 months. Let them thaw in the refrigerator before serving.
Tips and Variations
Here are a few extra tips and ideas to make these truffles even more amazing:
- Use Different Types of Oreos: While this recipe calls for Peppermint Oreos, you can easily adapt it to use other flavors of Oreos. Try using regular Oreos, Golden Oreos, or any of the seasonal or limited-edition flavors.
- Add Extracts: For an extra boost of flavor, you can add a few drops of peppermint extract to the Oreo mixture or the melted white chocolate. Just be careful not to add too much, as it can be overpowering.
- Use Different Coatings: Instead of white chocolate, you can use milk chocolate, dark chocolate, or even candy melts to coat the truffles. You can also drizzle the truffles with a different color of chocolate for a festive look.
- Add Sprinkles: In addition to crushed peppermint candies, you can decorate the truffles with sprinkles, edible glitter, or other festive toppings.
- Make Them Vegan: You can make these truffles vegan by using vegan Oreos (many varieties are accidentally vegan) and vegan cream cheese. You’ll also need to use vegan white chocolate.

Conclusion:
And there you have it! These Peppermint Oreo Truffles are more than just a dessert; they’re a festive explosion of flavor and texture that will undoubtedly become a holiday staple in your home. The creamy, minty filling combined with the crunchy Oreo cookie and the decadent chocolate coating is a symphony of deliciousness that’s surprisingly easy to achieve. Seriously, if I can make these, anyone can! But why are these truffles a must-try? Beyond the incredible taste, they’re incredibly versatile. Need a last-minute dessert for a holiday party? These truffles are your answer. Looking for a homemade gift that will impress? Wrap these beauties in a decorative box, and you’ll be the star of the gift exchange. Want a fun activity to do with the kids? They’ll love helping to crush the Oreos and roll the truffles. Plus, let’s be honest, who can resist a bite-sized treat that’s bursting with pepperminty goodness? These Peppermint Oreo Truffles are the perfect blend of simplicity and sophistication. They require minimal ingredients and effort, yet they deliver a gourmet experience that will leave everyone wanting more. Now, let’s talk about serving suggestions and variations. While these truffles are divine on their own, there are plenty of ways to customize them to your liking. For a richer flavor, use dark chocolate for the coating. If you prefer a white chocolate experience, go for it! You could even drizzle both dark and white chocolate over the truffles for a visually stunning and extra-delicious treat. Consider adding a sprinkle of crushed peppermint candies on top for an extra burst of peppermint flavor and a festive touch. Or, if you’re feeling adventurous, try dipping the truffles in melted white chocolate and then rolling them in crushed candy canes. Another fun variation is to add a teaspoon of peppermint extract to the cream cheese mixture for an even more intense peppermint flavor. For serving, these truffles are perfect on a dessert platter alongside other holiday treats. They also make a wonderful addition to a cookie exchange. You can even crumble them over ice cream or use them as a topping for cupcakes. The possibilities are endless! I truly believe that these Peppermint Oreo Truffles will become a beloved tradition in your family, just as they have in mine. They’re the perfect way to spread holiday cheer and create lasting memories. So, what are you waiting for? Gather your ingredients, put on some festive music, and get ready to embark on a truffle-making adventure! I promise you won’t regret it. And most importantly, I want to hear about your experience! Did you try the recipe? Did you make any variations? What did your family and friends think? Share your photos and stories in the comments below. I can’t wait to see your creations and hear all about your truffle-making adventures. Happy baking, and happy holidays! I hope you enjoy these little bites of pepperminty heaven as much as I do. Let me know if you have any questions, and I’ll do my best to help. Now go forth and make some delicious memories! Print
Peppermint Oreo Truffles: Easy Recipe for the Holidays
- Total Time: 60 minutes
- Yield: 30–36 truffles 1x
Description
Easy, no-bake Peppermint Oreo Truffles! Crushed Oreos, cream cheese, and a smooth white chocolate coating make these festive treats perfect for holidays or gifts.
Ingredients
- 1 package (14.3 ounces) Peppermint Oreo cookies
- 4 ounces cream cheese, softened
- 16 ounces white chocolate, chopped
- 1 tablespoon vegetable shortening
- Crushed peppermint candies, for garnish (optional)
Instructions
- Crush the Peppermint Oreos: In a food processor, pulse the entire package of Peppermint Oreos (filling and all!) until you have fine crumbs. Alternatively, place Oreos in a zip-top bag and crush with a rolling pin.
- Combine Oreo Crumbs and Cream Cheese: In a large mixing bowl, combine the crushed Oreo crumbs and the softened cream cheese.
- Mix Until Well Combined: Use an electric mixer to beat the Oreo crumbs and cream cheese together until smooth and uniform. The mixture should resemble a soft dough.
- Chill the Oreo Mixture: Cover the bowl with plastic wrap and refrigerate for at least 30 minutes.
- Scoop and Roll: Remove the chilled Oreo mixture from the refrigerator. Use a small cookie scoop or a spoon to scoop out portions of the mixture (about 1 tablespoon per truffle). Roll each portion between your palms to form a smooth, round ball.
- Place on Baking Sheet: Place each truffle on a baking sheet lined with parchment paper or wax paper.
- Chill Again: Place the baking sheet in the freezer for another 15-20 minutes.
- Prepare the White Chocolate: Chop the white chocolate into small, even pieces. Place the chopped white chocolate in a heat-safe bowl.
- Melt Using a Double Boiler or Microwave:
- Double Boiler Method: Fill a saucepan with about an inch of water and bring it to a simmer over medium heat. Place the heat-safe bowl with the chopped white chocolate on top of the saucepan, making sure the bottom of the bowl doesn’t touch the water. Stir the chocolate constantly until it is completely melted and smooth.
- Microwave Method: Microwave the chopped white chocolate in 30-second intervals, stirring after each interval, until it is completely melted and smooth.
- Add Vegetable Shortening: Once the white chocolate is melted, stir in the vegetable shortening.
- Prepare Your Dipping Station: Set up your dipping station. You’ll need the bowl of melted white chocolate, the baking sheet with the chilled truffle balls, and a plate or bowl with the crushed peppermint candies (if using).
- Dip the Truffles: Remove the baking sheet with the truffle balls from the freezer. Use a fork or dipping tools to carefully dip each truffle into the melted white chocolate, making sure it is completely coated. Gently tap off any excess chocolate.
- Decorate with Crushed Peppermint: Immediately after dipping each truffle, sprinkle it with crushed peppermint candies (if using).
- Place on Baking Sheet to Set: Place the dipped and decorated truffles back on the baking sheet lined with parchment paper or wax paper.
- Chill to Set: Place the baking sheet in the refrigerator for about 15-20 minutes, or until the chocolate is completely set.
- Storing the Peppermint Oreo Truffles: Store them in an airtight container in the refrigerator for up to a week. They’re best served cold, so take them out of the fridge a few minutes before serving. You can also freeze them for longer storage. Just wrap them tightly in plastic wrap and then place them in a freezer-safe container. They’ll keep in the freezer for up to 2 months. Let them thaw in the refrigerator before serving.
Notes
- Make sure your cream cheese is softened for easy mixing.
- Chilling the Oreo mixture is crucial for easy rolling.
- White chocolate can seize easily, so melt it carefully using a double boiler or microwave in short intervals.
- Vegetable shortening thins the melted chocolate for a smoother coating.
- Work quickly when decorating with crushed peppermint, as the chocolate sets fast.
- For variations, try different Oreo flavors, extracts, coatings (milk chocolate, dark chocolate, candy melts), or sprinkles.
- To make vegan, use vegan Oreos, vegan cream cheese, and vegan white chocolate.
- Prep Time: 20 minutes
- Cook Time: 10 minutes


