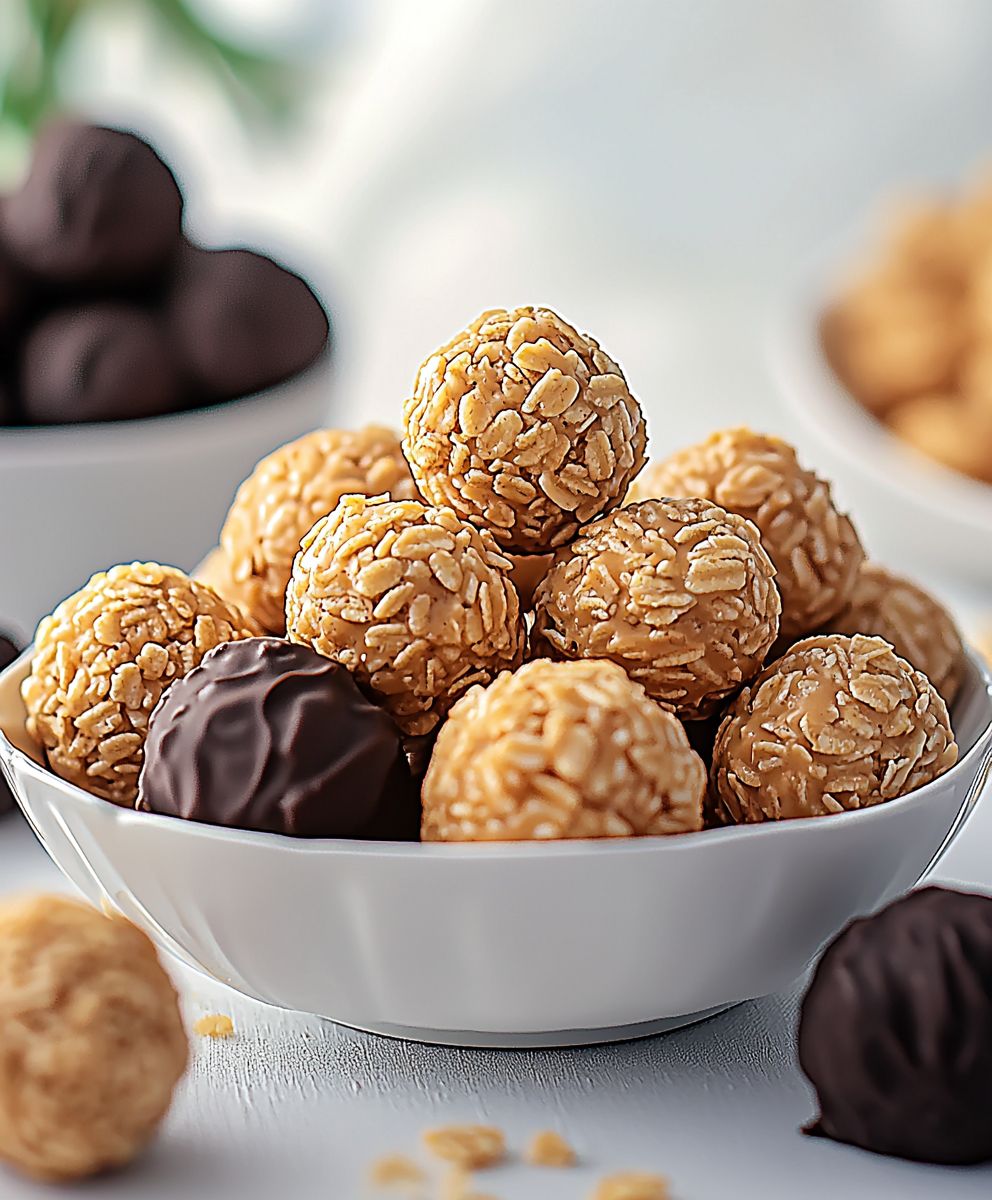
Peanut Butter Balls: Prepare to be amazed by these decadent, no-bake treats that are unbelievably easy to make and even easier to devour! Imagine biting into a perfectly round sphere of creamy peanut butter, coated in rich chocolate a symphony of flavors and textures that will leave you craving more. These aren’t just any dessert; they’re a nostalgic throwback to simpler times, often associated with holiday baking and family gatherings.
While the exact origin of Peanut Butter Balls is shrouded in a bit of mystery, their popularity exploded in the mid-20th century alongside the rise of commercial peanut butter. They quickly became a staple in home kitchens across America, prized for their simplicity and crowd-pleasing appeal. The combination of salty peanut butter and sweet chocolate is a classic for a reason it’s a match made in dessert heaven!
What makes these little delights so irresistible? It’s the perfect balance of creamy and crunchy, sweet and salty. The smooth peanut butter filling melts in your mouth, while the chocolate coating provides a satisfying snap. Plus, the no-bake aspect makes them incredibly convenient, perfect for those times when you need a quick and impressive dessert without spending hours in the kitchen. Whether you’re making them for a holiday party, a potluck, or simply a sweet treat for yourself, these Peanut Butter Balls are guaranteed to be a hit!
Ingredients:
- 1 cup (2 sticks) unsalted butter, softened
- 1 cup creamy peanut butter
- 3 cups powdered sugar, plus more for dusting
- 3 cups graham cracker crumbs (about 24 graham crackers), finely crushed
- 1 teaspoon vanilla extract
- 1/2 teaspoon salt
- 12 ounces semi-sweet chocolate chips
- 1 tablespoon vegetable shortening (or coconut oil)
Preparing the Peanut Butter Mixture
Okay, let’s get started! First, we’re going to create the base for our peanut butter balls. This is where all that delicious peanut butter flavor comes from, so pay close attention!
- Cream the Butter and Peanut Butter: In a large mixing bowl, combine the softened butter and peanut butter. I like to use an electric mixer (either a stand mixer or a hand mixer) for this, as it makes the process much easier and ensures everything is well combined. Beat the butter and peanut butter together on medium speed until they are light and fluffy. This usually takes about 2-3 minutes. Make sure to scrape down the sides of the bowl occasionally to ensure everything is evenly mixed. You don’t want any pockets of butter hiding out!
- Add the Powdered Sugar: Gradually add the powdered sugar to the butter and peanut butter mixture, one cup at a time. Beat on low speed until the powdered sugar is fully incorporated. Be careful not to add the powdered sugar too quickly, or you’ll end up with a cloud of sugar dust in your kitchen! Again, scrape down the sides of the bowl as needed. The mixture will start to become quite thick at this point, which is exactly what we want.
- Incorporate the Graham Cracker Crumbs: Now, it’s time to add the graham cracker crumbs. These add a lovely texture and a subtle sweetness to the peanut butter balls. Add the graham cracker crumbs to the mixture and beat on low speed until they are evenly distributed. The mixture will become even thicker now, almost like a dough. Don’t worry if it seems a little dry at this point; we’ll fix that in the next step.
- Add Vanilla and Salt: Stir in the vanilla extract and salt. The vanilla enhances the peanut butter flavor, and the salt balances the sweetness. Mix until just combined. Be careful not to overmix at this stage.
Forming the Peanut Butter Balls
Now comes the fun part shaping our peanut butter balls! This is a great activity to get the kids involved in, if you have any little helpers around.
- Chill the Dough: Cover the bowl with plastic wrap and refrigerate the peanut butter mixture for at least 30 minutes. This will help the dough firm up, making it easier to roll into balls. If you’re short on time, you can chill it for a shorter period, but the longer it chills, the easier it will be to work with. I sometimes chill it for an hour or even longer if I’m not in a rush.
- Roll into Balls: Once the dough is chilled, remove it from the refrigerator. Using a small cookie scoop or a spoon, scoop out portions of the dough and roll them into 1-inch balls. I find that a cookie scoop helps to ensure that all the balls are the same size. Place the rolled balls on a baking sheet lined with parchment paper or a silicone baking mat. This will prevent them from sticking to the baking sheet.
- Refrigerate Again: Once all the balls are rolled, return the baking sheet to the refrigerator and chill for another 30 minutes. This will help them hold their shape during the dipping process. This step is crucial for preventing the peanut butter balls from melting into the chocolate.
Melting the Chocolate and Dipping
Time for the chocolate! This is where the magic happens. We want a smooth, glossy chocolate coating that perfectly complements the peanut butter filling.
- Melt the Chocolate: In a heat-safe bowl set over a saucepan of simmering water (double boiler), combine the chocolate chips and vegetable shortening (or coconut oil). Make sure the bottom of the bowl doesn’t touch the water. Stir constantly until the chocolate is completely melted and smooth. The vegetable shortening (or coconut oil) helps to thin the chocolate, making it easier to dip the peanut butter balls. You can also melt the chocolate in the microwave in 30-second intervals, stirring in between, until melted and smooth. Be careful not to overheat the chocolate, or it will seize up.
- Dipping the Peanut Butter Balls: Remove the peanut butter balls from the refrigerator. Using a fork or dipping tools, carefully dip each ball into the melted chocolate, ensuring that it is completely coated. Gently tap off any excess chocolate. Place the dipped peanut butter balls back on the parchment-lined baking sheet.
- Optional: Sprinkle with Toppings: If desired, sprinkle the dipped peanut butter balls with toppings such as sprinkles, chopped nuts, or sea salt while the chocolate is still wet. This adds a festive touch and extra flavor.
- Chill to Set: Return the baking sheet to the refrigerator and chill for at least 30 minutes, or until the chocolate is completely set. This will ensure that the chocolate coating is firm and doesn’t melt when you handle the peanut butter balls.
Serving and Storage
Finally, the moment we’ve all been waiting for enjoying our homemade peanut butter balls!
- Serve: Once the chocolate is set, remove the peanut butter balls from the refrigerator and serve. They are best enjoyed chilled or at room temperature.
- Store: Store the peanut butter balls in an airtight container in the refrigerator for up to a week. They can also be frozen for longer storage. To freeze, place the peanut butter balls in a single layer on a baking sheet and freeze until solid. Then, transfer them to a freezer-safe bag or container. They can be stored in the freezer for up to 2-3 months. Thaw in the refrigerator before serving.
Tips and Tricks for Perfect Peanut Butter Balls
- Use Softened Butter: Make sure the butter is softened to room temperature before you start. This will make it easier to cream with the peanut butter and ensure a smooth, even mixture.
- Finely Crushed Graham Crackers: The finer the graham cracker crumbs, the smoother the texture of the peanut butter balls. You can use a food processor to grind the graham crackers into a fine powder.
- Don’t Overheat the Chocolate: Overheating the chocolate can cause it to seize up and become grainy. Melt the chocolate slowly and carefully, stirring frequently.
- Chill, Chill, Chill: Chilling the dough and the dipped peanut butter balls is crucial for preventing them from melting and ensuring that they hold their shape.
- Experiment with Toppings: Get creative with your toppings! Try sprinkles, chopped nuts, sea salt, or even a drizzle of melted white chocolate.
- Use High-Quality Chocolate: The quality of the chocolate will affect the taste and texture of the peanut butter balls. Use a good-quality semi-sweet chocolate for the best results.
- Make Ahead: Peanut butter balls can be made ahead of time and stored in the refrigerator or freezer. This makes them a great option for parties and holidays.
Variations
- Chocolate Peanut Butter Balls: Use chocolate graham crackers instead of regular graham crackers for a richer, chocolatey flavor.
- White Chocolate Peanut Butter Balls: Use white chocolate chips instead of semi-sweet chocolate chips for a sweeter, more decadent treat.
- Dark Chocolate Peanut Butter Balls: Use dark chocolate chips for a more intense chocolate flavor.
- Peanut-Free Option: Substitute the peanut butter with sunflower seed butter or another nut-free alternative for those with peanut allergies.

Conclusion:
So, there you have it! These Peanut Butter Balls are truly a must-try for anyone who loves a quick, easy, and utterly satisfying treat. They’re the perfect balance of sweet and salty, creamy and slightly crunchy, and they require absolutely no baking! What’s not to love?
I know, I know, there are a million peanut butter ball recipes out there, but trust me, this one is special. The combination of ingredients creates a texture that’s just divine, and the chocolate coating adds that extra touch of indulgence that makes them irresistible. Plus, they’re so simple to make that even the most novice baker can whip up a batch in no time. Seriously, if you’re looking for a foolproof dessert that will impress your friends and family, look no further.
Serving Suggestions and Variations
While these Peanut Butter Balls are amazing on their own, there are tons of ways to customize them to your liking. Here are a few ideas to get you started:
- Drizzle with different types of chocolate: Try white chocolate, dark chocolate, or even a combination of all three! A simple drizzle adds a beautiful touch and enhances the flavor.
- Add a sprinkle of sea salt: A pinch of flaky sea salt on top of the chocolate coating elevates the sweetness and creates a delightful contrast.
- Roll in chopped nuts: Before the chocolate sets, roll the balls in chopped peanuts, pecans, or walnuts for added crunch and flavor.
- Use different types of peanut butter: Experiment with creamy, chunky, or even flavored peanut butter (like honey roasted or chocolate peanut butter) to create unique variations.
- Add a touch of spice: A pinch of cinnamon or cayenne pepper to the peanut butter mixture adds a subtle warmth and complexity.
- Make them festive: Use colored sprinkles or edible glitter to decorate the balls for holidays or special occasions.
- Serve them chilled: Pop them in the fridge for a few minutes before serving for an extra refreshing treat.
- Pair them with ice cream: Serve a few Peanut Butter Balls alongside a scoop of vanilla or chocolate ice cream for a decadent dessert.
These are just a few ideas to get your creative juices flowing. Feel free to experiment and come up with your own unique variations! The possibilities are endless.
I truly believe that these Peanut Butter Balls will become a staple in your dessert repertoire. They’re perfect for parties, potlucks, or simply a sweet treat to enjoy on a cozy night in. They’re also a great option for making ahead of time, as they can be stored in the refrigerator for several days.
So, what are you waiting for? Grab your ingredients and get ready to make some magic! I’m confident that you’ll love these Peanut Butter Balls as much as I do. And don’t forget to share your creations with me! I’d love to see your photos and hear about your experiences. Tag me on social media and let me know what you think. Happy baking (or rather, no-baking)! I can’t wait to see what delicious variations you come up with. Enjoy!
Print
Peanut Butter Balls: Easy Recipe & Tips for Perfect Treats
- Total Time: 90 minutes
- Yield: 36 peanut butter balls 1x
Description
Delicious, easy, no-bake peanut butter balls coated in rich chocolate. Perfect for any occasion!
Ingredients
- 1 cup (2 sticks) unsalted butter, softened
- 1 cup creamy peanut butter
- 3 cups powdered sugar, plus more for dusting
- 3 cups graham cracker crumbs (about 24 graham crackers), finely crushed
- 1 teaspoon vanilla extract
- 1/2 teaspoon salt
- 12 ounces semi-sweet chocolate chips
- 1 tablespoon vegetable shortening (or coconut oil)
Instructions
- Cream the Butter and Peanut Butter: In a large mixing bowl, combine the softened butter and peanut butter. Beat with an electric mixer on medium speed until light and fluffy (2-3 minutes). Scrape down the sides of the bowl as needed.
- Add the Powdered Sugar: Gradually add the powdered sugar, one cup at a time, to the butter and peanut butter mixture. Beat on low speed until fully incorporated. Scrape down the sides of the bowl as needed.
- Incorporate the Graham Cracker Crumbs: Add the graham cracker crumbs and beat on low speed until evenly distributed.
- Add Vanilla and Salt: Stir in the vanilla extract and salt until just combined.
- Chill the Dough: Cover the bowl with plastic wrap and refrigerate for at least 30 minutes to firm up the dough.
- Roll into Balls: Scoop out portions of the chilled dough and roll them into 1-inch balls. Place the rolled balls on a baking sheet lined with parchment paper or a silicone baking mat.
- Refrigerate Again: Return the baking sheet to the refrigerator and chill for another 30 minutes.
- Melt the Chocolate: In a heat-safe bowl set over a saucepan of simmering water (double boiler), combine the chocolate chips and vegetable shortening (or coconut oil). Stir constantly until the chocolate is completely melted and smooth. Alternatively, melt in the microwave in 30-second intervals, stirring in between.
- Dipping the Peanut Butter Balls: Remove the peanut butter balls from the refrigerator. Using a fork or dipping tools, carefully dip each ball into the melted chocolate, ensuring that it is completely coated. Gently tap off any excess chocolate. Place the dipped peanut butter balls back on the parchment-lined baking sheet.
- Optional: Sprinkle with Toppings: If desired, sprinkle the dipped peanut butter balls with toppings such as sprinkles, chopped nuts, or sea salt while the chocolate is still wet.
- Chill to Set: Return the baking sheet to the refrigerator and chill for at least 30 minutes, or until the chocolate is completely set.
- Serve: Once the chocolate is set, remove the peanut butter balls from the refrigerator and serve. They are best enjoyed chilled or at room temperature.
- Store: Store the peanut butter balls in an airtight container in the refrigerator for up to a week. They can also be frozen for longer storage. To freeze, place the peanut butter balls in a single layer on a baking sheet and freeze until solid. Then, transfer them to a freezer-safe bag or container. They can be stored in the freezer for up to 2-3 months. Thaw in the refrigerator before serving.
Notes
- Use softened butter for easy creaming.
- Finely crushed graham crackers create a smoother texture.
- Don’t overheat the chocolate to prevent seizing.
- Chilling the dough and dipped balls is crucial for shape.
- Experiment with toppings for added flavor and decoration.
- Use high-quality chocolate for the best taste.
- These can be made ahead and stored in the refrigerator or freezer.
- For Chocolate Peanut Butter Balls: Use chocolate graham crackers instead of regular graham crackers for a richer, chocolatey flavor.
- For White Chocolate Peanut Butter Balls: Use white chocolate chips instead of semi-sweet chocolate chips for a sweeter, more decadent treat.
- For Dark Chocolate Peanut Butter Balls: Use dark chocolate chips for a more intense chocolate flavor.
- For Peanut-Free Option: Substitute the peanut butter with sunflower seed butter or another nut-free alternative for those with peanut allergies.
- Prep Time: 20 minutes
- Cook Time: 10 minutes


