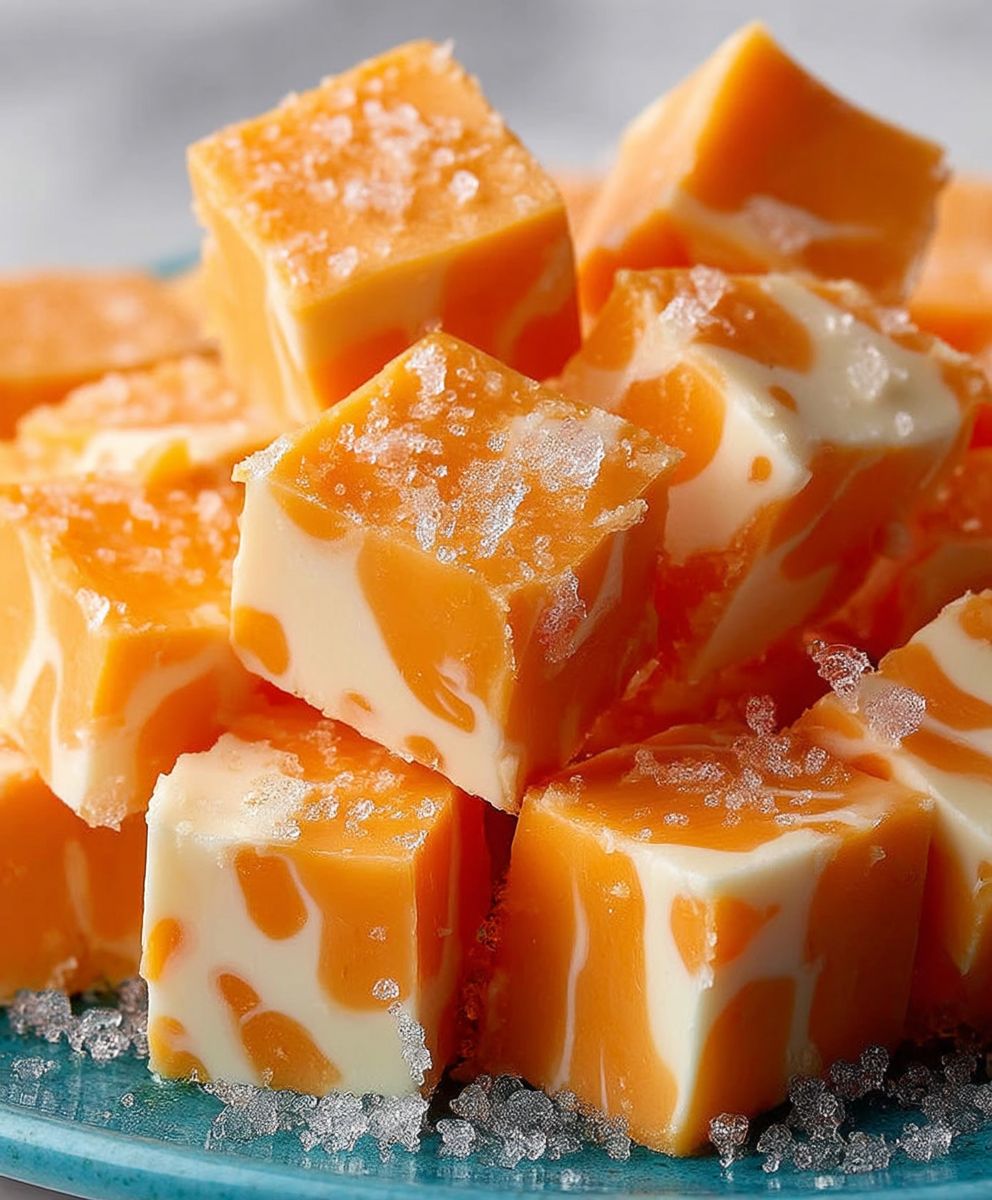
Orange Creamsicle Fudge: Prepare to be transported back to carefree summer days with every single bite! Remember chasing after the ice cream truck, the anticipation building as you waited for that perfect swirl of orange and vanilla? Well, now you can capture that nostalgic joy in a decadent, melt-in-your-mouth fudge. This isn’t just any fudge; it’s a vibrant, creamy dream that perfectly balances the tangy zest of orange with the smooth sweetness of vanilla.
While fudge itself has a rich history, evolving from a happy accident in the late 19th century to a beloved confection, the Orange Creamsicle Fudge flavor profile is a modern twist on a classic pairing. The combination of orange and vanilla has long been celebrated for its harmonious blend of bright citrus and comforting creaminess. Think of it as sunshine and clouds meeting in perfect harmony!
People adore this dish because it’s more than just a treat; it’s an experience. The creamy texture is incredibly satisfying, and the flavor combination is simply irresistible. Plus, this Orange Creamsicle Fudge is surprisingly easy to make, requiring minimal ingredients and effort. It’s the perfect dessert for potlucks, holidays, or simply satisfying your sweet tooth on a cozy evening. Get ready to create a batch of pure happiness!

Ingredients:
- For the Orange Layer:
- 3 cups granulated sugar
- ¾ cup (1 ½ sticks) unsalted butter, cut into cubes
- ? cup evaporated milk
- 1 (12 ounce) package white chocolate chips
- 1 teaspoon orange extract
- ½ teaspoon vanilla extract
- Orange food coloring (gel is recommended)
- Zest of 1 large orange
- For the Vanilla Layer:
- 3 cups granulated sugar
- ¾ cup (1 ½ sticks) unsalted butter, cut into cubes
- ? cup evaporated milk
- 1 (12 ounce) package white chocolate chips
- 1 teaspoon vanilla extract
Preparing the Orange Layer:
- In a large, heavy-bottomed saucepan, combine the granulated sugar, butter, and evaporated milk. Make sure your saucepan is large enough, as the mixture will bubble up quite a bit during cooking.
- Place the saucepan over medium heat and stir constantly until the sugar is completely dissolved and the butter is melted. This is a crucial step, so don’t rush it! Undissolved sugar can result in grainy fudge.
- Once the mixture is smooth and the sugar is dissolved, bring it to a rolling boil, stirring constantly. A rolling boil means the mixture continues to boil even while you are stirring.
- Continue to boil for exactly 5 minutes, stirring constantly. Use a timer to ensure accuracy. Overcooking or undercooking will affect the fudge’s texture.
- Remove the saucepan from the heat immediately after the 5 minutes.
- Add the white chocolate chips, orange extract, and vanilla extract to the hot mixture. Stir vigorously until the chocolate chips are completely melted and the mixture is smooth and creamy. Be patient; it might take a minute or two for all the chocolate to melt.
- Stir in the orange food coloring, a few drops at a time, until you reach your desired shade of orange. Remember that the color will deepen slightly as the fudge cools.
- Finally, stir in the orange zest. This will add a wonderful burst of fresh orange flavor to the fudge.
Preparing the Vanilla Layer:
- In a separate large, heavy-bottomed saucepan, combine the granulated sugar, butter, and evaporated milk. Again, ensure your saucepan is large enough to accommodate the bubbling mixture.
- Place the saucepan over medium heat and stir constantly until the sugar is completely dissolved and the butter is melted. Just like with the orange layer, complete dissolution of the sugar is key to a smooth fudge.
- Once the mixture is smooth and the sugar is dissolved, bring it to a rolling boil, stirring constantly.
- Continue to boil for exactly 5 minutes, stirring constantly. Set a timer to ensure you boil for the correct amount of time.
- Remove the saucepan from the heat immediately after the 5 minutes.
- Add the white chocolate chips and vanilla extract to the hot mixture. Stir vigorously until the chocolate chips are completely melted and the mixture is smooth and creamy.
Assembling the Orange Creamsicle Fudge:
- Prepare an 8×8 inch square baking pan by lining it with parchment paper. Leave an overhang of parchment paper on the sides; this will make it easier to lift the fudge out of the pan later.
- Pour the orange fudge mixture into the prepared pan and spread it evenly. Use a spatula to ensure a smooth surface.
- Immediately pour the vanilla fudge mixture over the orange layer and spread it evenly. You can swirl the two layers together slightly with a knife or spatula for a marbled effect, but be careful not to overmix, or the colors will blend too much.
- Gently tap the pan on the counter a few times to release any air bubbles and help the fudge settle evenly.
- Cover the pan with plastic wrap, pressing it gently onto the surface of the fudge to prevent a skin from forming.
- Refrigerate the fudge for at least 2-3 hours, or preferably overnight, to allow it to set completely. This is important for achieving the right consistency.
Cutting and Storing the Fudge:
- Once the fudge is firm, lift it out of the pan using the parchment paper overhang.
- Place the fudge on a cutting board and use a large, sharp knife to cut it into squares. For clean cuts, run the knife under hot water and wipe it dry between each cut.
- Store the Orange Creamsicle Fudge in an airtight container in the refrigerator for up to 2 weeks. You can also freeze it for longer storage; just wrap it tightly in plastic wrap and then place it in a freezer bag. Frozen fudge can last for up to 2-3 months.
Tips for Perfect Fudge:
- Use a heavy-bottomed saucepan: This will help prevent the fudge from scorching.
- Stir constantly: This is especially important while the mixture is boiling to prevent sticking and burning.
- Use a candy thermometer (optional): If you have a candy thermometer, you can use it to ensure the mixture reaches the correct temperature (235-240°F or 113-116°C). However, the 5-minute boiling method is generally reliable.
- Don’t overcook or undercook: Overcooked fudge can be dry and crumbly, while undercooked fudge can be too soft and sticky.
- Use good quality chocolate: The quality of the white chocolate chips will affect the flavor and texture of the fudge.
- Be patient: Allow the fudge to set completely in the refrigerator before cutting it.
Variations:
- Add nuts: Stir in chopped pecans, walnuts, or almonds to either the orange or vanilla layer for added texture and flavor.
- Use different extracts: Experiment with other extracts, such as lemon extract or almond extract, to create different flavor combinations.
- Add sprinkles: Sprinkle the top of the fudge with orange and white sprinkles for a festive touch.
- Make it vegan: Substitute the butter with vegan butter and the evaporated milk with coconut milk. Ensure the white chocolate chips are also vegan.
Troubleshooting:
- Fudge is grainy: This is usually caused by undissolved sugar. Make sure to stir the mixture constantly until the sugar is completely dissolved before bringing it to a boil.
- Fudge is too soft: This could be due to undercooking. Next time, try boiling the mixture for a slightly longer time, or use a candy thermometer to ensure it reaches the correct temperature.
- Fudge is too hard: This could be due to overcooking. Next time, try boiling the mixture for a slightly shorter time.
- Fudge is not setting: Make sure you are using the correct ingredients and following the instructions carefully. Also, ensure that you are refrigerating the fudge for a sufficient amount of time.
Conclusion:
This Orange Creamsicle Fudge isn’t just another dessert; it’s a burst of sunshine in every bite, a nostalgic trip back to childhood summers, and a guaranteed crowd-pleaser. The creamy, melt-in-your-mouth texture combined with the vibrant citrus notes and subtle vanilla undertones creates a symphony of flavors that will leave you craving more. Seriously, I’ve made this fudge for countless gatherings, and it’s always the first thing to disappear!
Why is this a must-try? Because it’s incredibly easy to make, requiring minimal ingredients and effort. You don’t need to be a seasoned baker to whip up a batch of this deliciousness. Plus, the bright orange color makes it visually appealing, perfect for gifting or adding a touch of cheer to any dessert table. It’s a simple recipe that delivers maximum impact, both in terms of flavor and presentation.
But the best part? It’s incredibly versatile! While I personally adore it just as it is, there are so many ways to customize this Orange Creamsicle Fudge to suit your preferences.
Serving Suggestions and Variations:
* For a richer flavor: Use high-quality white chocolate. The better the chocolate, the better the fudge!
* Add some zest: Incorporate a teaspoon of orange zest into the fudge mixture for an extra burst of citrus.
* Get nutty: Sprinkle chopped pecans or walnuts on top before the fudge sets for a delightful crunch.
* Make it festive: Add a swirl of red and green food coloring for a Christmas-themed treat.
* Go boozy: A tablespoon of orange liqueur or Grand Marnier will add a sophisticated twist.
* Creamsicle Parfaits: Crumble the fudge and layer it with vanilla ice cream and whipped cream for a decadent parfait.
* Fudge Brownies: Chop the fudge into small pieces and fold it into your favorite brownie batter before baking.
* Gift Giving: Package the fudge in decorative tins or boxes for a thoughtful homemade gift.
I encourage you to give this recipe a try. It’s a fantastic way to impress your friends and family, satisfy your sweet tooth, and create lasting memories. Don’t be intimidated by the idea of making fudge; this recipe is foolproof, and I’m confident you’ll be amazed at how easy it is to achieve such delicious results.
Once you’ve made your own batch of this delightful Orange Creamsicle Fudge, I’d love to hear about your experience! Did you try any of the variations? What did your friends and family think? Share your photos and stories in the comments below. Let’s spread the joy of this amazing recipe and inspire others to get creative in the kitchen. Happy fudging! I can’t wait to see what you create! Remember to store your fudge in an airtight container in the refrigerator for optimal freshness. Enjoy!
Orange Creamsicle Fudge: A Deliciously Easy Recipe
Creamy Orange Creamsicle Fudge with vibrant orange and smooth vanilla layers. Perfect for a sweet treat or gift.
Ingredients
- 3 cups granulated sugar
- ¾ cup (1 ½ sticks) unsalted butter, cut into cubes
- ? cup evaporated milk
- 1 (12 ounce) package white chocolate chips
- 1 teaspoon orange extract
- ½ teaspoon vanilla extract
- Orange food coloring (gel is recommended)
- Zest of 1 large orange
- 3 cups granulated sugar
- ¾ cup (1 ½ sticks) unsalted butter, cut into cubes
- ? cup evaporated milk
- 1 (12 ounce) package white chocolate chips
- 1 teaspoon vanilla extract
Instructions
- In a large, heavy-bottomed saucepan, combine the granulated sugar, butter, and evaporated milk.
- Place the saucepan over medium heat and stir constantly until the sugar is completely dissolved and the butter is melted.
- Once the mixture is smooth and the sugar is dissolved, bring it to a rolling boil, stirring constantly.
- Continue to boil for exactly 5 minutes, stirring constantly. Use a timer to ensure accuracy.
- Remove the saucepan from the heat immediately after the 5 minutes.
- Add the white chocolate chips, orange extract, and vanilla extract to the hot mixture. Stir vigorously until the chocolate chips are completely melted and the mixture is smooth and creamy.
- Stir in the orange food coloring, a few drops at a time, until you reach your desired shade of orange.
- Finally, stir in the orange zest.
- In a separate large, heavy-bottomed saucepan, combine the granulated sugar, butter, and evaporated milk.
- Place the saucepan over medium heat and stir constantly until the sugar is completely dissolved and the butter is melted.
- Once the mixture is smooth and the sugar is dissolved, bring it to a rolling boil, stirring constantly.
- Continue to boil for exactly 5 minutes, stirring constantly. Set a timer to ensure you boil for the correct amount of time.
- Remove the saucepan from the heat immediately after the 5 minutes.
- Add the white chocolate chips and vanilla extract to the hot mixture. Stir vigorously until the chocolate chips are completely melted and the mixture is smooth and creamy.
- Prepare an 8×8 inch square baking pan by lining it with parchment paper. Leave an overhang of parchment paper on the sides.
- Pour the orange fudge mixture into the prepared pan and spread it evenly. Use a spatula to ensure a smooth surface.
- Immediately pour the vanilla fudge mixture over the orange layer and spread it evenly. You can swirl the two layers together slightly with a knife or spatula for a marbled effect, but be careful not to overmix.
- Gently tap the pan on the counter a few times to release any air bubbles and help the fudge settle evenly.
- Cover the pan with plastic wrap, pressing it gently onto the surface of the fudge to prevent a skin from forming.
- Refrigerate the fudge for at least 2-3 hours, or preferably overnight, to allow it to set completely.
- Once the fudge is firm, lift it out of the pan using the parchment paper overhang.
- Place the fudge on a cutting board and use a large, sharp knife to cut it into squares. For clean cuts, run the knife under hot water and wipe it dry between each cut.
- Store the Orange Creamsicle Fudge in an airtight container in the refrigerator for up to 2 weeks. You can also freeze it for longer storage; just wrap it tightly in plastic wrap and then place it in a freezer bag. Frozen fudge can last for up to 2-3 months.
Notes
- Use a heavy-bottomed saucepan to prevent scorching.
- Stir constantly, especially while boiling.
- A candy thermometer (optional) can be used to ensure the mixture reaches 235-240°F (113-116°C).
- Don’t overcook or undercook.
- Use good quality white chocolate chips.
- Allow the fudge to set completely before cutting.