Description
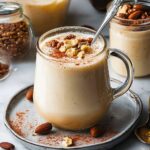
Make creamy, dairy-free nut milk at home with nuts, water, and optional sweeteners/flavorings. Customize to your taste and enjoy!
Ingredients
Scale
- 1 cup raw nuts (almonds, cashews, walnuts, macadamia nuts, or a mix)
- 4 cups filtered water
- Optional: 1-2 pitted dates (for sweetness)
- Optional: 1/2 teaspoon vanilla extract (for flavor)
- Optional: Pinch of sea salt (enhances flavor)
Instructions
- Rinse the Nuts: Place the raw nuts in a bowl and rinse them thoroughly under cold water.
- Soak in Water: Cover the nuts with plenty of filtered water (at least twice the volume of the nuts).
- Soaking Time: Let the nuts soak for at least 4 hours, or preferably overnight (8-12 hours). You can soak them in the refrigerator to prevent fermentation, especially in warmer climates.
- Drain and Rinse Again: After soaking, drain the nuts and rinse them thoroughly under cold water.
- Combine Ingredients: Place the soaked and rinsed nuts (or unsoaked nuts if you skipped the soaking step) into your blender. Add the 4 cups of filtered water.
- Add Sweetener and Flavorings (Optional): If you’re using dates for sweetness, add them to the blender now. If you’re using vanilla extract and/or sea salt, add those as well.
- Blend Until Smooth: Blend the mixture on high speed until it’s completely smooth and creamy. This usually takes about 1-2 minutes in a high-speed blender, and potentially longer in a regular blender.
- Check the Consistency: If the milk seems too thick, you can add a little more water and blend again. If it’s too thin, you can add a few more nuts and blend again.
- Prepare Your Straining Setup: Place your nut milk bag (or cheesecloth-lined sieve) over a large bowl or pitcher.
- Pour the Milk: Carefully pour the blended nut milk into the nut milk bag or sieve.
- Strain the Milk: Gently squeeze the nut milk bag (or press down on the pulp in the sieve) to extract as much liquid as possible.
- Collect the Pulp: Set the nut pulp aside for later use (see notes).
- Taste and Adjust: Pour a small amount of the strained nut milk into a glass and taste it.
- Add Sweetener (if needed): If the milk isn’t sweet enough, add a little more date syrup, maple syrup, honey, or your preferred sweetener. Stir well and taste again.
- Add Flavorings (if desired): If you want to add more vanilla extract, cinnamon, or other flavorings, add them now. Stir well and taste again.
- Adjust Consistency (if needed): If the milk is too thick, add a little more water and stir well. If it’s too thin, you can try adding a small amount of nut butter (like almond butter or cashew butter) and blending again.
- Pour into a Container: Pour the strained and flavored nut milk into an airtight container, such as a glass jar or a sealed pitcher.
- Refrigerate: Store the nut milk in the refrigerator for up to 3-5 days.
- Shake Before Serving: Before serving, shake the nut milk well, as it may separate slightly during storage.
Notes
- Soaking: Soaking the nuts is highly recommended for a creamier milk and to reduce phytic acid.
- Blending: A high-speed blender works best, but a regular blender will work too.
- Straining: Use a nut milk bag, cheesecloth, or fine-mesh sieve.
- Nut Pulp: Don’t discard the nut pulp! Use it in smoothies, make nut pulp flour, add it to oatmeal or yogurt, make energy bites, add it to veggie burgers, or compost it.
- Flavor Variations: Get creative with flavorings like cinnamon, nutmeg, cocoa powder, or maple syrup.
- Troubleshooting: If your nut milk is grainy, blend it longer and strain it thoroughly.
- Prep Time: 5 minutes
- Cook Time: 2 minutes