No-churn coffee ice cream is a delightful treat that brings the rich, robust flavors of coffee into a creamy, indulgent dessert. As someone who has always had a passion for coffee, I find that this recipe perfectly captures the essence of my favorite morning beverage, transforming it into a frozen delight that can be enjoyed any time of day. The beauty of no-churn coffee ice cream lies not only in its simplicity but also in its ability to evoke memories of cozy coffee shop visits and warm summer evenings spent with friends.
This dessert has gained popularity for its incredible taste and texture, offering a smooth, velvety experience that coffee lovers simply can’t resist. The convenience of making no-churn coffee ice cream at home means you can whip up a batch without the need for an ice cream maker, making it accessible for everyone. Whether you’re hosting a gathering or simply treating yourself, this recipe is sure to impress. Join me as we dive into the world of no-churn coffee ice cream and discover how easy it is to create this deliciously satisfying dessert!

Ingredients:
- 2 cups heavy cream
- 1 cup sweetened condensed milk
- 1 cup brewed coffee, cooled
- 1 teaspoon vanilla extract
- 1/4 cup coffee granules (optional, for added texture)
- Pinch of salt
Preparing the Base
1. **Start by brewing your coffee.** I like to use a strong brew for this recipe, so I usually go for a dark roast. Brew about 1 cup of coffee and let it cool to room temperature. This step is crucial because hot coffee can affect the texture of the ice cream. 2. **In a large mixing bowl, combine the sweetened condensed milk and cooled coffee.** Whisk them together until they are well blended. The sweetened condensed milk adds a rich creaminess that balances the coffee’s bitterness. 3. **Add the vanilla extract and a pinch of salt.** The salt enhances the flavors, making the ice cream taste even better. Mix everything until its smooth and uniform.Whipping the Cream
4. **In a separate bowl, pour in the heavy cream.** Using an electric mixer, whip the cream on medium-high speed until stiff peaks form. This usually takes about 3-5 minutes. Be careful not to over-whip, as it can turn into butter! 5. **Gently fold the whipped cream into the coffee mixture.** Use a spatula to incorporate the whipped cream in batches. Start with about a third of the whipped cream, folding it in gently to lighten the coffee mixture. Then, gradually add the rest of the whipped cream, being careful not to deflate it. The goal is to keep the mixture airy and light. 6. **If youre using coffee granules, now is the time to add them.** Gently fold them into the mixture for a delightful texture and an extra coffee kick.Freezing the Ice Cream
7. **Transfer the mixture into a freezer-safe container.** I like to use a loaf pan or a large airtight container. Make sure to spread it evenly and smooth the top with a spatula. 8. **Cover the container with a lid or plastic wrap.** This helps prevent ice crystals from forming on the surface of the ice cream. 9. **Place the container in the freezer.** Let it freeze for at least 6 hours, but overnight is best. This allows the flavors to meld beautifully and the ice cream to firm up to the perfect scoopable consistency.Serving the Ice Cream
10. **Once the ice cream is fully frozen, its time to serve!** Take it out of the freezer and let it sit at room temperature for about 5-10 minutes. This will make scooping easier. 11. **Use a warm ice cream scoop or a spoon to serve.** I find that dipping the scoop in warm water helps it glide through the ice cream effortlessly. 12. **Scoop the ice cream into bowls or cones.** You can also get creative with toppings! I love adding chocolate shavings, a drizzle of caramel sauce, or even a sprinkle of cocoa powder for an extra touch.Storing Leftovers
13. **If you have any leftovers (which is rare!), store the ice cream in an airtight container.** Make sure to press a piece of parchment paper directly onto the surface of the ice cream before sealing it. This helps prevent ice crystals from forming. 14. **Return the container to the freezer.** The ice cream will keep well for about 2-3 weeks, but I doubt it will last that long!Tips and Variations
15. **Experiment with flavors!** You can add different extracts like almond or hazelnut for a unique twist. Swirling in some chocolate or caramel sauce before freezing can create a delicious ripple effect. 16. **For a mocha version, add 1/4 cup of cocoa powder to the coffee mixture.** This gives a rich chocolate flavor that pairs beautifully with coffee. 17. **If you want a more intense coffee flavor, try using espresso instead of brewed coffee.** Just make sure to cool it down before mixing it in. 18. **For a fun texture, consider adding crushed cookies or nuts.** Fold them in just before transferring the mixture to the freezer. 19. **If youre feeling adventurous, try adding a splash of your favorite liqueur, like Kahlua or Baileys, to the mixture.** This not only enhances the flavor but also helps keep the ice cream creamy. 20. **Dont forget to share!**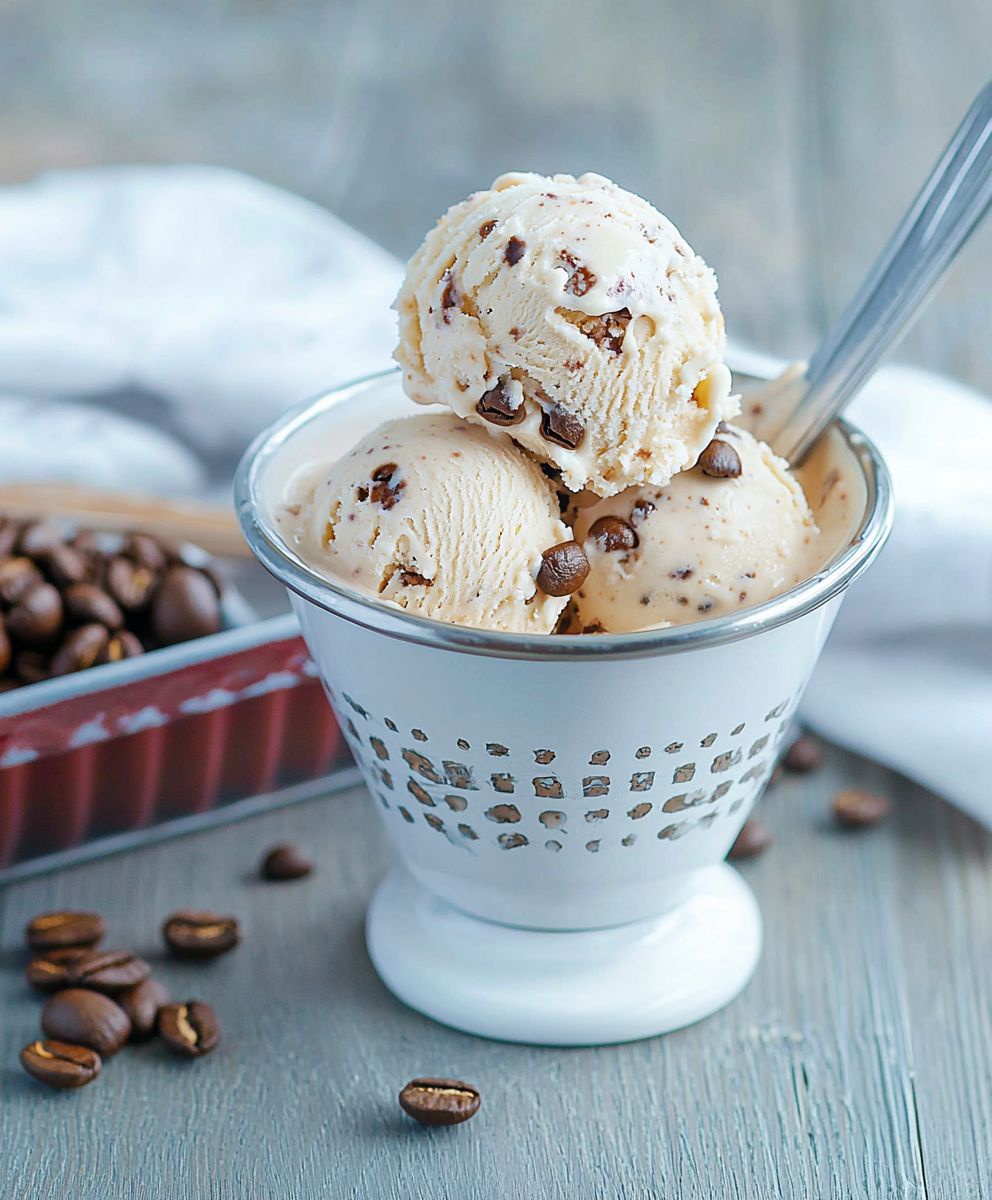
Conclusion:
In summary, this no-churn coffee ice cream recipe is an absolute must-try for anyone who loves the rich, bold flavor of coffee combined with the creamy indulgence of ice cream. The beauty of this recipe lies in its simplicity; you dont need an ice cream maker, and it comes together in just a few easy steps. Plus, the result is a luscious, velvety treat that will impress your friends and family, making it perfect for gatherings or a cozy night in. For serving suggestions, consider pairing this delightful coffee ice cream with a drizzle of chocolate sauce or a sprinkle of crushed espresso beans for an extra touch of elegance. You can also experiment with variations by adding in your favorite mix-ins, such as chocolate chips, caramel swirls, or even a hint of vanilla for a unique twist. If youre feeling adventurous, try blending in some crushed cookies or nuts to add texture and flavor. I wholeheartedly encourage you to give this no-churn coffee ice cream a try. Its a fantastic way to satisfy your sweet tooth while enjoying the rich taste of coffee. Once youve made it, Id love to hear about your experience! Share your thoughts, any variations you tried, or even a photo of your creation. Lets celebrate the joy of homemade treats together! Print
No-Churn Coffee Ice Cream: The Easy Recipe You Need to Try
- Total Time: 375 minutes
- Yield: 6 servings 1x
Description
Enjoy a rich and creamy homemade coffee ice cream made with brewed coffee and sweetened condensed milk. This no-churn recipe is simple to prepare and perfect for coffee enthusiasts, allowing for customization with your favorite mix-ins.
Ingredients
- 2 cups heavy cream
- 1 cup sweetened condensed milk
- 1 cup brewed coffee, cooled
- 1 teaspoon vanilla extract
- 1/4 cup coffee granules (optional, for added texture)
- Pinch of salt
Instructions
- Start by brewing your coffee. Use a strong dark roast for the best flavor. Brew about 1 cup and let it cool to room temperature.
- In a large mixing bowl, combine the sweetened condensed milk and cooled coffee. Whisk until well blended.
- Stir in the vanilla extract and a pinch of salt until smooth.
- In a separate bowl, pour in the heavy cream. Using an electric mixer, whip on medium-high speed until stiff peaks form (about 3-5 minutes). Be careful not to over-whip.
- Gently fold the whipped cream into the coffee mixture in batches, starting with a third to lighten the mixture, then gradually adding the rest.
- If using, fold in the coffee granules for added texture.
- Pour the mixture into a freezer-safe container, smoothing the top with a spatula.
- Seal the container with a lid or plastic wrap to prevent ice crystals.
- Place in the freezer for at least 6 hours, preferably overnight.
- Once frozen, let the ice cream sit at room temperature for 5-10 minutes for easier scooping.
- Use a warm ice cream scoop or spoon to serve. Dipping the scoop in warm water can help.
- Serve in bowls or cones and add your favorite toppings like chocolate shavings, caramel sauce, or cocoa powder.
- If you have any leftovers, store in an airtight container. Press parchment paper onto the surface before sealing to prevent ice crystals.
- The ice cream will keep well for about 2-3 weeks.
Notes
- Experiment with flavors by adding different extracts or swirls of chocolate or caramel.
- For a mocha version, add 1/4 cup of cocoa powder to the coffee mixture.
- Use espresso for a more intense coffee flavor.
- Consider adding crushed cookies or nuts for texture.
- A splash of liqueur like Kahlua or Baileys can enhance flavor and creaminess.
- Prep Time: 15 minutes
- Cook Time: 0 minutes