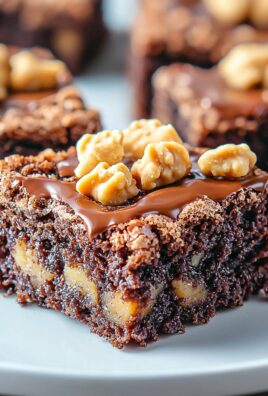
Magical Jello Cookies, are you ready to unlock a little bit of baking magic? These aren’t your average cookies; they’re a delightful explosion of color and flavor that will bring a smile to everyone’s face. Imagine biting into a soft, chewy cookie with a subtle fruity tang that’s the enchanting experience that awaits you!
While the exact origins of these vibrant treats are shrouded in a bit of mystery, the concept of incorporating gelatin into baking has been around for decades. It’s a clever way to add moisture and a unique texture to baked goods. These cookies gained popularity as a fun and easy way to get kids involved in the kitchen, and their festive appearance makes them perfect for holidays and celebrations.
What makes Magical Jello Cookies so irresistible? It’s the perfect combination of simplicity and deliciousness. They’re incredibly easy to make, requiring just a handful of ingredients that you probably already have in your pantry. The soft, almost melt-in-your-mouth texture is a crowd-pleaser, and the vibrant colors are guaranteed to brighten up any dessert table. Plus, the subtle fruity flavor from the Jello adds a unique twist that sets them apart from ordinary cookies. Get ready to experience a little bit of baking bliss!
Ingredients:
- 1 cup (2 sticks) unsalted butter, softened
- 1 ½ cups granulated sugar
- 2 large eggs
- 1 teaspoon vanilla extract
- 3 cups all-purpose flour
- 1 (3 ounce) package Jell-O gelatin, any flavor (I love using strawberry or lime!)
- ½ teaspoon baking soda
- ¼ teaspoon salt
- Optional: Sprinkles or sanding sugar for decoration
Preparing the Dough: The Foundation of Our Magical Cookies
Alright, let’s get started! The key to amazing Jello cookies is a well-prepared dough. Don’t rush this part; it’s where the magic begins!
- Cream the Butter and Sugar: In a large bowl (or the bowl of your stand mixer), cream together the softened butter and granulated sugar until light and fluffy. This usually takes about 3-5 minutes. You want the mixture to be pale and airy. This step is crucial for incorporating air into the dough, which will result in a tender cookie. If you’re using a hand mixer, make sure to take breaks to avoid overheating it.
- Incorporate the Eggs and Vanilla: Beat in the eggs one at a time, making sure each egg is fully incorporated before adding the next. Then, stir in the vanilla extract. The vanilla enhances the flavor of the Jello and adds a warm, comforting note to the cookies.
- Combine Dry Ingredients: In a separate medium bowl, whisk together the all-purpose flour, Jell-O gelatin, baking soda, and salt. Whisking ensures that the baking soda and salt are evenly distributed throughout the flour, which is important for proper leavening and flavor.
- Gradually Add Dry Ingredients to Wet Ingredients: Gradually add the dry ingredients to the wet ingredients, mixing on low speed until just combined. Be careful not to overmix! Overmixing develops the gluten in the flour, which can result in tough cookies. Mix until the flour is just incorporated, and then stop. A few streaks of flour are okay at this point.
- Form the Dough into a Disc: Gently form the dough into a disc, wrap it tightly in plastic wrap, and refrigerate for at least 2 hours, or preferably overnight. This chilling time is essential! It allows the gluten to relax, which prevents the cookies from spreading too much during baking. It also allows the flavors to meld together, resulting in a more flavorful cookie. The longer the dough chills, the better the cookies will be.
Baking the Cookies: Unleashing the Jello Magic
Now for the fun part baking! This is where the Jello really shines and gives the cookies their unique flavor and color.
- Preheat the Oven and Prepare Baking Sheets: Preheat your oven to 375°F (190°C). Line baking sheets with parchment paper or silicone baking mats. Parchment paper prevents the cookies from sticking and makes cleanup a breeze. Silicone mats provide even heat distribution, which helps the cookies bake evenly.
- Roll and Cut Out the Cookies: On a lightly floured surface, roll out the chilled dough to about ¼ inch thickness. Use cookie cutters to cut out desired shapes. Get creative with your shapes! Stars, hearts, and circles are always a hit. If the dough becomes too soft while rolling, return it to the refrigerator for a few minutes to firm up.
- Place Cookies on Baking Sheets: Place the cut-out cookies onto the prepared baking sheets, leaving about 2 inches between each cookie. This allows for proper air circulation and prevents the cookies from baking together.
- Decorate (Optional): If desired, sprinkle the cookies with sprinkles or sanding sugar before baking. This adds a festive touch and extra sweetness. You can also brush the cookies with a little milk or egg wash before adding the sprinkles to help them adhere better.
- Bake the Cookies: Bake for 8-10 minutes, or until the edges are lightly golden brown. Keep a close eye on the cookies, as they can burn easily. The baking time will vary depending on the size and thickness of the cookies.
- Cool the Cookies: Remove the baking sheets from the oven and let the cookies cool on the baking sheets for a few minutes before transferring them to a wire rack to cool completely. This prevents the cookies from breaking while they are still soft.
Tips and Tricks for Perfect Jello Cookies
Here are a few extra tips to ensure your Jello cookies are a smashing success:
- Don’t Overbake: Overbaked cookies will be dry and crumbly. Bake them just until the edges are lightly golden brown.
- Use Quality Ingredients: The quality of your ingredients will affect the taste and texture of the cookies. Use good quality butter, vanilla extract, and Jell-O gelatin.
- Experiment with Flavors: Try different flavors of Jell-O gelatin to create unique and delicious cookies. Lime, orange, and cherry are all great options.
- Add Extracts: Enhance the flavor of your cookies by adding a few drops of extract that complements the Jell-O flavor. For example, almond extract pairs well with cherry Jell-O, and lemon extract pairs well with lime Jell-O.
- Store Properly: Store the cooled cookies in an airtight container at room temperature for up to 3 days.
- Freezing the Dough: You can freeze the cookie dough for up to 2 months. Wrap the dough tightly in plastic wrap and then place it in a freezer bag. Thaw the dough in the refrigerator overnight before rolling and baking.
- Freezing Baked Cookies: Baked cookies can also be frozen. Let them cool completely, then place them in a freezer bag or airtight container. They can be frozen for up to 2 months. Thaw them at room temperature before serving.
- Adjusting Sweetness: If you prefer a less sweet cookie, you can reduce the amount of sugar slightly. However, keep in mind that the sugar also contributes to the texture of the cookie, so don’t reduce it too much.
- Adding Citrus Zest: For an extra burst of flavor, add a teaspoon of citrus zest to the dough. Lemon zest pairs well with lemon or lime Jell-O, and orange zest pairs well with orange Jell-O.
- Troubleshooting: Cookies Spreading Too Much: If your cookies are spreading too much during baking, it could be due to a few factors. Make sure your oven is at the correct temperature. Also, ensure that your butter is not too soft. If the butter is too soft, the cookies will spread more. Finally, make sure you are not overmixing the dough.
- Troubleshooting: Cookies Too Dry: If your cookies are too dry, it could be because they were overbaked. Reduce the baking time slightly. Also, make sure you are using enough butter in the dough.
- Making Gluten-Free Jello Cookies: To make gluten-free Jello cookies, substitute the all-purpose flour with a gluten-free all-purpose flour blend. Make sure the blend contains xanthan gum, which helps to bind the ingredients together.
Variations: Let Your Creativity Shine!
Don’t be afraid to experiment and put your own spin on these magical Jello cookies! Here are a few ideas to get you started:
- Chocolate Jello Cookies: Add 1/4 cup of unsweetened cocoa powder to the dry ingredients for a chocolatey twist.
- Peanut Butter Jello Cookies: Add 1/2 cup of peanut butter to the wet ingredients for a nutty flavor.
- Sprinkle Explosion Cookies: Roll the edges of the cut-out cookies in sprinkles before baking for a super festive look.
- Sandwich Cookies: Spread frosting or jam between two cookies to create a delicious sandwich cookie.
- Holiday-Themed Cookies: Use holiday-themed cookie cutters and Jell-O flavors to create festive cookies for Christmas, Halloween, or Easter.
I hope you enjoy making these magical Jello cookies as much as I do! They’re perfect for parties, holidays, or just a fun afternoon of baking. Happy baking!

Conclusion:
And there you have it! These Magical Jello Cookies are truly a must-try for anyone looking to add a burst of fun and flavor to their baking repertoire. They’re incredibly easy to make, surprisingly versatile, and guaranteed to bring a smile to everyone who tries them. The vibrant colors and delightful chewiness make them a perfect treat for kids’ parties, holiday gatherings, or simply a cheerful afternoon snack.
But what truly sets these cookies apart is their adaptability. Feel free to experiment with different Jello flavors to create a rainbow of colors and tastes. Imagine a batch of lime-flavored cookies for St. Patrick’s Day, or perhaps some strawberry-flavored ones for Valentine’s Day. The possibilities are endless!
Beyond the Jello itself, you can also play around with the mix-ins. Chopped nuts, chocolate chips, sprinkles, or even dried fruit can add extra texture and flavor complexity. For a richer cookie, try using brown butter instead of regular melted butter. The nutty aroma will complement the sweetness of the Jello beautifully.
Serving Suggestions and Variations:
* Ice Cream Sandwiches: Use two cookies to sandwich a scoop of your favorite ice cream. The chewy texture of the cookies pairs perfectly with the creamy ice cream.
* Cookie Crumble Topping: Crumble the cookies and use them as a topping for yogurt, ice cream, or even a fruit crisp.
* Gift Giving: Package the cookies in a cute box or tin for a thoughtful and homemade gift.
* Holiday Themes: Use holiday-themed sprinkles and Jello flavors to create festive cookies for Christmas, Halloween, or Easter.
* Gluten-Free Option: Substitute the all-purpose flour with a gluten-free blend for a gluten-free version of these delightful cookies. Just be sure to use a 1:1 replacement blend that contains xanthan gum.
* Vegan Option: While traditional Jello contains gelatin, you can find vegan gelatin alternatives. Use a vegan butter substitute and a vegan gelatin to make these cookies completely plant-based.
I’m absolutely confident that you’ll love making and eating these Magical Jello Cookies. They’re a simple yet satisfying treat that’s perfect for any occasion. The recipe is straightforward, the ingredients are readily available, and the results are simply magical.
So, what are you waiting for? Gather your ingredients, preheat your oven, and get ready to bake up a batch of these delightful cookies. I promise you won’t be disappointed.
And once you’ve tried them, I’d love to hear about your experience! Share your photos, variations, and feedback in the comments below. Did you try a unique Jello flavor? Did you add any special mix-ins? I’m always eager to learn new ways to make these cookies even more magical. Happy baking, and enjoy your Magical Jello Cookies! I can’t wait to see what you create! Let me know if you have any questions, and I’ll do my best to help. Remember, baking should be fun, so don’t be afraid to experiment and make these cookies your own. The most important ingredient is love, so bake with passion and enjoy the process!
Magical Jello Cookies: A Recipe for Colorful, Delicious Fun
Soft and chewy Jello cookies bursting with flavor and color! These fun and festive treats are perfect for any occasion.
Ingredients
- 1 cup (2 sticks) unsalted butter, softened
- 1 ½ cups granulated sugar
- 2 large eggs
- 1 teaspoon vanilla extract
- 3 cups all-purpose flour
- 1 (3 ounce) package Jell-O gelatin, any flavor
- ½ teaspoon baking soda
- ¼ teaspoon salt
- Optional: Sprinkles or sanding sugar for decoration
Instructions
- Cream the Butter and Sugar: In a large bowl, cream together the softened butter and granulated sugar until light and fluffy (3-5 minutes).
- Incorporate the Eggs and Vanilla: Beat in the eggs one at a time, then stir in the vanilla extract.
- Combine Dry Ingredients: In a separate bowl, whisk together the flour, Jell-O gelatin, baking soda, and salt.
- Gradually Add Dry Ingredients to Wet Ingredients: Gradually add the dry ingredients to the wet ingredients, mixing on low speed until just combined. Do not overmix.
- Form the Dough into a Disc: Gently form the dough into a disc, wrap it tightly in plastic wrap, and refrigerate for at least 2 hours, or preferably overnight.
- Preheat the Oven and Prepare Baking Sheets: Preheat your oven to 375°F (190°C). Line baking sheets with parchment paper or silicone baking mats.
- Roll and Cut Out the Cookies: On a lightly floured surface, roll out the chilled dough to about ¼ inch thickness. Use cookie cutters to cut out desired shapes.
- Place Cookies on Baking Sheets: Place the cut-out cookies onto the prepared baking sheets, leaving about 2 inches between each cookie.
- Decorate (Optional): If desired, sprinkle the cookies with sprinkles or sanding sugar before baking.
- Bake the Cookies: Bake for 8-10 minutes, or until the edges are lightly golden brown.
- Cool the Cookies: Remove the baking sheets from the oven and let the cookies cool on the baking sheets for a few minutes before transferring them to a wire rack to cool completely.
Notes
- Chilling the dough is essential to prevent spreading.
- Don’t overbake the cookies.
- Experiment with different Jell-O flavors and extracts.
- Store cooled cookies in an airtight container at room temperature for up to 3 days.
- Dough can be frozen for up to 2 months.
- Baked cookies can be frozen for up to 2 months.
- For gluten-free cookies, substitute all-purpose flour with a gluten-free all-purpose flour blend.


