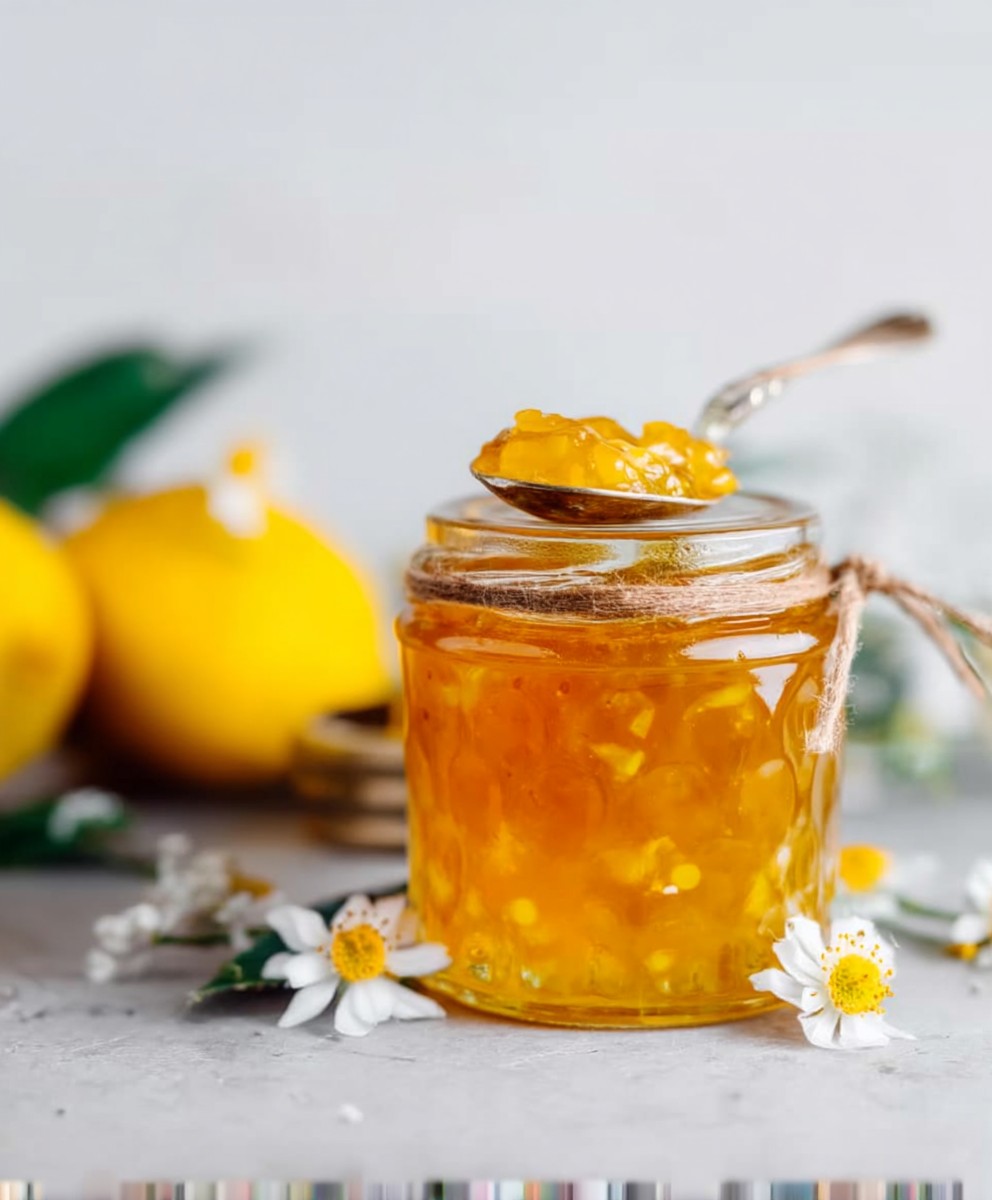
Lemon Jam, a vibrant burst of sunshine in a jar, is more than just a spread; it’s a culinary experience. Imagine waking up to the zesty aroma of freshly made lemon jam, its golden hue promising a delightful start to your day. Have you ever wondered how something so simple could deliver such an intense flavor?
The history of fruit preserves stretches back centuries, with citrus fruits like lemons playing a starring role in adding brightness and preserving techniques. While the exact origins of lemon jam are debated, its popularity soared as a way to capture the fleeting essence of the citrus season, allowing people to enjoy the taste of summer throughout the year.
What makes lemon jam so irresistible? It’s the perfect balance of sweet and tart, a dance of flavors that awakens the palate. The smooth, slightly tangy texture is a delight on toast, scones, or even as a glaze for cakes and pastries. Beyond its incredible taste, lemon jam is surprisingly easy to make at home, requiring just a few simple ingredients and a little patience. It’s a rewarding project that fills your kitchen with a wonderful fragrance and yields a delicious treat you can share with friends and family. So, are you ready to embark on a journey to create your own jar of sunshine?

Ingredients:
- 1.5 kg (approximately 6-8) unwaxed lemons
- 3 kg granulated sugar
- 3 liters of water (filtered is best!)
- Optional: 1 tbsp lemon juice (for extra tang)
- Optional: 1 packet of pectin (if your lemons are low in pectin)
Preparing the Lemons: The Key to Success
Okay, let’s get started! The most important part of making amazing lemon jam is prepping the lemons properly. This takes a little time, but trust me, it’s worth it. We want to remove as much bitterness as possible, and that starts with the peel and pith.
- Wash and Scrub: First, give those lemons a really good wash. Since we’re using the entire fruit (peel and all!), you want to make sure they’re squeaky clean. Use a vegetable brush to scrub off any dirt or residue. Pay special attention to the ends.
- Thinly Slice the Lemons: Now, using a sharp knife, carefully slice the lemons as thinly as you possibly can. Aim for slices that are about 1-2mm thick. The thinner the slices, the quicker they’ll soften during cooking, and the less bitter the final jam will be. Remove any seeds as you go. This is important! Nobody wants to bite into a lemon seed in their jam.
- Remove the Pith (Optional but Recommended): This step is optional, but I highly recommend it, especially if you’re sensitive to bitterness. After slicing, you can remove the pith (the white part between the peel and the flesh) from each slice. This is the most bitter part of the lemon. You can do this by using a small paring knife to carefully scrape it away. It’s a bit tedious, but it makes a huge difference in the final flavor. If you’re short on time, you can skip this, but be prepared for a slightly more bitter jam.
- Soak the Sliced Lemons: Place the sliced lemons in a large, non-reactive bowl (glass or stainless steel is best). Add the 3 liters of water. Make sure all the lemon slices are submerged. If they aren’t, you can weigh them down with a plate. Cover the bowl and let it sit at room temperature for at least 24 hours, or even better, 48 hours. This soaking process helps to draw out the bitterness from the peel. Change the water at least once during the soaking period (after 12-24 hours). This further reduces the bitterness.
Cooking the Jam: Patience is a Virtue
Alright, the lemons have had their spa day! Now it’s time to transform them into delicious jam. This part requires a bit of patience, but the aroma that fills your kitchen will be totally worth it.
- Drain and Rinse: After the soaking period, drain the lemons in a colander and rinse them thoroughly under cold running water. This removes any remaining bitter water.
- Combine Lemons and Sugar: In a large, heavy-bottomed pot (stainless steel or enamel-coated cast iron is ideal), combine the drained lemon slices and the 3 kg of granulated sugar. Stir well to ensure the sugar is evenly distributed.
- Macerate (Optional but Recommended): Cover the pot and let the lemon and sugar mixture sit at room temperature for at least 2 hours, or even overnight. This process, called maceration, allows the sugar to draw out the juices from the lemons, creating a more flavorful and concentrated jam. You’ll notice the mixture becomes quite liquidy as the sugar dissolves.
- Bring to a Boil: Place the pot over medium-high heat and bring the mixture to a rolling boil. A rolling boil is a boil that continues even when you stir it. Stir frequently to prevent the sugar from sticking to the bottom of the pot and burning.
- Cook Until Setting Point is Reached: Once the mixture is boiling, reduce the heat slightly to maintain a steady, rolling boil. Continue to cook, stirring occasionally, until the jam reaches its setting point. This can take anywhere from 30 minutes to an hour or more, depending on the lemons and your stove.
- Testing for Setting Point: There are a few ways to test for setting point:
- The Cold Plate Test: Place a small plate in the freezer before you start cooking the jam. When you think the jam is almost ready, take the plate out of the freezer and drop a small spoonful of jam onto it. Return the plate to the freezer for 1-2 minutes. Then, push the jam with your finger. If it wrinkles and forms a skin, it’s ready. If it’s still runny, continue cooking.
- The Thermometer Test: Use a candy thermometer to monitor the temperature of the jam. Lemon jam typically sets at around 220°F (104°C).
- The Spoon Test: Dip a cold metal spoon into the jam and lift it out. If the jam drips off the spoon in thick sheets or flakes, rather than thin, watery drips, it’s likely ready.
- Add Lemon Juice and Pectin (Optional): If you want a tangier jam, stir in the tablespoon of lemon juice a few minutes before the end of the cooking time. If your lemons are low in pectin (some varieties are), you can add a packet of pectin according to the package directions. This will help the jam set properly.
- Skim Off Any Foam: As the jam cooks, you may notice some foam forming on the surface. Use a spoon to skim off this foam and discard it. This will result in a clearer, more attractive jam.
Jarring and Sealing: The Final Touch
Almost there! Now it’s time to get that beautiful lemon jam into jars so you can enjoy it for months to come. Proper jarring and sealing are crucial for preserving the jam and preventing spoilage.
- Sterilize Jars and Lids: This is a MUST! You can sterilize your jars and lids in a few different ways:
- Boiling Water Bath: Place the jars and lids in a large pot of boiling water for 10 minutes. Remove them carefully with tongs and place them on a clean towel to dry.
- Oven: Preheat your oven to 250°F (120°C). Place the jars on a baking sheet and heat them for 20 minutes. Boil the lids in a separate saucepan for 10 minutes.
- Dishwasher: Run the jars and lids through a hot cycle in your dishwasher.
- Fill the Jars: Ladle the hot jam into the sterilized jars, leaving about ¼ inch of headspace (the space between the top of the jam and the rim of the jar). Use a clean, damp cloth to wipe the rims of the jars to remove any spills or drips.
- Place Lids and Rings: Place the sterilized lids on the jars and screw on the rings until they are fingertip tight (not too tight, not too loose).
- Process in a Boiling Water Bath (Recommended for Long-Term Storage): Place the filled jars in a boiling water bath canner. Make sure the jars are completely submerged in water, with at least 1 inch of water covering the tops of the jars. Bring the water to a rolling boil and process for 10 minutes for half-pint (8 oz) jars and 15 minutes for pint (16 oz) jars. Adjust processing time for altitude (add 1 minute for every 1,000 feet above sea level).
- Cool and Check Seals: Carefully remove the jars from the boiling water bath and place them on a clean towel to cool completely. As the jars cool, you should hear a “pop” sound, which indicates that the lids have sealed properly. After the jars have cooled completely (about 12-24 hours), check the seals by pressing down on the center of each lid. If the lid doesn’t flex or move, it’s sealed. If the lid flexes, it’s not sealed, and you should either reprocess the jar with a new lid or store the jam in the refrigerator and use it within a few weeks.
- Label and Store: Label the jars with the date and contents. Store the sealed jars in a cool, dark place for up to a year. Once opened, store the jam in the refrigerator.
Enjoy your homemade lemon jam! It’s perfect on toast, scones, muffins, or even as a glaze for chicken or fish.
Conclusion:
And there you have it! This Lemon Jam recipe is more than just a spread; it’s sunshine in a jar, a burst of citrusy joy that will brighten even the gloomiest of mornings. I truly believe this is a must-try recipe for anyone who appreciates homemade goodness and the vibrant flavors of fresh lemons. The bright, tangy, and slightly sweet profile is simply irresistible, and the homemade touch elevates it far beyond anything you can find on a supermarket shelf.
But why is this particular Lemon Jam so special? It’s the perfect balance of sweet and tart, achieved through careful attention to the ratio of lemons to sugar. It’s the vibrant color, a testament to the quality of the lemons and the gentle cooking process. And it’s the satisfyingly smooth texture, free from any bitterness, that makes it an absolute pleasure to spread on toast, scones, or even a simple cracker.
Beyond the classic toast topping, the possibilities for enjoying this Lemon Jam are truly endless! Imagine swirling a spoonful into your morning yogurt for a zesty kick. Or using it as a glaze for grilled chicken or fish, adding a touch of sweetness and acidity that perfectly complements the savory flavors. It’s also fantastic as a filling for cakes, pastries, and even thumbprint cookies. For a truly decadent treat, try layering it with mascarpone cheese and crushed biscotti in a parfait.
If you’re feeling adventurous, consider these variations:
* Lemon & Ginger Jam: Add a knob of grated fresh ginger to the pot while the jam is simmering for a warm and spicy twist.
* Lemon & Lavender Jam: Stir in a teaspoon of dried culinary lavender towards the end of the cooking process for a floral and aromatic jam.
* Lemon & Chili Jam: Add a pinch of red pepper flakes for a subtle heat that balances the sweetness of the lemons.
I’ve poured my heart into perfecting this recipe, and I’m confident that you’ll love it as much as I do. It’s a relatively simple process, but the rewards are immense. The satisfaction of creating something so delicious from scratch is truly unparalleled. Plus, it makes a wonderful homemade gift for friends and family! Imagine the delight on their faces when you present them with a jar of your own homemade sunshine.
So, what are you waiting for? Gather your lemons, grab your sugar, and get ready to embark on a jam-making adventure! I promise you won’t regret it. This Lemon Jam is a recipe that you’ll come back to time and time again.
And most importantly, I’d love to hear about your experience! Once you’ve tried this recipe, please come back and share your thoughts in the comments below. Did you make any variations? What did you serve it with? Any tips or tricks you’d like to share? Your feedback is invaluable, and it helps me to continue creating and sharing recipes that you’ll love. Happy jam-making! I can’t wait to hear all about your delicious creations. Let me know if you have any questions along the way, I’m always happy to help!
Lemon Jam: The Ultimate Guide to Making & Enjoying It
Bright, tangy homemade lemon jam bursting with fresh citrus flavor. This recipe uses the whole lemon for a vibrant, slightly bittersweet taste, perfect on toast, scones, or as a glaze.
Ingredients
- 1.5 kg (approximately 6-8) unwaxed lemons
- 3 kg granulated sugar
- 3 liters of filtered water
- Optional: 1 tbsp lemon juice (for extra tang)
- Optional: 1 packet of pectin (if your lemons are low in pectin)
Instructions
- Wash and Scrub: Thoroughly wash the lemons with a vegetable brush to remove any dirt or residue.
- Thinly Slice: Thinly slice the lemons (1-2mm thick), removing any seeds as you go.
- Remove Pith (Optional): For a less bitter jam, remove the pith (white part) from each slice using a paring knife.
- Soak: Place the sliced lemons in a large bowl with the 3 liters of water. Ensure the lemons are submerged. Cover and let sit at room temperature for 24-48 hours, changing the water at least once.
- Drain and Rinse: Drain the lemons and rinse thoroughly under cold running water.
- Combine: In a large, heavy-bottomed pot, combine the drained lemon slices and the 3 kg of sugar. Stir well.
- Macerate (Optional): Cover the pot and let the mixture sit at room temperature for at least 2 hours, or overnight, to allow the sugar to draw out the lemon juices.
- Boil: Place the pot over medium-high heat and bring to a rolling boil, stirring frequently to prevent burning.
- Cook: Reduce heat slightly to maintain a steady rolling boil. Cook, stirring occasionally, until the jam reaches its setting point (30 minutes to 1 hour or more).
- Test for Setting Point: Use the cold plate test, thermometer test (220°F/104°C), or spoon test to determine if the jam is ready.
- Add Lemon Juice and Pectin (Optional): Stir in the lemon juice for extra tang or pectin if needed, a few minutes before the end of cooking.
- Skim Foam: Skim off any foam that forms on the surface of the jam.
- Sterilize Jars and Lids: Sterilize jars and lids by boiling, baking, or using a dishwasher.
- Fill Jars: Ladle the hot jam into the sterilized jars, leaving ¼ inch of headspace. Wipe the rims clean.
- Place Lids and Rings: Place the sterilized lids on the jars and screw on the rings until fingertip tight.
- Process (Recommended): Process the filled jars in a boiling water bath for 10 minutes (half-pint jars) or 15 minutes (pint jars). Adjust processing time for altitude.
- Cool and Check Seals: Remove the jars and let them cool completely. Check the seals by pressing down on the center of each lid.
- Label and Store: Label the jars with the date and contents. Store in a cool, dark place for up to a year. Refrigerate after opening.
Notes
- Using unwaxed lemons is essential for this recipe.
- Thinly slicing the lemons and soaking them helps to reduce bitterness.
- Removing the pith is optional but highly recommended for a less bitter jam.
- Macerating the lemons and sugar enhances the flavor of the jam.
- Testing for setting point is crucial to ensure the jam sets properly.
- Sterilizing jars and lids is essential for preserving the jam.
- Processing the jars in a boiling water bath is recommended for long-term storage.