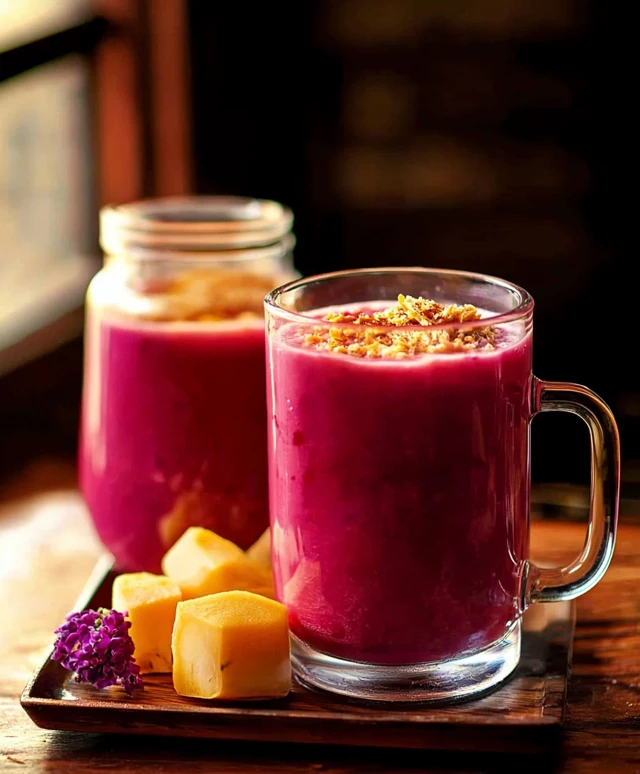
Kanji Probiotic Drink is not just a refreshing beverage; its a delightful fusion of taste and health that has been cherished for generations. Originating from the rich culinary traditions of India, this fermented drink is made from a blend of water, spices, and a variety of vegetables, making it a staple in many households. The tangy flavor and effervescent texture of Kanji Probiotic Drink make it a favorite among those seeking a delicious way to boost their gut health.
What I love most about Kanji Probiotic Drink is its versatility and convenience. Its not only easy to prepare at home, but it also serves as a perfect accompaniment to spicy meals, enhancing the overall dining experience. People adore this drink for its unique taste and the myriad of health benefits it offers, including improved digestion and a strengthened immune system. Join me as we explore the delightful world of Kanji Probiotic Drink and learn how to make this invigorating beverage right in your kitchen!

Ingredients:
- 1 cup of cooked rice (preferably white or brown)
- 4 cups of filtered water
- 1/4 cup of sugar (you can use cane sugar or coconut sugar)
- 1/4 cup of whey (you can use homemade or store-bought)
- 1/2 teaspoon of salt
- 1 tablespoon of ginger (grated, optional for flavor)
- 1/2 cup of fruit (like berries or citrus slices, optional for flavor)
- 1 tablespoon of lemon juice (optional for added tang)
Preparing the Rice Base
To start off, I like to prepare the rice base for my Kanji probiotic drink. This is a crucial step as it sets the foundation for the fermentation process.
- Begin by cooking 1 cup of rice according to the package instructions. If youre using brown rice, it may take a bit longer to cook, so keep that in mind.
- Once the rice is cooked, allow it to cool down to room temperature. This is important because adding hot rice to the water can kill the beneficial bacteria we want to cultivate.
Creating the Fermentation Mixture
Now that the rice is ready, its time to create the fermentation mixture. This is where the magic happens!
- In a large mixing bowl, combine the cooled rice with 4 cups of filtered water. Stir gently to break up any clumps of rice.
- Add 1/4 cup of sugar to the mixture. This sugar will feed the beneficial bacteria during fermentation, so dont skip this step!
- Next, add 1/4 cup of whey. If you dont have whey, you can use a probiotic capsule or a tablespoon of yogurt as a substitute. Just make sure its a live culture.
- Sprinkle in 1/2 teaspoon of salt. This will help balance the flavors and also aid in the fermentation process.
- If youre using ginger for flavor, add the grated ginger at this point. It adds a lovely zing to the drink!
- Mix everything together until the sugar is dissolved and the ingredients are well combined.
Fermentation Process
Now comes the waiting game! Fermentation is a crucial step in developing the probiotic qualities of your Kanji drink.
- Transfer the mixture into a clean glass jar or a fermentation vessel. Make sure to leave some space at the top, as the mixture may expand during fermentation.
- Cover the jar with a clean cloth or a coffee filter, securing it with a rubber band. This allows air to flow in while keeping out dust and insects.
- Place the jar in a warm, dark place, ideally around 70-75°F (21-24°C). I usually put mine in a cupboard or on the kitchen counter away from direct sunlight.
- Let the mixture ferment for 2 to 5 days. The exact time will depend on the temperature and your taste preference. I recommend tasting it after 2 days to see if it has reached your desired level of tanginess.
Flavoring the Kanji Drink
Once the fermentation process is complete, its time to add some flavor to your Kanji drink!
- If you want to add fruit for flavor, now is the time! You can add 1/2 cup of your favorite fruits like berries, citrus slices, or even diced apples. This will not only enhance the flavor but also add some natural sweetness.
- If you like a bit of extra tang, add 1 tablespoon of lemon juice. This will brighten up the flavors and give it a refreshing kick.
- Stir the mixture gently to incorporate the fruits and lemon juice.
Straining and Storing the Kanji Drink
Now that your Kanji drink is flavored and ready, its time to strain and store it.
- Using a fine mesh strainer or cheesecloth, strain the mixture into another clean jar or pitcher. This will separate the liquid from the rice and any fruit pieces.
- Press down
Conclusion:
In summary, the Kanji Probiotic Drink is a must-try for anyone looking to boost their gut health while enjoying a delicious and refreshing beverage. This unique drink not only offers a delightful balance of flavors but also packs a powerful punch of probiotics that can enhance your overall well-being. Whether youre sipping it on a hot summer day or using it as a base for smoothies, the versatility of this drink makes it a fantastic addition to your daily routine. For serving suggestions, consider pairing your Kanji Probiotic Drink with a light salad or a bowl of fresh fruit for a wholesome snack. You can also experiment with variations by adding different fruits or herbs, such as mint or ginger, to customize the flavor to your liking. The possibilities are endless, and I encourage you to get creative! I genuinely believe that once you try making this Kanji Probiotic Drink at home, youll be hooked. Its not just a drink; its a step towards a healthier lifestyle. So, gather your ingredients, follow the recipe, and enjoy the process. I would love to hear about your experience, so dont forget to share your thoughts and any variations you come up with. Happy brewing! Print
Kanji Probiotic Drink: Unlocking the Health Benefits of Fermented Beverages
- Total Time: 2 to 5 days
- Yield: 4 cups
Description
This refreshing Kanji drink is a probiotic powerhouse made from fermented rice, sugar, and whey. It’s a delicious and healthy beverage that can be flavored with fruits and spices, perfect for gut health and hydration!
Ingredients
- rice
- sugar
- whey
Instructions
- On the solids to extract as much liquid as possible.
- Discard the solids or use them in another recipe.
- Seal the jar or pitcher with a lid and store it in the refrigerator.
- Your Kanji drink is now ready to enjoy!
Notes
- The fermentation time can vary based on your environment. Taste it daily after the second day to find your preferred flavor.
- You can experiment with different fruits and flavors to customize your Kanji drink.
- Always use clean utensils and containers to avoid contamination during the fermentation process.
- Prep Time: 10 minutes
- Cook Time: 30 minutes