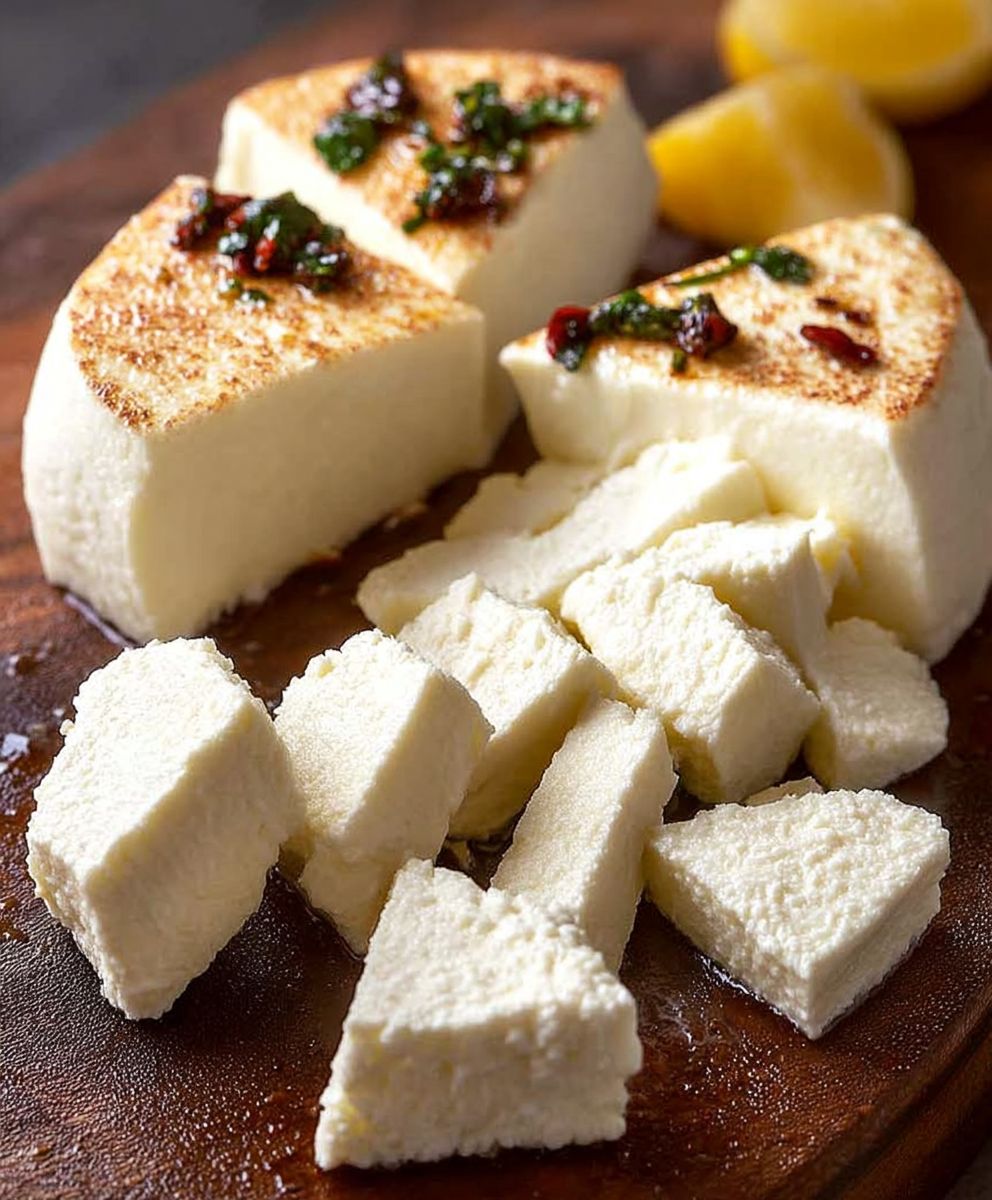
Homemade Paneer, that creamy, versatile Indian cheese, is easier to make than you might think! Forget trekking to specialty stores or settling for less-than-fresh options. Imagine sinking your teeth into perfectly soft, melt-in-your-mouth paneer, crafted right in your own kitchen. It’s a culinary adventure that’s both rewarding and surprisingly simple.
Paneer has a rich history in Indian cuisine, dating back centuries. While its exact origins are debated, it’s believed to have been influenced by Persian or Afghan cheesemaking techniques. Regardless of its precise beginnings, paneer has become a staple ingredient across India, gracing everything from rich curries to flavorful snacks.
What makes paneer so beloved? Its mild, milky flavor and delightfully firm yet yielding texture make it incredibly versatile. It acts as a blank canvas, readily absorbing the flavors of the spices and sauces it’s cooked with. Plus, it’s a fantastic source of protein, making it a healthy and satisfying addition to any meal. And the best part? Learning how to make homemade paneer opens up a world of culinary possibilities. You’ll be amazed at how much better it tastes than store-bought, and you’ll have complete control over the ingredients and freshness. So, let’s embark on this cheesemaking journey together!
Ingredients:
- 8 cups (2 quarts) whole milk, not ultra-pasteurized
- 1/4 cup lemon juice, freshly squeezed (or white vinegar)
- 1/2 teaspoon salt (optional, but enhances flavor)
- Ice water bath (a large bowl filled with ice and water)
- Cheesecloth or muslin cloth
Making Homemade Paneer: A Step-by-Step Guide
Okay, let’s dive into making some delicious homemade paneer! It’s surprisingly easy, and the taste is so much better than store-bought. Trust me, once you try this, you’ll be hooked. We’ll walk through each step together, so don’t worry if you’ve never done this before.
Heating the Milk
- Pour the Milk: In a large, heavy-bottomed pot (this helps prevent scorching), pour in all 8 cups of whole milk. Make sure your pot is clean!
- Heat Over Medium Heat: Place the pot over medium heat. We want to heat the milk slowly and evenly. Keep a close eye on it, as milk can boil over quickly.
- Stir Frequently: Stir the milk frequently, especially as it starts to heat up. This prevents the milk from sticking to the bottom of the pot and burning. Use a long-handled spoon or spatula to reach all areas of the pot.
- Watch for Simmering: Continue heating and stirring until the milk begins to simmer. You’ll see small bubbles forming around the edges of the pot, and steam will start to rise. Don’t let it come to a rolling boil! We just want a gentle simmer.
Curdling the Milk
- Reduce the Heat: Once the milk is simmering, reduce the heat to low. This is important to prevent the paneer from becoming tough.
- Add the Acid: Slowly pour in the 1/4 cup of lemon juice (or white vinegar). It’s best to add it gradually, stirring gently as you pour. This helps the milk curdle evenly.
- Observe the Curdling: As you stir, you’ll notice the milk starting to separate into curds (the solid part) and whey (the watery liquid). The whey should become a clear, yellowish color. If the whey is still milky, add another tablespoon of lemon juice and stir gently. You might need a little more or less depending on the acidity of your lemon juice.
- Stir Gently: Continue stirring gently for a minute or two, allowing the curds to fully separate from the whey. Don’t over-stir, as this can break up the curds too much.
- Check for Separation: The whey should be clear and yellowish. If it’s still milky, add a little more lemon juice, a teaspoon at a time, until the whey is clear.
- Add Salt (Optional): If you’re using salt, stir it in now. This is a good time to add any other flavorings you might want to experiment with, like herbs or spices.
Draining the Curds
- Prepare the Cheesecloth: Line a colander with several layers of cheesecloth or muslin cloth. Make sure the cloth is large enough to hold all the curds and whey. You can also use a fine-mesh sieve lined with cheesecloth.
- Pour the Curds and Whey: Carefully pour the curds and whey into the cheesecloth-lined colander. The cheesecloth will catch the curds, while the whey will drain through.
- Rinse the Curds: Gently rinse the curds with cold water. This helps to remove any remaining lemon juice flavor and stops the cooking process. Rinse for about a minute or two.
- Gather the Cheesecloth: Gather the edges of the cheesecloth and twist it tightly to form a ball. This will help to squeeze out as much excess whey as possible.
Pressing the Paneer
- Squeeze Out Excess Water: Squeeze the cheesecloth ball firmly to remove as much whey as possible. Be careful not to burn yourself if the paneer is still hot.
- Shape the Paneer: You can shape the paneer into a round or square shape, depending on your preference.
- Press the Paneer: Place the cheesecloth ball on a plate or cutting board. Place another plate or cutting board on top of the cheesecloth ball, and then weigh it down with something heavy, like a stack of books or a heavy pot. The amount of weight you use will determine the firmness of the paneer. For a softer paneer, use less weight. For a firmer paneer, use more weight.
- Refrigerate: Place the weighted paneer in the refrigerator for at least 2-3 hours, or preferably overnight. This will allow the paneer to firm up and hold its shape.
Storing and Using Your Homemade Paneer
- Unwrap the Paneer: After pressing, carefully unwrap the paneer from the cheesecloth.
- Cut and Store: Cut the paneer into cubes or slices, depending on how you plan to use it.
- Store in Water: To keep the paneer fresh and moist, store it in a container filled with cold water in the refrigerator. Change the water daily.
- Shelf Life: Homemade paneer will last for about 3-4 days in the refrigerator.
- Enjoy! Use your homemade paneer in your favorite Indian dishes, such as Palak Paneer, Paneer Tikka Masala, or Matar Paneer. You can also grill it, fry it, or add it to salads.
Tips for Perfect Paneer
- Use Whole Milk: Whole milk is essential for making good paneer. Skim milk or low-fat milk will not work as well.
- Fresh Lemon Juice: Freshly squeezed lemon juice is always best. Bottled lemon juice can sometimes have a bitter taste.
- Don’t Overcook: Be careful not to overcook the milk, as this can make the paneer tough.
- Gentle Stirring: Stir gently when adding the lemon juice to avoid breaking up the curds too much.
- Proper Pressing: Pressing the paneer is important for removing excess whey and creating a firm texture.
- Experiment with Flavors: Feel free to experiment with different flavorings, such as herbs, spices, or chili peppers.
- Adjust Acidity: The amount of lemon juice needed may vary depending on the acidity of the lemons. Add more lemon juice, a teaspoon at a time, until the whey is clear.
- Cleanliness is Key: Make sure all your equipment is clean to prevent contamination.
- Don’t Rush: Making paneer is a simple process, but it requires patience. Don’t rush any of the steps.
And there you have it! Homemade paneer that’s fresh, delicious, and ready to be used in all your favorite recipes. Enjoy!

Conclusion:
And there you have it! Making homemade paneer is truly a rewarding experience. It’s fresher, tastier, and surprisingly simple. Forget the store-bought stuff once you taste the difference, you’ll never go back. This recipe isn’t just about making cheese; it’s about unlocking a world of culinary possibilities and enjoying the satisfaction of creating something delicious from scratch.
Why is this a must-try? Because it’s more than just paneer. It’s about control. You control the ingredients, ensuring a pure, wholesome product free from unnecessary additives. You control the texture, achieving that perfect balance of firmness and creaminess that store-bought paneer often lacks. And you control the flavor, allowing the natural sweetness of the milk to shine through. Plus, let’s be honest, there’s a certain pride that comes with saying, “I made this myself!”
But the fun doesn’t stop there! Once you’ve mastered the basic recipe, the possibilities are endless. Craving something spicy? Marinate your freshly made paneer in a tandoori spice blend and grill it to perfection. Looking for a comforting vegetarian curry? Add cubes of paneer to a rich and creamy butter masala sauce. Want a light and refreshing salad? Crumble the paneer over a bed of greens with your favorite vegetables and a zesty vinaigrette.
Here are a few serving suggestions to get you started:
- Paneer Tikka Masala: A classic for a reason! This creamy, tomato-based curry is the perfect showcase for your homemade paneer.
- Palak Paneer: Another Indian favorite, this dish features paneer simmered in a flavorful spinach sauce.
- Paneer Bhurji: A scrambled paneer dish, perfect for breakfast or a light lunch. Add onions, tomatoes, and spices for a delicious and satisfying meal.
- Paneer Skewers: Marinate paneer cubes in your favorite spices and grill them on skewers with vegetables for a healthy and flavorful appetizer.
- Paneer Salad: Crumble paneer over a salad for a protein-packed and delicious addition.
And for those feeling adventurous, here are a few variations to try:
- Herb-Infused Paneer: Add fresh herbs like cilantro, mint, or dill to the milk during the heating process for a subtle yet flavorful twist.
- Spice-Infused Paneer: Add a pinch of turmeric, cumin, or chili powder to the milk for a warm and aromatic paneer.
- Smoked Paneer: Smoke the paneer after it’s been pressed for a unique and smoky flavor.
- Lemon Paneer: Add lemon zest to the milk for a citrusy kick.
I truly believe that this homemade paneer recipe will become a staple in your kitchen. It’s a simple, versatile, and delicious way to elevate your cooking and impress your friends and family. So, gather your ingredients, put on some music, and get ready to embark on a culinary adventure.
I’m so excited for you to try this recipe! Don’t be intimidated it’s easier than you think. And remember, even if your first batch isn’t perfect, you’ll learn something new and get closer to mastering the art of homemade paneer.
Once you’ve tried it, I’d love to hear about your experience! Share your photos, tips, and variations in the comments below. Let’s create a community of homemade paneer enthusiasts and inspire each other to get creative in the kitchen. Happy cooking! I can’t wait to see what you create!
Homemade Paneer: A Simple Guide to Making Paneer at Home
Easy homemade paneer with simple ingredients. Fresh, delicious, and perfect for Indian dishes!
Ingredients
- 8 cups (2 quarts) whole milk, not ultra-pasteurized
- 1/4 cup lemon juice, freshly squeezed (or white vinegar)
- 1/2 teaspoon salt (optional, but enhances flavor)
- Ice water bath (a large bowl filled with ice and water)
- Cheesecloth or muslin cloth
Instructions
- Pour the Milk: In a large, heavy-bottomed pot, pour in all 8 cups of whole milk.
- Heat Over Medium Heat: Place the pot over medium heat. Stir frequently, especially as it starts to heat up, to prevent sticking.
- Watch for Simmering: Continue heating and stirring until the milk begins to simmer (small bubbles around the edges). Don’t let it boil.
- Reduce the Heat: Once simmering, reduce heat to low.
- Add the Acid: Slowly pour in the 1/4 cup of lemon juice (or white vinegar), stirring gently.
- Observe the Curdling: The milk will separate into curds and whey. The whey should become clear and yellowish. If the whey is still milky, add another tablespoon of lemon juice and stir gently.
- Stir Gently: Continue stirring gently for a minute or two, allowing the curds to fully separate from the whey.
- Check for Separation: The whey should be clear and yellowish. If it’s still milky, add a little more lemon juice, a teaspoon at a time, until the whey is clear.
- Add Salt (Optional): If using, stir in the salt now.
- Prepare the Cheesecloth: Line a colander with several layers of cheesecloth or muslin cloth.
- Pour the Curds and Whey: Carefully pour the curds and whey into the cheesecloth-lined colander.
- Rinse the Curds: Gently rinse the curds with cold water for about a minute or two to remove lemon juice flavor and stop cooking.
- Gather the Cheesecloth: Gather the edges of the cheesecloth and twist it tightly to form a ball to squeeze out excess whey.
- Squeeze Out Excess Water: Squeeze the cheesecloth ball firmly to remove as much whey as possible.
- Shape the Paneer: Shape the paneer into a round or square shape.
- Press the Paneer: Place the cheesecloth ball on a plate or cutting board. Place another plate or cutting board on top of the cheesecloth ball, and then weigh it down with something heavy, like a stack of books or a heavy pot.
- Refrigerate: Place the weighted paneer in the refrigerator for at least 2-3 hours, or preferably overnight, to firm up.
- Unwrap the Paneer: After pressing, carefully unwrap the paneer from the cheesecloth.
- Cut and Store: Cut the paneer into cubes or slices.
- Store in Water: Store the paneer in a container filled with cold water in the refrigerator. Change the water daily.
- Enjoy! Use your homemade paneer in your favorite Indian dishes.
Notes
- Use whole milk for best results. Skim or low-fat milk won’t work as well.
- Freshly squeezed lemon juice is preferred over bottled.
- Don’t overcook the milk, as it can make the paneer tough.
- Stir gently when adding lemon juice to avoid breaking up the curds too much.
- Pressing is important for removing excess whey and creating a firm texture.
- Experiment with different flavorings like herbs, spices, or chili peppers.
- Adjust the amount of lemon juice based on its acidity.
- Cleanliness is key to prevent contamination.
- Be patient and don’t rush any of the steps.
- For a softer paneer, use less weight when pressing. For a firmer paneer, use more weight.
- Homemade paneer will last for about 3-4 days in the refrigerator when stored in water.


