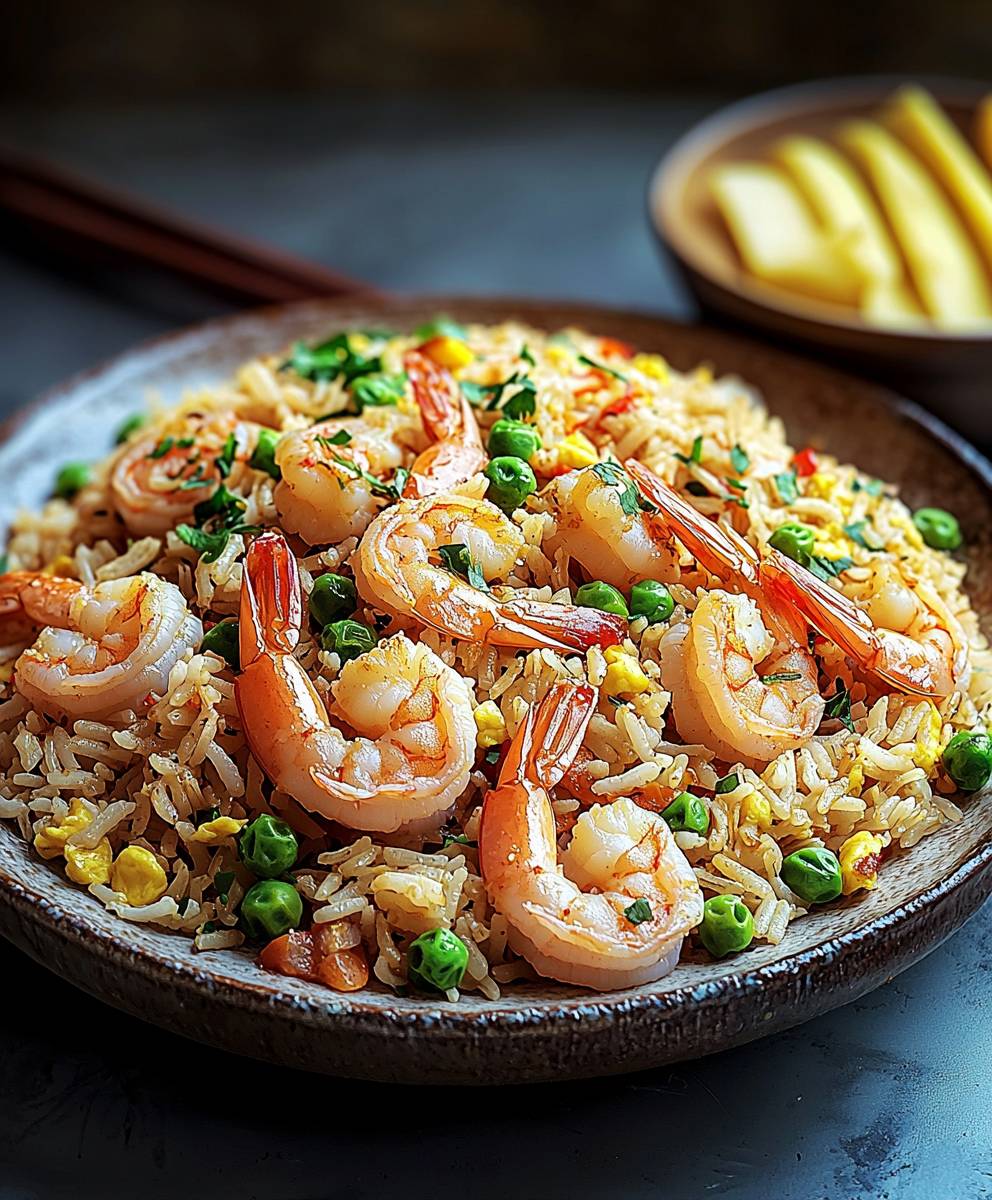
Hibachi Shrimp Fried Rice: craving that sizzling, savory, and slightly sweet flavor of your favorite Japanese steakhouse, but don’t want to break the bank? I’ve got you covered! Imagine perfectly cooked, plump shrimp, tender rice, and crisp vegetables all tossed together in a symphony of umami goodness. This isn’t just fried rice; it’s an experience.
Fried rice, in its essence, is a culinary chameleon, adapting to ingredients and cultures across Asia. While its exact origins are debated, it’s widely believed to have originated as a way to use leftover rice in China. The Hibachi style, however, is a more modern adaptation, popularized by Japanese steakhouses in America. These restaurants, with their theatrical chefs and sizzling flat-top grills, transformed a simple dish into an interactive and entertaining dining experience.
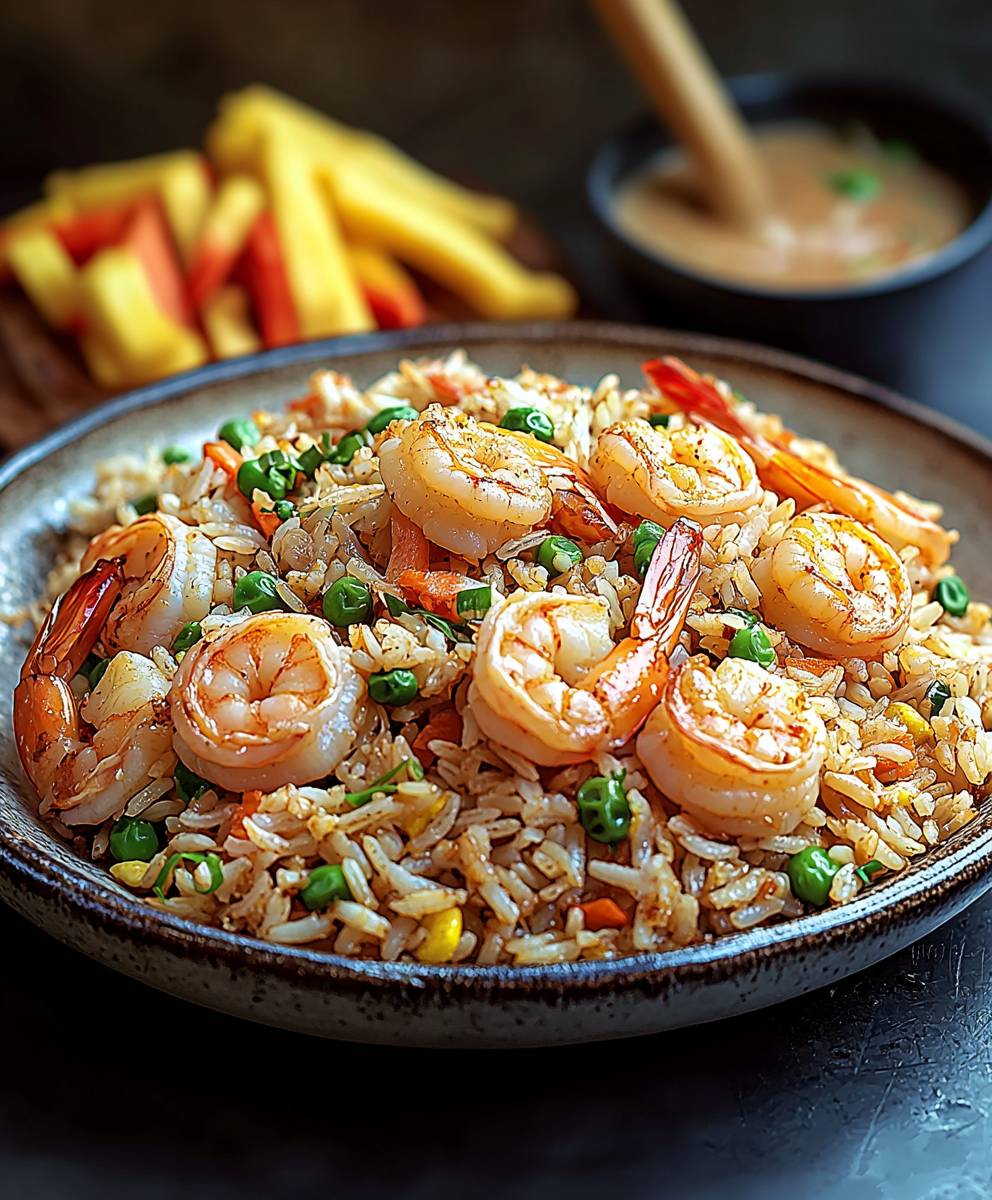
What makes Hibachi Shrimp Fried Rice so irresistible? It’s the perfect balance of textures and flavors. The slightly chewy rice, the succulent shrimp, the crunchy vegetables, and that signature ginger-garlic sauce create a harmonious blend that’s both satisfying and addictive. Plus, it’s incredibly versatile! You can easily customize it with your favorite vegetables or protein. And let’s be honest, who doesn’t love a one-pan meal that’s ready in under 30 minutes? Get ready to ditch the takeout menu and impress your family and friends with this restaurant-quality dish made right in your own kitchen!
Ingredients:
- For the Shrimp:
- 1 pound large shrimp, peeled and deveined
- 2 tablespoons soy sauce
- 1 tablespoon sake (or dry sherry)
- 1 teaspoon sesame oil
- 1/2 teaspoon ground ginger
- 1/4 teaspoon garlic powder
- Pinch of white pepper
- For the Fried Rice:
- 4 cups cooked and cooled long-grain rice (day-old is best!)
- 2 tablespoons vegetable oil
- 1 medium yellow onion, finely diced
- 2 carrots, peeled and diced
- 2 celery stalks, diced
- 2 cloves garlic, minced
- 1 cup frozen peas and carrots mix, thawed
- 2 large eggs, lightly beaten
- 3 tablespoons soy sauce
- 1 tablespoon oyster sauce (optional, but highly recommended!)
- 1 teaspoon sesame oil
- 1/2 teaspoon ground ginger
- 1/4 teaspoon garlic powder
- Pinch of white pepper
- 2 green onions, thinly sliced, for garnish
- For the Hibachi Sauce (Optional, but adds a great flavor!):
- 1/4 cup soy sauce
- 2 tablespoons mirin (or rice wine vinegar with 1 teaspoon sugar)
- 1 tablespoon sake (or dry sherry)
- 1 tablespoon brown sugar
- 1 teaspoon sesame oil
- 1/2 teaspoon garlic, minced
- 1/4 teaspoon ginger, grated
- 1 tablespoon butter
Preparing the Shrimp:
- In a medium bowl, combine the shrimp, soy sauce, sake (or sherry), sesame oil, ginger, garlic powder, and white pepper.
- Mix well to ensure the shrimp are evenly coated.
- Cover the bowl and refrigerate for at least 15 minutes, or up to 30 minutes, to allow the shrimp to marinate. This will infuse them with flavor and help them stay tender during cooking. Don’t marinate for too long, as the soy sauce can start to “cook” the shrimp.
Cooking the Fried Rice:
- Heat 1 tablespoon of vegetable oil in a large skillet or wok over medium-high heat. Make sure your wok or skillet is nice and hot before adding the ingredients. This helps to prevent sticking and gives the rice a slightly crispy texture.
- Add the diced onion, carrots, and celery to the skillet. Cook, stirring occasionally, until the vegetables are softened, about 5-7 minutes. You want them to be tender but still have a little bit of bite.
- Add the minced garlic and cook for another minute, until fragrant. Be careful not to burn the garlic, as it can become bitter.
- Push the vegetables to one side of the skillet. Add the remaining 1 tablespoon of vegetable oil to the empty side.
- Pour the beaten eggs into the empty side of the skillet. Let them cook for a few seconds, then scramble them with a spatula until they are cooked through. Break the scrambled eggs into small pieces.
- Combine the scrambled eggs with the vegetables in the skillet.
- Add the cooked and cooled rice to the skillet. Break up any clumps of rice with a spatula.
- Pour in the soy sauce, oyster sauce (if using), and sesame oil. Sprinkle with ginger, garlic powder, and white pepper.
- Stir-fry the rice mixture, constantly tossing and stirring, until the rice is heated through and evenly coated with the sauce, about 3-5 minutes. This is where the “fried” part comes in you want to get a little bit of color on the rice.
- Add the thawed frozen peas and carrots mix to the skillet. Stir to combine and heat through, about 1-2 minutes.
- Remove the fried rice from the skillet and set aside.
Cooking the Shrimp:
- Heat a clean skillet or wok over medium-high heat. You can use the same skillet you used for the rice, just make sure to wipe it clean first.
- Add the marinated shrimp to the hot skillet in a single layer. Be careful not to overcrowd the skillet, as this will lower the temperature and steam the shrimp instead of searing them. If necessary, cook the shrimp in batches.
- Cook the shrimp for 2-3 minutes per side, or until they are pink and opaque and cooked through. Be careful not to overcook the shrimp, as they can become rubbery.
- Remove the cooked shrimp from the skillet and set aside.
Making the Hibachi Sauce (Optional):
- In a small saucepan, combine the soy sauce, mirin (or rice wine vinegar with sugar), sake (or sherry), and brown sugar.
- Bring the mixture to a simmer over medium heat, stirring until the brown sugar is dissolved.
- Reduce the heat to low and simmer for 5-7 minutes, or until the sauce has thickened slightly.
- Remove the saucepan from the heat and stir in the sesame oil, minced garlic, and grated ginger.
- Add the butter and stir until it is melted and the sauce is smooth.
Assembling the Hibachi Shrimp Fried Rice:
- Add the cooked shrimp to the skillet with the fried rice.
- Toss to combine and heat through, about 1-2 minutes.
- Drizzle the hibachi sauce (if using) over the shrimp and fried rice.
- Stir to combine and coat everything evenly with the sauce.
- Serve the hibachi shrimp fried rice immediately, garnished with thinly sliced green onions.
Tips and Variations:
- Rice is Key: Using day-old rice is crucial for achieving the perfect fried rice texture. Freshly cooked rice is too moist and will result in mushy fried rice. Spread the cooked rice on a baking sheet to cool quickly and dry out slightly.
- Vegetable Options: Feel free to customize the vegetables to your liking. Some other great options include mushrooms, bell peppers, bean sprouts, and water chestnuts.
- Protein Power: You can easily add other proteins to this dish, such as chicken, pork, or tofu. Just cook the protein separately and add it to the fried rice along with the shrimp.
- Spice it Up: If you like a little heat, add a pinch of red pepper flakes or a dash of sriracha to the fried rice.
- Egg-cellent Addition: For extra egg flavor, you can add another egg or two to the fried rice.
- Sauce it Up: Experiment with different sauces to create your own unique flavor profile. Hoisin sauce, teriyaki sauce, or even a little bit of sweet chili sauce can be delicious additions.
- Make it Vegetarian: Omit the shrimp and oyster sauce for a delicious vegetarian fried rice. You can add extra vegetables or tofu to make it more filling.
- Hibachi Grill Alternative: If you have a hibachi grill, you can cook the shrimp and fried rice directly on the grill for an authentic hibachi experience.
- Serving Suggestions: Serve the hibachi shrimp fried rice as a main course or as a side dish. It pairs well with other Asian-inspired dishes, such as spring rolls, egg rolls, or miso soup.
- Storage: Leftover hibachi shrimp fried rice can be stored in an airtight container in the refrigerator for up to 3 days. Reheat in the microwave or in a skillet over medium heat until heated through.
Enjoy your homemade Hibachi Shrimp Fried Rice!
Conclusion:
This Hibachi Shrimp Fried Rice isn’t just another weeknight dinner; it’s a flavor explosion waiting to happen! From the perfectly cooked, succulent shrimp to the savory, slightly sweet fried rice, every bite is a delightful experience. I truly believe this recipe is a must-try because it captures the essence of a restaurant-quality hibachi meal right in your own kitchen, without the hefty price tag or the need to leave the comfort of your home. It’s quick, it’s easy, and it’s guaranteed to impress even the pickiest eaters.
But the best part? It’s incredibly versatile! While I’ve shared my go-to recipe, feel free to get creative and customize it to your liking. For a vegetarian option, simply omit the shrimp and add extra vegetables like broccoli, zucchini, or bell peppers. Tofu, cut into small cubes and pan-fried until golden brown, also makes a fantastic protein substitute. If you’re a spice lover, a dash of sriracha or a pinch of red pepper flakes will add a welcome kick.
Serving suggestions? Oh, the possibilities are endless! This Hibachi Shrimp Fried Rice is delicious on its own as a complete meal, but it also pairs beautifully with a side of steamed edamame or a refreshing cucumber salad. For a truly authentic hibachi experience, serve it with a side of yum yum sauce or ginger sauce. And don’t forget the chopsticks!
Want to elevate your presentation? Garnish your fried rice with a sprinkle of sesame seeds, chopped green onions, or a few sprigs of cilantro. A wedge of lemon or lime adds a bright, citrusy note that complements the flavors perfectly. You can even serve it in individual bowls for a more elegant presentation.
I’ve poured my heart and soul into perfecting this recipe, and I’m confident that you’ll love it as much as I do. It’s the perfect dish for a busy weeknight, a casual weekend gathering, or even a special occasion. The combination of flavors and textures is simply irresistible, and the aroma that fills your kitchen while it’s cooking is enough to make anyone’s mouth water.
So, what are you waiting for? Gather your ingredients, fire up your wok (or large skillet), and get ready to create some culinary magic. I promise, this Hibachi Shrimp Fried Rice will become a new family favorite.
Now, I want to hear from you! Once you’ve tried this recipe, please come back and share your experience in the comments below. Did you make any modifications? What did you think of the flavor? What did your family and friends think? I’m always eager to learn from your experiences and see how you’ve made this recipe your own. Don’t be shy your feedback is invaluable!
I truly believe that cooking is a journey, not a destination. And this Hibachi Shrimp Fried Rice is just one stop along the way. So, embrace the process, have fun in the kitchen, and don’t be afraid to experiment. And most importantly, enjoy the delicious results! Happy cooking!
Hibachi Shrimp Fried Rice: The Ultimate Recipe You Need
Easy, homemade Hibachi Shrimp Fried Rice! Tender shrimp and flavorful rice with optional tangy hibachi sauce for a restaurant-quality meal.
Ingredients
- 1 pound large shrimp, peeled and deveined
- 2 tablespoons soy sauce
- 1 tablespoon sake (or dry sherry)
- 1 teaspoon sesame oil
- 1/2 teaspoon ground ginger
- 1/4 teaspoon garlic powder
- Pinch of white pepper
- 4 cups cooked and cooled long-grain rice (day-old is best!)
- 2 tablespoons vegetable oil
- 1 medium yellow onion, finely diced
- 2 carrots, peeled and diced
- 2 celery stalks, diced
- 2 cloves garlic, minced
- 1 cup frozen peas and carrots mix, thawed
- 2 large eggs, lightly beaten
- 3 tablespoons soy sauce
- 1 tablespoon oyster sauce (optional, but highly recommended!)
- 1 teaspoon sesame oil
- 1/2 teaspoon ground ginger
- 1/4 teaspoon garlic powder
- Pinch of white pepper
- 2 green onions, thinly sliced, for garnish
- 1/4 cup soy sauce
- 2 tablespoons mirin (or rice wine vinegar with 1 teaspoon sugar)
- 1 tablespoon sake (or dry sherry)
- 1 tablespoon brown sugar
- 1 teaspoon sesame oil
- 1/2 teaspoon garlic, minced
- 1/4 teaspoon ginger, grated
- 1 tablespoon butter
Instructions
- Prepare the Shrimp: In a medium bowl, combine the shrimp, soy sauce, sake (or sherry), sesame oil, ginger, garlic powder, and white pepper. Mix well and refrigerate for 15-30 minutes.
- Cook the Fried Rice: Heat 1 tablespoon of vegetable oil in a large skillet or wok over medium-high heat. Add the diced onion, carrots, and celery and cook until softened (5-7 minutes). Add the minced garlic and cook for another minute until fragrant.
- Push the vegetables to one side of the skillet. Add the remaining 1 tablespoon of vegetable oil to the empty side. Pour the beaten eggs into the empty side of the skillet. Let them cook for a few seconds, then scramble them with a spatula until they are cooked through. Break the scrambled eggs into small pieces. Combine the scrambled eggs with the vegetables in the skillet.
- Add the cooked and cooled rice to the skillet. Break up any clumps of rice with a spatula. Pour in the soy sauce, oyster sauce (if using), and sesame oil. Sprinkle with ginger, garlic powder, and white pepper.
- Stir-fry the rice mixture, constantly tossing and stirring, until the rice is heated through and evenly coated with the sauce, about 3-5 minutes. Add the thawed frozen peas and carrots mix to the skillet. Stir to combine and heat through, about 1-2 minutes. Remove the fried rice from the skillet and set aside.
- Cook the Shrimp: Heat a clean skillet or wok over medium-high heat. Add the marinated shrimp in a single layer. Cook for 2-3 minutes per side, or until pink and opaque. Remove from skillet and set aside.
- Make the Hibachi Sauce (Optional): In a small saucepan, combine the soy sauce, mirin (or rice wine vinegar with sugar), sake (or sherry), and brown sugar. Bring to a simmer over medium heat, stirring until the brown sugar is dissolved. Reduce the heat to low and simmer for 5-7 minutes, or until the sauce has thickened slightly. Remove the saucepan from the heat and stir in the sesame oil, minced garlic, and grated ginger. Add the butter and stir until it is melted and the sauce is smooth.
- Assemble: Add the cooked shrimp to the skillet with the fried rice. Toss to combine and heat through, about 1-2 minutes. Drizzle the hibachi sauce (if using) over the shrimp and fried rice. Stir to combine and coat everything evenly with the sauce.
- Serve immediately, garnished with thinly sliced green onions.
Notes
- Using day-old rice is crucial for achieving the perfect fried rice texture.
- Customize the vegetables to your liking. Mushrooms, bell peppers, bean sprouts, and water chestnuts are great options.
- Add other proteins such as chicken, pork, or tofu.
- Add a pinch of red pepper flakes or a dash of sriracha to the fried rice for a little heat.
- Omit the shrimp and oyster sauce for a delicious vegetarian fried rice.
- Leftover hibachi shrimp fried rice can be stored in an airtight container in the refrigerator for up to 3 days.