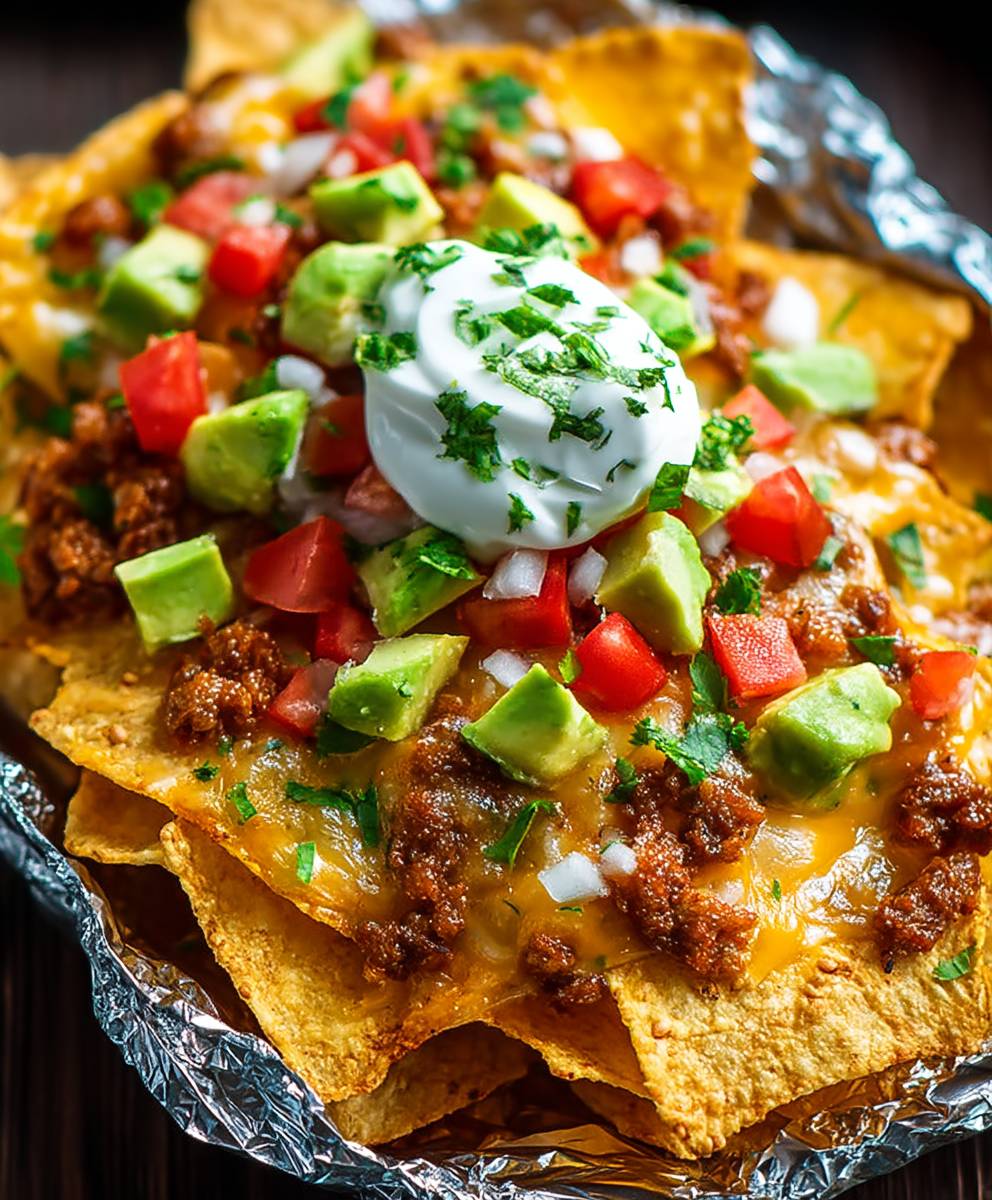
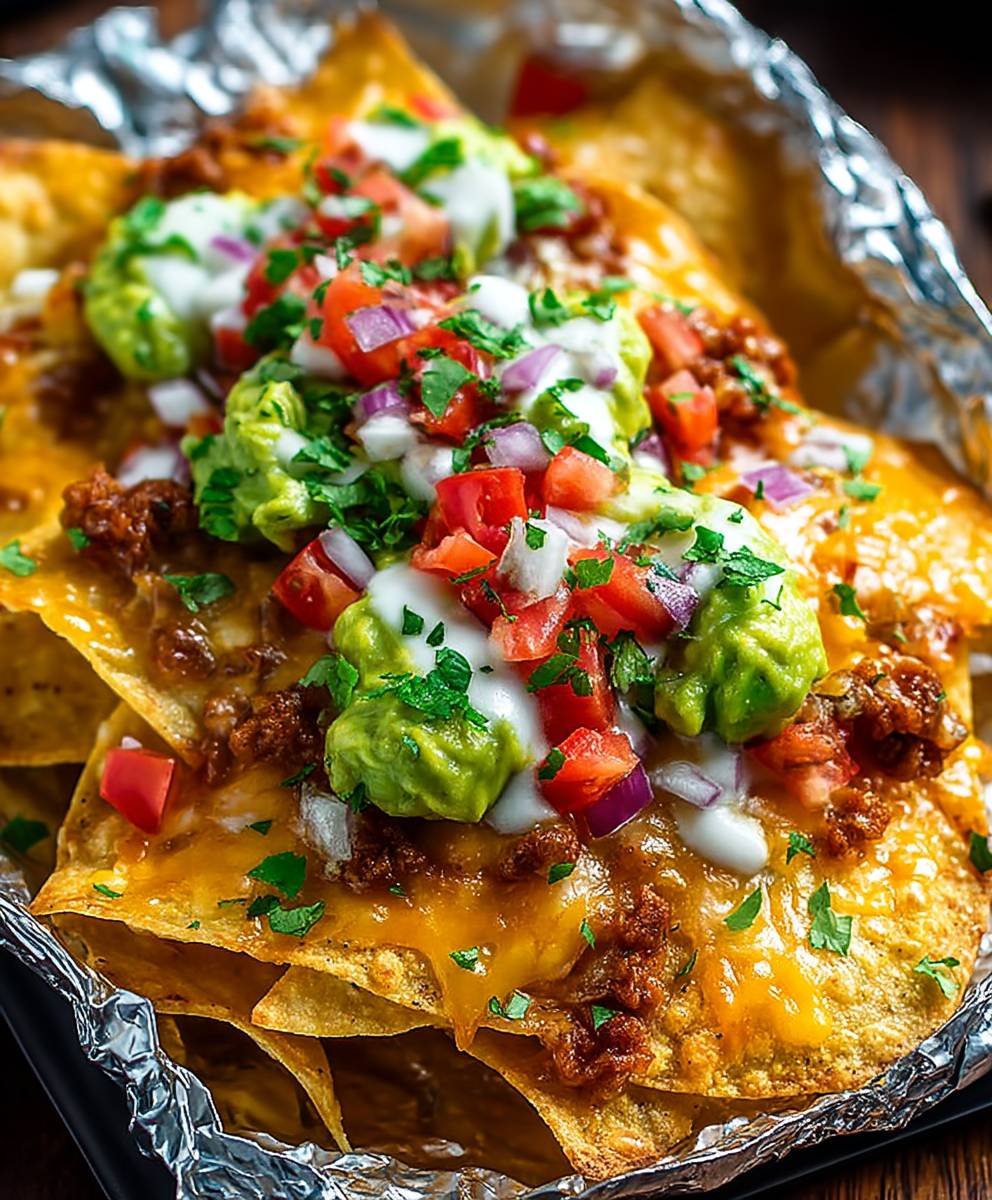
Foil Pack Baked Nachos: the ultimate crowd-pleasing, mess-free meal that’s about to revolutionize your outdoor gatherings! Imagine this: you’re camping under the stars, the aroma of smoky goodness fills the air, and everyone’s digging into a bubbling, cheesy mountain of nachos cooked right over the campfire. Sounds idyllic, right? Well, it’s easier than you think!
While the exact origins of nachos are debated, their popularity exploded in the mid-20th century, quickly becoming a staple at sporting events and casual get-togethers. The beauty of nachos lies in their versatility and shareability. They are a blank canvas for culinary creativity, allowing you to customize them with your favorite toppings and flavors.
But let’s be honest, traditional nachos can be a bit of a hassle, especially when you’re dealing with a large group or cooking outdoors. That’s where foil pack baked nachos come in. This ingenious method eliminates the need for multiple dishes and messy cleanup. The foil pack seals in all the delicious flavors, creating a steamy, cheesy paradise that’s ready to devour in minutes. People love this dish because it’s incredibly easy to prepare, endlessly customizable, and undeniably delicious. The combination of crispy tortilla chips, melted cheese, and your favorite toppings creates a symphony of textures and flavors that’s simply irresistible. So, gather your friends, fire up the grill (or oven!), and get ready to experience the magic of foil pack nachos!
Ingredients:
- 1 pound ground beef
- 1 packet taco seasoning
- 1/2 cup water
- 1 (15 ounce) can black beans, rinsed and drained
- 1 (15 ounce) can corn, drained
- 1 red bell pepper, chopped
- 1/2 red onion, chopped
- 2 cups shredded cheddar cheese
- 2 cups shredded Monterey Jack cheese
- 1 bag tortilla chips (thick-cut recommended)
- Optional toppings: sour cream, guacamole, salsa, jalapenos, cilantro
- Heavy-duty aluminum foil
Preparing the Ground Beef Mixture:
- First, we need to brown the ground beef. In a large skillet over medium-high heat, crumble the ground beef and cook until it’s no longer pink. Make sure to break it up into small pieces as it cooks.
- Once the beef is browned, drain off any excess grease. This is important because we don’t want soggy nachos!
- Now, stir in the taco seasoning and water. Follow the instructions on your taco seasoning packet, but generally, you’ll want to simmer the mixture for about 5-7 minutes, or until the water is absorbed and the beef is nicely coated with the seasoning. This step is crucial for infusing the beef with that classic nacho flavor.
- Remove the skillet from the heat and set aside. We’ll be using this flavorful beef mixture as the base for our foil pack nachos.
Assembling the Foil Packs:
- Preheat your oven to 375°F (190°C). While the oven is heating up, let’s get our foil packs ready.
- Cut four large sheets of heavy-duty aluminum foil, each about 12×18 inches. Using heavy-duty foil is essential to prevent tearing and ensure the packs hold their shape during baking.
- Place one sheet of foil on a flat surface. Now, we’re going to start layering the ingredients.
- Spread a layer of tortilla chips evenly across the center of the foil. Don’t overcrowd the chips; we want them to be able to get nice and cheesy.
- Next, spoon about one-quarter of the seasoned ground beef mixture over the chips. Distribute it evenly so every chip gets a taste of that delicious beef.
- Sprinkle about one-quarter of the black beans and corn over the beef. These add a nice texture and flavor contrast to the nachos.
- Add about one-quarter of the chopped red bell pepper and red onion. These veggies provide a fresh, crisp element to the nachos.
- Now, for the cheese! Sprinkle about one-quarter of the cheddar cheese and one-quarter of the Monterey Jack cheese over the vegetables. A generous layer of cheese is what makes nachos truly irresistible.
- Repeat steps 4-8 for the remaining three foil packs. Layering the ingredients ensures that each bite is packed with flavor and texture.
Sealing the Foil Packs:
- Now comes the important part: sealing the foil packs. Bring the two long sides of the foil together above the nachos.
- Fold the edges over several times, creating a tight seal. This will trap the heat and steam inside, helping the cheese melt and the flavors meld together.
- Fold in the short ends of the foil to completely seal the pack. Make sure there are no gaps or openings.
- Repeat steps 1-3 for the remaining foil packs. The goal is to create a secure, airtight seal for each pack.
Baking the Foil Packs:
- Carefully place the foil packs on a baking sheet. This will make it easier to transfer them to and from the oven.
- Bake in the preheated oven for 15-20 minutes, or until the cheese is melted and bubbly and the nachos are heated through. Keep an eye on them to prevent the chips from burning.
- Remove the baking sheet from the oven and let the foil packs cool for a few minutes before opening. Be careful, as the steam inside will be hot!
Serving and Enjoying:
- Carefully open the foil packs. You can either serve the nachos directly from the foil packs or transfer them to a serving platter.
- Add your favorite toppings! Sour cream, guacamole, salsa, jalapenos, and cilantro are all great options.
- Serve immediately and enjoy! These foil pack baked nachos are perfect for parties, game nights, or a casual weeknight dinner.
Tips and Variations:
- Spice it up: Add a pinch of cayenne pepper to the ground beef mixture or use jalapenos as a topping for extra heat.
- Add protein: Substitute ground beef with shredded chicken, pulled pork, or even vegetarian crumbles.
- Customize the cheese: Use your favorite cheese blend, such as pepper jack, queso quesadilla, or a Mexican blend.
- Get creative with toppings: Add diced tomatoes, green onions, olives, or any other toppings you enjoy on your nachos.
- Make it vegetarian: Omit the ground beef and add more beans, corn, and vegetables. You can also use a vegetarian taco seasoning.
- Prep ahead: You can prepare the ground beef mixture ahead of time and store it in the refrigerator until you’re ready to assemble the foil packs.
- Grilling option: These foil packs can also be cooked on a grill. Preheat your grill to medium heat and cook for 15-20 minutes, or until the cheese is melted and bubbly.
- Don’t overfill: Avoid overfilling the foil packs, as this can make them difficult to seal and cook evenly.
- Heavy-duty foil is key: Using heavy-duty aluminum foil is essential to prevent tearing and ensure the packs hold their shape during baking.
- Serving size: This recipe makes four individual foil packs, which is perfect for a small gathering or family dinner. You can easily adjust the recipe to make more or fewer packs as needed.
Troubleshooting:
- Chips are soggy: Make sure to drain off any excess grease from the ground beef and avoid adding too much liquid to the foil packs.
- Cheese isn’t melting: Ensure that the oven is preheated to the correct temperature and that the foil packs are sealed tightly to trap the heat.
- Foil packs are leaking: Use heavy-duty aluminum foil and make sure to seal the packs tightly to prevent leaks.
- Nachos are burning: Keep an eye on the foil packs while they’re baking and adjust the baking time as needed.
Nutritional Information (approximate, per serving):
- Calories: 600-800
- Protein: 30-40g
- Fat: 40-50g
- Carbohydrates: 50-60g
Note: Nutritional information may vary depending on the specific ingredients used.
Why Foil Pack Nachos are Awesome:
- Easy cleanup: The foil packs make cleanup a breeze! Simply discard the foil after you’re done.
- Customizable: You can easily customize the ingredients to suit your taste preferences and dietary needs.
- Portable: Foil pack nachos are perfect for camping trips, picnics, or tailgating events.
- Fun and interactive: Assembling the foil packs is a fun activity that the whole family can enjoy.
- Delicious and satisfying: These nachos are packed with flavor and texture, making them a truly satisfying meal or snack.
Storing Leftovers:
If you have any leftover nachos, you can store them in an airtight container in the refrigerator for up to 2 days. Reheat them in the oven or microwave before serving.
Enjoy your Foil Pack Baked Nachos!

Conclusion:
So there you have it! These Foil Pack Baked Nachos are truly a game-changer for your outdoor cooking adventures, or even a quick and easy weeknight dinner. I know, I know, I might be biased, but trust me on this one. The combination of smoky flavors, melted cheese, and customizable toppings makes them utterly irresistible. They’re not just nachos; they’re an experience!
What makes this recipe a must-try? First, the sheer convenience is unmatched. Imagine prepping everything ahead of time, wrapping it all up in foil, and then simply tossing it on the grill or in the oven. Minimal cleanup is a huge win in my book, especially when you’re trying to enjoy the great outdoors or just don’t feel like doing dishes after a long day. Second, the flavor is incredible. The foil pack traps all the delicious aromas and allows the cheese to melt into gooey perfection, infusing every chip with cheesy, savory goodness. And third, it’s completely customizable! You can tailor the toppings to your exact preferences, making it a crowd-pleaser for even the pickiest eaters.
Looking for serving suggestions? These nachos are fantastic on their own as a hearty appetizer or a satisfying meal. But if you want to take things to the next level, consider adding a dollop of sour cream or Greek yogurt for a cool and tangy contrast. A sprinkle of fresh cilantro adds a burst of freshness, while a drizzle of hot sauce provides a welcome kick. For a more substantial meal, serve them alongside grilled chicken, steak, or shrimp.
Now, let’s talk variations! The possibilities are truly endless. Feeling adventurous? Try adding some pulled pork or shredded beef for a meaty twist. Vegetarian? Load them up with black beans, corn, bell peppers, and onions. Craving something spicy? Jalapeños, habaneros, or a generous dose of chili powder will do the trick. You could even experiment with different types of cheese, like pepper jack for a spicy kick or Monterey Jack for a milder flavor. Don’t be afraid to get creative and experiment with your favorite ingredients! I personally love adding a layer of refried beans to the bottom of the foil pack for an extra layer of flavor and texture. And sometimes, I’ll even throw in some crumbled chorizo for a smoky, spicy kick.
These Foil Pack Baked Nachos are perfect for:
* Camping trips
* Backyard barbecues
* Tailgating parties
* Quick and easy weeknight dinners
* Potlucks
* Any occasion where you want delicious food with minimal effort!
I truly believe that this recipe will become a staple in your cooking repertoire. It’s simple, delicious, and incredibly versatile. So, what are you waiting for? Gather your ingredients, fire up the grill (or preheat your oven), and get ready to experience nacho perfection.
I’m so excited for you to try this recipe! Once you do, please, please, please come back and share your experience in the comments below. I’d love to hear what toppings you used, what variations you tried, and how much everyone enjoyed them. Did you add anything special? Did you make any modifications? Your feedback is invaluable and helps me (and other readers) learn and grow as cooks. And if you loved the recipe, don’t forget to share it with your friends and family! Let’s spread the nacho love far and wide. Happy cooking!
Foil Pack Baked Nachos: Easy Camping Recipe You'll Love
Individual foil pack nachos baked to cheesy perfection! Easy cleanup and customizable with your favorite toppings. Perfect for parties, game nights, or a fun weeknight dinner.
Ingredients
- 1 pound ground beef
- 1 packet taco seasoning
- 1/2 cup water
- 1 (15 ounce) can black beans, rinsed and drained
- 1 (15 ounce) can corn, drained
- 1 red bell pepper, chopped
- 1/2 red onion, chopped
- 2 cups shredded cheddar cheese
- 2 cups shredded Monterey Jack cheese
- 1 bag tortilla chips (thick-cut recommended)
- Optional toppings: sour cream, guacamole, salsa, jalapenos, cilantro
- Heavy-duty aluminum foil
Instructions
- In a large skillet over medium-high heat, crumble the ground beef and cook until it’s no longer pink. Drain off any excess grease. Stir in the taco seasoning and water. Simmer for 5-7 minutes, or until the water is absorbed and the beef is nicely coated. Remove from heat.
- Preheat oven to 375°F (190°C). Cut four large sheets of heavy-duty aluminum foil (about 12×18 inches).
- Place one sheet of foil on a flat surface. Layer tortilla chips evenly across the center.
- Spoon about one-quarter of the seasoned ground beef mixture over the chips.
- Sprinkle about one-quarter of the black beans and corn over the beef.
- Add about one-quarter of the chopped red bell pepper and red onion.
- Sprinkle about one-quarter of the cheddar cheese and one-quarter of the Monterey Jack cheese over the vegetables.
- Repeat steps 3-7 for the remaining three foil packs.
- Bring the two long sides of the foil together above the nachos. Fold the edges over several times to create a tight seal. Fold in the short ends of the foil to completely seal the pack. Repeat for remaining packs.
- Carefully place the foil packs on a baking sheet. Bake in the preheated oven for 15-20 minutes, or until the cheese is melted and bubbly and the nachos are heated through.
- Remove from oven and let cool for a few minutes before opening. Carefully open the foil packs. Add your favorite toppings and serve immediately.
Notes
- Spice it up: Add a pinch of cayenne pepper to the ground beef mixture or use jalapenos as a topping for extra heat.
- Add protein: Substitute ground beef with shredded chicken, pulled pork, or even vegetarian crumbles.
- Customize the cheese: Use your favorite cheese blend, such as pepper jack, queso quesadilla, or a Mexican blend.
- Get creative with toppings: Add diced tomatoes, green onions, olives, or any other toppings you enjoy on your nachos.
- Make it vegetarian: Omit the ground beef and add more beans, corn, and vegetables. You can also use a vegetarian taco seasoning.
- Prep ahead: You can prepare the ground beef mixture ahead of time and store it in the refrigerator until you’re ready to assemble the foil packs.
- Grilling option: These foil packs can also be cooked on a grill. Preheat your grill to medium heat and cook for 15-20 minutes, or until the cheese is melted and bubbly.
- Don’t overfill: Avoid overfilling the foil packs, as this can make them difficult to seal and cook evenly.
- Heavy-duty foil is key: Using heavy-duty aluminum foil is essential to prevent tearing and ensure the packs hold their shape during baking.
- Serving size: This recipe makes four individual foil packs, which is perfect for a small gathering or family dinner. You can easily adjust the recipe to make more or fewer packs as needed.


