Christmas Peanut Butter Clusters: the quintessential holiday treat that disappears faster than Santa down a chimney! I don’t know about you, but for me, the holiday season isn’t complete without a batch (or three!) of these irresistible goodies. These aren’t just any candy; they’re a nostalgic trip back to childhood, a symbol of festive gatherings, and a testament to the simple joy of combining chocolate and peanut butter.
While the exact origins of this particular cluster variation are shrouded in family recipe lore and passed-down traditions, the combination of chocolate and peanut butter has been a beloved pairing in American confectionery for decades. Think of the iconic peanut butter cup, and you’ll understand the enduring appeal. What makes Christmas Peanut Butter Clusters so special, though, is their ease of preparation and their customizable nature. You can add sprinkles, pretzels, or even a dash of sea salt to elevate the flavor profile.
People adore these clusters for their perfect balance of sweet and salty, their satisfying crunch, and their melt-in-your-mouth texture. Plus, they require minimal baking skills and use readily available ingredients, making them the ideal treat to whip up for holiday parties, potlucks, or even a cozy night in by the fire. So, grab your ingredients, and let’s get ready to create some holiday magic with these delightful Christmas Peanut Butter Clusters!
Ingredients:
- 1 pound (16 ounces) milk chocolate, chopped
- 1 pound (16 ounces) semi-sweet chocolate, chopped
- 1 cup creamy peanut butter
- 1 cup dry roasted peanuts, lightly salted
- 1 cup mini pretzels, broken into small pieces
- 1 cup Rice Krispies cereal
- 1/2 cup powdered sugar, for dusting (optional)
- 1/4 cup sprinkles, for decoration (optional)
Melting the Chocolate:
Okay, let’s get started! The first and most crucial step is melting the chocolate. This is where patience is key. We don’t want to burn the chocolate, so we’ll use a double boiler method. If you don’t have a double boiler, don’t worry! You can easily create one using a heat-safe bowl and a saucepan.
- Prepare the Double Boiler: Fill a saucepan with about 2 inches of water. Make sure the water doesn’t touch the bottom of the bowl you’ll be placing on top. Bring the water to a simmer over medium heat.
- Combine the Chocolate: In the heat-safe bowl (glass or stainless steel works best), combine the chopped milk chocolate and semi-sweet chocolate.
- Melt the Chocolate Slowly: Place the bowl on top of the simmering water. Make sure the bowl fits snugly so steam doesn’t escape. Stir the chocolate frequently with a rubber spatula. Be patient! It will take about 10-15 minutes for the chocolate to completely melt. Avoid overheating the chocolate, as this can cause it to seize up and become grainy.
- Check for Smoothness: The chocolate is ready when it’s completely melted and smooth. There should be no lumps or unmelted pieces. If you find any stubborn pieces, continue stirring gently until they melt.
- Remove from Heat: Once the chocolate is melted, remove the bowl from the heat and carefully dry the bottom to prevent any water from getting into the chocolate.
Adding the Peanut Butter and Mix-Ins:
Now for the fun part! We’re going to add the peanut butter and all those delicious mix-ins that make these clusters so irresistible. It’s important to work quickly at this stage, as the chocolate will start to cool and set.
- Stir in the Peanut Butter: Add the creamy peanut butter to the melted chocolate. Stir until the peanut butter is completely incorporated and the mixture is smooth and glossy. Make sure there are no streaks of peanut butter remaining.
- Add the Peanuts: Pour in the dry roasted peanuts. Gently fold them into the chocolate mixture until they are evenly distributed.
- Add the Pretzels: Add the broken mini pretzels to the mixture. Again, fold them in gently to avoid crushing them further. We want those salty pretzel pieces to add a nice crunch to our clusters.
- Add the Rice Krispies: Finally, add the Rice Krispies cereal. Fold them in carefully to avoid breaking them. The Rice Krispies will add a light and airy texture to the clusters.
- Ensure Even Distribution: Make sure all the mix-ins are evenly distributed throughout the chocolate mixture. This will ensure that each cluster has a good balance of flavors and textures.
Forming the Clusters:
Time to create those beautiful clusters! We’ll use a spoon or a small cookie scoop to portion out the chocolate mixture onto a prepared surface. Parchment paper or wax paper works best to prevent the clusters from sticking.
- Prepare the Baking Sheet: Line a baking sheet with parchment paper or wax paper. This will make it easy to remove the clusters once they’ve set.
- Scoop the Clusters: Using a spoon or a small cookie scoop (about 1-2 tablespoons), scoop portions of the chocolate mixture onto the prepared baking sheet. Leave a little space between each cluster so they don’t stick together.
- Shape the Clusters (Optional): If you want, you can gently shape the clusters with your fingers or the back of a spoon. You can make them round, oval, or leave them in their natural, slightly irregular shape.
- Decorate (Optional): While the chocolate is still wet, you can sprinkle the clusters with powdered sugar or sprinkles. The powdered sugar will give them a snowy, festive look, while the sprinkles will add a pop of color.
Setting the Clusters:
Now comes the hardest part: waiting! We need to let the clusters set completely before we can enjoy them. You can either let them set at room temperature or speed up the process by refrigerating them.
- Setting at Room Temperature: If you choose to let the clusters set at room temperature, it will take about 1-2 hours. Make sure the baking sheet is placed in a cool, dry place away from direct sunlight or heat.
- Setting in the Refrigerator: If you want to speed up the setting process, you can refrigerate the clusters for about 30-60 minutes. This will help them harden more quickly.
- Check for Firmness: The clusters are ready when they are firm to the touch and the chocolate has completely set. You should be able to easily lift them off the parchment paper without them sticking or losing their shape.
Storing the Clusters:
Once the clusters are set, it’s important to store them properly to maintain their freshness and prevent them from melting. These clusters are perfect for gifting, so make sure they look their best!
- Store in an Airtight Container: Place the set clusters in an airtight container. This will prevent them from drying out or absorbing any odors from the refrigerator.
- Layer with Parchment Paper: If you’re stacking the clusters in the container, layer them with parchment paper to prevent them from sticking together.
- Refrigerate for Longer Storage: For longer storage, keep the clusters in the refrigerator. They will stay fresh for up to 2 weeks.
- Freezing (Optional): You can also freeze the clusters for up to 2 months. Wrap them tightly in plastic wrap and then place them in a freezer-safe bag or container. Thaw them in the refrigerator before serving.
Tips and Variations:
Want to customize your Christmas peanut butter clusters? Here are a few ideas to get you started!
- Different Chocolate: Experiment with different types of chocolate, such as dark chocolate, white chocolate, or even flavored chocolate.
- Nut Variations: Use different types of nuts, such as almonds, walnuts, or pecans. You can also use a mix of different nuts.
- Dried Fruit: Add dried cranberries, raisins, or chopped apricots for a chewy texture and a burst of flavor.
- Spices: Add a pinch of cinnamon, nutmeg, or ginger to the chocolate mixture for a warm and festive flavor.
- Extracts: Add a teaspoon of vanilla extract, almond extract, or peppermint extract to the chocolate mixture for an extra layer of flavor.
- Caramel: Drizzle melted caramel over the clusters before they set for a decadent treat.
- Sea Salt: Sprinkle a pinch of sea salt over the clusters before they set for a sweet and salty combination.
- Peanut Butter Chips: Add peanut butter chips to the mixture for an extra peanut butter boost.
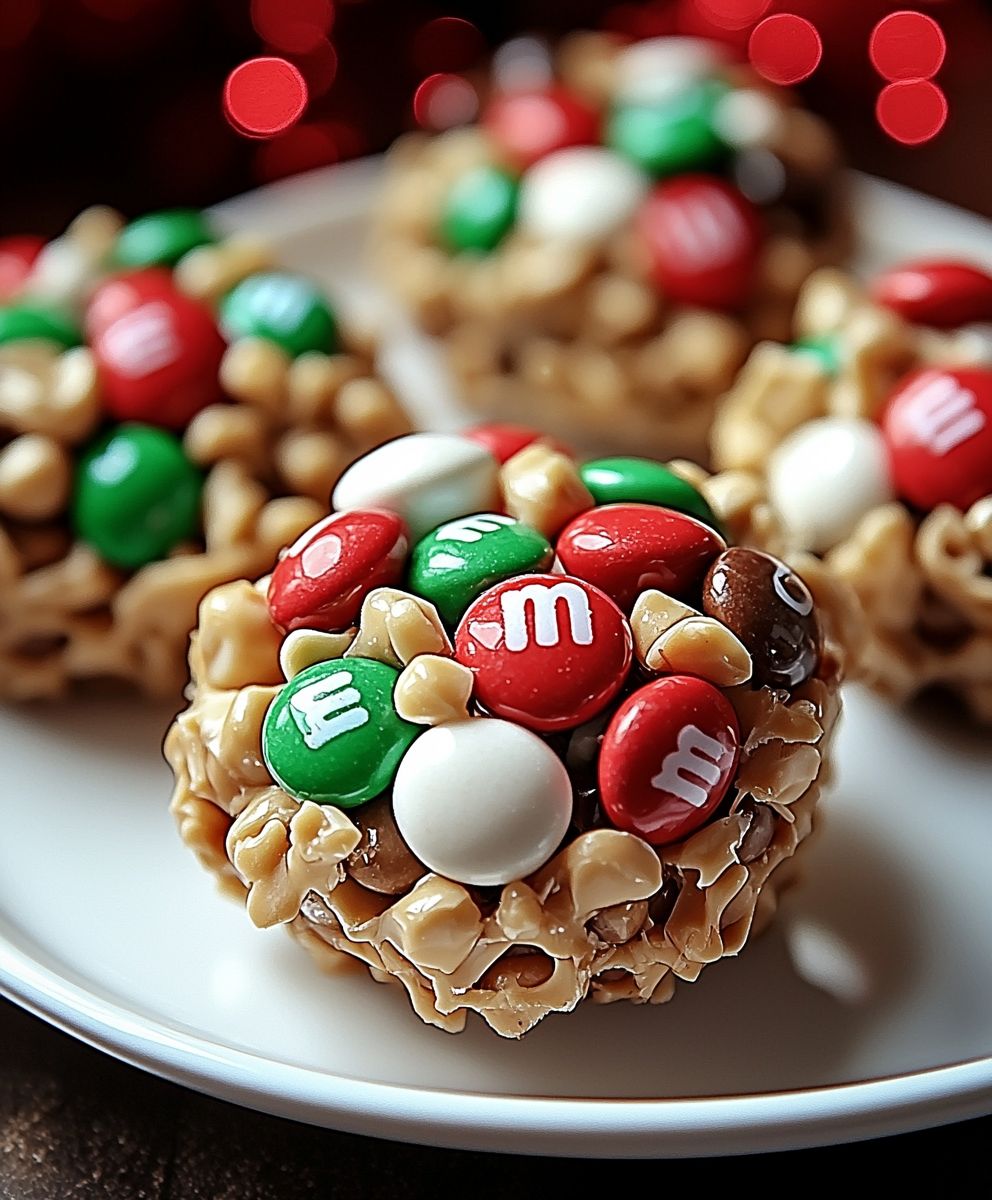
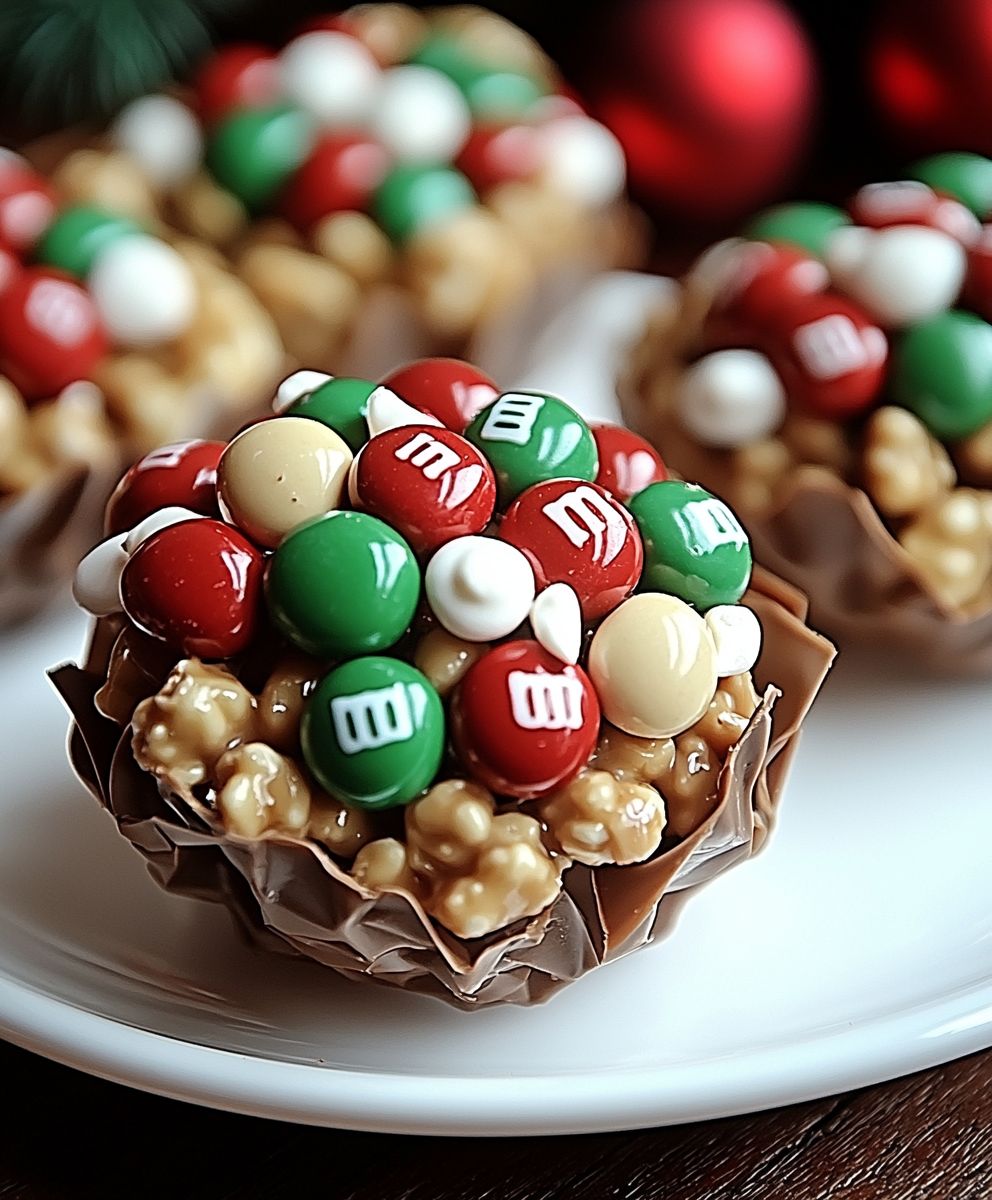
- M&Ms: Add Christmas-colored M&Ms for a festive touch.
Troubleshooting:
Sometimes things don’t go exactly as planned. Here are a few common issues and how to fix them:
- Chocolate Seizing: If your chocolate seizes up and becomes grainy, it’s likely because it got too hot or came into contact with water. Try adding a tablespoon of vegetable oil or shortening to the chocolate and stirring vigorously. This may help to smooth it out.
- Clusters Not Setting: If your clusters aren’t setting properly, it could be because the chocolate wasn’t tempered correctly or the room temperature is too warm. Try refrigerating the clusters for a longer period of time.
- Clusters Sticking to Parchment Paper: If your clusters are sticking to the parchment paper, make sure the chocolate is completely set before trying to remove them. You can also try chilling the baking sheet in the freezer for a few minutes to help the clusters release more easily.
Enjoy!
These Christmas peanut butter clusters are a delicious and festive treat that everyone will love. They’re perfect for holiday parties, gift-giving, or simply enjoying with a cup of hot cocoa. Happy baking!
Conclusion:
This Christmas peanut butter clusters recipe isn’t just another holiday treat; it’s a guaranteed crowd-pleaser that’s ridiculously easy to make and endlessly customizable. Seriously, if you’re looking for a last-minute dessert to bring to a party, a fun activity to do with the kids, or simply a sweet fix that won’t take hours in the kitchen, this is it. The combination of creamy peanut butter, crunchy pretzels, and rich chocolate is simply irresistible, and the festive sprinkles add that perfect touch of holiday magic. But the best part? You can totally make this recipe your own! Feeling adventurous? Try using different types of chocolate dark chocolate for a more sophisticated flavor, white chocolate for extra sweetness, or even a swirl of both! You could also experiment with different nut butters, like almond butter or cashew butter, for a unique twist. And don’t be afraid to get creative with your toppings! Instead of sprinkles, try crushed peppermint candies, chopped nuts, mini marshmallows, or even a drizzle of caramel. For serving suggestions, these clusters are perfect on their own as a sweet snack or dessert. But they also make a wonderful addition to a holiday dessert platter, a thoughtful homemade gift for friends and family, or even a festive topping for ice cream or yogurt. Imagine crumbling a cluster over a scoop of vanilla ice cream pure bliss! You can also package them up in cute little bags or boxes and give them as party favors. They’re guaranteed to be a hit! I know that during the holidays, time is precious, and the thought of adding another recipe to your already long list can be daunting. But trust me, this Christmas peanut butter clusters recipe is worth it. It’s so simple and quick that even the busiest of bakers can whip up a batch in no time. And the smiles on the faces of those who taste them will make all the effort worthwhile. So, what are you waiting for? Gather your ingredients, preheat your oven (just kidding, no baking required!), and get ready to create some delicious holiday magic. I’m absolutely confident that you’ll love this recipe as much as I do. It’s a family favorite in my house, and I know it will become one in yours too. I’m so excited for you to try this recipe! And I’d absolutely love to hear about your experience. Did you make any variations? What toppings did you use? How did your family and friends react? Please, share your photos and stories in the comments below! I can’t wait to see your creations and hear all about your holiday baking adventures. Happy baking, and happy holidays! Let me know if you have any questions, and I’ll do my best to help. Enjoy your delicious, homemade Christmas peanut butter clusters! Print
Christmas Peanut Butter Clusters: Easy Recipe & Festive Treat
- Total Time: 30 minutes
- Yield: 30–40 clusters 1x
Description
Easy, festive Christmas Peanut Butter Clusters with chocolate, peanut butter, peanuts, pretzels, and Rice Krispies. Great for gifts or holiday treats!
Ingredients
- 1 pound (16 ounces) milk chocolate, chopped
- 1 pound (16 ounces) semi-sweet chocolate, chopped
- 1 cup creamy peanut butter
- 1 cup dry roasted peanuts, lightly salted
- 1 cup mini pretzels, broken into small pieces
- 1 cup Rice Krispies cereal
- 1/2 cup powdered sugar, for dusting (optional)
- 1/4 cup sprinkles, for decoration (optional)
Instructions
- Fill a saucepan with about 2 inches of water. Make sure the water doesn’t touch the bottom of the bowl you’ll be placing on top. Bring the water to a simmer over medium heat.
- In a heat-safe bowl (glass or stainless steel works best), combine the chopped milk chocolate and semi-sweet chocolate.
- Place the bowl on top of the simmering water. Make sure the bowl fits snugly so steam doesn’t escape. Stir the chocolate frequently with a rubber spatula. Be patient! It will take about 10-15 minutes for the chocolate to completely melt. Avoid overheating the chocolate, as this can cause it to seize up and become grainy.
- The chocolate is ready when it’s completely melted and smooth. There should be no lumps or unmelted pieces. If you find any stubborn pieces, continue stirring gently until they melt.
- Once the chocolate is melted, remove the bowl from the heat and carefully dry the bottom to prevent any water from getting into the chocolate.
- Add the creamy peanut butter to the melted chocolate. Stir until the peanut butter is completely incorporated and the mixture is smooth and glossy. Make sure there are no streaks of peanut butter remaining.
- Pour in the dry roasted peanuts. Gently fold them into the chocolate mixture until they are evenly distributed.
- Add the broken mini pretzels to the mixture. Again, fold them in gently to avoid crushing them further. We want those salty pretzel pieces to add a nice crunch to our clusters.
- Finally, add the Rice Krispies cereal. Fold them in carefully to avoid breaking them. The Rice Krispies will add a light and airy texture to the clusters.
- Make sure all the mix-ins are evenly distributed throughout the chocolate mixture. This will ensure that each cluster has a good balance of flavors and textures.
- Line a baking sheet with parchment paper or wax paper. This will make it easy to remove the clusters once they’ve set.
- Using a spoon or a small cookie scoop (about 1-2 tablespoons), scoop portions of the chocolate mixture onto the prepared baking sheet. Leave a little space between each cluster so they don’t stick together.
- If you want, you can gently shape the clusters with your fingers or the back of a spoon. You can make them round, oval, or leave them in their natural, slightly irregular shape.
- While the chocolate is still wet, you can sprinkle the clusters with powdered sugar or sprinkles. The powdered sugar will give them a snowy, festive look, while the sprinkles will add a pop of color.
- If you choose to let the clusters set at room temperature, it will take about 1-2 hours. Make sure the baking sheet is placed in a cool, dry place away from direct sunlight or heat.
- If you want to speed up the setting process, you can refrigerate the clusters for about 30-60 minutes. This will help them harden more quickly.
- The clusters are ready when they are firm to the touch and the chocolate has completely set. You should be able to easily lift them off the parchment paper without them sticking or losing their shape.
- Place the set clusters in an airtight container. This will prevent them from drying out or absorbing any odors from the refrigerator.
- If you’re stacking the clusters in the container, layer them with parchment paper to prevent them from sticking together.
- For longer storage, keep the clusters in the refrigerator. They will stay fresh for up to 2 weeks.
- You can also freeze the clusters for up to 2 months. Wrap them tightly in plastic wrap and then place them in a freezer-safe bag or container. Thaw them in the refrigerator before serving.
Notes
- Melting Chocolate: Be patient when melting the chocolate. Avoid overheating, as this can cause it to seize.
- Mix-Ins: Work quickly after melting the chocolate, as it will start to set.
- Variations: Experiment with different types of chocolate, nuts, dried fruit, spices, or extracts to customize your clusters.
- Troubleshooting: If chocolate seizes, add a tablespoon of vegetable oil or shortening. If clusters aren’t setting, refrigerate longer. If clusters stick, chill the baking sheet in the freezer.
- Prep Time: 15 minutes
- Cook Time: 15 minutes