Chocolate Peanut Butter Pretzels: Prepare to enter a realm of irresistible salty-sweet perfection! I’m about to share a recipe that’s not just a treat, but an experience a symphony of flavors and textures that will have you reaching for “just one more” again and again. Forget complicated desserts; this is pure, unadulterated snacking bliss, ready in minutes.
While the exact origins of combining chocolate, peanut butter, and pretzels are shrouded in delicious mystery, the combination itself speaks to a universal craving. Think about it: the creamy, nutty richness of peanut butter, the decadent allure of chocolate, and the satisfying crunch of a pretzel. It’s a trifecta of taste that transcends cultures and generations. Its a modern classic!
People adore chocolate peanut butter pretzels for their sheer simplicity and addictive nature. The salty pretzel cuts through the sweetness of the chocolate and peanut butter, creating a balanced flavor profile that’s impossible to resist. Plus, they’re incredibly easy to make, requiring minimal ingredients and effort. Whether you’re looking for a quick after-school snack, a crowd-pleasing party treat, or a homemade gift that will be devoured in seconds, these chocolate peanut butter pretzels are always a winning choice. Get ready to experience the magic!

Ingredients:
- For the Chocolate Coating:
- 16 ounces (450g) high-quality milk chocolate, chopped (or semi-sweet, if preferred)
- 2 tablespoons vegetable shortening (Crisco), optional but recommended for smoother chocolate
- For the Peanut Butter Filling:
- 1 cup (250g) creamy peanut butter (no-stir variety works best)
- 1/2 cup (115g) unsalted butter, softened
- 3 cups (360g) powdered sugar, sifted
- 1/4 cup (60ml) milk
- 1 teaspoon vanilla extract
- Pinch of salt
- For the Pretzels:
- Approximately 60-70 pretzel snaps (square pretzels)
- Optional Toppings:
- Sprinkles (chocolate, peanut butter, or rainbow)
- Chopped peanuts
- Sea salt flakes
- Mini chocolate chips
Preparing the Peanut Butter Filling:
- Cream the Butter and Peanut Butter: In a large bowl, using an electric mixer (stand mixer or hand mixer), cream together the softened butter and peanut butter until light and fluffy. This usually takes about 2-3 minutes. Make sure the butter is truly softened; otherwise, you’ll end up with lumps.
- Add the Powdered Sugar: Gradually add the sifted powdered sugar, one cup at a time, mixing on low speed after each addition. Sifting the powdered sugar is crucial to prevent lumps in your filling. If you add it all at once, you’ll have a cloud of powdered sugar and a mess to clean up!
- Incorporate the Milk and Vanilla: Add the milk and vanilla extract to the mixture. Beat on medium speed until well combined. The mixture will likely be quite thick at this point, which is perfectly normal.
- Adjust Consistency (if needed): If the filling seems too thick, add a tablespoon of milk at a time until you reach a smooth, spreadable consistency. Be careful not to add too much milk, or the filling will become too runny. You want it to be firm enough to hold its shape between the pretzels.
- Add a Pinch of Salt: A small pinch of salt will enhance the peanut butter flavor and balance the sweetness of the powdered sugar.
- Taste Test: Give the filling a taste and adjust the sweetness or peanut butter flavor to your liking. You can add a little more powdered sugar if it’s not sweet enough or a bit more peanut butter if you want a stronger peanut butter taste.
Assembling the Pretzel Sandwiches:
- Prepare Your Work Station: Lay out a sheet of parchment paper or wax paper on a clean, flat surface. This will prevent the pretzels from sticking to the counter.
- Spread the Peanut Butter Filling: Take one pretzel snap and spread a generous amount of peanut butter filling on the flat side. You want a good layer of filling, but not so much that it squishes out excessively when you add the second pretzel.
- Sandwich the Pretzels: Top the peanut butter filling with another pretzel snap, pressing down gently to create a sandwich. Be careful not to press too hard, or the pretzels might break.
- Repeat: Continue this process until you have assembled all of your pretzel sandwiches. Place the finished sandwiches on the prepared parchment paper.
- Chill the Sandwiches (Optional but Recommended): Place the assembled pretzel sandwiches in the refrigerator for at least 30 minutes. This will help the peanut butter filling firm up, making them easier to dip in the chocolate. Chilling also helps prevent the chocolate from melting the filling too much during the dipping process.
Melting the Chocolate:
- Choose Your Melting Method: You can melt the chocolate using either a double boiler or the microwave. I prefer the double boiler method for more even melting and less risk of burning the chocolate, but the microwave is faster.
- Double Boiler Method: Fill a saucepan with about an inch of water and bring it to a simmer over medium heat. Place a heat-safe bowl (glass or stainless steel) on top of the saucepan, ensuring that the bottom of the bowl does not touch the water. Add the chopped chocolate and vegetable shortening (if using) to the bowl. Stir occasionally until the chocolate is completely melted and smooth. The shortening helps to create a smoother, more fluid chocolate coating.
- Microwave Method: Place the chopped chocolate and vegetable shortening (if using) in a microwave-safe bowl. Microwave in 30-second intervals, stirring well after each interval, until the chocolate is almost completely melted. Be very careful not to overheat the chocolate, as it can burn easily. Once the chocolate is mostly melted, continue stirring until it is completely smooth. The residual heat will melt the remaining chocolate.
- Maintain Chocolate Temperature: If you’re using the double boiler, keep the heat on low to maintain the chocolate’s melted consistency. If you’re using the microwave, the chocolate may start to harden as it cools. You can microwave it again in short bursts (10-15 seconds) to keep it melted.
Dipping and Decorating:
- Prepare Your Dipping Station: Have your melted chocolate in a bowl and your parchment paper-lined baking sheet ready. Also, prepare any toppings you want to use (sprinkles, chopped nuts, sea salt, etc.) in small bowls so they are easily accessible.
- Dip the Pretzel Sandwiches: One at a time, carefully dip each pretzel sandwich into the melted chocolate, ensuring that it is completely coated. You can use a fork or dipping tools to help you. Gently tap off any excess chocolate.
- Place on Parchment Paper: Place the chocolate-covered pretzel sandwich on the prepared parchment paper-lined baking sheet.
- Add Toppings (Immediately): While the chocolate is still wet, immediately sprinkle with your desired toppings. If you wait too long, the chocolate will harden, and the toppings won’t stick. Get creative with your toppings!
- Chill to Set: Place the baking sheet in the refrigerator for at least 15-20 minutes, or until the chocolate is completely set. This will help the chocolate harden and prevent it from melting at room temperature.
- Enjoy! Once the chocolate is set, remove the pretzel sandwiches from the refrigerator and enjoy! Store any leftovers in an airtight container at room temperature or in the refrigerator.
Tips and Variations:
- Type of Chocolate: Feel free to experiment with different types of chocolate. Dark chocolate, white chocolate, or even flavored chocolate (like mint or caramel) would all be delicious.
- Peanut Butter Alternatives: If you’re not a fan of peanut butter, you can use other nut butters, such as almond butter, cashew butter, or sunflower seed butter.
- Pretzel Variations: While pretzel snaps are the most common choice, you can also use pretzel rods or mini pretzels. You may need to adjust the amount of peanut butter filling depending on the size of the pretzels.
- Flavor Extracts: Add a few drops of different flavor extracts to the peanut butter filling or the melted chocolate to customize the flavor. Peppermint extract, almond extract, or coffee extract would all be great additions.
- Chocolate Drizzle: After the chocolate has set, you can drizzle with a contrasting color of melted chocolate for a decorative touch.
- Storage: Store these chocolate peanut butter pretzels in an airtight container at room temperature for up to a week, or in the refrigerator for up to two weeks.
- Make Ahead: You can make the peanut butter filling and assemble the pretzel sandwiches ahead of time. Store them in the refrigerator until you’re ready to dip them in chocolate.
- Troubleshooting Chocolate: If your chocolate seizes (becomes thick and grainy), try adding a teaspoon of vegetable shortening or coconut oil and stirring vigorously. Sometimes, a small amount of liquid can help to smooth it out. However, be careful not to add too much liquid, or the chocolate will become too thin.
- Vegan Option: To make these pretzels vegan, use vegan chocolate, vegan butter, and a plant-based milk alternative.
Conclusion:
And there you have it! These Chocolate Peanut Butter Pretzels are truly irresistible, and I’m confident they’ll become a new favorite in your household. Why are they a must-try? Well, beyond the sheer deliciousness of the salty-sweet combination, they’re incredibly easy to make, requiring minimal ingredients and effort. We’re talking about a treat that satisfies your cravings without demanding hours in the kitchen perfect for busy weeknights, impromptu gatherings, or simply when you need a little something special.
But the real magic lies in the symphony of flavors and textures. The crunchy pretzel base provides a delightful contrast to the smooth, creamy peanut butter and the rich, decadent chocolate coating. It’s a textural masterpiece that keeps you coming back for more. Plus, the salty pretzel perfectly balances the sweetness of the chocolate and peanut butter, preventing it from becoming overly cloying. It’s a harmonious blend that will tantalize your taste buds and leave you feeling completely satisfied.
Beyond the basic recipe, the possibilities are endless! For a festive touch, sprinkle the pretzels with colorful sprinkles before the chocolate sets. Or, if you’re feeling adventurous, try adding a pinch of sea salt to the chocolate for an extra layer of flavor. Chopped nuts, like peanuts or pecans, also make a fantastic addition, adding even more crunch and richness.
Serving suggestions? These Chocolate Peanut Butter Pretzels are perfect on their own as a snack or dessert. But they also shine as part of a larger dessert platter, alongside cookies, brownies, and other sweet treats. They make a wonderful addition to a party spread, and they’re always a hit with kids and adults alike. Consider packaging them in small cellophane bags and tying them with ribbon for a thoughtful homemade gift. They’re also fantastic crumbled over ice cream or yogurt for a decadent topping. For a more sophisticated presentation, arrange them artfully on a serving platter and drizzle with melted white chocolate.
Don’t be afraid to experiment and get creative with your own variations. Perhaps you’d like to try using different types of chocolate, such as dark chocolate or white chocolate. Or maybe you’d like to add a layer of caramel between the pretzel and the peanut butter. The only limit is your imagination!
I truly believe that everyone should experience the joy of these Chocolate Peanut Butter Pretzels. They’re simple, satisfying, and guaranteed to bring a smile to your face. So, what are you waiting for? Gather your ingredients, preheat your oven (if you’re using a baking method for melting the chocolate), and get ready to create some delicious magic.
I’m so excited for you to try this recipe! Once you’ve made your own batch of these delightful treats, I’d love to hear about your experience. Did you make any variations? What did you think of the flavor combination? Share your photos and comments in the comments section below. Let’s spread the love for these irresistible Chocolate Peanut Butter Pretzels and inspire others to give them a try! Happy baking (or rather, dipping)! I can’t wait to see what you create!
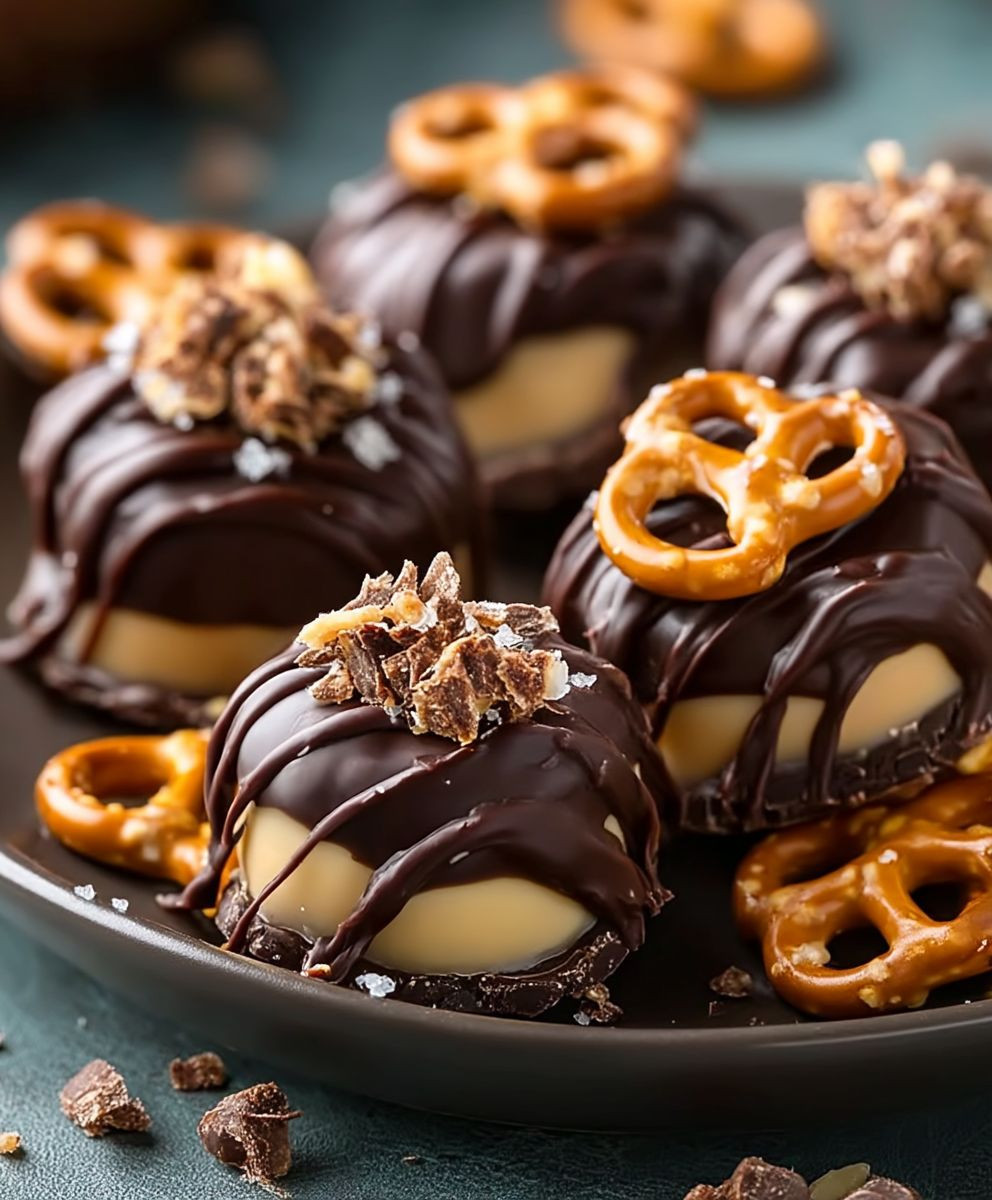
Chocolate Peanut Butter Pretzels: The Ultimate Sweet & Salty Snack
Sweet and salty chocolate-covered pretzel sandwiches with a creamy peanut butter filling. An easy and perfect treat!
Ingredients
- 16 ounces (450g) high-quality milk chocolate, chopped (or semi-sweet, if preferred)
- 2 tablespoons vegetable shortening (Crisco), optional but recommended for smoother chocolate
- 1 cup (250g) creamy peanut butter (no-stir variety works best)
- 1/2 cup (115g) unsalted butter, softened
- 3 cups (360g) powdered sugar, sifted
- 1/4 cup (60ml) milk
- 1 teaspoon vanilla extract
- Pinch of salt
- Approximately 60-70 pretzel snaps (square pretzels)
- Sprinkles (chocolate, peanut butter, or rainbow)
- Chopped peanuts
- Sea salt flakes
- Mini chocolate chips
Instructions
- In a large bowl, cream together the softened butter and peanut butter until light and fluffy (2-3 minutes).
- Gradually add the sifted powdered sugar, one cup at a time, mixing on low speed after each addition.
- Add the milk and vanilla extract. Beat on medium speed until well combined.
- If the filling seems too thick, add a tablespoon of milk at a time until you reach a smooth, spreadable consistency.
- A small pinch of salt will enhance the peanut butter flavor and balance the sweetness of the powdered sugar.
- Give the filling a taste and adjust the sweetness or peanut butter flavor to your liking.
- Lay out a sheet of parchment paper or wax paper on a clean, flat surface.
- Take one pretzel snap and spread a generous amount of peanut butter filling on the flat side.
- Top the peanut butter filling with another pretzel snap, pressing down gently to create a sandwich.
- Continue this process until you have assembled all of your pretzel sandwiches. Place the finished sandwiches on the prepared parchment paper.
- Place the assembled pretzel sandwiches in the refrigerator for at least 30 minutes.
- Melt the chocolate using either a double boiler or the microwave.
- Fill a saucepan with about an inch of water and bring it to a simmer over medium heat. Place a heat-safe bowl (glass or stainless steel) on top of the saucepan, ensuring that the bottom of the bowl does not touch the water. Add the chopped chocolate and vegetable shortening (if using) to the bowl. Stir occasionally until the chocolate is completely melted and smooth. The shortening helps to create a smoother, more fluid chocolate coating.
- Place the chopped chocolate and vegetable shortening (if using) in a microwave-safe bowl. Microwave in 30-second intervals, stirring well after each interval, until the chocolate is almost completely melted. Be very careful not to overheat the chocolate, as it can burn easily. Once the chocolate is mostly melted, continue stirring until it is completely smooth. The residual heat will melt the remaining chocolate.
- If you’re using the double boiler, keep the heat on low to maintain the chocolate’s melted consistency. If you’re using the microwave, the chocolate may start to harden as it cools. You can microwave it again in short bursts (10-15 seconds) to keep it melted.
- Have your melted chocolate in a bowl and your parchment paper-lined baking sheet ready. Also, prepare any toppings you want to use (sprinkles, chopped nuts, sea salt, etc.) in small bowls so they are easily accessible.
- One at a time, carefully dip each pretzel sandwich into the melted chocolate, ensuring that it is completely coated. You can use a fork or dipping tools to help you. Gently tap off any excess chocolate.
- Place the chocolate-covered pretzel sandwich on the prepared parchment paper-lined baking sheet.
- While the chocolate is still wet, immediately sprinkle with your desired toppings. If you wait too long, the chocolate will harden, and the toppings won’t stick. Get creative with your toppings!
- Place the baking sheet in the refrigerator for at least 15-20 minutes, or until the chocolate is completely set. This will help the chocolate harden and prevent it from melting at room temperature.
- Once the chocolate is set, remove the pretzel sandwiches from the refrigerator and enjoy! Store any leftovers in an airtight container at room temperature or in the refrigerator.
Notes
- Feel free to experiment with different types of chocolate (dark, white, flavored).
- Peanut butter alternatives: almond butter, cashew butter, sunflower seed butter.
- Pretzel variations: pretzel rods or mini pretzels (adjust filling amount).
- Add flavor extracts to the filling or chocolate (peppermint, almond, coffee).
- Drizzle with contrasting chocolate after the main chocolate sets.
- Store in an airtight container at room temperature (up to a week) or in the refrigerator (up to two weeks).
- Make the filling and assemble sandwiches ahead of time.
- If chocolate seizes, add a teaspoon of vegetable shortening or coconut oil.
- Vegan option: use vegan chocolate, butter, and milk.