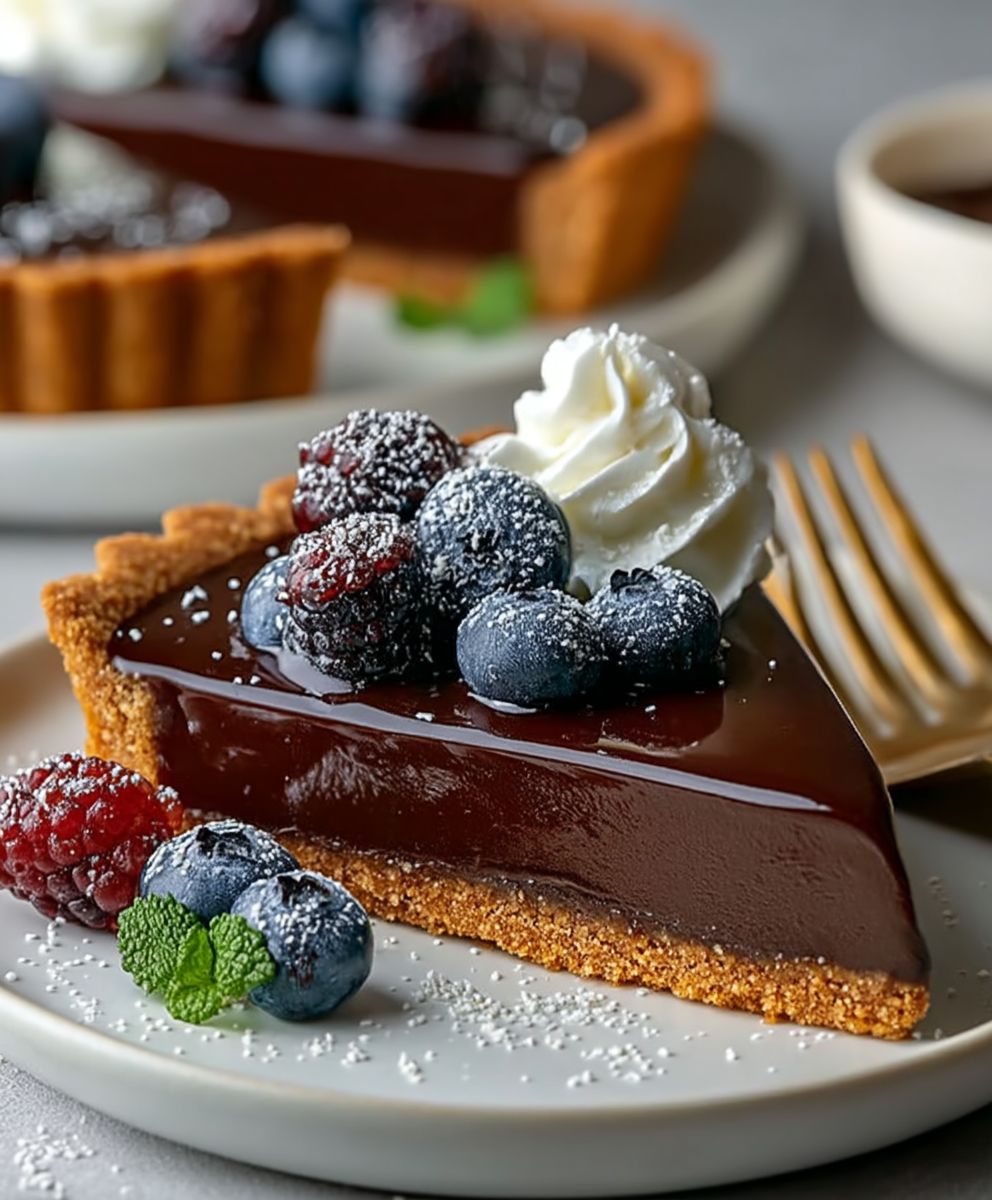
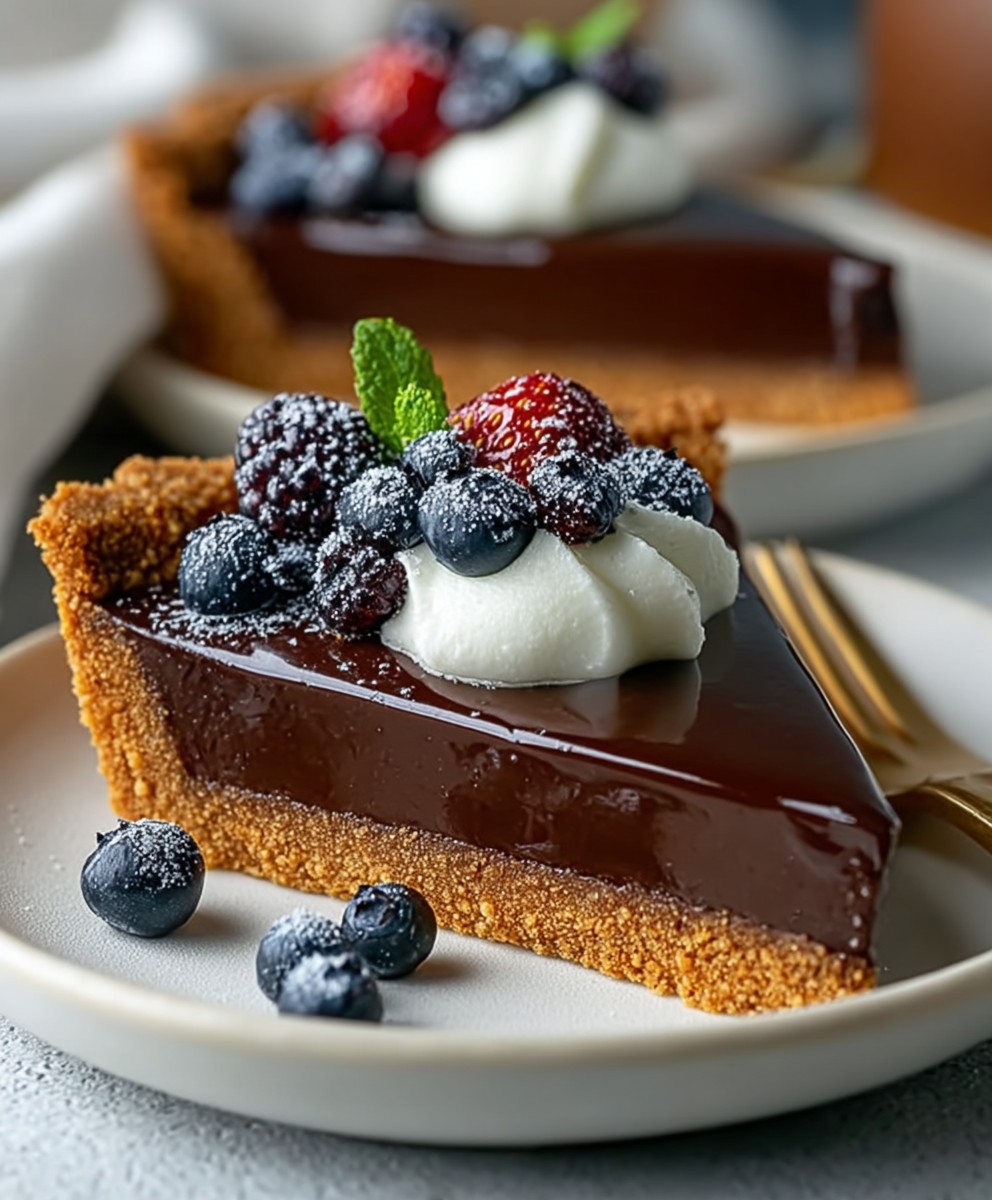
Chocolate Ganache Tart: Prepare to be utterly captivated by this decadent dessert! Imagine a buttery, crumbly crust embracing a velvety smooth, intensely chocolatey ganache. It’s a symphony of textures and flavors that will leave you craving more. This isn’t just a tart; it’s an experience.
While the exact origins of the chocolate ganache tart are debated, ganache itself has a rich history, dating back to 19th-century France. Legend has it that a clumsy apprentice accidentally poured hot cream into chocolate, and the chef, initially annoyed, discovered the delicious concoction that we now know and love. From its humble beginnings, ganache has evolved into a versatile ingredient used in everything from truffles to glazes, and, of course, our star today: the tart.
People adore this dessert for its luxurious simplicity. The combination of the crisp, often slightly salty, pastry crust and the rich, melt-in-your-mouth ganache is simply irresistible. It’s elegant enough for a special occasion but also surprisingly easy to make at home. Plus, the intense chocolate flavor satisfies even the most ardent chocoholic. Whether you’re looking for a show-stopping dessert to impress your guests or a comforting treat for yourself, this chocolate ganache tart is guaranteed to be a winner. Let’s get baking!
Ingredients:
- For the Chocolate Shortbread Crust:
- 1 1/2 cups (180g) all-purpose flour
- 1/2 cup (50g) unsweetened cocoa powder
- 1/2 cup (100g) granulated sugar
- 1/4 teaspoon salt
- 1/2 cup (113g) cold unsalted butter, cut into cubes
- 1 large egg yolk
- 2-4 tablespoons ice water
- For the Chocolate Ganache Filling:
- 12 ounces (340g) semi-sweet chocolate, finely chopped
- 1 cup (240ml) heavy cream
- 2 tablespoons (28g) unsalted butter, softened
- 1 tablespoon light corn syrup (optional, for shine)
- 1/2 teaspoon vanilla extract
- Pinch of sea salt
- Optional Garnishes:
- Fresh raspberries
- Chocolate shavings
- Whipped cream
- Dusting of cocoa powder
Preparing the Chocolate Shortbread Crust
- Combine Dry Ingredients: In a large bowl, whisk together the flour, cocoa powder, sugar, and salt. Make sure everything is evenly distributed for a consistent flavor and texture.
- Cut in the Butter: Add the cold, cubed butter to the dry ingredients. Using a pastry blender or your fingertips (work quickly to keep the butter cold!), cut the butter into the flour mixture until it resembles coarse crumbs. You should still see small pieces of butter throughout. This is crucial for creating a flaky crust.
- Add the Egg Yolk: In a small bowl, lightly whisk the egg yolk. Add the egg yolk to the flour mixture. The egg yolk adds richness and helps bind the dough.
- Add Ice Water: Gradually add the ice water, one tablespoon at a time, mixing after each addition. Mix until the dough just comes together. Be careful not to overmix, as this will develop the gluten and result in a tough crust. The dough should be slightly crumbly but hold together when pressed.
- Form the Dough into a Disc: Turn the dough out onto a lightly floured surface. Gently form it into a disc about 1 inch thick. Wrap the disc tightly in plastic wrap.
- Chill the Dough: Refrigerate the dough for at least 30 minutes, or up to 2 hours. This allows the gluten to relax and the butter to firm up, preventing the crust from shrinking during baking.
- Preheat the Oven: Preheat your oven to 350°F (175°C). Place a rack in the center of the oven.
- Roll Out the Dough: On a lightly floured surface, roll out the chilled dough into a circle about 12 inches in diameter. The dough should be about 1/8 inch thick.
- Transfer to Tart Pan: Carefully transfer the rolled-out dough to a 9-inch tart pan with a removable bottom. Gently press the dough into the bottom and up the sides of the pan.
- Trim the Edges: Trim any excess dough from the edges of the tart pan. You can use a rolling pin to roll over the top of the pan, or simply trim with a knife.
- Dock the Crust: Use a fork to prick the bottom of the crust all over. This prevents the crust from puffing up during baking.
- Chill Again: Place the tart pan in the freezer for 15 minutes. This helps the crust hold its shape during baking.
- Bake the Crust: Line the crust with parchment paper and fill with pie weights or dried beans. Bake for 20 minutes.
- Remove Weights and Bake Again: Remove the parchment paper and pie weights. Bake for another 10-15 minutes, or until the crust is golden brown and set.
- Cool Completely: Let the crust cool completely in the tart pan on a wire rack before filling.
Preparing the Chocolate Ganache Filling
- Chop the Chocolate: Finely chop the semi-sweet chocolate and place it in a heatproof bowl. Make sure the chocolate is finely chopped so it melts evenly.
- Heat the Heavy Cream: In a saucepan, heat the heavy cream over medium heat until it just begins to simmer. Do not boil the cream.
- Pour Cream Over Chocolate: Pour the hot heavy cream over the chopped chocolate. Let it sit for 1 minute to allow the heat to melt the chocolate.
- Whisk Until Smooth: Gently whisk the chocolate and cream together until smooth and glossy. Start in the center and work your way outwards. Be patient and continue whisking until all the chocolate is melted and the ganache is homogenous.
- Add Butter, Corn Syrup, Vanilla, and Salt: Add the softened butter, corn syrup (if using), vanilla extract, and salt to the ganache. Whisk until everything is fully incorporated and the ganache is smooth and shiny. The butter adds richness and shine, while the corn syrup helps prevent crystallization.
Assembling the Chocolate Ganache Tart
- Pour Ganache into Crust: Pour the warm chocolate ganache into the cooled chocolate shortbread crust. Spread it evenly to the edges.
- Refrigerate to Set: Refrigerate the tart for at least 2-3 hours, or preferably overnight, to allow the ganache to set completely. The ganache should be firm to the touch but still have a slight jiggle.
- Garnish (Optional): Before serving, garnish the tart with fresh raspberries, chocolate shavings, whipped cream, or a dusting of cocoa powder, if desired. Get creative and add your personal touch!
- Serve and Enjoy: Carefully remove the tart from the tart pan by gently pushing up on the removable bottom. Slice and serve. This decadent chocolate ganache tart is best served slightly chilled.
Conclusion:
This Chocolate Ganache Tart isn’t just a dessert; it’s an experience. From the satisfyingly crisp crust to the intensely rich and smooth ganache, every bite is a symphony of textures and flavors that will leave you craving more. I truly believe this recipe is a must-try for any chocolate lover, whether you’re a seasoned baker or just starting out. The simplicity of the ingredients belies the incredible depth of flavor you’ll achieve, making it a show-stopping dessert that’s surprisingly easy to create.
But don’t just take my word for it! The real magic happens when you bring this tart to life in your own kitchen. Imagine the aroma of the buttery crust baking, followed by the intoxicating scent of melting chocolate and cream. It’s a sensory experience that’s as rewarding as the final product.
And the best part? This recipe is incredibly versatile. While the classic Chocolate Ganache Tart is divine on its own, there are endless ways to customize it to your liking. For a touch of elegance, try sprinkling the finished tart with flaky sea salt or dusting it with cocoa powder. If you’re feeling adventurous, consider adding a layer of raspberry jam between the crust and the ganache for a burst of fruity tartness that perfectly complements the rich chocolate.
Looking for serving suggestions? A slice of this tart pairs beautifully with a scoop of vanilla ice cream or a dollop of whipped cream. For a more sophisticated pairing, try serving it with a glass of port wine or a strong cup of coffee. It’s also the perfect ending to a special occasion meal or a delightful treat to share with friends and family.
Think about adding a swirl of peanut butter to the ganache before it sets for a Reese’s-inspired twist. Or, infuse the cream with orange zest for a bright and citrusy note. You could even top the tart with fresh berries for a pop of color and freshness. The possibilities are truly endless!
I’ve poured my heart and soul into perfecting this recipe, and I’m confident that you’ll love it as much as I do. It’s a dessert that’s both impressive and approachable, perfect for any occasion. The rich, decadent chocolate ganache is the star, but the buttery, crumbly crust provides the perfect counterpoint. It’s a balance of textures and flavors that’s simply irresistible.
So, what are you waiting for? Gather your ingredients, preheat your oven, and get ready to embark on a chocolatey adventure. I promise you won’t be disappointed. This Chocolate Ganache Tart is more than just a recipe; it’s an invitation to indulge in a little bit of pure bliss.
Once you’ve tried it, I’d absolutely love to hear about your experience! Share your photos, your variations, and your thoughts in the comments below. Did you add any special toppings? Did you try a different flavor infusion? I’m always eager to learn from your culinary creations and see how you’ve made this recipe your own. Happy baking! Let me know what you think of this decadent treat!
Chocolate Ganache Tart: The Ultimate Decadent Dessert Recipe
Decadent chocolate ganache tart with a rich, buttery chocolate shortbread crust. A perfect dessert for chocolate lovers!
Ingredients
- 1 1/2 cups (180g) all-purpose flour
- 1/2 cup (50g) unsweetened cocoa powder
- 1/2 cup (100g) granulated sugar
- 1/4 teaspoon salt
- 1/2 cup (113g) cold unsalted butter, cut into cubes
- 1 large egg yolk
- 2-4 tablespoons ice water
- 12 ounces (340g) semi-sweet chocolate, finely chopped
- 1 cup (240ml) heavy cream
- 2 tablespoons (28g) unsalted butter, softened
- 1 tablespoon light corn syrup (optional, for shine)
- 1/2 teaspoon vanilla extract
- Pinch of sea salt
- Fresh raspberries
- Chocolate shavings
- Whipped cream
- Dusting of cocoa powder
Instructions
- Combine Dry Ingredients: In a large bowl, whisk together the flour, cocoa powder, sugar, and salt.
- Cut in the Butter: Add the cold, cubed butter to the dry ingredients. Using a pastry blender or your fingertips (work quickly to keep the butter cold!), cut the butter into the flour mixture until it resembles coarse crumbs.
- Add the Egg Yolk: In a small bowl, lightly whisk the egg yolk. Add the egg yolk to the flour mixture.
- Add Ice Water: Gradually add the ice water, one tablespoon at a time, mixing after each addition. Mix until the dough just comes together. Be careful not to overmix.
- Form the Dough into a Disc: Turn the dough out onto a lightly floured surface. Gently form it into a disc about 1 inch thick. Wrap the disc tightly in plastic wrap.
- Chill the Dough: Refrigerate the dough for at least 30 minutes, or up to 2 hours.
- Preheat the Oven: Preheat your oven to 350°F (175°C). Place a rack in the center of the oven.
- Roll Out the Dough: On a lightly floured surface, roll out the chilled dough into a circle about 12 inches in diameter. The dough should be about 1/8 inch thick.
- Transfer to Tart Pan: Carefully transfer the rolled-out dough to a 9-inch tart pan with a removable bottom. Gently press the dough into the bottom and up the sides of the pan.
- Trim the Edges: Trim any excess dough from the edges of the tart pan.
- Dock the Crust: Use a fork to prick the bottom of the crust all over.
- Chill Again: Place the tart pan in the freezer for 15 minutes.
- Bake the Crust: Line the crust with parchment paper and fill with pie weights or dried beans. Bake for 20 minutes.
- Remove Weights and Bake Again: Remove the parchment paper and pie weights. Bake for another 10-15 minutes, or until the crust is golden brown and set.
- Cool Completely: Let the crust cool completely in the tart pan on a wire rack before filling.
- Chop the Chocolate: Finely chop the semi-sweet chocolate and place it in a heatproof bowl.
- Heat the Heavy Cream: In a saucepan, heat the heavy cream over medium heat until it just begins to simmer. Do not boil the cream.
- Pour Cream Over Chocolate: Pour the hot heavy cream over the chopped chocolate. Let it sit for 1 minute to allow the heat to melt the chocolate.
- Whisk Until Smooth: Gently whisk the chocolate and cream together until smooth and glossy.
- Add Butter, Corn Syrup, Vanilla, and Salt: Add the softened butter, corn syrup (if using), vanilla extract, and salt to the ganache. Whisk until everything is fully incorporated and the ganache is smooth and shiny.
- Pour Ganache into Crust: Pour the warm chocolate ganache into the cooled chocolate shortbread crust. Spread it evenly to the edges.
- Refrigerate to Set: Refrigerate the tart for at least 2-3 hours, or preferably overnight, to allow the ganache to set completely.
- Garnish (Optional): Before serving, garnish the tart with fresh raspberries, chocolate shavings, whipped cream, or a dusting of cocoa powder, if desired.
- Serve and Enjoy: Carefully remove the tart from the tart pan by gently pushing up on the removable bottom. Slice and serve.
Notes
- For the flakiest crust, keep your butter and water as cold as possible.
- Don’t overmix the dough for the crust, as this will develop the gluten and make it tough.
- If you don’t have pie weights, you can use dried beans or rice.
- The corn syrup in the ganache is optional, but it adds a nice shine.
- For a richer flavor, use high-quality semi-sweet chocolate.
- The tart can be stored in the refrigerator for up to 3 days.

