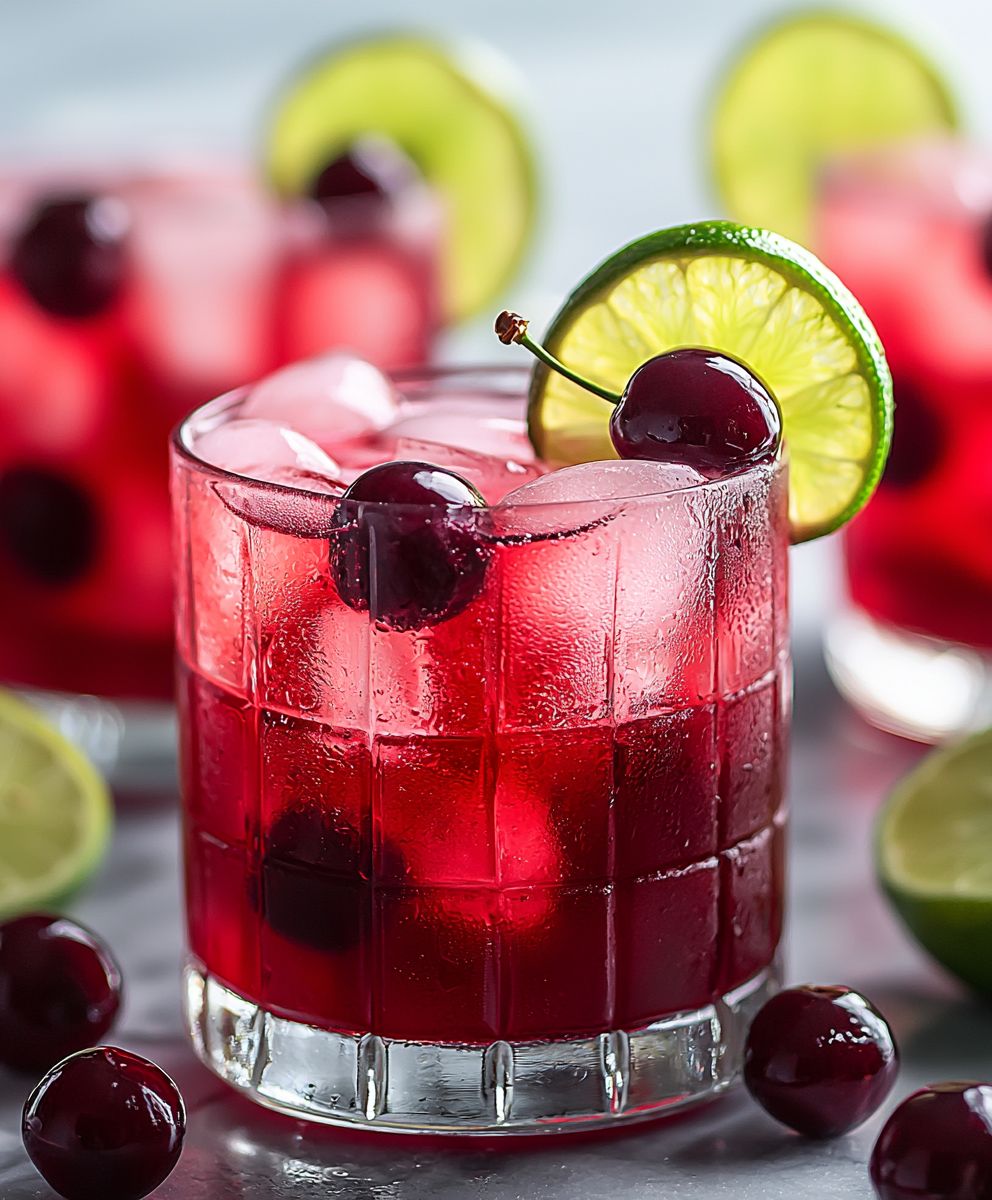
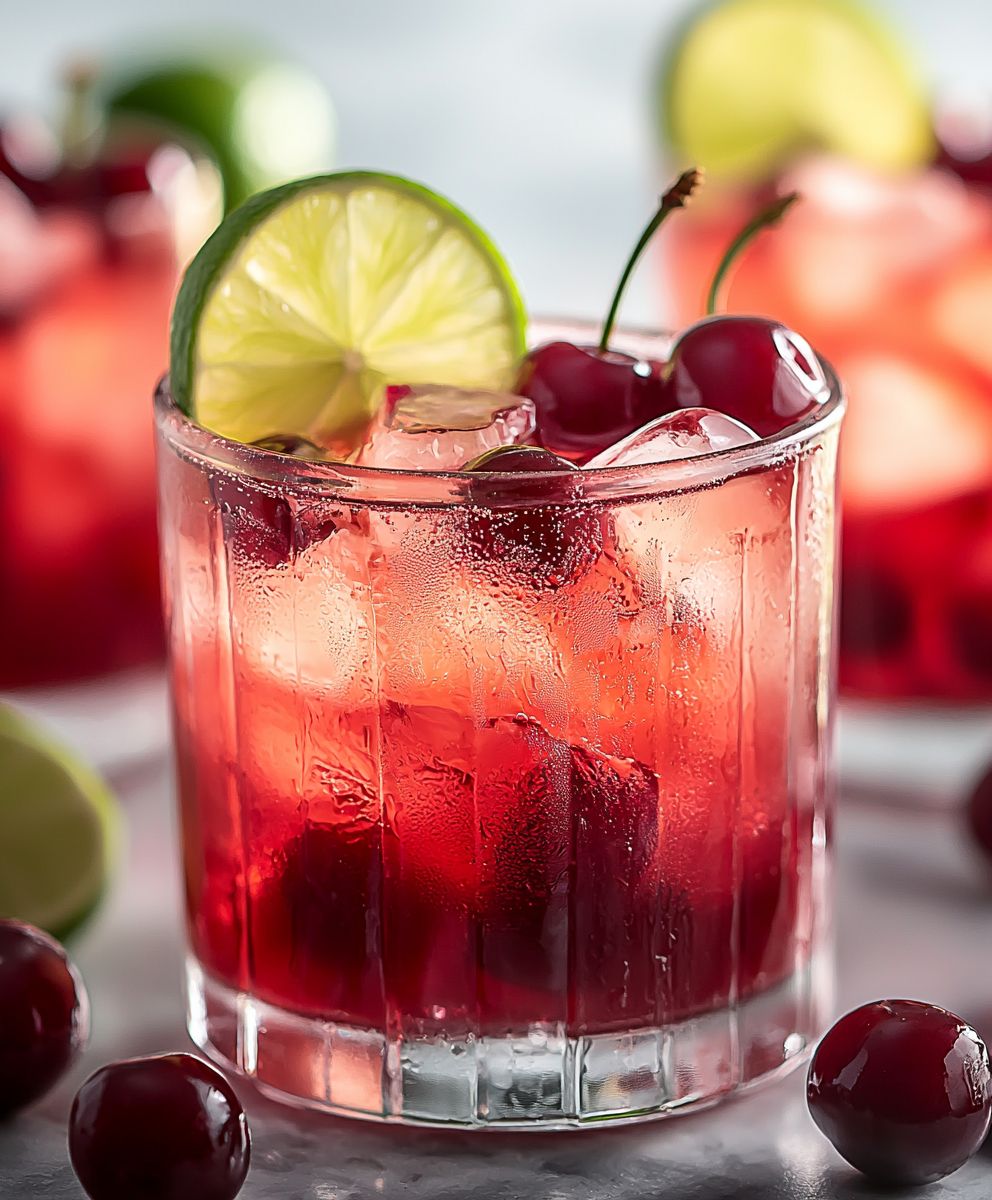
Cherry Limeade, the quintessential summer cooler, is more than just a drink; it’s a vibrant burst of sunshine in a glass! Imagine yourself lounging on a porch swing, the sun warming your skin, and a frosty glass of this ruby-red refreshment in your hand. Doesn’t that sound like pure bliss? This isn’t just a recipe; it’s a memory waiting to be made.
While the exact origins of limeade are somewhat hazy, the addition of cherry elevates it to a whole new level of deliciousness. Cherries, with their rich history as a symbol of abundance and good fortune, perfectly complement the zesty tang of lime. Think of it as a modern twist on a classic, a delightful marriage of sweet and tart that dances on your taste buds.
People adore Cherry Limeade for its incredibly refreshing taste and its ease of preparation. It’s the perfect drink to quench your thirst on a hot day, and it’s equally welcome at barbecues, picnics, or simply as a special treat. The combination of sweet cherries and tart lime creates a flavor profile that’s both invigorating and satisfying. Plus, it’s incredibly versatile! You can easily adjust the sweetness and tartness to suit your personal preferences. So, are you ready to learn how to make this irresistible summer beverage? Let’s dive in!
Ingredients:
- 1 pound fresh or frozen cherries, pitted (if using frozen, thaw slightly)
- 1 cup granulated sugar (adjust to taste depending on cherry sweetness)
- 1 cup water
- 1 cup fresh lime juice (about 8-10 limes)
- 6 cups cold water (for diluting the concentrate)
- Lime slices, for garnish (optional)
- Fresh mint sprigs, for garnish (optional)
- Ice cubes
Making the Cherry Syrup:
This is where the magic happens! We’re going to create a rich, flavorful cherry syrup that forms the base of our limeade. Don’t skip this step it’s what makes this recipe truly special.
- Combine Cherries, Sugar, and Water: In a medium saucepan, combine the pitted cherries, granulated sugar, and 1 cup of water. Make sure the sugar is evenly distributed among the cherries.
- Bring to a Simmer: Place the saucepan over medium heat and bring the mixture to a gentle simmer. You’ll want to see small bubbles forming around the edges of the pan.
- Simmer and Stir: Once simmering, reduce the heat to low and continue to simmer for about 15-20 minutes, stirring occasionally. This allows the cherries to release their juices and the sugar to dissolve completely, creating a thick syrup. The cherries should become very soft and almost fall apart.
- Mash the Cherries: After simmering, remove the saucepan from the heat. Use a potato masher or the back of a spoon to gently mash the cherries. This helps to release even more flavor and color into the syrup. Don’t worry about getting them completely smooth; a little texture is perfectly fine.
- Strain the Syrup (Optional but Recommended): For a smoother syrup, strain the mixture through a fine-mesh sieve lined with cheesecloth. Place the sieve over a bowl and pour the cherry mixture into it. Use a spoon to press down on the cherries, extracting as much syrup as possible. Discard the solids or save them for another use (like adding to yogurt or oatmeal!). If you don’t mind a little pulp in your limeade, you can skip this step.
- Cool the Syrup: Allow the cherry syrup to cool completely before using it. This will take about 30-45 minutes at room temperature. You can speed up the process by placing the syrup in the refrigerator for about 15-20 minutes. Cooling the syrup helps to prevent the ice from melting too quickly when you assemble the limeade.
Preparing the Lime Juice:
Fresh lime juice is key to a bright and zesty limeade. Avoid using bottled lime juice, as it often lacks the vibrant flavor of freshly squeezed juice. Trust me, the extra effort is worth it!
- Choose Ripe Limes: Select limes that are heavy for their size and have a smooth, thin skin. These limes tend to be juicier.
- Roll the Limes: Before juicing, roll the limes firmly on a countertop or cutting board. This helps to break down the membranes inside the lime and release more juice.
- Juice the Limes: Use a citrus juicer (either a handheld squeezer or an electric juicer) to extract the juice from the limes. Aim for about 1 cup of fresh lime juice.
- Strain the Lime Juice (Optional): If you prefer a pulp-free limeade, strain the lime juice through a fine-mesh sieve to remove any seeds or pulp.
Assembling the Cherry Limeade:
Now for the fun part putting everything together! This is where you can customize the limeade to your liking, adjusting the sweetness and tartness to your taste.
- Combine Syrup and Lime Juice: In a large pitcher, combine the cooled cherry syrup and the fresh lime juice. Stir well to combine.
- Add Water: Pour in the 6 cups of cold water. Stir gently to mix everything together.
- Taste and Adjust: This is the most important step! Taste the limeade and adjust the sweetness or tartness as needed. If it’s too tart, add a little more cherry syrup or sugar. If it’s too sweet, add a little more lime juice or water. Remember, you can always add more, but you can’t take it away!
- Chill the Limeade: For the best flavor, chill the limeade in the refrigerator for at least 30 minutes before serving. This allows the flavors to meld together and the limeade to become nice and cold.
Serving the Cherry Limeade:
Presentation is everything! A beautifully served limeade is even more refreshing. Here are a few tips for serving your homemade cherry limeade:
- Fill Glasses with Ice: Fill glasses with ice cubes. Crushed ice is also a great option for a more slushy texture.
- Pour the Limeade: Pour the chilled cherry limeade into the ice-filled glasses.
- Garnish (Optional): Garnish with lime slices and fresh mint sprigs for a pop of color and added flavor. You can also add a cherry to each glass for an extra touch of sweetness.
- Serve Immediately: Serve the cherry limeade immediately and enjoy!
Tips and Variations:
Want to put your own spin on this recipe? Here are a few ideas:
- Sparkling Cherry Limeade: Substitute sparkling water or club soda for the still water for a fizzy version.
- Cherry Limeade with a Kick: Add a splash of vodka or rum for an adult-friendly version.
- Frozen Cherry Limeade: Blend the limeade with ice for a refreshing frozen treat.
- Different Fruits: Experiment with other fruits, such as raspberries, strawberries, or blackberries, in addition to or instead of cherries.
- Sweetener Options: Use honey, agave nectar, or maple syrup instead of granulated sugar.
- Spice it Up: Add a pinch of cayenne pepper to the cherry syrup for a subtle kick.
Making Ahead:
The cherry syrup can be made up to 3 days in advance and stored in an airtight container in the refrigerator. This is a great way to save time when you’re ready to assemble the limeade.
Storage:
Leftover cherry limeade can be stored in an airtight container in the refrigerator for up to 2 days. The flavor may diminish slightly over time, but it will still be delicious.
Why This Recipe Works:
This recipe stands out because it uses fresh ingredients and a homemade cherry syrup. The combination of sweet cherries and tart lime juice creates a perfectly balanced and refreshing drink. The step-by-step instructions ensure that even beginner cooks can easily make this recipe. Plus, the variations offer endless possibilities for customization.
Nutritional Information (Approximate):
Please note that the nutritional information is an estimate and may vary depending on the specific ingredients used and portion sizes.
- Calories: Approximately 150-200 per serving
- Sugar: Approximately 30-40 grams per serving
Enjoy your homemade Cherry Limeade! I hope you find this recipe as refreshing and delicious as I do. Let me know in the comments if you try it and what variations you come up with!
Conclusion:
This Cherry Limeade recipe isn’t just another drink; it’s a burst of sunshine in a glass, a symphony of sweet and tart that will tantalize your taste buds and leave you feeling refreshed and invigorated. I truly believe it’s a must-try for anyone looking for a simple, delicious, and utterly satisfying beverage, especially during those hot summer months. The vibrant color alone is enough to brighten your day, but the incredible flavor combination is what will keep you coming back for more. Why is this Cherry Limeade a must-try? Because it’s incredibly easy to make with just a few simple ingredients, it’s naturally sweet and tart, and it’s infinitely customizable to your personal preferences. Forget those sugary, artificial-tasting store-bought versions; this homemade Cherry Limeade is the real deal, bursting with fresh, natural flavor. It’s the perfect drink to quench your thirst and satisfy your sweet cravings without any of the guilt. But the fun doesn’t stop there! This recipe is just a starting point. Feel free to experiment with different variations to create your own signature Cherry Limeade.Serving Suggestions and Variations:
* Sparkling Cherry Limeade: Add a splash of sparkling water or club soda for a fizzy and refreshing twist. * Cherry Limeade Mocktail: Garnish with fresh mint sprigs and lime wedges for an elegant and sophisticated mocktail. Perfect for parties and special occasions! * Frozen Cherry Limeade Slushie: Blend the Cherry Limeade with ice for a frosty and refreshing slushie. This is a great way to cool down on a hot day. * Spiked Cherry Limeade: For an adult version, add a shot of vodka, rum, or tequila. Be sure to drink responsibly! * Berry Cherry Limeade: Add a handful of fresh raspberries, blueberries, or strawberries to the blender for an extra burst of flavor and antioxidants. * Herbal Cherry Limeade: Infuse the simple syrup with fresh herbs like basil or rosemary for a unique and aromatic twist. * Make it a float! Add a scoop of vanilla ice cream or sherbet for a decadent and creamy treat. I’m so excited for you to try this recipe and experience the magic of homemade Cherry Limeade for yourself. It’s a guaranteed crowd-pleaser, perfect for everything from casual backyard barbecues to elegant summer soirees. Don’t be afraid to get creative and experiment with different variations to find your perfect Cherry Limeade combination. I’m confident that you’ll love this recipe as much as I do. So, what are you waiting for? Gather your ingredients, put on some music, and get ready to whip up a batch of this incredibly delicious and refreshing Cherry Limeade. I promise you won’t be disappointed! And most importantly, I’d love to hear about your experience! Share your photos and comments on your favorite social media platform and tag me. Let me know what variations you tried and what you thought of the recipe. I can’t wait to see your creations and hear your feedback. Happy mixing! Print
Cherry Limeade: The Ultimate Refreshing Summer Drink Recipe
- Total Time: 70 minutes
- Yield: 8 servings 1x
Description
Refreshing homemade cherry limeade with fresh cherries, lime juice, and a touch of sweetness. Perfect for a hot summer day!
Ingredients
- 1 pound fresh or frozen cherries, pitted (if using frozen, thaw slightly)
- 1 cup granulated sugar (adjust to taste depending on cherry sweetness)
- 1 cup water
- 1 cup fresh lime juice (about 8–10 limes)
- 6 cups cold water (for diluting the concentrate)
- Lime slices, for garnish (optional)
- Fresh mint sprigs, for garnish (optional)
- Ice cubes
Instructions
- Combine Cherries, Sugar, and Water: In a medium saucepan, combine the pitted cherries, granulated sugar, and 1 cup of water. Make sure the sugar is evenly distributed among the cherries.
- Bring to a Simmer: Place the saucepan over medium heat and bring the mixture to a gentle simmer. You’ll want to see small bubbles forming around the edges of the pan.
- Simmer and Stir: Once simmering, reduce the heat to low and continue to simmer for about 15-20 minutes, stirring occasionally. This allows the cherries to release their juices and the sugar to dissolve completely, creating a thick syrup. The cherries should become very soft and almost fall apart.
- Mash the Cherries: After simmering, remove the saucepan from the heat. Use a potato masher or the back of a spoon to gently mash the cherries. This helps to release even more flavor and color into the syrup. Don’t worry about getting them completely smooth; a little texture is perfectly fine.
- Strain the Syrup (Optional but Recommended): For a smoother syrup, strain the mixture through a fine-mesh sieve lined with cheesecloth. Place the sieve over a bowl and pour the cherry mixture into it. Use a spoon to press down on the cherries, extracting as much syrup as possible. Discard the solids or save them for another use (like adding to yogurt or oatmeal!). If you don’t mind a little pulp in your limeade, you can skip this step.
- Cool the Syrup: Allow the cherry syrup to cool completely before using it. This will take about 30-45 minutes at room temperature. You can speed up the process by placing the syrup in the refrigerator for about 15-20 minutes. Cooling the syrup helps to prevent the ice from melting too quickly when you assemble the limeade.
- Choose Ripe Limes: Select limes that are heavy for their size and have a smooth, thin skin. These limes tend to be juicier.
- Roll the Limes: Before juicing, roll the limes firmly on a countertop or cutting board. This helps to break down the membranes inside the lime and release more juice.
- Juice the Limes: Use a citrus juicer (either a handheld squeezer or an electric juicer) to extract the juice from the limes. Aim for about 1 cup of fresh lime juice.
- Strain the Lime Juice (Optional): If you prefer a pulp-free limeade, strain the lime juice through a fine-mesh sieve to remove any seeds or pulp.
- Combine Syrup and Lime Juice: In a large pitcher, combine the cooled cherry syrup and the fresh lime juice. Stir well to combine.
- Add Water: Pour in the 6 cups of cold water. Stir gently to mix everything together.
- Taste and Adjust: This is the most important step! Taste the limeade and adjust the sweetness or tartness as needed. If it’s too tart, add a little more cherry syrup or sugar. If it’s too sweet, add a little more lime juice or water. Remember, you can always add more, but you can’t take it away!
- Chill the Limeade: For the best flavor, chill the limeade in the refrigerator for at least 30 minutes before serving. This allows the flavors to meld together and the limeade to become nice and cold.
- Fill Glasses with Ice: Fill glasses with ice cubes. Crushed ice is also a great option for a more slushy texture.
- Pour the Limeade: Pour the chilled cherry limeade into the ice-filled glasses.
- Garnish (Optional): Garnish with lime slices and fresh mint sprigs for a pop of color and added flavor. You can also add a cherry to each glass for an extra touch of sweetness.
- Serve Immediately: Serve the cherry limeade immediately and enjoy!
Notes
- The cherry syrup can be made up to 3 days in advance and stored in an airtight container in the refrigerator.
- Leftover cherry limeade can be stored in an airtight container in the refrigerator for up to 2 days.
- Prep Time: 15 minutes
- Cook Time: 20 minutes