Bacon Kimchi Fried Rice is a delightful fusion dish that brings together the savory richness of crispy bacon and the tangy, spicy kick of kimchi, creating a flavor explosion that is simply irresistible. As a fan of both Korean cuisine and comfort food, I can confidently say that this dish has become a staple in my kitchen. The history of fried rice dates back centuries, with various cultures adding their unique twists, but the combination of bacon and kimchi adds a modern twist that many have come to adore.
People love Bacon Kimchi Fried Rice not just for its incredible taste, but also for its satisfying texture and convenience. Its a one-pan wonder that can be whipped up in under 30 minutes, making it perfect for busy weeknights or a quick lunch. The crispy bacon provides a delightful crunch, while the kimchi adds a depth of flavor that elevates this dish to new heights. Whether youre a seasoned chef or a kitchen novice, this recipe is sure to impress and satisfy your cravings!

Ingredients:
- 2 cups cooked rice (preferably day-old for better texture)
- 4 strips of bacon, chopped
- 1 cup kimchi, chopped (adjust to taste)
- 1 small onion, diced
- 2 cloves garlic, minced
- 1 cup frozen peas and carrots mix
- 2 green onions, sliced (for garnish)
- 2 tablespoons soy sauce
- 1 tablespoon sesame oil
- 1 tablespoon vegetable oil
- 1 teaspoon gochujang (Korean chili paste, optional for heat)
- Salt and pepper to taste
- 1 egg (optional, for topping)
Preparing the Ingredients
1. **Cook the Rice**: If you haven’t done so already, cook your rice according to package instructions. For the best fried rice, it’s ideal to use day-old rice as it dries out a bit and prevents the dish from becoming mushy. If youre using freshly cooked rice, spread it out on a baking sheet to cool and dry for about 30 minutes. 2. **Chop the Bacon**: Take your strips of bacon and chop them into small pieces. This will help them cook evenly and mix well with the rice. 3. **Prepare the Kimchi**: If your kimchi is not already chopped, take a cutting board and chop it into bite-sized pieces. This will make it easier to distribute throughout the fried rice. 4. **Dice the Onion and Mince the Garlic**: Dice your onion into small pieces and mince the garlic cloves. This will add flavor to the dish. 5. **Slice the Green Onions**: Set aside the green onions for garnish. You can slice them thinly and keep them in a small bowl.Cooking Process
6. **Cook the Bacon**: In a large skillet or wok, heat the vegetable oil over medium heat. Once hot, add the chopped bacon. Cook until the bacon is crispy and has rendered its fat, about 5-7 minutes. Stir occasionally to ensure even cooking. 7. **Sauté the Aromatics**: Once the bacon is crispy, add the diced onion to the skillet. Sauté for about 2-3 minutes until the onion becomes translucent. Then, add the minced garlic and cook for an additional 30 seconds, stirring constantly to prevent burning. 8. **Add the Kimchi**: Stir in the chopped kimchi and cook for about 3-4 minutes. This will allow the kimchi to caramelize slightly and infuse its flavor into the bacon and onions. 9. **Incorporate the Vegetables**: Add the frozen peas and carrots mix to the skillet. Stir everything together and cook for another 2-3 minutes until the vegetables are heated through. 10. **Add the Rice**: Now its time to add the cooked rice. Break up any clumps with your hands or a spatula before adding it to the skillet. Stir everything together, ensuring the rice is well mixed with the bacon, kimchi, and vegetables. 11. **Season the Rice**: Pour in the soy sauce, sesame oil, and gochujang (if using). Mix everything thoroughly, ensuring the rice is evenly coated with the sauces. Taste and adjust seasoning with salt and pepper as needed. 12. **Fry the Rice**: Increase the heat to medium-high and let the rice fry for about 5-7 minutes, stirring occasionally. This will help to get a nice crispy texture on the bottom and throughout the rice.Assembling the Dish
13. **Prepare the Egg (Optional)**: If you want to top your fried rice with an egg, you can fry or poach an egg in a separate pan while the rice is finishing up. A sunny-side-up egg works beautifully, with the yolk adding richness to the dish. 14. **Serve the Fried Rice**: Once the rice is cooked to your liking, remove it from the heat. Transfer the fried rice to a serving platter or individual bowls. 15. **Garnish**: Top the fried rice with the sliced green onions for a fresh crunch. If you prepared an egg, place it on top of the rice for an extra touch. 16. **Enjoy**: Serve your Bacon Kimchi Fried Rice hot, and enjoy the delightful combination of flavors and textures. This dish is perfect as a main course or a side dish, and its sure to impress anyone who tries it!Tips for the Best Bacon Kimchi Fried Rice
Conclusion:
In summary, this Bacon Kimchi Fried Rice recipe is an absolute must-try for anyone looking to elevate their weeknight dinners with a burst of flavor and a touch of comfort. The combination of crispy bacon, tangy kimchi, and perfectly cooked rice creates a dish that is not only satisfying but also incredibly versatile. You can easily customize it by adding your favorite vegetables, such as peas or bell peppers, or even swapping out the bacon for tofu or chicken for a different protein twist. I encourage you to give this recipe a go and experience the delightful fusion of flavors for yourself. Whether you serve it as a main dish or a side, its sure to impress your family and friends. Dont forget to share your experience and any variations you try; Id love to hear how it turns out for you! So grab your ingredients, fire up that skillet, and lets make some delicious Bacon Kimchi Fried Rice together! Print
Bacon Kimchi Fried Rice: A Flavorful Twist on a Classic Dish
- Total Time: 30 minutes
- Yield: 4 servings 1x
Description
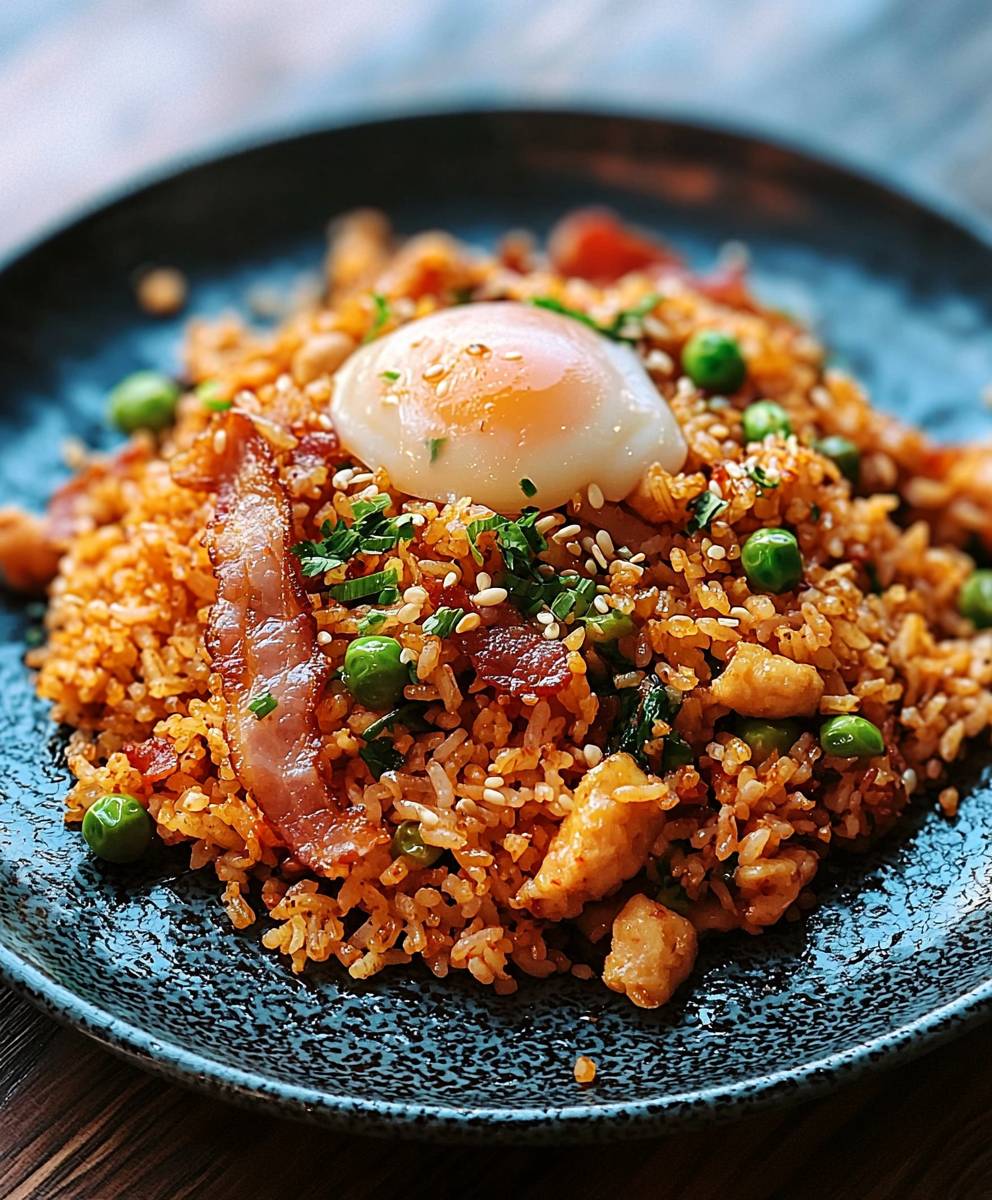
This Bacon Kimchi Fried Rice is a flavorful and satisfying dish that combines crispy bacon, tangy kimchi, and vibrant vegetables with perfectly cooked rice. Quick to prepare, it offers a delightful mix of bold flavors and textures, making it an ideal meal for any time of day.
Ingredients
“`html
- 2 cups cooked rice
- 4 strips of bacon, chopped
- 1 cup kimchi, chopped
- 1 small onion, diced
- 2 cloves garlic, minced
- 1 cup frozen peas and carrots mix
- 2 green onions, sliced
- 2 tablespoons soy sauce
- 1 tablespoon sesame oil
- 1 tablespoon vegetable oil
- 1 teaspoon gochujang (optional)
- Salt and pepper to taste
- 1 egg (optional)
“`
Instructions
“`html
- Cook your rice according to package instructions. For the best fried rice, use day-old rice or spread freshly cooked rice on a baking sheet to cool and dry for about 30 minutes.
- Chop the bacon into small pieces.
- Chop the kimchi into bite-sized pieces.
- Dice the onion and mince the garlic.
- Slice the green onions for garnish and set aside.
- In a large skillet or wok, heat the vegetable oil over medium heat and add the chopped bacon. Cook until crispy, about 5-7 minutes.
- Add the diced onion to the skillet and sauté for 2-3 minutes until translucent. Then add the minced garlic and cook for an additional 30 seconds.
- Stir in the chopped kimchi and cook for about 3-4 minutes.
- Add the frozen peas and carrots mix to the skillet and cook for another 2-3 minutes until heated through.
- Add the cooked rice, breaking up any clumps, and stir everything together.
- Pour in the soy sauce, sesame oil, and gochujang (if using). Mix thoroughly and adjust seasoning with salt and pepper as needed.
- Increase the heat to medium-high and let the rice fry for about 5-7 minutes, stirring occasionally.
- If desired, fry or poach an egg in a separate pan while the rice finishes cooking.
- Remove the rice from heat and transfer to a serving platter or individual bowls.
- Top the fried rice with sliced green onions and the prepared egg, if using.
- Serve hot and enjoy the dish.
“`
Notes
- For a vegetarian version, you can omit the bacon and use tofu or additional vegetables.
- Adjust the amount of kimchi and gochujang based on your spice preference.
- Prep Time: 15 minutes
- Cook Time: 20 minutes