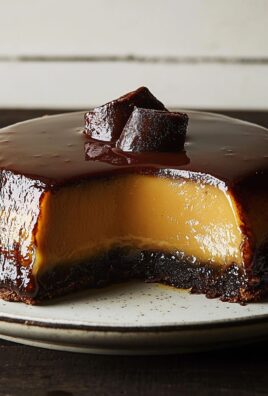
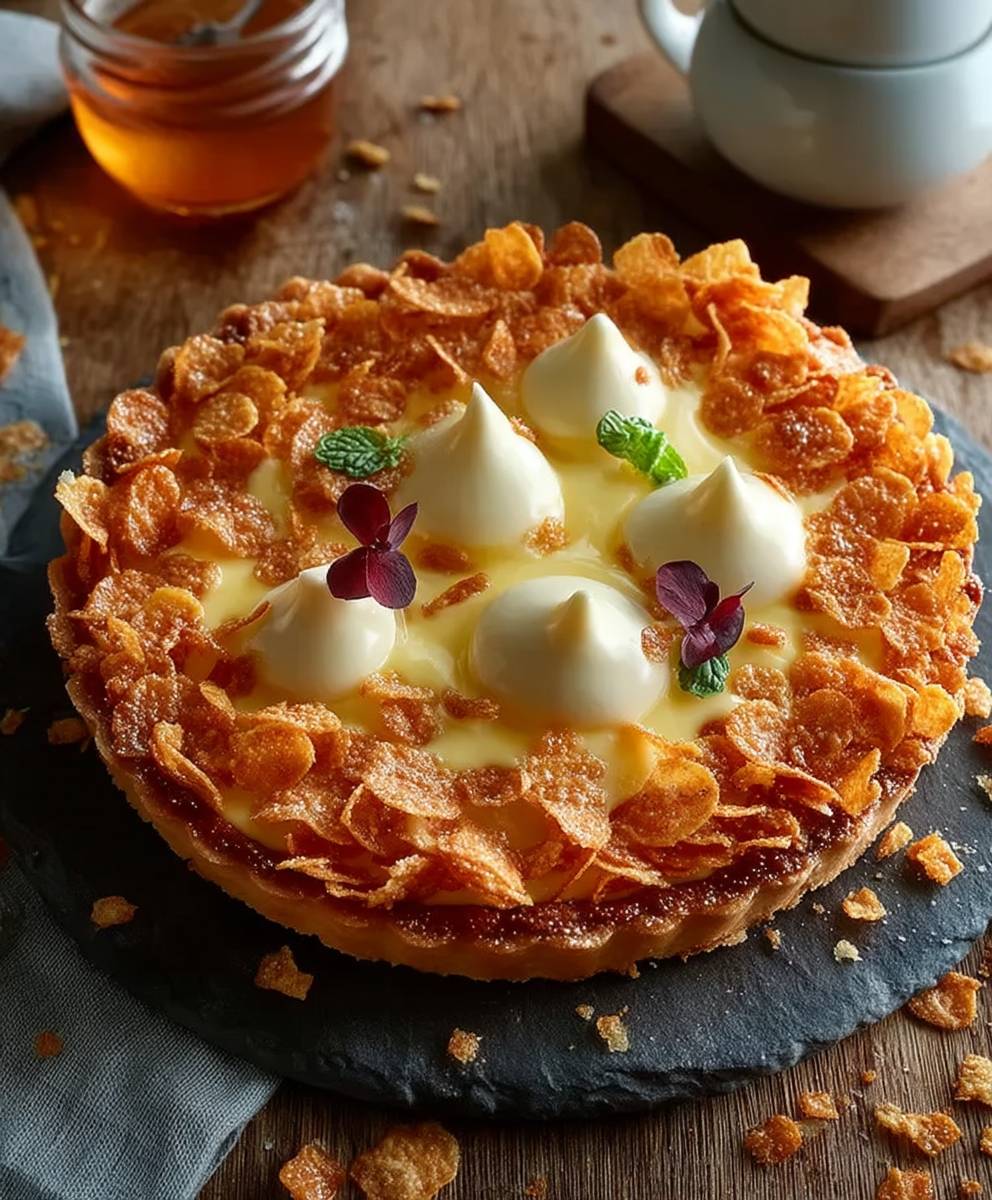
Cornflake Tart: Just the name conjures up images of school dinners, comforting nostalgia, and a taste of pure, unadulterated sweetness, doesn’t it? This isn’t just a dessert; it’s a time machine back to simpler days, a warm hug in every bite. I remember eagerly anticipating Fridays at school, knowing that the highlight of the day would be that golden, crunchy square of cornflake tart, served with a generous dollop of creamy custard.
While its exact origins are shrouded in a bit of mystery, the cornflake tart is undeniably a British classic, a staple in school cafeterias and family kitchens for generations. It’s a testament to the resourcefulness of home cooks, transforming humble ingredients like cornflakes, golden syrup, and jam into something truly extraordinary.
What is it about this simple tart that makes it so beloved? Perhaps it’s the delightful contrast of textures the satisfying crunch of the cornflake topping against the soft, sweet jam filling. Or maybe it’s the comforting, familiar flavors that evoke childhood memories. Whatever the reason, the cornflake tart remains a firm favorite, and I’m thrilled to share my foolproof recipe with you. Get ready to recreate this iconic treat and experience a taste of pure joy!

Ingredients:
- For the Sweet Shortcrust Pastry:
- 225g plain flour, plus extra for dusting
- 100g cold unsalted butter, cubed
- 50g icing sugar
- 1 large egg yolk
- 1-2 tbsp cold milk
- For the Raspberry Jam Filling:
- 400g good quality raspberry jam
- For the Cornflake Topping:
- 100g unsalted butter
- 175g golden syrup
- 50g light brown soft sugar
- 150g cornflakes
Making the Sweet Shortcrust Pastry
Okay, let’s start with the pastry. Don’t be intimidated! It’s easier than you think. The key is to keep everything cold, cold, cold!
- Combine Dry Ingredients: In a large bowl, sift together the flour and icing sugar. This helps to get rid of any lumps and ensures a light and tender pastry.
- Add the Butter: Add the cubed cold butter to the flour mixture. Now, here’s where the magic happens. You need to rub the butter into the flour until it resembles breadcrumbs. You can do this with your fingertips, but be quick so the butter doesn’t melt. Alternatively, you can use a food processor. Pulse it until you get that breadcrumb consistency.
- Add the Egg Yolk: Make a well in the center of the flour and butter mixture. Add the egg yolk and 1 tablespoon of cold milk.
- Bring it Together: Use a knife or your hands to gradually mix the wet ingredients into the dry ingredients. Add the remaining tablespoon of milk if needed to bring the dough together. You want a dough that just comes together without being sticky. Be careful not to overwork the dough, as this will develop the gluten and make the pastry tough.
- Form a Disc and Chill: Gently form the dough into a disc, wrap it tightly in cling film, and chill in the refrigerator for at least 30 minutes. This allows the gluten to relax and the butter to firm up, which will result in a more tender pastry. You can chill it for longer, even overnight, if you need to.
Preparing the Tart Case
Now that our pastry is chilled, we can get to work on the tart case. This is where we turn that disc of dough into something beautiful!
- Preheat the Oven: Preheat your oven to 180°C (160°C fan/Gas Mark 4). Get that oven nice and toasty!
- Roll Out the Pastry: Lightly flour a clean work surface. Take the chilled pastry out of the fridge and unwrap it. Roll out the pastry to about 3mm thick, making sure it’s large enough to fit your tart tin with some overhang.
- Line the Tart Tin: Carefully lift the pastry and drape it over your tart tin (usually a 20cm/8-inch tin). Gently press the pastry into the corners and up the sides of the tin.
- Trim the Edges: Use a sharp knife to trim off the excess pastry, leaving a slight overhang. You can also use a rolling pin to roll over the top of the tin, which will neatly trim the edges.
- Prick the Base: Prick the base of the pastry case all over with a fork. This prevents the pastry from puffing up during baking.
- Chill Again: Place the tart tin in the freezer for 15 minutes. This helps to prevent the pastry from shrinking during baking.
- Blind Bake: Line the pastry case with baking parchment and fill it with baking beans or dried rice. This will weigh down the pastry and prevent it from puffing up. Bake in the preheated oven for 15 minutes.
- Remove Baking Beans and Bake Again: Remove the baking beans and parchment paper. Return the pastry case to the oven and bake for a further 5-10 minutes, or until it’s lightly golden brown. Keep a close eye on it to prevent it from burning.
- Cool Slightly: Remove the tart case from the oven and let it cool slightly before adding the filling.
Filling and Topping the Tart
Alright, the hard work is done! Now for the fun part filling and topping our tart. This is where the magic really happens!
- Spread the Jam: Spread the raspberry jam evenly over the base of the pre-baked tart case. Make sure it’s a nice, even layer.
- Make the Cornflake Topping: In a saucepan, melt the butter, golden syrup, and light brown soft sugar over a low heat. Stir until the sugar has dissolved and the mixture is smooth.
- Add the Cornflakes: Remove the saucepan from the heat and gently stir in the cornflakes until they are evenly coated in the syrup mixture. Be gentle so you don’t crush the cornflakes too much.
- Spoon the Topping: Spoon the cornflake mixture evenly over the raspberry jam filling. Gently press down on the topping to ensure it adheres to the jam.
- Bake Again: Return the tart to the oven and bake for a further 10-15 minutes, or until the cornflake topping is golden brown and crispy. Keep a close eye on it to prevent it from burning.
- Cool Completely: Remove the tart from the oven and let it cool completely in the tin before serving. This allows the filling to set and the topping to crisp up.
Serving and Storing
Congratulations, you’ve made a delicious Cornflake Tart! Now it’s time to enjoy it.
- Serving: Serve the Cornflake Tart at room temperature. It’s delicious on its own, or you can serve it with a dollop of vanilla ice cream or custard.
- Storing: Store the Cornflake Tart in an airtight container at room temperature for up to 3 days. The cornflake topping may soften slightly over time, but it will still taste delicious.
Conclusion:
And there you have it! This Cornflake Tart recipe is more than just a trip down memory lane; it’s a guaranteed crowd-pleaser that’s surprisingly simple to make. From the satisfying crunch of the cornflake topping to the sweet, golden syrup filling nestled in a buttery pastry crust, every bite is an explosion of textures and flavors that will leave you wanting more. Trust me, this isn’t your average dessert it’s a nostalgic hug in a tart form, perfect for any occasion.
Why is this a must-try? Because it’s ridiculously easy! Even if you’re a baking novice, you can absolutely nail this recipe. The ingredients are readily available, the steps are straightforward, and the result is a show-stopping dessert that will impress your friends and family. Plus, who can resist the allure of a classic comfort food that evokes childhood memories? It’s the perfect balance of sweet, crunchy, and comforting, making it an ideal treat for afternoon tea, a special occasion, or simply a well-deserved indulgence.
But the fun doesn’t stop there! Feel free to get creative with your Cornflake Tart. For a richer flavor, try using brown butter in the pastry crust. The nutty notes will complement the sweetness of the filling beautifully. Or, if you’re feeling adventurous, add a layer of raspberry jam beneath the cornflake topping for a fruity twist. A sprinkle of sea salt over the finished tart can also elevate the flavors and add a delightful salty-sweet contrast.
Serving suggestions? This tart is delicious served warm or cold. A dollop of vanilla ice cream or a generous spoonful of custard is the perfect accompaniment. For a more sophisticated presentation, dust the tart with powdered sugar and garnish with fresh berries. It also pairs wonderfully with a cup of strong coffee or a glass of dessert wine.
Don’t be intimidated by the thought of making pastry from scratch. While I’ve included a recipe for homemade pastry, you can easily use store-bought shortcrust pastry to save time. Just make sure to blind bake it properly to prevent a soggy bottom! And if you’re looking for a gluten-free option, you can substitute the regular flour with a gluten-free blend.
I’m absolutely confident that you’ll love this recipe as much as I do. It’s a timeless classic that’s sure to become a family favorite. So, gather your ingredients, preheat your oven, and get ready to bake some magic!
I’m so excited for you to try this recipe! Once you’ve made your own delicious Cornflake Tart, I’d love to hear about your experience. Did you make any variations? What did your family think? Share your photos and comments below I can’t wait to see your creations! Happy baking! Let me know if you have any questions, and I’ll do my best to help. Enjoy!
Cornflake Tart: The Ultimate Guide to This Classic Treat
Classic British Cornflake Tart with sweet pastry, raspberry jam, and crunchy cornflake topping.
Ingredients
- 225g (approx. 1 3/4 cups) plain flour, plus extra for dusting
- 100g (approx. 1/2 cup or 7 tablespoons) cold unsalted butter, cubed
- 50g (approx. 1/2 cup) icing sugar
- 1 large egg yolk
- 1-2 tbsp cold milk
- 400g (approx. 1 1/2 cups) good quality raspberry jam
- 100g (approx. 1/2 cup or 7 tablespoons) unsalted butter
- 175g (approx. 1/2 cup + 2 tablespoons) golden syrup
- 50g (approx. 1/4 cup) light brown soft sugar
- 150g (approx. 6 cups) cornflakes
Instructions
- In a large bowl, sift together the flour and icing sugar.
- Add the cubed cold butter to the flour mixture. Rub the butter into the flour until it resembles breadcrumbs. You can do this with your fingertips or use a food processor (pulse until breadcrumb consistency).
- Make a well in the center of the flour and butter mixture. Add the egg yolk and 1 tablespoon of cold milk.
- Use a knife or your hands to gradually mix the wet ingredients into the dry ingredients. Add the remaining tablespoon of milk if needed to bring the dough together. Be careful not to overwork the dough.
- Gently form the dough into a disc, wrap it tightly in cling film, and chill in the refrigerator for at least 30 minutes (or longer, even overnight).
- Preheat your oven to 180°C (350°F).
- Lightly flour a clean work surface. Take the chilled pastry out of the fridge and unwrap it. Roll out the pastry to about 3mm thick, making sure it’s large enough to fit your tart tin with some overhang.
- Carefully lift the pastry and drape it over your tart tin (usually a 20cm/8-inch tin). Gently press the pastry into the corners and up the sides of the tin.
- Use a sharp knife to trim off the excess pastry, leaving a slight overhang. You can also use a rolling pin to roll over the top of the tin, which will neatly trim the edges.
- Prick the base of the pastry case all over with a fork. This prevents the pastry from puffing up during baking.
- Place the tart tin in the freezer for 15 minutes. This helps to prevent the pastry from shrinking during baking.
- Line the pastry case with baking parchment and fill it with baking beans or dried rice. This will weigh down the pastry and prevent it from puffing up. Bake in the preheated oven for 15 minutes.
- Remove the baking beans and parchment paper. Return the pastry case to the oven and bake for a further 5-10 minutes, or until it’s lightly golden brown. Keep a close eye on it to prevent it from burning.
- Remove the tart case from the oven and let it cool slightly before adding the filling.
- Spread the raspberry jam evenly over the base of the pre-baked tart case.
- In a saucepan, melt the butter, golden syrup, and light brown soft sugar over a low heat. Stir until the sugar has dissolved and the mixture is smooth.
- Remove the saucepan from the heat and gently stir in the cornflakes until they are evenly coated in the syrup mixture. Be gentle so you don’t crush the cornflakes too much.
- Spoon the cornflake mixture evenly over the raspberry jam filling. Gently press down on the topping to ensure it adheres to the jam.
- Return the tart to the oven and bake for a further 10-15 minutes, or until the cornflake topping is golden brown and crispy. Keep a close eye on it to prevent it from burning.
- Remove the tart from the oven and let it cool completely in the tin before serving.
Notes
- Keeping the pastry ingredients cold is crucial for a tender crust.
- Don’t overwork the pastry dough, as this will result in a tough crust.
- Blind baking the crust prevents it from becoming soggy.
- Be gentle when mixing the cornflakes with the syrup mixture to avoid crushing them.
- Store in an airtight container at room temperature for up to 3 days. The cornflake topping may soften slightly over time.
- Serve at room temperature, on its own or with vanilla ice cream or custard.