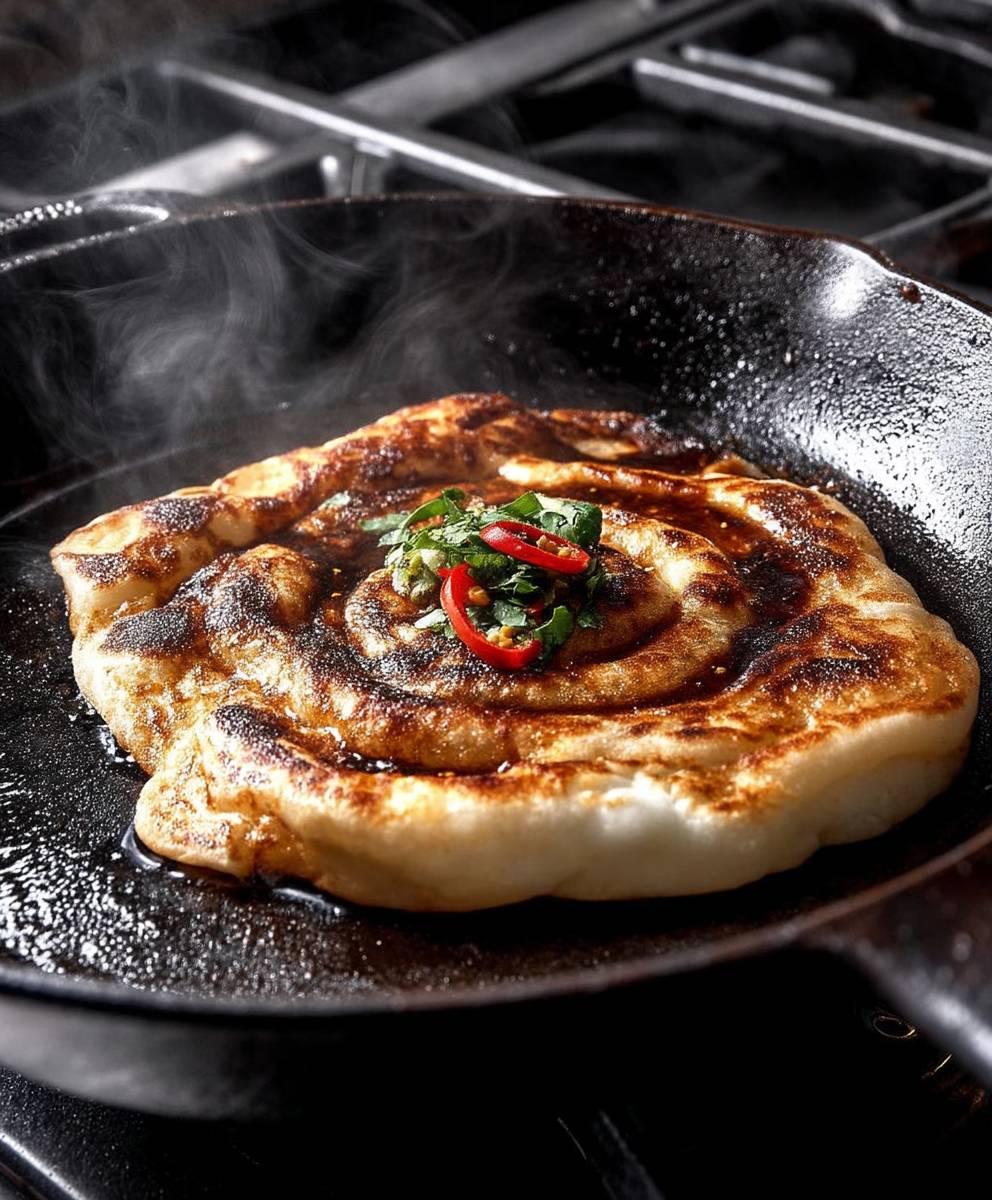
Malaysian Flatbread, or Roti Canai as it’s known in Malaysia, is more than just a breakfast staple; it’s a culinary experience that will transport your taste buds straight to the bustling streets of Southeast Asia. Imagine flaky, buttery layers yielding to a soft, chewy interior, all while offering the perfect canvas for a variety of savory or sweet accompaniments. Are you ready to recreate this iconic dish in your own kitchen?
The origins of Roti Canai are believed to trace back to Indian immigrants who brought their flatbread-making skills to Malaysia. Over time, the recipe evolved, incorporating local ingredients and techniques to become the beloved dish we know today. It’s a testament to the beautiful fusion of cultures that defines Malaysian cuisine.
What makes Malaysian Flatbread so irresistible? It’s the delightful combination of textures and flavors. The crispy exterior gives way to a soft, almost pillowy inside, creating a satisfying mouthfeel. The subtle buttery flavor is incredibly versatile, pairing perfectly with dhal curry, sambal, or even a simple sprinkle of sugar. Plus, it’s surprisingly easy to make at home with just a few simple ingredients. So, let’s embark on this culinary adventure and learn how to make authentic Roti Canai that will impress your family and friends!

Ingredients:
- For the Dough:
- 500g (about 4 cups) all-purpose flour, plus extra for dusting
- 1 teaspoon salt
- 1 teaspoon sugar
- 250ml (1 cup) warm water
- 60ml (1/4 cup) vegetable oil, plus extra for greasing
- 1 large egg, lightly beaten
- For Cooking:
- Vegetable oil, for cooking
Preparing the Dough:
Okay, let’s get started with the dough! This is the most important part, so pay close attention. We want a soft, pliable dough that stretches easily.
- Combine Dry Ingredients: In a large mixing bowl, whisk together the flour, salt, and sugar. Make sure everything is evenly distributed. This ensures a consistent flavor throughout the flatbread.
- Add Wet Ingredients: Create a well in the center of the dry ingredients. Pour in the warm water, vegetable oil, and beaten egg.
- Mix the Dough: Using a wooden spoon or your hands, gradually incorporate the wet ingredients into the dry ingredients. Start from the center and work your way outwards. Mix until a shaggy dough forms.
- Knead the Dough: Turn the dough out onto a lightly floured surface. Knead for about 8-10 minutes, or until the dough becomes smooth, elastic, and no longer sticky. If the dough is too sticky, add a little more flour, one tablespoon at a time. If it’s too dry, add a teaspoon of water at a time. The kneading process develops the gluten, which gives the flatbread its characteristic chewy texture.
- First Rise (Rest): Lightly grease a clean bowl with vegetable oil. Place the dough in the bowl, turning to coat it with the oil. Cover the bowl with plastic wrap or a clean kitchen towel. Let the dough rest for at least 2 hours, or preferably longer (up to 4 hours), at room temperature. This allows the gluten to relax and the dough to become more extensible. The longer the rest, the easier it will be to stretch the dough later. You can even let it rest in the fridge overnight for an even better flavor development.
- Divide the Dough: After the first rise, gently punch down the dough to release any trapped air. Turn the dough out onto a lightly floured surface. Divide the dough into 8-10 equal portions. Each portion will become one flatbread.
- Shape into Balls: Roll each portion of dough into a smooth ball. This helps to create a uniform shape for the flatbreads.
- Second Rise (Rest): Place the dough balls on a lightly oiled baking sheet or plate. Brush the tops of the balls with vegetable oil to prevent them from drying out. Cover the balls with plastic wrap or a clean kitchen towel. Let them rest for another 30-60 minutes. This second rest allows the gluten to relax even further, making the dough even easier to stretch.
Stretching and Preparing the Flatbreads:
Now comes the fun part stretching the dough! This is where you’ll get that thin, almost translucent texture that’s characteristic of Malaysian flatbread.
- Prepare Your Work Surface: Generously oil a clean, smooth work surface. This is crucial to prevent the dough from sticking and tearing.
- Flatten the Dough: Take one dough ball and place it on the oiled surface. Gently flatten it with your fingertips to form a small disc.
- Stretch the Dough: Using your fingertips and the palms of your hands, gently stretch the dough outwards from the center. The goal is to stretch it as thin as possible without tearing it. You can use a rolling pin if you prefer, but stretching by hand gives you more control and helps to create a more delicate texture.
- The Stretching Technique: Lift the edges of the dough and gently stretch them outwards, rotating the dough as you go. If the dough starts to resist, let it rest for a few minutes before continuing. The key is to be patient and gentle. You want the dough to be almost translucent, so you can see the surface underneath. Don’t worry if you get a few small tears it’s perfectly normal!
- Folding the Dough (Optional): For a flakier texture, you can fold the stretched dough. Lift one side of the dough and fold it towards the center. Then, lift the opposite side and fold it over the first fold. Repeat with the remaining two sides, creating a square or rectangle. This creates layers in the flatbread, which will result in a flakier texture when cooked.
- Repeat: Repeat the stretching and folding process with the remaining dough balls. Keep the stretched dough covered with plastic wrap or a clean kitchen towel to prevent them from drying out.
Cooking the Flatbreads:
Time to cook these beauties! The cooking process is quick, so make sure you have everything ready before you start.
- Heat the Pan: Heat a large, flat griddle or frying pan over medium-high heat. You want the pan to be hot enough to cook the flatbread quickly, but not so hot that it burns.
- Oil the Pan: Lightly oil the pan with vegetable oil. You don’t need a lot of oil, just enough to prevent the flatbread from sticking.
- Cook the Flatbread: Carefully place one stretched flatbread in the hot pan.
- Cook Each Side: Cook for about 1-2 minutes per side, or until the flatbread is golden brown and slightly puffed up. You should see some bubbles forming on the surface.
- Flip and Cook: Flip the flatbread and cook the other side for another 1-2 minutes, or until golden brown.
- Press Down (Optional): While cooking, you can gently press down on the flatbread with a spatula to ensure even cooking and to help it puff up.
- Remove and Serve: Remove the cooked flatbread from the pan and place it on a plate.
- Repeat: Repeat the cooking process with the remaining stretched flatbreads, adding more oil to the pan as needed.
- Serve Immediately: Serve the flatbreads immediately while they are still warm and pliable. They are delicious on their own or with your favorite curry, dhal, or other dipping sauces.
Tips for Success:
- Dough Consistency: The dough should be soft and slightly sticky, but not too sticky that it’s unmanageable. Adjust the amount of flour or water as needed to achieve the right consistency.
- Resting Time: Don’t skip the resting time! It’s crucial for developing the gluten and making the dough easier to stretch.
- Stretching Technique: Be gentle and patient when stretching the dough. If it starts to resist, let it rest for a few minutes before continuing.
- Pan Temperature: The pan should be hot enough to cook the flatbread quickly, but not so hot that it burns. Adjust the heat as needed.
- Oil: Use enough oil to prevent the flatbread from sticking, but not so much that it becomes greasy.
- Serving Suggestions: Serve the flatbreads immediately while they are still warm and pliable. They are delicious with a variety of dishes, such as curry, dhal, sambal, or even just plain with butter or ghee.
Variations:
Want to spice things up a bit? Here are a few variations you can try:
- Garlic Flatbread: Add minced garlic to the dough for a flavorful twist.
- Onion Flatbread: Add finely chopped onions to the dough for a savory flavor.
- Cheese Flatbread: Sprinkle grated cheese on the stretched dough before cooking for a cheesy treat.
- Sweet Flatbread: Add a little sugar and cinnamon to the dough for a sweet and delicious flatbread.
Storage:
Leftover flatbreads can be stored in an airtight container at room temperature for up to 2 days. Reheat them in a dry pan or microwave before serving.
Enjoy!
I hope you enjoy making and eating these delicious Malaysian flatbreads! They are a truly versatile and satisfying dish that can be enjoyed any time of day.
Conclusion:
This isn’t just another bread recipe; it’s an invitation to experience the vibrant flavors and satisfying textures of Malaysian cuisine right in your own kitchen. I truly believe this Malaysian Flatbread recipe is a must-try for anyone looking to expand their culinary horizons and impress their friends and family. The slightly chewy interior, the crispy, flaky exterior, and the subtle buttery flavor combine to create a truly unforgettable eating experience. It’s simple enough for a weeknight meal, yet impressive enough to serve at a dinner party.
But what truly sets this recipe apart is its versatility. While it’s absolutely divine served warm, straight from the pan, there are so many ways to enjoy it!
Serving Suggestions:
* Classic Curry Companion: The most traditional way to enjoy this flatbread is alongside a rich and flavorful curry. Think chicken curry, lamb curry, or even a vegetarian lentil curry. The bread is perfect for soaking up all that delicious sauce.
* Savory Breakfast Wrap: Transform your breakfast routine by using this flatbread as a wrap. Fill it with scrambled eggs, cheese, and your favorite breakfast meats like sausage or bacon. A drizzle of hot sauce adds a nice kick!
* Sweet Treat: Don’t limit yourself to savory options! Spread some Nutella or peanut butter on a warm flatbread and top it with sliced bananas or strawberries for a quick and satisfying dessert.
* Pizza Alternative: Get creative and use the flatbread as a pizza base! Top it with your favorite pizza toppings and bake until the cheese is melted and bubbly. It’s a fun and easy way to make pizza at home.
* Snack Attack: Simply serve it with your favorite dips, such as hummus, guacamole, or even a spicy salsa. It’s a great appetizer for parties or a satisfying snack any time of day.
Variations to Explore:
* Garlic and Herb Infusion: Add minced garlic and chopped fresh herbs like cilantro or parsley to the dough for an extra layer of flavor.
* Spicy Kick: Incorporate a pinch of chili flakes or a dash of cayenne pepper into the dough for a subtle heat.
* Cheese Lover’s Delight: Sprinkle shredded cheese, such as cheddar or mozzarella, on the flatbread while it’s cooking for a cheesy and gooey treat.
* Sweetened Version: Add a tablespoon of sugar to the dough for a slightly sweeter flatbread that pairs well with sweet toppings.
* Whole Wheat Option: Substitute half of the all-purpose flour with whole wheat flour for a healthier and nuttier flavor.
I’ve poured my heart into perfecting this recipe, and I’m confident that you’ll love it as much as I do. The process is surprisingly simple, and the results are incredibly rewarding. The aroma that fills your kitchen as these flatbreads cook is simply intoxicating, and the first bite is pure bliss.
So, what are you waiting for? Gather your ingredients, roll up your sleeves, and get ready to embark on a culinary adventure. I promise you won’t be disappointed. Once you’ve tried this Malaysian Flatbread, you’ll be making it again and again.
I’m so excited for you to try this recipe! Please, please, please, once you’ve made it, come back and share your experience in the comments below. Let me know what variations you tried, what you served it with, and any tips or tricks you discovered along the way. I can’t wait to hear all about your culinary creations! Happy cooking!
Malaysian Flatbread: A Delicious and Easy Recipe
Soft, chewy, and incredibly versatile Malaysian flatbread (Roti Canai). Perfect for dipping in curry, dhal, or enjoying on its own.
Ingredients
- 500g (about 4 cups) all-purpose flour, plus extra for dusting
- 1 teaspoon salt
- 1 teaspoon sugar
- 250ml (1 cup) warm water
- 60ml (1/4 cup) vegetable oil, plus extra for greasing
- 1 large egg, lightly beaten
- Vegetable oil, for cooking
Instructions
- Combine Dry Ingredients: In a large mixing bowl, whisk together the flour, salt, and sugar.
- Add Wet Ingredients: Create a well in the center of the dry ingredients. Pour in the warm water, vegetable oil, and beaten egg.
- Mix the Dough: Gradually incorporate the wet ingredients into the dry ingredients until a shaggy dough forms.
- Knead the Dough: Turn the dough out onto a lightly floured surface. Knead for 8-10 minutes, or until the dough becomes smooth, elastic, and no longer sticky. Add flour or water as needed to adjust consistency.
- First Rise (Rest): Lightly grease a clean bowl with vegetable oil. Place the dough in the bowl, turning to coat. Cover and let rest for at least 2 hours (up to 4 hours) at room temperature, or overnight in the fridge.
- Divide the Dough: Gently punch down the dough. Turn out onto a lightly floured surface and divide into 8-10 equal portions.
- Shape into Balls: Roll each portion into a smooth ball.
- Second Rise (Rest): Place the dough balls on a lightly oiled baking sheet or plate. Brush with vegetable oil, cover, and let rest for 30-60 minutes.
- Prepare Your Work Surface: Generously oil a clean, smooth work surface.
- Flatten the Dough: Take one dough ball and place it on the oiled surface. Gently flatten it with your fingertips to form a small disc.
- Stretch the Dough: Using your fingertips and the palms of your hands, gently stretch the dough outwards from the center. The goal is to stretch it as thin as possible without tearing it. You can use a rolling pin if you prefer, but stretching by hand gives you more control and helps to create a more delicate texture.
- The Stretching Technique: Lift the edges of the dough and gently stretch them outwards, rotating the dough as you go. If the dough starts to resist, let it rest for a few minutes before continuing. The key is to be patient and gentle. You want the dough to be almost translucent, so you can see the surface underneath. Don’t worry if you get a few small tears it’s perfectly normal!
- Folding the Dough (Optional): For a flakier texture, you can fold the stretched dough. Lift one side of the dough and fold it towards the center. Then, lift the opposite side and fold it over the first fold. Repeat with the remaining two sides, creating a square or rectangle. This creates layers in the flatbread, which will result in a flakier texture when cooked.
- Repeat: Repeat the stretching and folding process with the remaining dough balls. Keep the stretched dough covered with plastic wrap or a clean kitchen towel to prevent them from drying out.
- Heat the Pan: Heat a large, flat griddle or frying pan over medium-high heat.
- Oil the Pan: Lightly oil the pan with vegetable oil.
- Cook the Flatbread: Carefully place one stretched flatbread in the hot pan.
- Cook Each Side: Cook for about 1-2 minutes per side, or until the flatbread is golden brown and slightly puffed up. You should see some bubbles forming on the surface.
- Flip and Cook: Flip the flatbread and cook the other side for another 1-2 minutes, or until golden brown.
- Press Down (Optional): While cooking, you can gently press down on the flatbread with a spatula to ensure even cooking and to help it puff up.
- Remove and Serve: Remove the cooked flatbread from the pan and place it on a plate.
- Repeat: Repeat the cooking process with the remaining stretched flatbreads, adding more oil to the pan as needed.
- Serve Immediately: Serve the flatbreads immediately while they are still warm and pliable. They are delicious on their own or with your favorite curry, dhal, or other dipping sauces.
Notes
- The dough should be soft and slightly sticky, but not unmanageable. Adjust flour/water as needed.
- Resting time is crucial for gluten development and easier stretching.
- Be gentle and patient when stretching the dough.
- Pan should be hot enough to cook quickly, but not burn. Adjust heat as needed.
- Use enough oil to prevent sticking, but not be greasy.
- Serve immediately while warm and pliable.
- Leftover flatbreads can be stored in an airtight container at room temperature for up to 2 days. Reheat them in a dry pan or microwave before serving.