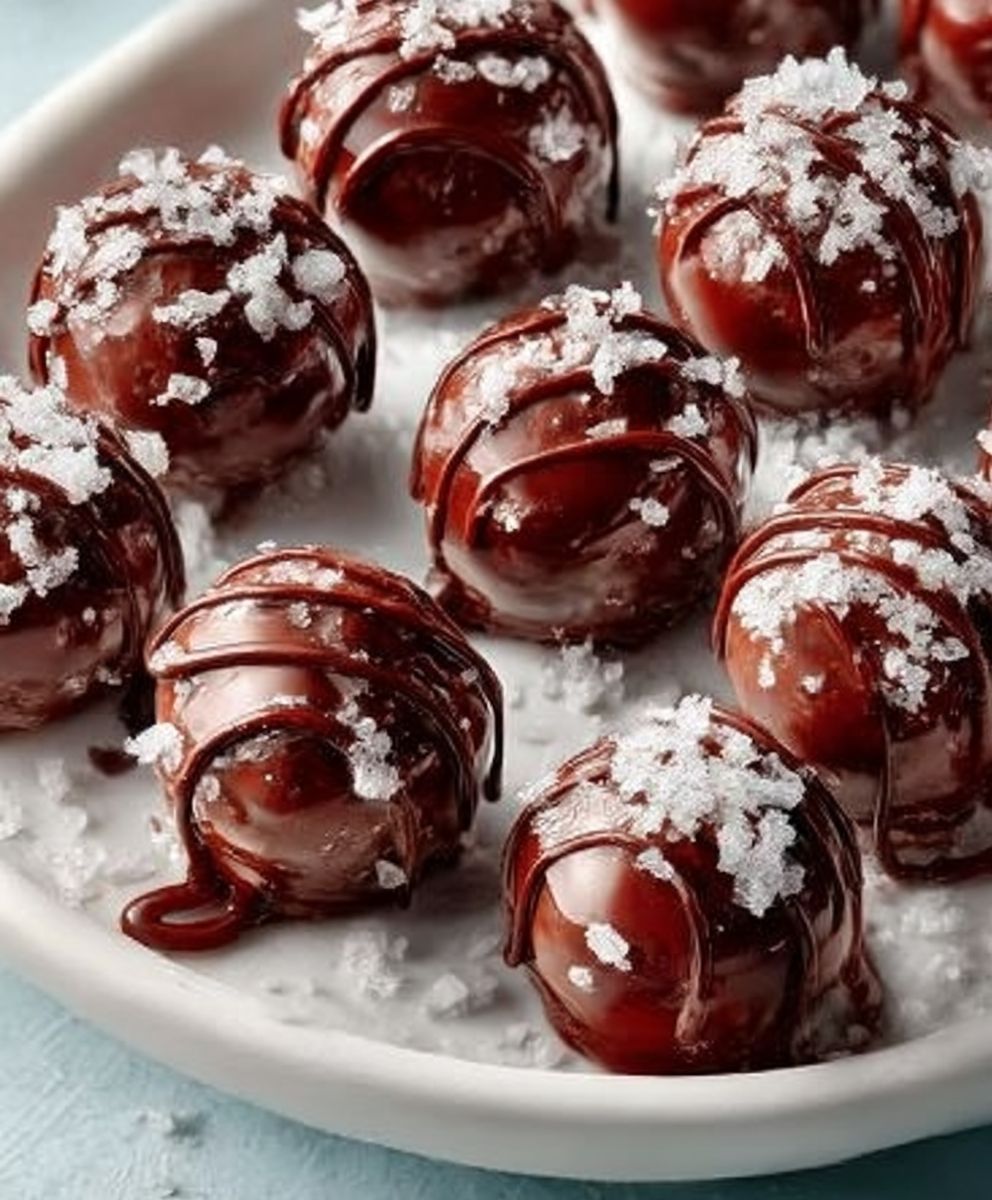
Martha Washington Candy: a name that evokes images of powdered wigs and elegant tea parties. But don’t let the historical moniker fool you; this confection is surprisingly simple to make and utterly irresistible! Imagine biting into a creamy, melt-in-your-mouth center, subtly sweet and infused with the delicate flavors of vanilla and pecans, all encased in a crisp, smooth chocolate shell. Sounds divine, doesn’t it?
While the exact origins of Martha Washington Candy are shrouded in a bit of mystery, it’s widely believed that this treat gained popularity in the early 20th century. Some speculate that it was named in honor of the First Lady due to its refined taste and elegant presentation, fitting for a hostess of her stature. Regardless of its true history, this candy has stood the test of time, becoming a beloved classic passed down through generations.
What makes this candy so enduringly popular? Well, for starters, the combination of textures is simply sublime. The smooth, rich chocolate perfectly complements the soft, almost fudge-like interior. And let’s not forget the taste! The subtle sweetness, the hint of vanilla, and the nutty crunch of pecans create a symphony of flavors that dance on your palate. Plus, while it looks impressive, Martha Washington Candy is surprisingly easy to make at home, making it a perfect treat for special occasions or a delightful homemade gift. So, are you ready to experience a taste of history? Let’s get started!

Ingredients:
- 1 pound powdered sugar, sifted
- 1/2 cup butter, softened
- 1/4 cup sweetened condensed milk
- 1 teaspoon vanilla extract
- 1/4 teaspoon salt
- 1 pound milk chocolate or dark chocolate, chopped
- 1 tablespoon shortening (optional, for smoother chocolate)
- Pecan halves, for topping (optional)
Making the Candy Centers
Alright, let’s get started on these delightful Martha Washington Candies! The first step is creating the creamy, melt-in-your-mouth centers. This is where the magic happens, so pay close attention!
- Combine the Butter and Sweetened Condensed Milk: In a large mixing bowl, cream together the softened butter and sweetened condensed milk until the mixture is light and fluffy. You can use a stand mixer or a hand mixer for this. If you’re using a hand mixer, make sure your butter is truly softened, or you’ll end up with lumps. We want a smooth, consistent base for our candy. This usually takes about 3-5 minutes on medium speed. Scrape down the sides of the bowl occasionally to ensure everything is evenly incorporated.
- Add Vanilla and Salt: Once the butter and sweetened condensed milk are well combined, add the vanilla extract and salt. Mix until just combined. The vanilla adds a lovely warmth to the candy, and the salt helps to balance the sweetness. Don’t overmix at this stage; just a quick blend is all you need.
- Gradually Incorporate the Powdered Sugar: This is the most important part of making the candy centers. Gradually add the sifted powdered sugar to the wet ingredients, mixing on low speed. Add the powdered sugar in about 1/2 cup increments, making sure each addition is fully incorporated before adding the next. Sifting the powdered sugar is crucial to prevent lumps in your candy. If you add the powdered sugar too quickly, you’ll end up with a cloud of sugar and a mess! Trust me, I’ve been there. Continue mixing until the dough comes together and forms a soft, pliable ball. It should be slightly sticky but not overly so. If the dough seems too dry, you can add a tiny bit more sweetened condensed milk, a teaspoon at a time, until it reaches the right consistency. If it’s too sticky, add a little more powdered sugar, a tablespoon at a time.
- Knead the Dough (Optional): At this point, you can either continue mixing in the bowl or turn the dough out onto a lightly powdered surface and knead it gently for a minute or two. Kneading helps to bring the dough together and create a smoother texture. Be careful not to over-knead, as this can make the candy tough.
- Chill the Dough: Wrap the dough tightly in plastic wrap and refrigerate for at least 30 minutes, or up to an hour. This chilling time is essential because it allows the dough to firm up, making it easier to shape into balls. If you try to shape the candy centers while the dough is still warm, they’ll be too sticky and difficult to handle.
Shaping the Candy Centers
Now that our candy dough is chilled and ready to go, it’s time to shape those centers! This is where you can get creative and make them any size or shape you like. I prefer to make mine about 1 inch in diameter, but feel free to experiment.
- Prepare Your Work Surface: Line a baking sheet with parchment paper or wax paper. This will prevent the candy centers from sticking to the sheet.
- Shape the Candy Centers: Remove the chilled dough from the refrigerator. Using a small spoon or your hands, scoop out portions of the dough and roll them into balls. Place the balls on the prepared baking sheet, leaving a little space between each one. If the dough starts to get too sticky as you’re working, you can lightly dust your hands with powdered sugar.
- Flatten the Balls (Optional): If you prefer a flatter candy, you can gently flatten the balls with the palm of your hand or the bottom of a glass. This is entirely up to you and depends on your personal preference.
- Chill Again: Once all the candy centers are shaped, return the baking sheet to the refrigerator and chill for another 30 minutes. This will help them firm up even more before we dip them in chocolate.
Melting the Chocolate
Ah, the best part! Melting the chocolate is crucial for achieving a smooth, glossy coating on your Martha Washington Candies. There are a couple of methods you can use: the double boiler method or the microwave method. I’ll walk you through both.
Double Boiler Method:
- Prepare the Double Boiler: Fill a saucepan with about 1-2 inches of water and bring it to a simmer over medium heat. Place a heat-safe bowl (glass or stainless steel) on top of the saucepan, making sure the bottom of the bowl doesn’t touch the water.
- Add the Chocolate and Shortening (Optional): Place the chopped chocolate and shortening (if using) in the bowl. The shortening helps to create a smoother, more fluid chocolate coating.
- Melt the Chocolate: Stir the chocolate constantly until it is completely melted and smooth. Be patient and don’t rush the process. If the chocolate gets too hot, it can seize up and become grainy. If this happens, you can try adding a teaspoon of vegetable oil to help smooth it out.
- Remove from Heat: Once the chocolate is melted, remove the bowl from the heat and set it aside.
Microwave Method:
- Place Chocolate in a Microwave-Safe Bowl: Put the chopped chocolate and shortening (if using) in a microwave-safe bowl.
- Microwave in Intervals: Microwave on 50% power in 30-second intervals, stirring well after each interval. It’s crucial to use 50% power to prevent the chocolate from burning.
- Stir Until Smooth: Continue microwaving and stirring until the chocolate is almost completely melted. The residual heat will melt the remaining chocolate as you stir.
- Be Careful Not to Overheat: Overheating the chocolate can cause it to seize up and become grainy. If this happens, there’s not much you can do to save it, so be extra careful.
Dipping and Decorating
Now for the fun part dipping those chilled candy centers into the luscious melted chocolate! This is where your Martha Washington Candies really come to life.
- Prepare Your Dipping Station: Have your melted chocolate ready in a bowl, and your baking sheet lined with parchment paper nearby. You’ll also need a dipping tool, such as a fork, dipping tools, or even just two forks.
- Dip the Candy Centers: Remove the chilled candy centers from the refrigerator. One at a time, carefully dip each candy center into the melted chocolate, making sure it’s completely coated.
- Remove Excess Chocolate: Lift the dipped candy center out of the chocolate and gently tap the dipping tool against the side of the bowl to remove any excess chocolate. You can also use a toothpick to smooth out any drips or imperfections.
- Place on Baking Sheet: Place the dipped candy center on the prepared baking sheet.
- Add Toppings (Optional): While the chocolate is still wet, you can add toppings such as pecan halves, sprinkles, or a drizzle of white chocolate. I love adding a pecan half to the top of each candy for a classic Martha Washington Candy look.
- Repeat: Repeat the dipping and decorating process with the remaining candy centers.
- Chill to Set: Once all the candies are dipped and decorated, place the baking sheet in the refrigerator for at least 30 minutes, or until the chocolate is completely set. This will prevent the chocolate from melting when you handle the candies.
Storing Your Martha Washington Candies
Once the chocolate is set, your Martha Washington Candies are ready to be enjoyed! But if you’re not planning on eating them all right away (which is unlikely!), here’s how to store them properly:
- Store in an Airtight Container: Place the candies in an airtight container to prevent them from drying out or absorbing odors from the refrigerator.
- Refrigerate: Store the candies in the refrigerator for up to 2 weeks.
- Freeze (Optional): For longer storage, you can freeze the candies for up to 2 months. Wrap them individually in plastic wrap and then place them in a freezer-safe container. Thaw them in the refrigerator before serving.
Conclusion:
And there you have it! This Martha Washington Candy recipe is more than just a sweet treat; it’s a journey back in time, a taste of history, and a guaranteed crowd-pleaser all rolled into one delicious bite. I truly believe this is a must-try recipe for anyone who appreciates classic confections and enjoys creating something special in the kitchen. The creamy, melt-in-your-mouth texture combined with the subtle sweetness and the satisfying crunch of pecans is simply irresistible.
But why is this recipe a must-try? Beyond its historical significance and delightful flavor profile, it’s surprisingly easy to make. Don’t let the name intimidate you! With just a few simple ingredients and straightforward instructions, you can whip up a batch of these delectable candies in no time. It’s the perfect project for a weekend afternoon, a holiday gathering, or even a thoughtful homemade gift. Plus, the recipe is incredibly versatile, allowing you to customize it to your own preferences.
Speaking of customization, let’s talk serving suggestions and variations! While the classic Martha Washington Candy is perfect as is, there are plenty of ways to put your own spin on it. For a richer, more decadent flavor, try using dark chocolate instead of milk chocolate for dipping. Or, if you’re a fan of coconut, add a handful of shredded coconut to the filling for a tropical twist. You could even experiment with different nuts, such as walnuts or almonds, to create a unique flavor profile.
For serving, these candies are elegant enough to be presented on a dessert platter at a formal gathering, yet casual enough to be enjoyed as an everyday treat. I love to serve them with a cup of hot coffee or tea after dinner. They also make a wonderful addition to a holiday cookie exchange or a homemade gift basket. Consider packaging them in small cellophane bags tied with ribbon for a charming and thoughtful present.
Here are a few more ideas to get your creative juices flowing:
* Mini Martha Washingtons: Roll the filling into smaller balls for bite-sized treats.
* Martha Washington Bark: Spread the filling onto a baking sheet, top with melted chocolate, and sprinkle with chopped nuts. Let it set and then break it into pieces.
* Martha Washington Ice Cream Topping: Crumble the candies and sprinkle them over your favorite ice cream.
I’m so excited for you to try this recipe and experience the magic of Martha Washington Candy for yourself. I truly believe you’ll be amazed at how easy and delicious it is. Don’t be afraid to experiment with different variations and find your own perfect combination of flavors.
And now, for the most important part: I want to hear about your experience! Did you try the recipe? What variations did you make? How did your family and friends react? Share your photos and stories in the comments below. I can’t wait to see what you create! Your feedback is invaluable and helps me continue to improve and share recipes that you’ll love. So, go ahead, give this Martha Washington Candy recipe a try, and let’s create some sweet memories together! Happy baking!
Martha Washington Candy: A Deliciously Decadent Recipe
Creamy Martha Washington Candies: powdered sugar, butter, sweetened condensed milk centers dipped in rich chocolate. Perfect for holidays!
Ingredients
- 1 pound powdered sugar, sifted
- 1/2 cup butter, softened
- 1/4 cup sweetened condensed milk
- 1 teaspoon vanilla extract
- 1/4 teaspoon salt
- 1 pound milk chocolate or dark chocolate, chopped
- 1 tablespoon shortening (optional, for smoother chocolate)
- Pecan halves, for topping (optional)
Instructions
- In a large mixing bowl, cream together the softened butter and sweetened condensed milk until the mixture is light and fluffy. Use a stand mixer or a hand mixer. Scrape down the sides of the bowl occasionally to ensure everything is evenly incorporated (3-5 minutes on medium speed).
- Add the vanilla extract and salt. Mix until just combined.
- Gradually add the sifted powdered sugar to the wet ingredients, mixing on low speed. Add the powdered sugar in about 1/2 cup increments, making sure each addition is fully incorporated before adding the next. Continue mixing until the dough comes together and forms a soft, pliable ball. If the dough seems too dry, add a tiny bit more sweetened condensed milk, a teaspoon at a time, until it reaches the right consistency. If it’s too sticky, add a little more powdered sugar, a tablespoon at a time.
- Turn the dough out onto a lightly powdered surface and knead it gently for a minute or two. Be careful not to over-knead.
- Wrap the dough tightly in plastic wrap and refrigerate for at least 30 minutes, or up to an hour.
- Line a baking sheet with parchment paper or wax paper.
- Remove the chilled dough from the refrigerator. Using a small spoon or your hands, scoop out portions of the dough and roll them into balls. Place the balls on the prepared baking sheet, leaving a little space between each one. If the dough starts to get too sticky as you’re working, you can lightly dust your hands with powdered sugar.
- Gently flatten the balls with the palm of your hand or the bottom of a glass.
- Return the baking sheet to the refrigerator and chill for another 30 minutes.
- Fill a saucepan with about 1-2 inches of water and bring it to a simmer over medium heat. Place a heat-safe bowl on top of the saucepan, making sure the bottom of the bowl doesn’t touch the water.
- Place the chopped chocolate and shortening (if using) in the bowl.
- Stir the chocolate constantly until it is completely melted and smooth.
- Remove from Heat.
- Put the chopped chocolate and shortening (if using) in a microwave-safe bowl.
- Microwave on 50% power in 30-second intervals, stirring well after each interval.
- Continue microwaving and stirring until the chocolate is almost completely melted.
- Have your melted chocolate ready in a bowl, and your baking sheet lined with parchment paper nearby.
- Remove the chilled candy centers from the refrigerator. One at a time, carefully dip each candy center into the melted chocolate, making sure it’s completely coated.
- Lift the dipped candy center out of the chocolate and gently tap the dipping tool against the side of the bowl to remove any excess chocolate.
- Place the dipped candy center on the prepared baking sheet.
- While the chocolate is still wet, you can add toppings such as pecan halves, sprinkles, or a drizzle of white chocolate.
- Repeat the dipping and decorating process with the remaining candy centers.
- Place the baking sheet in the refrigerator for at least 30 minutes, or until the chocolate is completely set.
Notes
- Sifting the powdered sugar is crucial to prevent lumps in your candy.
- Make sure the bottom of the bowl doesn’t touch the water when melting chocolate using the double boiler method.
- Use 50% power when melting chocolate in the microwave to prevent burning.
- If the chocolate gets too hot, it can seize up and become grainy. If this happens, you can try adding a teaspoon of vegetable oil to help smooth it out.