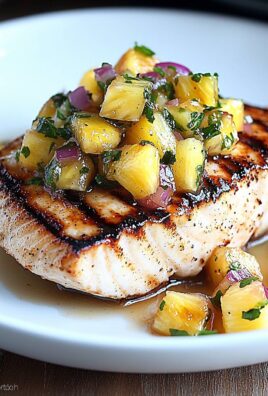
Oven Fried Chicken: Craving that crispy, golden-brown goodness of fried chicken but without the guilt and mess of deep-frying? You’ve come to the right place! I’m about to share my absolute favorite recipe for achieving that classic fried chicken flavor and texture, all while keeping things healthier and easier in your kitchen. Forget standing over a hot stove with splattering oil; this method delivers incredible results with minimal effort.
While the exact origins of fried chicken are debated, its roots are deeply intertwined with the culinary traditions of the American South. Enslaved Africans brought their own frying techniques to the region, and over time, fried chicken evolved into a beloved staple. Today, it’s a symbol of comfort food enjoyed worldwide.
But what makes oven fried chicken so irresistible? It’s the perfect combination of a crispy, flavorful coating and juicy, tender meat. Plus, baking it in the oven significantly reduces the fat content compared to traditional frying, making it a guilt-free indulgence. People love this dish because it’s a crowd-pleaser, relatively simple to prepare, and offers that satisfying crunch we all crave. Get ready to experience the best of both worlds the deliciousness of fried chicken without the fuss!
Ingredients:
- Chicken: 3 lbs chicken pieces (bone-in, skin-on thighs, drumsticks, and breasts work best)
- Buttermilk Marinade:
- 2 cups buttermilk
- 2 tablespoons hot sauce (such as Frank’s RedHot)
- 1 tablespoon salt
- 1 teaspoon black pepper
- 1 teaspoon garlic powder
- 1/2 teaspoon paprika
- Dry Coating:
- 3 cups all-purpose flour
- 1 cup cornstarch
- 2 tablespoons paprika
- 2 tablespoons garlic powder
- 2 tablespoons onion powder
- 2 tablespoons dried oregano
- 1 tablespoon dried thyme
- 1 tablespoon salt
- 1 tablespoon black pepper
- 1 teaspoon cayenne pepper (optional, for extra heat)
- Cooking Spray: Generous amount
- Optional: Fresh parsley, chopped, for garnish
Preparing the Chicken and Marinade
- Prepare the Chicken: First, pat the chicken pieces dry with paper towels. This is important because it helps the buttermilk marinade adhere better. Excess moisture will prevent the coating from sticking properly later on.
- Make the Buttermilk Marinade: In a large bowl, whisk together the buttermilk, hot sauce, salt, pepper, garlic powder, and paprika. The hot sauce adds a subtle kick, but you can adjust the amount to your liking or omit it entirely if you prefer a milder flavor.
- Marinate the Chicken: Place the chicken pieces into the buttermilk mixture, ensuring they are fully submerged. Cover the bowl with plastic wrap and refrigerate for at least 4 hours, or preferably overnight. The longer the chicken marinates, the more tender and flavorful it will become. I usually aim for at least 8 hours for the best results. The buttermilk helps to tenderize the chicken and infuses it with a tangy flavor.
Preparing the Dry Coating
- Combine Dry Ingredients: In a large, shallow dish (like a baking dish or a large pie plate), whisk together the flour, cornstarch, paprika, garlic powder, onion powder, dried oregano, dried thyme, salt, pepper, and cayenne pepper (if using). The cornstarch helps to create a crispier coating. Make sure all the ingredients are well combined to ensure even flavor distribution.
- Set up a Dredging Station: This is where organization is key! Have the bowl of marinated chicken next to the dish of dry coating. This will make the dredging process much smoother and less messy.
Coating the Chicken
- Dredge the Chicken: Remove a piece of chicken from the buttermilk marinade, letting any excess drip off. Place it into the dry coating mixture and press the flour mixture firmly onto all sides of the chicken. Make sure every nook and cranny is covered!
- Double Dredge (Optional, but Recommended): For an extra crispy coating, you can double dredge the chicken. After the first coating, dip the chicken back into the buttermilk marinade (briefly!) and then back into the dry coating. This creates a thicker, more textured crust that will be incredibly satisfying.
- Place on a Wire Rack: Place the coated chicken pieces onto a wire rack set over a baking sheet. This allows air to circulate around the chicken, promoting even cooking and crisping in the oven. Don’t overcrowd the rack; you may need to use two baking sheets.
- Let the Coating Set: Allow the coated chicken to sit on the wire rack for about 20-30 minutes before baking. This helps the coating to adhere better and prevents it from becoming soggy during baking.
Baking the Chicken
- Preheat the Oven: Preheat your oven to 400°F (200°C). Make sure your oven is properly preheated before you put the chicken in; this is crucial for even cooking.
- Prepare the Baking Sheet: Lightly spray the coated chicken pieces generously with cooking spray. Don’t be shy with the cooking spray! This is what helps the chicken to achieve that “fried” texture in the oven. I usually spray the tops and sides of each piece.
- Bake the Chicken: Place the baking sheet(s) with the chicken into the preheated oven and bake for 45-55 minutes, or until the internal temperature of the chicken reaches 165°F (74°C). Use a meat thermometer to ensure the chicken is fully cooked. The exact baking time will depend on the size and thickness of the chicken pieces.
- Turn the Chicken (Optional): For even browning, you can flip the chicken pieces halfway through the baking time (after about 25 minutes). This isn’t strictly necessary, but it can help to ensure that both sides are equally golden brown and crispy.
- Increase the Heat (Optional): For extra crispiness, you can broil the chicken for the last few minutes of baking. Keep a close eye on it to prevent burning! Broil for 2-3 minutes per side, or until the coating is golden brown and crispy.
- Rest the Chicken: Once the chicken is cooked through and crispy, remove it from the oven and let it rest for 5-10 minutes before serving. This allows the juices to redistribute, resulting in more tender and flavorful chicken.
Serving and Enjoying
- Garnish (Optional): Sprinkle the baked chicken with fresh chopped parsley for a pop of color and freshness.
- Serve: Serve the oven-fried chicken immediately while it’s still hot and crispy.
- Pairing Suggestions: This oven-fried chicken is delicious served with classic sides like mashed potatoes, coleslaw, corn on the cob, or green beans. It’s also great with a side of your favorite dipping sauce, such as ranch dressing, honey mustard, or barbecue sauce.
- Storage: Leftover oven-fried chicken can be stored in an airtight container in the refrigerator for up to 3-4 days. Reheat in the oven or air fryer for the best results. Microwaving is not recommended, as it can make the chicken soggy.

Conclusion:
This Oven Fried Chicken recipe isn’t just another chicken dish; it’s a game-changer. It delivers all the crispy, juicy goodness of traditional fried chicken without the mess, the extra calories, and the constant babysitting over a hot stove. Trust me, once you try this method, you might never go back to deep frying again! The perfectly seasoned, golden-brown crust gives way to incredibly tender and flavorful chicken inside, making it a guaranteed crowd-pleaser for weeknight dinners or weekend gatherings.
But why is this recipe a must-try? It’s simple: it’s healthier, easier, and just as delicious (if not more so!) than the classic. You get all the satisfaction of biting into crispy fried chicken without the guilt. Plus, the cleanup is a breeze! No more dealing with gallons of used oil. Just a baking sheet and a few dishes.
Serving Suggestions and Variations:
Now, let’s talk about how to make this Oven Fried Chicken your own. For a classic pairing, serve it alongside creamy mashed potatoes and gravy, some buttery corn on the cob, or a fresh coleslaw. If you’re feeling adventurous, try it with sweet potato fries and a spicy aioli dipping sauce.
Want to kick up the flavor profile? Experiment with different spice blends in the breading. A touch of cayenne pepper adds a nice kick, while smoked paprika lends a smoky depth. You could even add some dried herbs like thyme, rosemary, or oregano for an herbaceous twist.
Here are a few more ideas to get your creative juices flowing:
* Lemon Herb Chicken: Add lemon zest and chopped fresh herbs (like parsley and thyme) to the breadcrumb mixture.
* Spicy Buffalo Chicken: Toss the cooked chicken in your favorite buffalo wing sauce for a fiery treat. Serve with blue cheese dressing and celery sticks.
* Parmesan Garlic Chicken: Add grated Parmesan cheese and garlic powder to the breadcrumb mixture for an Italian-inspired twist.
* Honey Mustard Glazed Chicken: Brush the chicken with a honey mustard glaze during the last 10 minutes of baking for a sweet and tangy flavor.
Don’t be afraid to experiment and find your perfect combination! The beauty of this recipe is its versatility. It’s a blank canvas for your culinary creativity.
Time to Get Cooking!
I truly believe this Oven Fried Chicken recipe will become a staple in your kitchen. It’s a simple, satisfying, and healthier way to enjoy a classic comfort food. So, what are you waiting for? Gather your ingredients, preheat your oven, and get ready to experience the magic of oven-fried chicken.
I’m so excited for you to try this recipe! Once you’ve made it, I’d love to hear about your experience. Did you make any variations? What were your favorite sides to serve with it? Share your photos and comments below! Let’s create a community of oven-fried chicken enthusiasts! Happy cooking! I am confident that you will love this recipe as much as I do. It’s a fantastic way to enjoy the flavors you crave without all the extra work and calories. Enjoy!
Oven Fried Chicken: Crispy, Healthy, and Delicious Recipe
Crispy, flavorful oven-fried chicken that's healthier than traditional frying but just as delicious! Marinated in buttermilk and coated in a seasoned flour mixture, this chicken is baked to golden perfection.
Ingredients
- 3 lbs chicken pieces (bone-in, skin-on thighs, drumsticks, and breasts work best)
- 2 cups buttermilk
- 2 tablespoons hot sauce (such as Frank’s RedHot)
- 1 tablespoon salt
- 1 teaspoon black pepper
- 1 teaspoon garlic powder
- 1/2 teaspoon paprika
- 3 cups all-purpose flour
- 1 cup cornstarch
- 2 tablespoons paprika
- 2 tablespoons garlic powder
- 2 tablespoons onion powder
- 2 tablespoons dried oregano
- 1 tablespoon dried thyme
- 1 tablespoon salt
- 1 tablespoon black pepper
- 1 teaspoon cayenne pepper (optional, for extra heat)
- Generous amount Cooking Spray
- Fresh parsley, chopped, for garnish (Optional)
Instructions
- Pat the chicken pieces dry with paper towels.
- In a large bowl, whisk together the buttermilk, hot sauce, salt, pepper, garlic powder, and paprika.
- Place the chicken pieces into the buttermilk mixture, ensuring they are fully submerged. Cover the bowl with plastic wrap and refrigerate for at least 4 hours, or preferably overnight (8 hours recommended).
- In a large, shallow dish, whisk together the flour, cornstarch, paprika, garlic powder, onion powder, dried oregano, dried thyme, salt, pepper, and cayenne pepper (if using).
- Have the bowl of marinated chicken next to the dish of dry coating.
- Remove a piece of chicken from the buttermilk marinade, letting any excess drip off. Place it into the dry coating mixture and press the flour mixture firmly onto all sides of the chicken.
- For an extra crispy coating, dip the chicken back into the buttermilk marinade (briefly!) and then back into the dry coating.
- Place the coated chicken pieces onto a wire rack set over a baking sheet. Don’t overcrowd the rack.
- Allow the coated chicken to sit on the wire rack for about 20-30 minutes before baking.
- Preheat your oven to 400°F (200°C).
- Lightly spray the coated chicken pieces generously with cooking spray.
- Place the baking sheet(s) with the chicken into the preheated oven and bake for 45-55 minutes, or until the internal temperature of the chicken reaches 165°F (74°C).
- For even browning, you can flip the chicken pieces halfway through the baking time (after about 25 minutes).
- For extra crispiness, you can broil the chicken for the last few minutes of baking. Keep a close eye on it to prevent burning! Broil for 2-3 minutes per side, or until the coating is golden brown and crispy.
- Once the chicken is cooked through and crispy, remove it from the oven and let it rest for 5-10 minutes before serving.
- Sprinkle the baked chicken with fresh chopped parsley for a pop of color and freshness.
- Serve the oven-fried chicken immediately while it’s still hot and crispy.
- Leftover oven-fried chicken can be stored in an airtight container in the refrigerator for up to 3-4 days. Reheat in the oven or air fryer for the best results.
Notes
- Marinating the chicken overnight is highly recommended for the best flavor and tenderness.
- Don’t be shy with the cooking spray it’s key to achieving that “fried” texture.
- Use a meat thermometer to ensure the chicken is cooked to a safe internal temperature of 165°F (74°C).
- For extra crispy skin, broil the chicken for the last few minutes of baking, but watch it carefully to prevent burning.
- Serve with your favorite sides like mashed potatoes, coleslaw, corn on the cob, or green beans.

