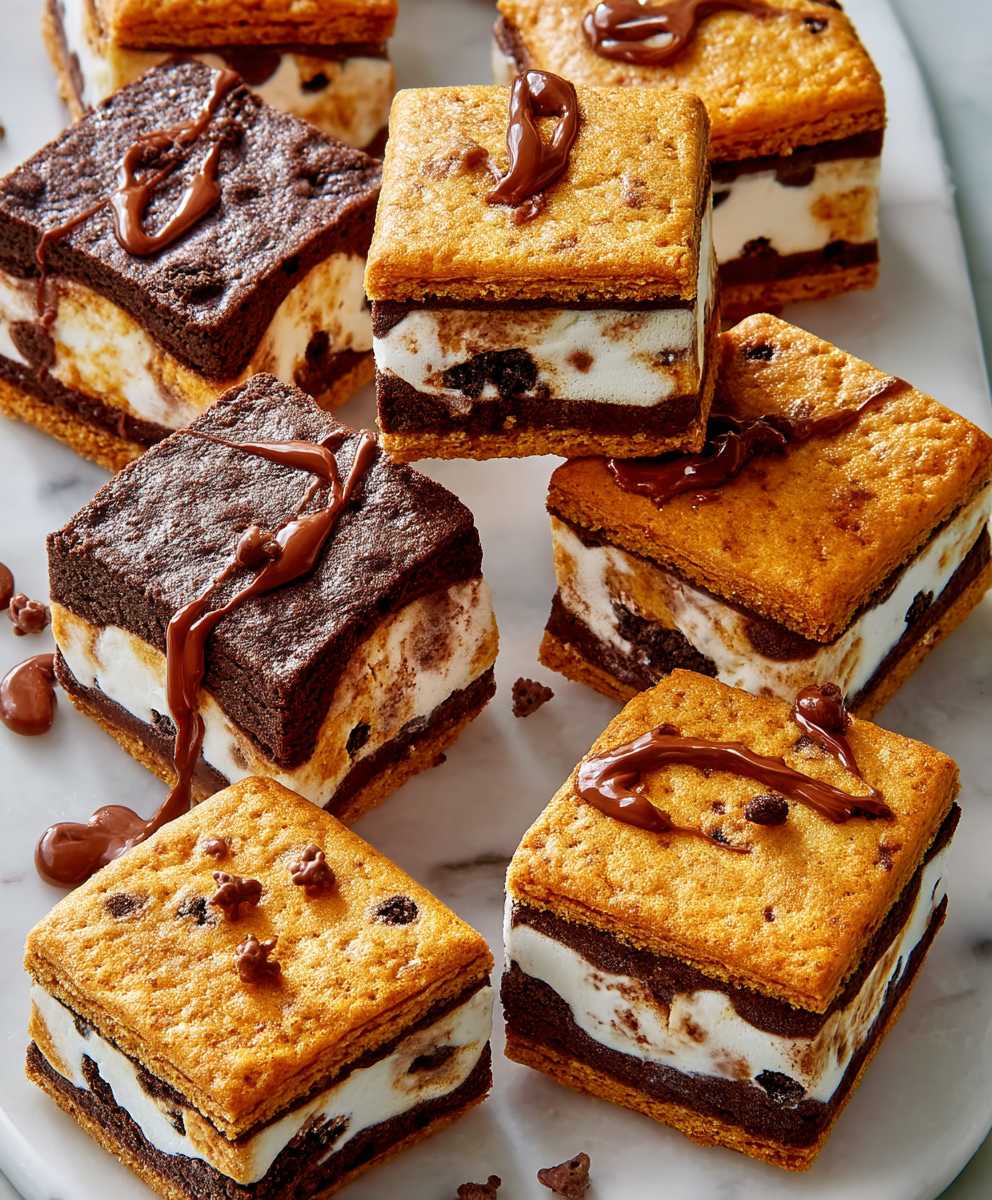
Brookie Ice Cream Sandwiches: Prepare to meet your new favorite dessert! Imagine sinking your teeth into a chewy, fudgy brownie base, topped with a layer of creamy, dreamy ice cream, all nestled between another decadent brownie. It’s a symphony of textures and flavors that will have you craving more after every bite.
While the exact origins of the brookie are debated, its popularity is undeniable. It’s a delightful fusion of two classic desserts, the brownie and the cookie, offering the best of both worlds in one convenient treat. This ingenious combination has captured the hearts (and stomachs!) of dessert lovers worldwide. The beauty of a brookie lies in its versatility; you can customize it with your favorite brownie and cookie recipes, adding nuts, chocolate chips, or even a swirl of caramel.
People adore Brookie Ice Cream Sandwiches for their irresistible combination of warm, gooey brownie and cold, refreshing ice cream. The contrast in temperature and texture is simply divine. Plus, they’re incredibly easy to make at home, perfect for a fun weekend baking project or a quick dessert to impress your friends and family. Whether you’re a seasoned baker or a novice in the kitchen, these Brookie Ice Cream Sandwiches are guaranteed to be a crowd-pleaser. So, let’s get baking and create some sweet memories!

Ingredients:
- For the Brownie Layer:
- 1 cup (2 sticks) unsalted butter, melted
- 2 cups granulated sugar
- 1 cup unsweetened cocoa powder
- 1 teaspoon salt
- 1 teaspoon baking powder
- 1 tablespoon vanilla extract
- 4 large eggs
- 1 cup all-purpose flour
- 1 cup chocolate chips (semi-sweet or dark, your preference!)
- For the Cookie Layer:
- 1 cup (2 sticks) unsalted butter, softened
- ¾ cup granulated sugar
- ¾ cup packed brown sugar
- 2 large eggs
- 1 tablespoon vanilla extract
- 2 ¼ cups all-purpose flour
- 1 teaspoon baking soda
- 1 teaspoon salt
- 2 cups chocolate chips (milk chocolate or a mix, your choice!)
- For the Ice Cream Filling:
- 1 ½ quarts (6 cups) of your favorite ice cream, softened slightly (vanilla, chocolate, cookies and cream the possibilities are endless!)
Preparing the Brownie Layer:
- Melt the Butter: In a large, heatproof bowl, melt the butter completely. You can do this in the microwave in 30-second intervals, stirring in between, or in a saucepan over low heat. Be careful not to burn it!
- Combine Wet Ingredients: Once the butter is melted, whisk in the granulated sugar, cocoa powder, salt, and baking powder until well combined. The mixture will be thick and a bit grainy at this point, but don’t worry!
- Add Vanilla and Eggs: Stir in the vanilla extract. Then, add the eggs one at a time, mixing well after each addition. This is crucial for creating that fudgy brownie texture. Make sure everything is fully incorporated.
- Incorporate the Flour: Gradually add the all-purpose flour, mixing until just combined. Be careful not to overmix, as this can lead to tough brownies. A few streaks of flour are okay at this stage.
- Fold in Chocolate Chips: Gently fold in the chocolate chips until they are evenly distributed throughout the batter.
Baking the Brownie Layer:
- Prepare the Baking Pan: Preheat your oven to 350°F (175°C). Grease and flour a 9×13 inch baking pan. You can also line it with parchment paper, leaving an overhang on the sides, for easy removal later.
- Pour in the Batter: Pour the brownie batter into the prepared pan and spread it evenly.
- Bake the Brownies: Bake for 25-30 minutes, or until a toothpick inserted into the center comes out with moist crumbs attached. Be careful not to overbake, as you want them to be fudgy and soft.
- Cool Completely: Let the brownies cool completely in the pan before cutting. This is important for easy handling later.
Preparing the Cookie Layer:
- Cream Butter and Sugars: In a large bowl, cream together the softened butter, granulated sugar, and brown sugar until light and fluffy. This usually takes about 3-5 minutes with an electric mixer.
- Add Eggs and Vanilla: Beat in the eggs one at a time, then stir in the vanilla extract.
- Combine Dry Ingredients: In a separate bowl, whisk together the all-purpose flour, baking soda, and salt.
- Gradually Add Dry Ingredients to Wet Ingredients: Gradually add the dry ingredients to the wet ingredients, mixing until just combined. Again, be careful not to overmix.
- Fold in Chocolate Chips: Fold in the chocolate chips until they are evenly distributed throughout the dough.
Baking the Cookie Layer:
- Preheat and Prepare: Preheat your oven to 375°F (190°C). Line a baking sheet with parchment paper.
- Drop Cookie Dough: Drop rounded tablespoons of cookie dough onto the prepared baking sheet, leaving about 2 inches between each cookie.
- Bake the Cookies: Bake for 9-11 minutes, or until the edges are golden brown and the centers are still slightly soft.
- Cool on Baking Sheet: Let the cookies cool on the baking sheet for a few minutes before transferring them to a wire rack to cool completely.
Assembling the Brookie Ice Cream Sandwiches:
- Prepare the Brownies and Cookies: Once the brownies and cookies are completely cool, use a large cookie cutter (about 3-4 inches in diameter) or a knife to cut out circles from both the brownie sheet and the cookies. You want to aim for roughly the same size for both. If you don’t have a cookie cutter, you can cut squares or rectangles the shape doesn’t matter as much as the size consistency.
- Soften the Ice Cream: Let your ice cream soften slightly at room temperature for about 10-15 minutes. This will make it easier to spread. Don’t let it melt completely, though!
- Assemble the Sandwiches: Take one brownie circle and spread a generous layer of softened ice cream on top.
- Top with a Cookie: Top the ice cream with a cookie circle, pressing down gently to create a sandwich.
- Smooth the Edges (Optional): If desired, use a knife or spatula to smooth the edges of the ice cream that are sticking out. You can also roll the edges in sprinkles, chopped nuts, or mini chocolate chips for extra flair!
- Freeze the Sandwiches: Place the assembled ice cream sandwiches on a baking sheet lined with parchment paper and freeze for at least 30 minutes to allow the ice cream to firm up. This will make them easier to handle and prevent them from melting too quickly.
- Wrap and Store: Once the sandwiches are frozen solid, wrap them individually in plastic wrap or store them in an airtight container in the freezer. They will keep for up to a month.
Tips for Success:
- Don’t Overbake: Overbaking the brownies or cookies will result in dry, crumbly sandwiches. Keep a close eye on them and remove them from the oven when they are just set.
- Use High-Quality Ingredients: Using good quality butter, chocolate, and vanilla will make a noticeable difference in the flavor of your brookie ice cream sandwiches.
- Get Creative with Ice Cream Flavors: Don’t be afraid to experiment with different ice cream flavors! Peanut butter cup, mint chocolate chip, or even strawberry cheesecake would be delicious.
- Make Ahead: You can bake the brownies and cookies ahead of time and store them in an airtight container at room temperature for a few days. This will save you time when you’re ready to assemble the sandwiches.
- Softening Ice Cream: The key to easy assembly is slightly softened ice cream. If it’s too hard, it will be difficult to spread. If it’s too soft, it will melt too quickly.
- Freezing Time: Make sure to freeze the assembled sandwiches for at least 30 minutes before serving. This will help them hold their shape and prevent them from melting.
Variations:
- Different Chocolate Chips: Use a mix of different types of chocolate chips (milk chocolate, dark chocolate, white chocolate) for a more complex flavor.
- Add Nuts: Add chopped nuts (walnuts, pecans, almonds) to the brownie or cookie batter for extra crunch and flavor.
- Use Different Extracts: Experiment with different extracts, such as almond extract or peppermint extract, to add a unique twist to the flavor.
- Add Sprinkles: Roll the edges of the ice cream sandwiches in sprinkles for a festive touch.
- Make Mini Sandwiches: Use smaller cookie cutters to make mini brookie ice cream sandwiches. These are perfect for parties or for portion control.
Conclusion:
This isn’t just a dessert; it’s a symphony of textures and flavors that will have everyone begging for more! The combination of chewy brownie, soft cookie, and creamy ice cream is simply irresistible. Trust me, once you take a bite of these Brookie Ice Cream Sandwiches, you’ll understand why I’m so obsessed. They’re the perfect treat for a hot summer day, a fun party, or just a little something special to brighten your week.
But what truly makes these sandwiches a must-try is their versatility. Feel free to experiment with different ice cream flavors! Classic vanilla is always a winner, but imagine the possibilities: mint chocolate chip for a refreshing twist, cookies and cream for extra indulgence, or even a fruity sorbet for a lighter option. You can also play around with the cookie and brownie components. Add chocolate chips to the brownie batter for an extra chocolatey punch, or sprinkle some sea salt on top of the cookies for a sweet and salty contrast.
For serving suggestions, these Brookie Ice Cream Sandwiches are fantastic on their own, but you can also dress them up a bit. Drizzle them with hot fudge sauce or caramel, sprinkle them with chopped nuts or sprinkles, or even serve them with a side of fresh berries. If you’re feeling extra fancy, you could even torch the marshmallows on top for a s’mores-inspired treat.
And don’t forget about presentation! Wrap each sandwich individually in parchment paper for a cute and convenient way to serve them at a party. Or, arrange them on a platter with a variety of toppings for a build-your-own-sandwich bar. The possibilities are endless!
I know that making these Brookie Ice Cream Sandwiches might seem a little daunting at first, but I promise you, it’s easier than you think. Just follow the recipe carefully, and don’t be afraid to get creative. The most important thing is to have fun and enjoy the process.
I truly believe that everyone should experience the joy of biting into one of these Brookie Ice Cream Sandwiches. They’re the perfect combination of comfort food and indulgence, and they’re guaranteed to put a smile on your face.
So, what are you waiting for? Grab your ingredients, preheat your oven, and get ready to create some magic in the kitchen. I can’t wait to hear about your experience! Please, please, please try this recipe.
Once you’ve made your own batch of these delectable treats, I’d love to hear all about it! Share your photos and stories on social media using [Your Hashtag Here] and tag me [Your Social Media Handle Here]. Let me know what variations you tried, what ice cream flavors you used, and what your friends and family thought. I’m always looking for new ideas and inspiration, and I can’t wait to see what you come up with.
Happy baking (and sandwich-making)! I hope you enjoy these Brookie Ice Cream Sandwiches as much as I do. They’re a true labor of love, and I’m so excited to share them with you.
Brookie Ice Cream Sandwiches: The Ultimate Summer Treat
Fudgy brownies, chewy chocolate chip cookies, and your favorite ice cream combine in these irresistible Brookie Ice Cream Sandwiches!
Ingredients
- 1 cup (2 sticks) unsalted butter, melted
- 2 cups granulated sugar
- 1 cup unsweetened cocoa powder
- 1 teaspoon salt
- 1 teaspoon baking powder
- 1 tablespoon vanilla extract
- 4 large eggs
- 1 cup all-purpose flour
- 1 cup chocolate chips (semi-sweet or dark, your preference!)
- 1 cup (2 sticks) unsalted butter, softened
- ¾ cup granulated sugar
- ¾ cup packed brown sugar
- 2 large eggs
- 1 tablespoon vanilla extract
- 2 ¼ cups all-purpose flour
- 1 teaspoon baking soda
- 1 teaspoon salt
- 2 cups chocolate chips (milk chocolate or a mix, your choice!)
- 1 ½ quarts (6 cups) of your favorite ice cream, softened slightly (vanilla, chocolate, cookies and cream the possibilities are endless!)
Instructions
- In a large, heatproof bowl, melt the butter completely. You can do this in the microwave in 30-second intervals, stirring in between, or in a saucepan over low heat. Be careful not to burn it!
- Once the butter is melted, whisk in the granulated sugar, cocoa powder, salt, and baking powder until well combined. The mixture will be thick and a bit grainy at this point, but don’t worry!
- Stir in the vanilla extract. Then, add the eggs one at a time, mixing well after each addition. This is crucial for creating that fudgy brownie texture. Make sure everything is fully incorporated.
- Gradually add the all-purpose flour, mixing until just combined. Be careful not to overmix, as this can lead to tough brownies. A few streaks of flour are okay at this stage.
- Gently fold in the chocolate chips until they are evenly distributed throughout the batter.
- Preheat your oven to 350°F (175°C). Grease and flour a 9×13 inch baking pan. You can also line it with parchment paper, leaving an overhang on the sides, for easy removal later.
- Pour the brownie batter into the prepared pan and spread it evenly.
- Bake for 25-30 minutes, or until a toothpick inserted into the center comes out with moist crumbs attached. Be careful not to overbake, as you want them to be fudgy and soft.
- Let the brownies cool completely in the pan before cutting. This is important for easy handling later.
- In a large bowl, cream together the softened butter, granulated sugar, and brown sugar until light and fluffy. This usually takes about 3-5 minutes with an electric mixer.
- Beat in the eggs one at a time, then stir in the vanilla extract.
- In a separate bowl, whisk together the all-purpose flour, baking soda, and salt.
- Gradually add the dry ingredients to the wet ingredients, mixing until just combined. Again, be careful not to overmix.
- Fold in the chocolate chips until they are evenly distributed throughout the dough.
- Preheat your oven to 375°F (190°C). Line a baking sheet with parchment paper.
- Drop rounded tablespoons of cookie dough onto the prepared baking sheet, leaving about 2 inches between each cookie.
- Bake for 9-11 minutes, or until the edges are golden brown and the centers are still slightly soft.
- Let the cookies cool on the baking sheet for a few minutes before transferring them to a wire rack to cool completely.
- Once the brownies and cookies are completely cool, use a large cookie cutter (about 3-4 inches in diameter) or a knife to cut out circles from both the brownie sheet and the cookies. You want to aim for roughly the same size for both. If you don’t have a cookie cutter, you can cut squares or rectangles the shape doesn’t matter as much as the size consistency.
- Let your ice cream soften slightly at room temperature for about 10-15 minutes. This will make it easier to spread. Don’t let it melt completely, though!
- Take one brownie circle and spread a generous layer of softened ice cream on top.
- Top the ice cream with a cookie circle, pressing down gently to create a sandwich.
- If desired, use a knife or spatula to smooth the edges of the ice cream that are sticking out. You can also roll the edges in sprinkles, chopped nuts, or mini chocolate chips for extra flair!
- Place the assembled ice cream sandwiches on a baking sheet lined with parchment paper and freeze for at least 30 minutes to allow the ice cream to firm up. This will make them easier to handle and prevent them from melting too quickly.
- Once the sandwiches are frozen solid, wrap them individually in plastic wrap or store them in an airtight container in the freezer. They will keep for up to a month.
Notes
- Don’t Overbake: Overbaking the brownies or cookies will result in dry, crumbly sandwiches. Keep a close eye on them and remove them from the oven when they are just set.
- Use High-Quality Ingredients: Using good quality butter, chocolate, and vanilla will make a noticeable difference in the flavor of your brookie ice cream sandwiches.
- Get Creative with Ice Cream Flavors: Don’t be afraid to experiment with different ice cream flavors! Peanut butter cup, mint chocolate chip, or even strawberry cheesecake would be delicious.
- Make Ahead: You can bake the brownies and cookies ahead of time and store them in an airtight container at room temperature for a few days. This will save you time when you’re ready to assemble the sandwiches.
- Softening Ice Cream: The key to easy assembly is slightly softened ice cream. If it’s too hard, it will be difficult to spread. If it’s too soft, it will melt too quickly.
- Freezing Time: Make sure to freeze the assembled sandwiches for at least 30 minutes before serving. This will help them hold their shape and prevent them from melting.