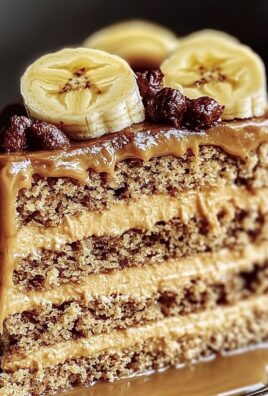
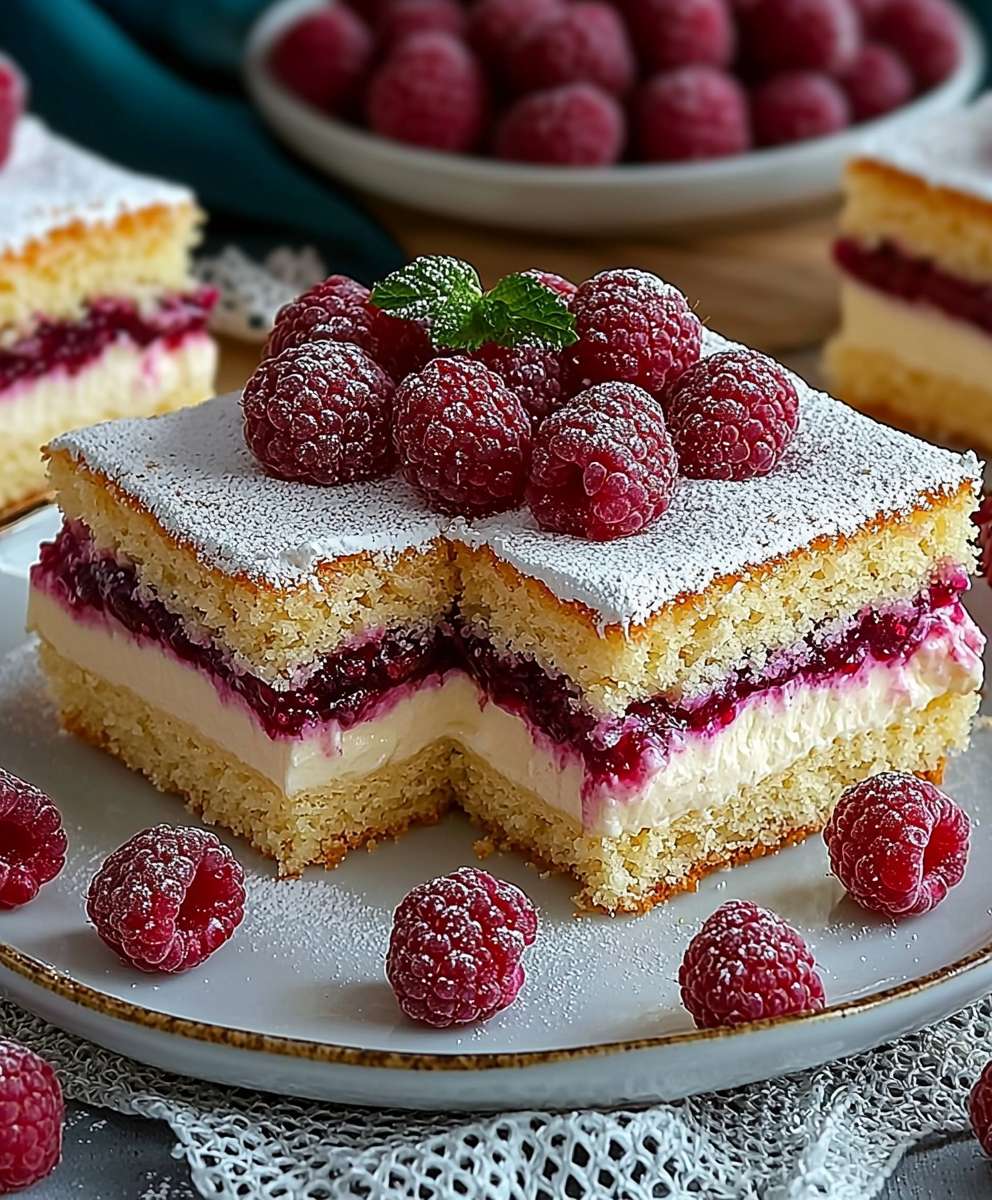
Raspberry pudding biscuit cake: just the name conjures up images of delightful, no-bake decadence, doesn’t it? Imagine layers of creamy, raspberry-infused pudding nestled between tender, buttery biscuits, all culminating in a dessert that’s both elegant and incredibly easy to make. This isn’t just a cake; it’s a symphony of textures and flavors that will have everyone begging for seconds!
While the exact origins of this particular dessert are shrouded in a bit of mystery, the concept of using biscuits as a base for cakes and desserts has been around for generations. Think of it as a modern twist on classic icebox cakes, a beloved treat that gained popularity in the early 20th century. These cakes were a clever way to create impressive desserts without the need for an oven, relying on the refrigerator to set and meld the flavors together. Our raspberry pudding biscuit cake follows in that tradition, offering a simple yet satisfying dessert option.
So, why do people adore this dish? It’s simple: it’s the perfect combination of convenience and indulgence. The creamy, cool pudding provides a luscious counterpoint to the slightly crumbly biscuits, creating a textural delight in every bite. The bright, tangy raspberries add a burst of freshness that cuts through the richness, making it a dessert that’s not too heavy or cloying. Plus, the fact that it requires no baking makes it a lifesaver for busy weeknights or impromptu gatherings. Trust me, once you try this raspberry pudding biscuit cake, it will become a staple in your dessert repertoire!

Ingredients:
- For the Biscuit Base:
- 300g Digestive Biscuits (or Graham Crackers)
- 150g Unsalted Butter, melted
- 50g Granulated Sugar
- 1/4 teaspoon Salt
- For the Raspberry Pudding:
- 750ml Whole Milk
- 150g Granulated Sugar
- 75g Cornstarch
- 1/4 teaspoon Salt
- 2 Large Egg Yolks
- 2 teaspoons Vanilla Extract
- 300g Fresh Raspberries, divided (reserve some for garnish)
- 2 tablespoons Raspberry Liqueur (optional, but adds a nice depth of flavor)
- For the Whipped Cream Topping:
- 300ml Heavy Cream, cold
- 50g Powdered Sugar
- 1 teaspoon Vanilla Extract
- Optional Garnishes:
- Fresh Raspberries
- Mint Leaves
- Chocolate Shavings
Preparing the Biscuit Base:
- Crush the Biscuits: The first thing we need to do is crush our digestive biscuits. You can do this in a food processor until they resemble fine crumbs. Alternatively, you can place them in a large zip-lock bag and crush them with a rolling pin. Make sure there are no large chunks remaining!
- Combine Dry Ingredients: In a medium bowl, combine the crushed biscuit crumbs, granulated sugar, and salt. This ensures that the sweetness and salt are evenly distributed throughout the base.
- Add Melted Butter: Pour the melted butter over the biscuit mixture. Stir well until all the crumbs are evenly moistened. The mixture should resemble wet sand.
- Press into Pan: Press the biscuit mixture firmly into the bottom of a 9-inch springform pan. Use the bottom of a measuring cup or a flat-bottomed glass to ensure an even and compact base. This is crucial for a sturdy cake!
- Chill the Base: Place the springform pan in the refrigerator for at least 30 minutes. This allows the butter to solidify, creating a firm base for the pudding. You can also place it in the freezer for 15 minutes for a quicker chill.
Making the Raspberry Pudding:
- Prepare the Milk Mixture: In a medium saucepan, whisk together 600ml of the whole milk, granulated sugar, cornstarch, and salt. Make sure the cornstarch is fully dissolved to prevent lumps in your pudding.
- Whisk in Egg Yolks: In a separate small bowl, whisk together the remaining 150ml of milk and the egg yolks. This tempers the egg yolks, preventing them from scrambling when added to the hot milk mixture.
- Cook the Pudding Base: Place the saucepan with the milk and cornstarch mixture over medium heat. Cook, stirring constantly with a whisk, until the mixture comes to a simmer and begins to thicken. This usually takes about 5-7 minutes.
- Temper the Egg Yolks: Slowly drizzle a small amount of the hot milk mixture into the egg yolk mixture, whisking constantly. This gradually raises the temperature of the egg yolks, preventing them from cooking too quickly.
- Combine and Cook: Pour the tempered egg yolk mixture back into the saucepan with the hot milk mixture. Continue to cook, stirring constantly, until the pudding thickens significantly and becomes smooth. This should take another 2-3 minutes. Be careful not to burn the pudding!
- Remove from Heat: Remove the saucepan from the heat and stir in the vanilla extract and raspberry liqueur (if using). The vanilla adds a lovely aroma, and the raspberry liqueur enhances the raspberry flavor.
- Add Raspberries: Gently fold in 200g of the fresh raspberries. Be careful not to crush the raspberries too much, as you want them to retain their shape and texture.
- Cool Slightly: Let the pudding cool slightly for about 10-15 minutes before pouring it over the biscuit base. This prevents the biscuit base from becoming soggy.
Assembling the Cake:
- Pour Pudding over Base: Carefully pour the slightly cooled raspberry pudding over the chilled biscuit base. Spread it evenly to ensure a smooth surface.
- Chill the Cake: Cover the springform pan with plastic wrap, pressing it gently onto the surface of the pudding to prevent a skin from forming. Refrigerate the cake for at least 4 hours, or preferably overnight. This allows the pudding to set completely and the flavors to meld together.
Making the Whipped Cream Topping:
- Chill Bowl and Whisk: Before making the whipped cream, make sure your mixing bowl and whisk (or beaters) are thoroughly chilled. This helps the cream whip up quickly and hold its shape. I usually put them in the freezer for about 15 minutes.
- Combine Ingredients: In the chilled bowl, combine the heavy cream, powdered sugar, and vanilla extract.
- Whip the Cream: Using an electric mixer (handheld or stand mixer), whip the cream on medium speed until stiff peaks form. Be careful not to overwhip, as this can turn the cream into butter. You want the cream to be thick and fluffy, but still smooth.
Final Touches and Serving:
- Release from Pan: Once the cake is fully chilled and the pudding is set, carefully remove it from the springform pan. Run a thin knife around the edge of the cake to loosen it from the pan before releasing the sides.
- Add Whipped Cream: Spread the whipped cream evenly over the top of the raspberry pudding cake. You can use a spatula or a piping bag to create a decorative design.
- Garnish: Garnish the cake with the remaining fresh raspberries, mint leaves, and chocolate shavings (if using). Get creative with your garnishes!
- Serve and Enjoy: Slice the raspberry pudding biscuit cake and serve immediately. This cake is best enjoyed chilled. It’s a perfect dessert for any occasion!
Conclusion:
This Raspberry Pudding Biscuit Cake isn’t just a dessert; it’s a delightful experience waiting to happen. It’s the perfect blend of creamy, fruity, and subtly sweet, all nestled between layers of tender biscuits. Honestly, I can’t recommend it enough! The ease of preparation combined with the incredible flavor profile makes it a must-try for anyone looking for a crowd-pleasing dessert that doesn’t require hours in the kitchen. It’s a guaranteed hit at potlucks, family gatherings, or even just a special treat for yourself on a cozy evening.
But why is this particular recipe a must-try? It’s the simplicity, really. No fancy techniques, no hard-to-find ingredients, just straightforward deliciousness. The raspberry pudding provides a vibrant, tangy counterpoint to the richness of the biscuits and whipped cream, creating a balanced and satisfying flavor. Plus, the visual appeal is undeniable! The layers of biscuits, the vibrant pink pudding, and the fluffy whipped cream make for a stunning presentation that’s sure to impress.
Serving Suggestions and Variations:
The beauty of this Raspberry Pudding Biscuit Cake is its versatility. Serve it chilled for a refreshing summer treat, or let it sit at room temperature for a softer, more decadent experience. For a more elegant presentation, try layering it in individual trifle bowls or glasses.
Here are a few variations to spark your creativity:
* Berry Bonanza: Add fresh raspberries, blueberries, or strawberries between the layers for an extra burst of fruity flavor and visual appeal.
* Chocolate Indulgence: Drizzle melted dark chocolate over the top or add chocolate shavings between the layers for a richer, more decadent dessert.
* Lemon Zest: Add a teaspoon of lemon zest to the raspberry pudding for a brighter, more citrusy flavor.
* Almond Extract: A few drops of almond extract in the whipped cream can elevate the flavor profile and add a subtle nutty note.
* Biscuit Swap: While I love using classic tea biscuits, feel free to experiment with other types of cookies or biscuits. Graham crackers or even shortbread cookies would work beautifully.
* Pudding Power: If raspberry isn’t your thing, don’t worry! You can easily substitute it with vanilla, strawberry, or even pistachio pudding. The possibilities are endless!
I truly believe that this recipe for Raspberry Pudding Biscuit Cake is a winner. It’s quick, easy, and incredibly delicious. It’s the kind of dessert that everyone will rave about and ask for the recipe.
So, what are you waiting for? Gather your ingredients, preheat your oven (or don’t, if you’re using pre-made biscuits!), and get ready to create a dessert masterpiece. I’m confident that you’ll love it as much as I do.
I’m so excited for you to try this recipe! Once you’ve made your own Raspberry Pudding Biscuit Cake, I’d love to hear about your experience. Did you make any variations? What did your family and friends think? Share your photos and stories in the comments below! I can’t wait to see your creations and hear all about your baking adventures. Happy baking!
Raspberry Pudding Biscuit Cake: The Ultimate Dessert Recipe
No-bake raspberry pudding cake with a buttery biscuit base, creamy raspberry filling, and light whipped cream topping. A refreshing dessert!
Ingredients
- 300g Digestive Biscuits (or Graham Crackers)
- 150g Unsalted Butter, melted
- 50g Granulated Sugar
- 1/4 teaspoon Salt
- 750ml Whole Milk
- 150g Granulated Sugar
- 75g Cornstarch
- 1/4 teaspoon Salt
- 2 Large Egg Yolks
- 2 teaspoons Vanilla Extract
- 300g Fresh Raspberries, divided (reserve some for garnish)
- 2 tablespoons Raspberry Liqueur (optional)
- 300ml Heavy Cream, cold
- 50g Powdered Sugar
- 1 teaspoon Vanilla Extract
- Fresh Raspberries
- Mint Leaves
- Chocolate Shavings
Instructions
- Crush the biscuits in a food processor or zip-lock bag until fine crumbs.
- In a medium bowl, combine crushed biscuits, sugar, and salt.
- Pour melted butter over the mixture and stir until evenly moistened.
- Press firmly into the bottom of a 9-inch springform pan.
- Chill in the refrigerator for 30 minutes or freezer for 15 minutes.
- In a saucepan, whisk 600ml milk, sugar, cornstarch, and salt.
- In a separate bowl, whisk remaining 150ml milk and egg yolks.
- Cook the milk mixture over medium heat, stirring constantly, until it simmers and thickens (5-7 minutes).
- Slowly drizzle a small amount of the hot milk mixture into the egg yolk mixture, whisking constantly.
- Pour the tempered egg yolk mixture back into the saucepan. Cook, stirring constantly, until the pudding thickens significantly (2-3 minutes).
- Remove from heat and stir in vanilla extract and raspberry liqueur (if using).
- Gently fold in 200g of the fresh raspberries.
- Cool slightly for 10-15 minutes.
- Pour the slightly cooled raspberry pudding over the chilled biscuit base.
- Cover with plastic wrap, pressing gently onto the surface.
- Refrigerate for at least 4 hours, or preferably overnight.
- Chill bowl and whisk/beaters.
- In the chilled bowl, combine heavy cream, powdered sugar, and vanilla extract.
- Whip on medium speed until stiff peaks form.
- Release the cake from the springform pan.
- Spread whipped cream evenly over the top.
- Garnish with remaining raspberries, mint leaves, and chocolate shavings (if using).
- Slice and serve chilled.
Notes
- For a quicker chill on the biscuit base, use the freezer.
- Make sure the cornstarch is fully dissolved to prevent lumps in the pudding.
- Tempering the egg yolks prevents them from scrambling.
- Be careful not to overwhip the cream.
- Chilling the bowl and beaters helps the cream whip up faster and hold its shape.
- The raspberry liqueur is optional but adds a nice depth of flavor.
- This cake is best enjoyed chilled.