Easy Crepes: Imagine waking up to the aroma of delicate, golden pancakes, so thin they practically melt in your mouth. That’s the magic of crepes! These versatile delights are surprisingly simple to make, and I’m here to show you just how easy it is to whip up a batch of perfect crepes in your own kitchen.
Crepes have a rich history, originating in the Brittany region of France. For centuries, they’ve been a staple, enjoyed during celebrations like Candlemas (La Chandeleur), where tradition dictates that holding a coin in one hand and flipping a crepe in the pan with the other will bring good fortune. Beyond tradition, crepes have become a global phenomenon, adapted and loved in countless variations.
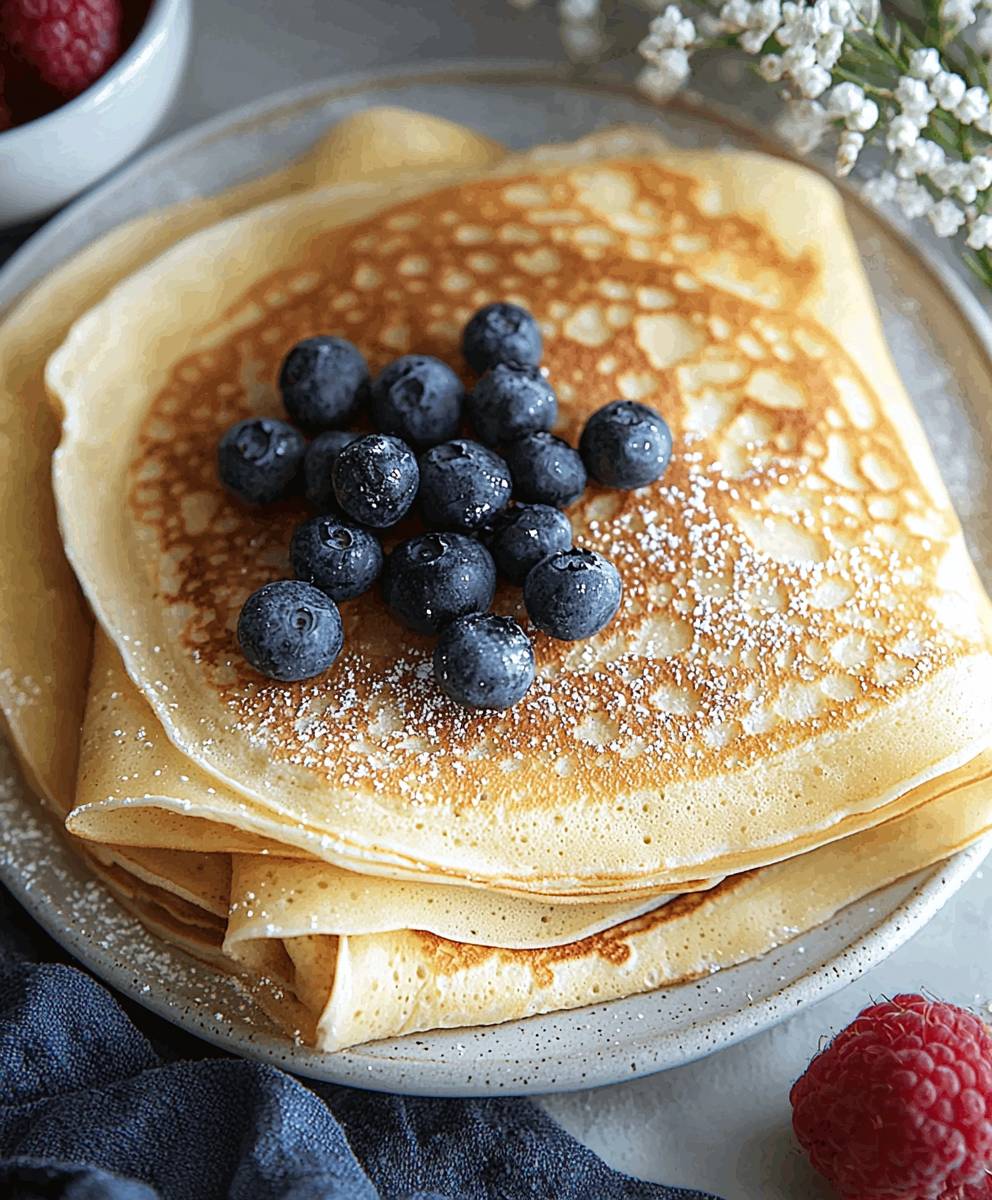
What makes crepes so irresistible? It’s their incredible versatility! You can fill them with sweet treats like Nutella, fresh berries, and whipped cream for a decadent dessert, or savory ingredients like ham, cheese, and vegetables for a satisfying meal. The light, airy texture of easy crepes provides the perfect canvas for endless culinary creations. Plus, they’re quick to prepare, making them ideal for a weekend brunch or a speedy weeknight dinner. So, are you ready to unlock the secrets to making perfect crepes? Let’s get started!

Ingredients:
- 1 cup all-purpose flour
- 1 1/4 cups milk
- 2 large eggs
- 2 tablespoons unsalted butter, melted, plus more for greasing the pan
- 1 tablespoon granulated sugar
- 1/4 teaspoon salt
- Optional: 1/2 teaspoon vanilla extract
Preparing the Crepe Batter:
Okay, let’s get started! Making crepes is easier than you think, and the batter is the foundation of everything. We want a smooth, lump-free batter, so follow these steps carefully.
- Combine the Dry Ingredients: In a large mixing bowl, whisk together the flour, sugar, and salt. This ensures that the salt and sugar are evenly distributed throughout the flour, which is important for the overall flavor and texture of the crepes. I like to use a whisk for this because it helps to aerate the flour and prevent clumps.
- Whisk in the Wet Ingredients: In a separate bowl, whisk together the milk, eggs, and melted butter. Make sure the butter isn’t too hot, or it might cook the eggs! Add the vanilla extract if you’re using it. The vanilla adds a lovely subtle flavor, but it’s totally optional.
- Gradually Incorporate Wet into Dry: This is the key to a smooth batter. Slowly pour the wet ingredients into the dry ingredients, whisking constantly. Start with a small amount of the wet ingredients and whisk until it’s incorporated, then add more, whisking until smooth. Continue until all the wet ingredients are added and the batter is smooth and lump-free. Don’t overmix, though! Overmixing can develop the gluten in the flour, which can make the crepes tough.
- Rest the Batter: Cover the bowl with plastic wrap and let the batter rest in the refrigerator for at least 30 minutes, or even better, an hour. This allows the gluten to relax, which will result in more tender crepes. It also allows any air bubbles to dissipate, which will give you a smoother crepe. You can even make the batter the night before and let it rest overnight!
Cooking the Crepes:
Now for the fun part cooking the crepes! This might take a little practice, but don’t worry, even the first few “practice” crepes will still taste delicious. The key is to get the pan temperature just right and to use a light hand with the batter.
- Prepare the Pan: Heat a lightly oiled griddle or non-stick frying pan over medium heat. I prefer using a non-stick pan because it makes it much easier to flip the crepes without them sticking. You can use a little butter or cooking spray to grease the pan. Make sure the pan is hot enough before you start cooking the crepes. You can test the temperature by flicking a few drops of water onto the pan. If the water sizzles and evaporates quickly, the pan is ready.
- Pour the Batter: Once the pan is hot, remove it from the heat and pour about 1/4 cup of batter onto the center of the pan. Immediately swirl the pan around to spread the batter into a thin, even circle. You want the crepe to be as thin as possible. If you pour too much batter, the crepe will be too thick. If you don’t pour enough batter, the crepe will be too thin and may tear.
- Cook the First Side: Return the pan to the heat and cook for about 1-2 minutes, or until the edges of the crepe start to lift and the bottom is lightly golden brown. You’ll know it’s time to flip the crepe when it easily releases from the pan.
- Flip and Cook the Second Side: Carefully flip the crepe using a thin spatula. Cook for another 30-60 seconds, or until the second side is lightly golden brown. The second side usually cooks faster than the first side.
- Repeat: Slide the cooked crepe onto a plate. Repeat with the remaining batter, stacking the crepes on top of each other. You can keep the crepes warm in a low oven (about 200°F) while you’re cooking the rest of the batter.
- Adjust Heat as Needed: As you continue cooking, you may need to adjust the heat of the pan. If the crepes are browning too quickly, reduce the heat. If they’re not browning enough, increase the heat.
Serving and Filling Ideas:
Now that you have a stack of beautiful crepes, it’s time to get creative with the fillings! The possibilities are endless. Here are a few of my favorite ideas:
- Sweet Crepes:
- Nutella and sliced bananas
- Fresh berries and whipped cream
- Lemon curd and powdered sugar
- Cinnamon sugar and melted butter
- Apple pie filling and caramel sauce
- Savory Crepes:
- Ham and cheese
- Spinach and ricotta
- Mushrooms and Gruyere
- Smoked salmon and cream cheese
- Chicken and pesto
Folding Techniques:
There are several ways to fold crepes, depending on the filling and your personal preference.
- The Triangle: This is the simplest method. Simply fold the crepe in half, then fold it in half again to form a triangle. This works well for both sweet and savory fillings.
- The Roll: Spread the filling evenly over the crepe, then roll it up like a burrito. This is a good option for fillings that are a bit messy.
- The Fan: Fold the crepe in half, then pleat it like a fan. This is a more elegant presentation.
- The Stack: Layer the crepes with filling in between each layer, creating a crepe cake. This is a great option for a special occasion.
Tips and Tricks for Perfect Crepes:
Here are a few extra tips to help you make perfect crepes every time:
- Use a good quality non-stick pan: This will make it much easier to flip the crepes without them sticking.
- Don’t overcrowd the pan: Cook the crepes one at a time.
- Use a thin spatula: This will make it easier to flip the crepes without tearing them.
- Adjust the heat as needed: If the crepes are browning too quickly, reduce the heat. If they’re not browning enough, increase the heat.
- Keep the crepes warm: You can keep the crepes warm in a low oven (about 200°F) while you’re cooking the rest of the batter.
- Experiment with different fillings: The possibilities are endless!
- Don’t be afraid to make mistakes: Even the first few “practice” crepes will still taste delicious.
Troubleshooting:
Sometimes things don’t go exactly as planned. Here are some common crepe-making problems and how to fix them:
- Crepes are sticking to the pan: Make sure the pan is properly greased. You may also need to increase the heat.
- Crepes are tearing: The batter may be too thin. Add a little more flour to the batter.
- Crepes are too thick: The batter may be too thick. Add a little more milk to the batter.
- Crepes are browning too quickly: Reduce the heat.
- Crepes are not browning enough: Increase the heat.
- Crepes are lumpy: Make sure you whisk the batter thoroughly to remove any lumps. You can also strain the batter through a fine-mesh sieve.
Storage:
Cooked crepes can be stored in the refrigerator for up to 3 days. To reheat, simply warm them in a skillet or microwave. You can also freeze crepes for up to 2 months. To freeze, stack the crepes with parchment paper in between each layer, then wrap them tightly in plastic wrap and aluminum foil.
Variations:
Once you’ve mastered the basic crepe recipe, you can start experimenting with different variations. Here are a few ideas:
- Chocolate Crepes: Add 2 tablespoons of cocoa powder to the dry ingredients.
- Whole Wheat Crepes: Substitute half of the all-purpose flour with whole wheat flour.
- Gluten-Free Crepes: Use a gluten-free flour blend.
- 1 cup all-purpose flour
- 1 1/4 cups milk
- 2 large eggs
- 2 tablespoons unsalted butter, melted, plus more for greasing the pan
- 1 tablespoon granulated sugar
- 1/4 teaspoon salt
- Optional: 1/2 teaspoon vanilla extract
- Combine Dry Ingredients: In a large mixing bowl, whisk together the flour, sugar, and salt.
- Whisk in Wet Ingredients: In a separate bowl, whisk together the milk, eggs, and melted butter. Add vanilla extract, if using.
- Incorporate Wet into Dry: Slowly pour the wet ingredients into the dry ingredients, whisking constantly until smooth and lump-free. Do not overmix.
- Rest the Batter: Cover the bowl with plastic wrap and refrigerate for at least 30 minutes (or up to overnight).
- Prepare the Pan: Heat a lightly oiled griddle or non-stick frying pan over medium heat.
- Pour the Batter: Remove the pan from the heat and pour about 1/4 cup of batter onto the center of the pan. Immediately swirl the pan to spread the batter into a thin, even circle.
- Cook the First Side: Return the pan to the heat and cook for 1-2 minutes, or until the edges start to lift and the bottom is lightly golden brown.
- Flip and Cook the Second Side: Carefully flip the crepe using a thin spatula. Cook for another 30-60 seconds, or until the second side is lightly golden brown.
- Repeat: Slide the cooked crepe onto a plate. Repeat with the remaining batter, stacking the crepes on top of each other. Keep warm in a low oven (200°F) if desired.
- Serve: Fill with your favorite sweet or savory fillings and fold as desired.
- Resting the batter is crucial for tender crepes.
- Use a good quality non-stick pan for best results.
- Adjust the heat as needed to prevent burning or undercooking.
- Crepes can be stored in the refrigerator for up to 3 days or frozen for up to 2 months.
- Experiment with different fillings and folding techniques!
Conclusion:
And there you have it! These easy crepes are truly a game-changer. I know, I know, crepes can seem intimidating, but trust me, this recipe demystifies the whole process. From the simple batter to the endless filling possibilities, its a recipe that will quickly become a staple in your kitchen. Why is it a must-try? Because it’s incredibly versatile, surprisingly quick to make, and delivers a restaurant-quality result without the restaurant price tag. Plus, who can resist a warm, delicate crepe filled with their favorite goodies?
Think of these crepes as a blank canvas for your culinary creativity. For a sweet treat, try filling them with Nutella and sliced bananas, a dollop of whipped cream and fresh berries, or a simple dusting of powdered sugar and a squeeze of lemon. If you’re feeling adventurous, a scoop of vanilla ice cream and a drizzle of chocolate sauce takes them to the next level. For a savory option, consider filling them with ham and cheese, sautéed mushrooms and spinach, or even a creamy chicken filling. I personally love them with smoked salmon, cream cheese, and a sprinkle of dill its a brunch sensation!
Don’t be afraid to experiment with the batter itself too! A splash of orange liqueur or a teaspoon of vanilla extract can add a subtle depth of flavor. For a chocolate crepe, simply add a tablespoon or two of cocoa powder to the batter. You can even make gluten-free crepes by substituting the all-purpose flour with a gluten-free blend. The possibilities are truly endless!
Beyond the fillings, consider different serving styles. You can roll them up like cigars, fold them into triangles, or stack them high for a crepe cake. A drizzle of maple syrup, a sprinkle of chopped nuts, or a dusting of cinnamon can add the perfect finishing touch.
Ive made these easy crepes countless times, and they always impress. They’re perfect for a weekend brunch, a quick weeknight dessert, or even a special occasion. They are also a fantastic way to use up leftover ingredients in your fridge. A little bit of cooked chicken? Crepe filling! Some leftover roasted vegetables? Crepe filling! You get the idea.
But the best part about this recipe is how easy it is to customize. Don’t like bananas? Use strawberries! Prefer cheddar cheese over Swiss? Go for it! This recipe is a starting point, a foundation for you to build upon and create your own signature crepe creations.
So, what are you waiting for? Grab your whisk, your frying pan, and your favorite ingredients, and get ready to make some magic. I promise you won’t be disappointed. Once you master this recipe, you’ll be making crepes for every occasion.
I’m so excited for you to try this recipe! And I’d absolutely love to hear about your experience. What fillings did you use? What variations did you try? Did you make them for a special occasion? Share your photos and stories in the comments below! Let’s create a crepe-loving community and inspire each other with our delicious creations. Happy crepe-making! I can’t wait to see what you come up with!
Easy Crepes: The Ultimate Guide to Perfect Homemade Crepes
Thin, delicate crepes perfect for sweet or savory fillings. This easy recipe yields tender crepes every time.