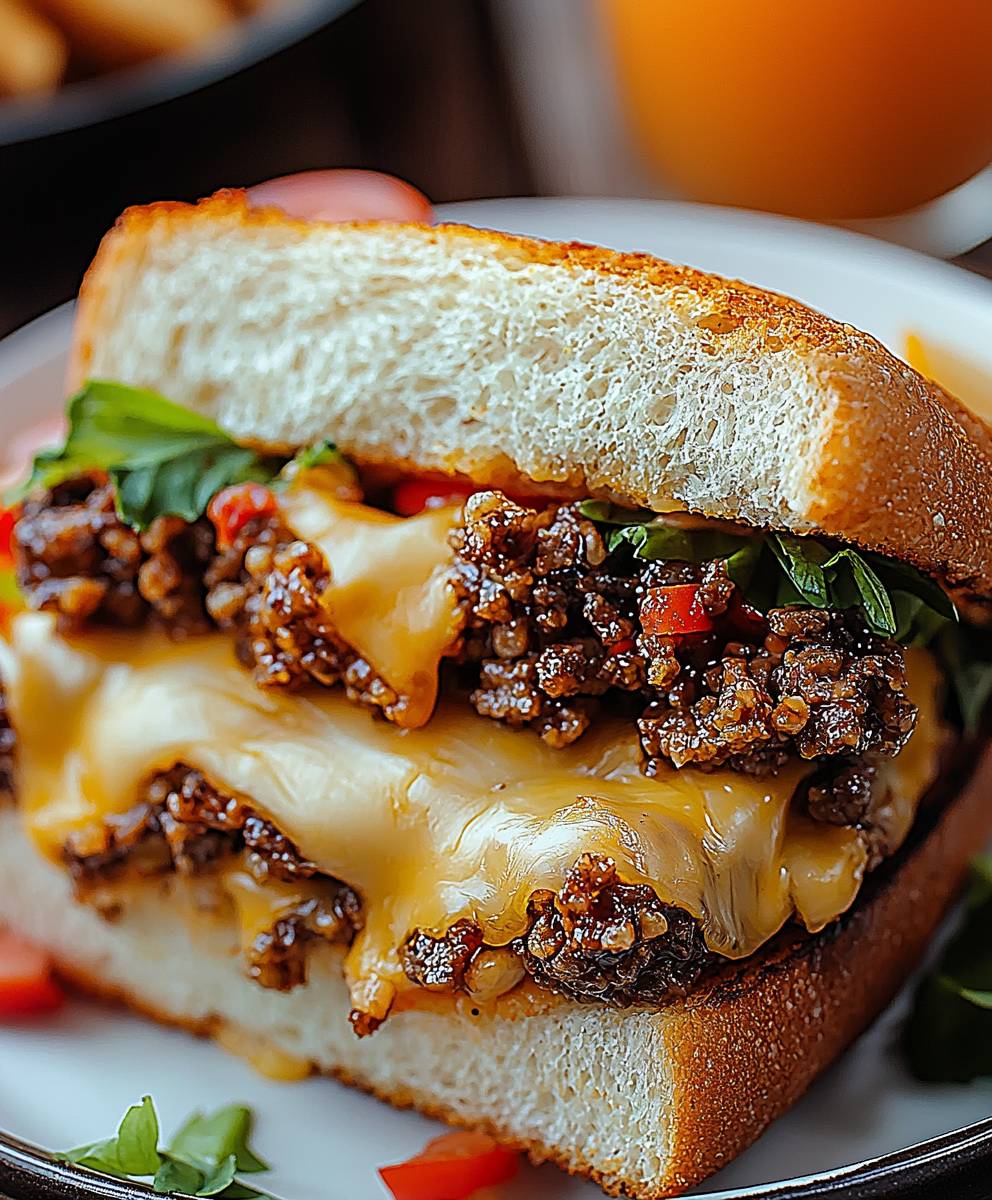
Chopped Cheese Sandwich: the name alone conjures images of late-night cravings and the vibrant energy of a bustling New York City bodega. Have you ever experienced that undeniable pull, that magnetic force drawing you towards the promise of a perfectly greasy, utterly satisfying sandwich? If not, prepare to be converted! This isn’t just a sandwich; it’s a cultural icon, a taste of home for many, and a culinary adventure waiting to happen for you.
The Chopped Cheese, often simply called a “Chop Cheese,” is rumored to have originated in the early 1990s in Harlem, quickly becoming a staple in bodegas across the city. Think of it as New York’s answer to the Philly cheesesteak, but with its own distinct personality. It’s a symphony of flavors and textures: seasoned ground beef, melted cheese, sautéed onions, crisp lettuce, juicy tomatoes, and creamy mayonnaise, all nestled within a toasted hero roll.
What makes the Chopped Cheese Sandwich so irresistible? It’s the perfect combination of savory, salty, and slightly sweet, with a satisfyingly messy texture that begs to be devoured. It’s quick, it’s easy, and it’s undeniably delicious. Whether you’re a seasoned New Yorker or simply a food enthusiast looking for your next great bite, this recipe will guide you through creating the ultimate bodega-style experience in your own kitchen. Get ready to experience a taste of New York, one delicious bite at a time!
Ingredients:
- 1 pound ground beef (80/20 blend recommended for flavor)
- 1 tablespoon olive oil
- 1 medium onion, finely chopped
- 1 green bell pepper, finely chopped
- 2 cloves garlic, minced
- 1 teaspoon Worcestershire sauce
- 1/2 teaspoon garlic powder
- 1/2 teaspoon onion powder
- 1/4 teaspoon black pepper
- 1/4 teaspoon red pepper flakes (optional, for a little kick)
- Salt to taste
- 4 slices American cheese (or your favorite melting cheese, like provolone or cheddar)
- 4 hoagie rolls (or your preferred sandwich rolls)
- Lettuce, shredded (optional)
- Tomato, sliced (optional)
- Mayonnaise (optional)
- Ketchup (optional)
- Mustard (optional)
Preparing the Meat Mixture:
- Get your pan hot! Heat the olive oil in a large skillet or on a griddle over medium-high heat. You want it hot enough to get a good sear on the beef.
- Add the ground beef to the hot skillet. Use a spatula to break it up into smaller pieces. You don’t want large clumps; the goal is to create a somewhat loose and crumbly texture.
- Cook the beef, stirring occasionally, until it’s browned. This usually takes about 5-7 minutes. Make sure to drain off any excess grease. Nobody wants a soggy sandwich! I usually tilt the pan and spoon the grease out.
- Add the chopped onion and green bell pepper to the skillet with the browned beef. Cook, stirring frequently, until the vegetables are softened and translucent. This should take another 5-7 minutes. The onions should be nicely softened and starting to caramelize a bit.
- Stir in the minced garlic, Worcestershire sauce, garlic powder, onion powder, black pepper, and red pepper flakes (if using). Cook for another minute or so, until the garlic is fragrant. Be careful not to burn the garlic! Burnt garlic is bitter and will ruin the flavor.
- Season the meat mixture with salt to taste. Remember that the cheese will also add saltiness, so start with a little and add more as needed. I usually start with about 1/2 teaspoon and then adjust from there.
Assembling the Chopped Cheese:
- Divide and Conquer! Divide the meat mixture into four equal portions in the skillet. This makes it easier to assemble the sandwiches evenly.
- Place a slice of American cheese (or your cheese of choice) on top of each portion of the meat mixture. Make sure the cheese covers the meat as much as possible so it melts nicely.
- Let the cheese melt completely. This usually takes about 1-2 minutes. You can cover the skillet with a lid to help the cheese melt faster. Keep an eye on it so the cheese doesn’t burn.
- While the cheese is melting, prepare the hoagie rolls. You can lightly toast them if you like, but it’s not necessary. I prefer mine toasted for a little extra crunch.
- Once the cheese is melted, use a spatula to carefully transfer each cheesy meat portion onto a hoagie roll. Try to keep the cheese intact as much as possible.
- Chop it Up! This is where the “chopped” part comes in. Using your spatula, roughly chop the meat and cheese mixture directly on the roll. This helps to combine the ingredients and create a more cohesive sandwich. Don’t over-chop it; you still want some texture.
Adding Toppings (Optional):
- Add your desired toppings to the chopped cheese sandwiches. I like to add shredded lettuce, sliced tomato, mayonnaise, ketchup, and mustard. But feel free to get creative and add whatever you like! Some people add pickles, onions, or even hot sauce.
- Serve immediately and enjoy your delicious homemade chopped cheese sandwich!
Tips and Variations:
- Cheese Choices: While American cheese is traditional, feel free to experiment with other melting cheeses like provolone, cheddar, or even pepper jack for a spicier kick.
- Meat Alternatives: You can substitute ground beef with ground turkey or ground chicken for a leaner option. Just adjust the cooking time accordingly.
- Vegetarian Option: For a vegetarian version, use plant-based ground meat substitute.
- Spice it Up: Add more red pepper flakes or a dash of hot sauce to the meat mixture for extra heat.
- Add Some Veggies: Feel free to add other vegetables to the meat mixture, such as mushrooms, jalapeños, or diced tomatoes.
- Bread Options: While hoagie rolls are traditional, you can use other types of bread, such as ciabatta rolls or even sliced bread.
- Make it a Wrap: For a lighter option, wrap the chopped cheese mixture in a tortilla.
- Meal Prep: You can prepare the meat mixture ahead of time and store it in the refrigerator for up to 3 days. When you’re ready to assemble the sandwiches, simply reheat the meat mixture and proceed with the recipe.
- Griddle Master: If you have a griddle, it’s perfect for making chopped cheese sandwiches. The flat surface allows you to cook the meat and vegetables evenly and melt the cheese perfectly.
- Don’t Overcook the Beef: Overcooked beef will be dry and tough. Cook it until it’s browned but still slightly juicy.
- Seasoning is Key: Don’t be afraid to experiment with different seasonings to find your perfect flavor combination.
- Fresh Ingredients: Using fresh, high-quality ingredients will make a big difference in the taste of your chopped cheese sandwich.
- Adjust to Your Taste: This recipe is just a starting point. Feel free to adjust the ingredients and seasonings to your liking.
Serving Suggestions:
- Serve your chopped cheese sandwich with a side of french fries, onion rings, or potato chips.
- Pair it with a cold drink, such as soda, iced tea, or lemonade.
- Cut the sandwich in half and serve it as an appetizer.
- Pack it for a picnic or lunch.
Storage Instructions:
- Store leftover chopped cheese sandwiches in the refrigerator for up to 2 days.
- Reheat the sandwiches in the microwave or oven until heated through.
- The meat mixture can be stored separately in the refrigerator for up to 3 days.
Nutritional Information (Approximate):
- Calories: 600-800 (depending on ingredients and toppings)
- Protein: 30-40 grams
- Fat: 40-50 grams
- Carbohydrates: 40-50 grams
Disclaimer: Nutritional information is approximate and may vary depending on the specific ingredients used.

Conclusion:
So, there you have it! This isn’t just another sandwich; it’s a culinary experience, a taste of New York right in your own kitchen. The Chopped Cheese Sandwich is a must-try because it’s incredibly easy to make, bursting with flavor, and satisfyingly comforting. The combination of seasoned ground beef, melted cheese, caramelized onions, and crisp lettuce and tomato, all nestled in a toasted hero roll, is simply irresistible. Its the perfect quick lunch, a hearty dinner, or even a late-night snack. Trust me, once you take that first bite, you’ll understand why this sandwich has such a devoted following.
But the best part about this recipe is its versatility! Feel free to experiment and make it your own.
Serving Suggestions and Variations:
* Spice it up: Add a pinch of red pepper flakes to the ground beef mixture or a dash of hot sauce to the finished sandwich for an extra kick. A little bit of jalapeño can go a long way!
* Cheese, please!: While American cheese is traditional, don’t be afraid to try other cheeses like provolone, cheddar, or even pepper jack for a different flavor profile. A blend of cheeses can also be amazing.
* Veggie boost: Add some sautéed bell peppers or mushrooms to the ground beef mixture for extra nutrients and flavor. Spinach or arugula can also be added for a fresh, peppery bite.
* Sauce it up: Experiment with different sauces like mayonnaise, mustard, ketchup, or even a creamy sriracha mayo. A drizzle of balsamic glaze can also add a touch of sweetness and acidity.
* Bread options: While a hero roll is the classic choice, you can also use other types of bread like a hoagie roll, a French baguette, or even a toasted bagel.
* Make it a meal: Serve your Chopped Cheese Sandwich with a side of crispy fries, onion rings, or a simple salad for a complete and satisfying meal.
I truly believe that this Chopped Cheese Sandwich recipe will become a new favorite in your household. It’s quick, easy, and customizable to your own taste preferences. It’s a guaranteed crowd-pleaser, perfect for family dinners, game nights, or even a solo indulgence.
So, what are you waiting for? Head to the kitchen, gather your ingredients, and get ready to experience the magic of the Chopped Cheese. I’m confident that you’ll love it as much as I do.
And now, for the most important part: I want to hear about your experience! Did you try the recipe? What variations did you make? What did your family and friends think? Share your photos and stories in the comments below. I can’t wait to see your creations and hear your feedback. Let’s spread the love for this amazing sandwich and inspire others to give it a try. Happy cooking, and enjoy your delicious Chopped Cheese Sandwich! I hope you find this recipe as satisfying and delicious as I do!
Chopped Cheese Sandwich: The Ultimate Guide to NYC's Favorite
A classic chopped cheese sandwich with seasoned ground beef, melted cheese, and toppings, chopped on a toasted roll.
Ingredients
- 1 pound ground beef (80/20 blend recommended for flavor)
- 1 tablespoon olive oil
- 1 medium onion, finely chopped
- 1 green bell pepper, finely chopped
- 2 cloves garlic, minced
- 1 teaspoon Worcestershire sauce
- 1/2 teaspoon garlic powder
- 1/2 teaspoon onion powder
- 1/4 teaspoon black pepper
- 1/4 teaspoon red pepper flakes (optional, for a little kick)
- Salt to taste
- 4 slices American cheese (or your favorite melting cheese, like provolone or cheddar)
- 4 hoagie rolls (or your preferred sandwich rolls)
- Lettuce, shredded (optional)
- Tomato, sliced (optional)
- Mayonnaise (optional)
- Ketchup (optional)
- Mustard (optional)
Instructions
- Prepare the Meat Mixture: Heat olive oil in a large skillet or on a griddle over medium-high heat. Add ground beef and break it up into smaller pieces. Cook, stirring occasionally, until browned (5-7 minutes). Drain off excess grease.
- Add chopped onion and green bell pepper to the skillet. Cook, stirring frequently, until vegetables are softened and translucent (5-7 minutes).
- Stir in minced garlic, Worcestershire sauce, garlic powder, onion powder, black pepper, and red pepper flakes (if using). Cook for another minute or so, until the garlic is fragrant.
- Season the meat mixture with salt to taste.
- Assemble the Chopped Cheese: Divide the meat mixture into four equal portions in the skillet.
- Place a slice of American cheese (or your cheese of choice) on top of each portion of the meat mixture.
- Let the cheese melt completely (1-2 minutes). Cover the skillet with a lid to help the cheese melt faster.
- While the cheese is melting, prepare the hoagie rolls. You can lightly toast them if you like.
- Once the cheese is melted, use a spatula to carefully transfer each cheesy meat portion onto a hoagie roll.
- Chop it Up! Using your spatula, roughly chop the meat and cheese mixture directly on the roll.
- Add Toppings (Optional): Add your desired toppings to the chopped cheese sandwiches. I like to add shredded lettuce, sliced tomato, mayonnaise, ketchup, and mustard.
- Serve immediately and enjoy your delicious homemade chopped cheese sandwich!
Notes
- Cheese Choices: While American cheese is traditional, feel free to experiment with other melting cheeses like provolone, cheddar, or even pepper jack for a spicier kick.
- Meat Alternatives: You can substitute ground beef with ground turkey or ground chicken for a leaner option. Just adjust the cooking time accordingly.
- Vegetarian Option: For a vegetarian version, use plant-based ground meat substitute.
- Spice it Up: Add more red pepper flakes or a dash of hot sauce to the meat mixture for extra heat.
- Add Some Veggies: Feel free to add other vegetables to the meat mixture, such as mushrooms, jalapeños, or diced tomatoes.
- Bread Options: While hoagie rolls are traditional, you can use other types of bread, such as ciabatta rolls or even sliced bread.
- Make it a Wrap: For a lighter option, wrap the chopped cheese mixture in a tortilla.
- Meal Prep: You can prepare the meat mixture ahead of time and store it in the refrigerator for up to 3 days. When you’re ready to assemble the sandwiches, simply reheat the meat mixture and proceed with the recipe.
- Griddle Master: If you have a griddle, it’s perfect for making chopped cheese sandwiches. The flat surface allows you to cook the meat and vegetables evenly and melt the cheese perfectly.
- Don’t Overcook the Beef: Overcooked beef will be dry and tough. Cook it until it’s browned but still slightly juicy.
- Seasoning is Key: Don’t be afraid to experiment with different seasonings to find your perfect flavor combination.
- Fresh Ingredients: Using fresh, high-quality ingredients will make a big difference in the taste of your chopped cheese sandwich.
- Adjust to Your Taste: This recipe is just a starting point. Feel free to adjust the ingredients and seasonings to your liking.


