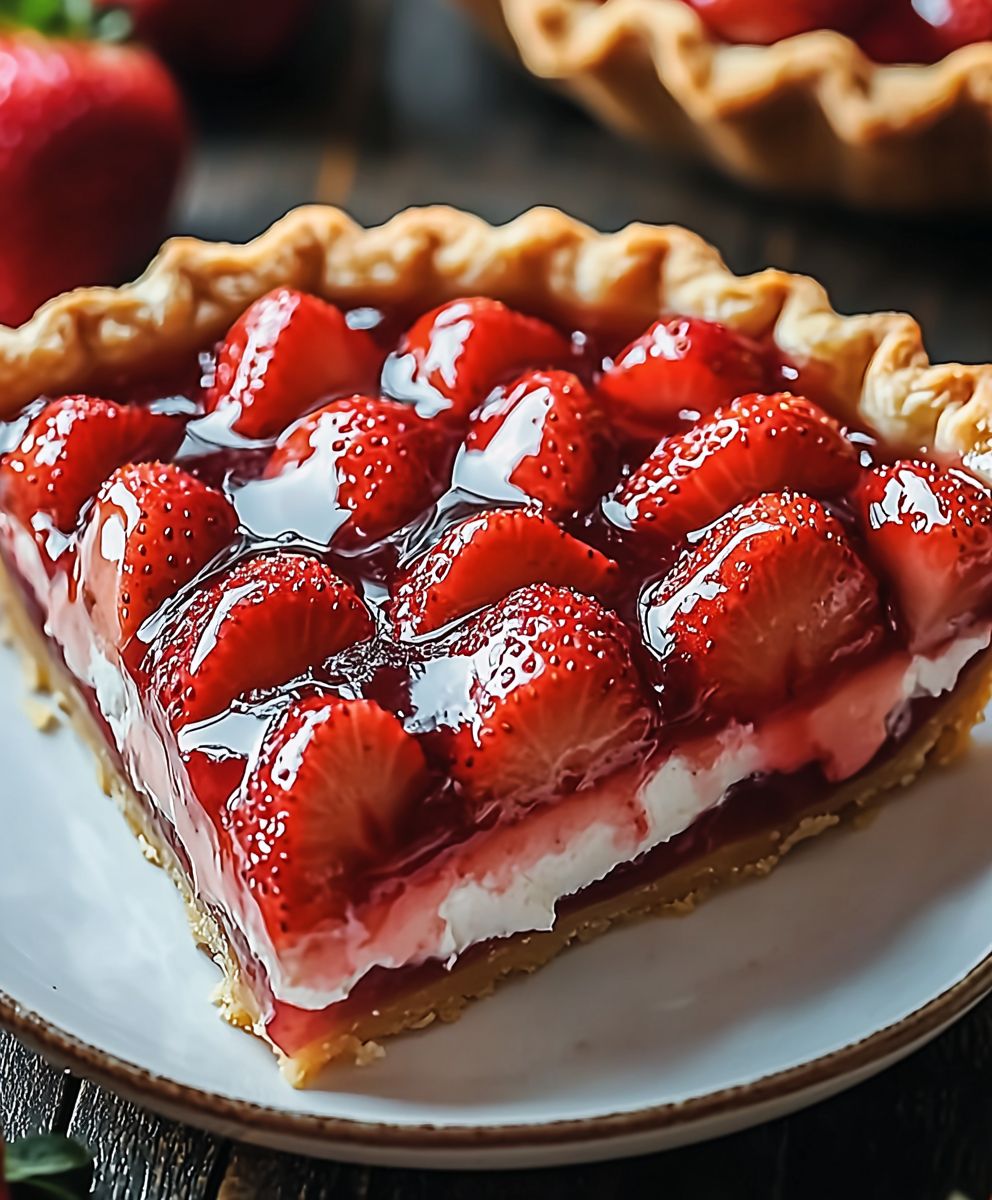
Strawberry Pie: Just the name conjures up images of sunny days, picnics, and the sweet, juicy taste of summer. Imagine sinking your fork into a slice of vibrant red filling, nestled in a flaky, golden crust. Is your mouth watering yet? Mine certainly is! This isn’t just dessert; it’s a nostalgic trip to simpler times.
The history of fruit pies stretches back centuries, with early versions appearing in ancient Rome. However, the strawberry pie, as we know and love it, is a more modern creation, flourishing with the rise of strawberry cultivation in the 18th and 19th centuries. It quickly became a beloved treat, especially in North America, where strawberries thrive.
But what makes this pie so irresistible? It’s the perfect balance of sweet and tart, the delightful contrast between the soft, yielding berries and the crisp, buttery crust. Plus, it’s relatively easy to make, making it a fantastic option for both seasoned bakers and kitchen novices. Whether you’re serving it at a summer barbecue or simply craving a comforting dessert, a homemade strawberry pie is guaranteed to be a crowd-pleaser. So, let’s get baking and create a slice of sunshine!

Ingredients:
- For the Crust:
- 2 ½ cups all-purpose flour
- 1 teaspoon salt
- 1 cup (2 sticks) unsalted butter, very cold and cut into cubes
- ½ cup vegetable shortening, very cold
- 6-8 tablespoons ice water
- For the Strawberry Filling:
- 6 cups fresh strawberries, hulled and sliced
- ¾ cup granulated sugar
- ¼ cup cornstarch
- ¼ cup water
- 2 tablespoons lemon juice
- 1 tablespoon butter, cut into small pieces
- Pinch of salt
- For the Egg Wash (Optional):
- 1 large egg, beaten
- 1 tablespoon milk or water
- For Sprinkling (Optional):
- Turbinado sugar or granulated sugar
Preparing the Crust:
- Combine Dry Ingredients: In a large bowl, whisk together the flour and salt. This ensures the salt is evenly distributed throughout the crust, which is crucial for flavor.
- Cut in the Butter and Shortening: Add the cold, cubed butter and vegetable shortening to the flour mixture. Using a pastry blender or your fingertips (work quickly to prevent the butter from melting!), cut the butter and shortening into the flour until the mixture resembles coarse crumbs. You should still see small pieces of butter and shortening these are what create flaky layers in the crust. The size of the pieces should be about pea-sized or slightly larger. Don’t overmix!
- Add Ice Water: Gradually add the ice water, one tablespoon at a time, mixing lightly after each addition. Continue adding water until the dough just comes together. Be careful not to add too much water, as this will make the crust tough. The amount of water needed can vary depending on the humidity and the flour you’re using. I usually start with 6 tablespoons and add more if needed.
- Form the Dough: Divide the dough in half. Gently flatten each half into a disc about 1 inch thick. Wrap each disc tightly in plastic wrap and refrigerate for at least 2 hours, or preferably overnight. This allows the gluten to relax, which will make the crust easier to roll out and prevent it from shrinking during baking.
Preparing the Strawberry Filling:
- Prepare the Strawberries: Wash and hull the strawberries. Slice them into even pieces. I prefer slices that are about ¼ inch thick.
- Combine Filling Ingredients: In a large bowl, gently toss the sliced strawberries with the granulated sugar, cornstarch, water, lemon juice, and salt. The cornstarch will help to thicken the filling as it bakes. The lemon juice brightens the flavor and helps to prevent the strawberries from becoming too mushy. Make sure the strawberries are evenly coated with the sugar and cornstarch mixture.
- Let the Filling Sit: Allow the strawberry mixture to sit for about 15-20 minutes. This will allow the strawberries to release some of their juices, which will combine with the sugar and cornstarch to create a delicious sauce.
Assembling and Baking the Pie:
- Preheat Oven: Preheat your oven to 400°F (200°C). Place a baking sheet on the lower rack of the oven. This will help to catch any drips from the pie and prevent your oven from getting messy.
- Roll Out the Bottom Crust: On a lightly floured surface, roll out one of the dough discs into a 12-inch circle. It should be large enough to fit into your pie plate with some overhang. Gently transfer the dough to a 9-inch pie plate. Trim the edges of the dough, leaving about a 1-inch overhang.
- Add the Filling: Pour the strawberry filling into the prepared pie crust. Dot the top of the filling with the small pieces of butter. This will add richness and flavor to the filling.
- Roll Out the Top Crust: On a lightly floured surface, roll out the second dough disc into a 12-inch circle.
- Cut Vents (Optional): Use a sharp knife or a pie crust cutter to cut vents in the top crust. This will allow steam to escape during baking and prevent the crust from puffing up too much. You can cut simple slits, or get creative with decorative shapes.
- Place Top Crust: Carefully place the top crust over the filling. Trim the edges of the top crust, leaving about a 1-inch overhang.
- Crimp the Edges: Crimp the edges of the crust together to seal the pie. You can use a fork to press the edges together, or use your fingers to create a decorative crimped edge. Make sure the edges are well sealed to prevent the filling from leaking out during baking.
- Egg Wash (Optional): In a small bowl, whisk together the egg and milk or water. Brush the top crust with the egg wash. This will give the crust a beautiful golden-brown color.
- Sprinkle with Sugar (Optional): Sprinkle the top crust with turbinado sugar or granulated sugar. This will add a touch of sweetness and sparkle to the pie.
- Bake the Pie: Place the pie on the preheated baking sheet in the oven. Bake for 45-55 minutes, or until the crust is golden brown and the filling is bubbly. If the crust starts to brown too quickly, you can tent it with aluminum foil.
- Cool Completely: Remove the pie from the oven and let it cool completely on a wire rack before slicing and serving. This is important because the filling will continue to thicken as it cools. If you cut into the pie while it’s still warm, the filling will be runny. I know it’s hard to wait, but trust me, it’s worth it! Ideally, let it cool for at least 3-4 hours.
Tips for Success:
- Keep Ingredients Cold: The key to a flaky pie crust is to keep the butter and shortening as cold as possible. This prevents the gluten from developing too much, which can make the crust tough.
- Don’t Overmix: Overmixing the dough will also develop the gluten, resulting in a tough crust. Mix the dough just until it comes together.
- Chill the Dough: Chilling the dough allows the gluten to relax and the butter to firm up, which will make the crust easier to roll out and prevent it from shrinking during baking.
- Use a Baking Sheet: Baking the pie on a baking sheet will help to catch any drips and prevent your oven from getting messy.
- Cool Completely: Letting the pie cool completely before slicing will allow the filling to thicken and prevent it from being runny.
Variations:
- Add Spices: You can add a pinch of cinnamon or nutmeg to the strawberry filling for a warm, comforting flavor.
- Use Different Berries: You can use a combination of strawberries and other berries, such as raspberries or blueberries, in the filling.
- Add a Crumble Topping: Instead of a top crust, you can add a crumble topping made from flour, butter, sugar, and oats.
- Make Mini Pies: You can use the same recipe to make mini strawberry pies in muffin tins.
Enjoy your homemade strawberry pie! I hope you find this recipe easy to follow and that it brings you as much joy as it brings me. Happy baking!
Conclusion:
This isn’t just another dessert; it’s a slice of summer sunshine on a plate! I truly believe this strawberry pie recipe is a must-try for anyone who appreciates the simple pleasures of life: fresh, vibrant flavors, a flaky, buttery crust, and the joy of creating something delicious from scratch. The combination of sweet, juicy strawberries and the subtle tang of lemon creates a symphony of flavors that will dance on your taste buds. It’s the kind of pie that evokes memories of warm afternoons, family gatherings, and pure, unadulterated happiness.
But what truly sets this recipe apart is its versatility. While it’s absolutely divine served chilled as is, with a dollop of freshly whipped cream or a scoop of vanilla bean ice cream, the possibilities are endless! For a richer experience, try adding a crumble topping made with oats, brown sugar, and butter. The contrasting textures of the smooth filling and the crunchy topping will elevate this pie to a whole new level. Or, if you’re feeling adventurous, consider incorporating other berries like raspberries or blueberries for a mixed berry pie that’s bursting with flavor.
Serving Suggestions and Variations:
* Classic: Serve chilled with whipped cream or vanilla ice cream.
* Crumble Topping: Add a crumble topping made with oats, brown sugar, and butter before baking.
* Mixed Berry: Incorporate raspberries or blueberries for a mixed berry pie.
* Individual Pies: Use the filling to make individual mini pies for a charming presentation.
* Strawberry Pie Parfaits: Layer crumbled pie crust, strawberry filling, and whipped cream in glasses for a quick and easy dessert.
* Strawberry Pie Milkshake: Blend a slice of pie with milk and ice cream for a decadent milkshake.
I’ve poured my heart and soul into perfecting this recipe, and I’m confident that you’ll love it as much as I do. It’s the perfect dessert for any occasion, from a casual weeknight treat to a special celebration. The vibrant color and irresistible aroma will instantly brighten up any table, and the taste will leave everyone wanting more.
So, what are you waiting for? Gather your ingredients, preheat your oven, and get ready to embark on a culinary adventure. I promise you, the effort is well worth the reward. This strawberry pie is more than just a recipe; it’s an experience. It’s a chance to connect with your inner baker, to create something beautiful and delicious, and to share it with the people you love.
I’m so excited for you to try this recipe and experience the magic of homemade strawberry pie for yourself. Once you’ve baked your masterpiece, please don’t hesitate to share your experience with me! I’d love to hear your feedback, see your photos, and learn about any variations you’ve tried. Tag me in your social media posts or leave a comment below. Let’s spread the joy of baking and celebrate the deliciousness of this incredible dessert together! Happy baking!
Strawberry Pie: The Ultimate Guide to Baking Perfection
Classic homemade strawberry pie with a flaky, buttery crust and a sweet, juicy strawberry filling.
Ingredients
- 2 ½ cups all-purpose flour
- 1 teaspoon salt
- 1 cup (2 sticks) unsalted butter, very cold and cut into cubes
- ½ cup vegetable shortening, very cold
- 6-8 tablespoons ice water
- 6 cups fresh strawberries, hulled and sliced
- ¾ cup granulated sugar
- ¼ cup cornstarch
- ¼ cup water
- 2 tablespoons lemon juice
- 1 tablespoon butter, cut into small pieces
- Pinch of salt
- 1 large egg, beaten
- 1 tablespoon milk or water
- Turbinado sugar or granulated sugar
Instructions
- Prepare the Crust:
- In a large bowl, whisk together the flour and salt.
- Cut in the cold butter and shortening using a pastry blender or your fingertips until the mixture resembles coarse crumbs with pea-sized pieces of butter.
- Gradually add the ice water, one tablespoon at a time, mixing lightly until the dough just comes together.
- Divide the dough in half, flatten each half into a disc, wrap in plastic wrap, and refrigerate for at least 2 hours (or overnight).
- Prepare the Strawberry Filling:
- Wash, hull, and slice the strawberries.
- In a large bowl, gently toss the strawberries with sugar, cornstarch, water, lemon juice, and salt.
- Let the mixture sit for 15-20 minutes.
- Assemble and Bake the Pie:
- Preheat oven to 400°F (200°C). Place a baking sheet on the lower rack.
- Roll out one dough disc into a 12-inch circle and transfer to a 9-inch pie plate. Trim edges, leaving a 1-inch overhang.
- Pour the strawberry filling into the crust and dot with small pieces of butter.
- Roll out the second dough disc into a 12-inch circle. Cut vents in the top crust (optional).
- Carefully place the top crust over the filling. Trim edges, leaving a 1-inch overhang.
- Crimp the edges of the crust together to seal the pie.
- Brush the top crust with egg wash (optional).
- Sprinkle with turbinado sugar or granulated sugar (optional).
- Bake for 45-55 minutes, or until the crust is golden brown and the filling is bubbly. Tent with foil if the crust browns too quickly.
- Cool completely on a wire rack before slicing and serving (at least 3-4 hours).
Notes
- Keep butter and shortening very cold for a flaky crust.
- Don’t overmix the dough.
- Chilling the dough is essential.
- Use a baking sheet to catch drips.
- Cool the pie completely before slicing to allow the filling to thicken.
- Variations: Add cinnamon or nutmeg to the filling, use mixed berries, add a crumble topping, or make mini pies.