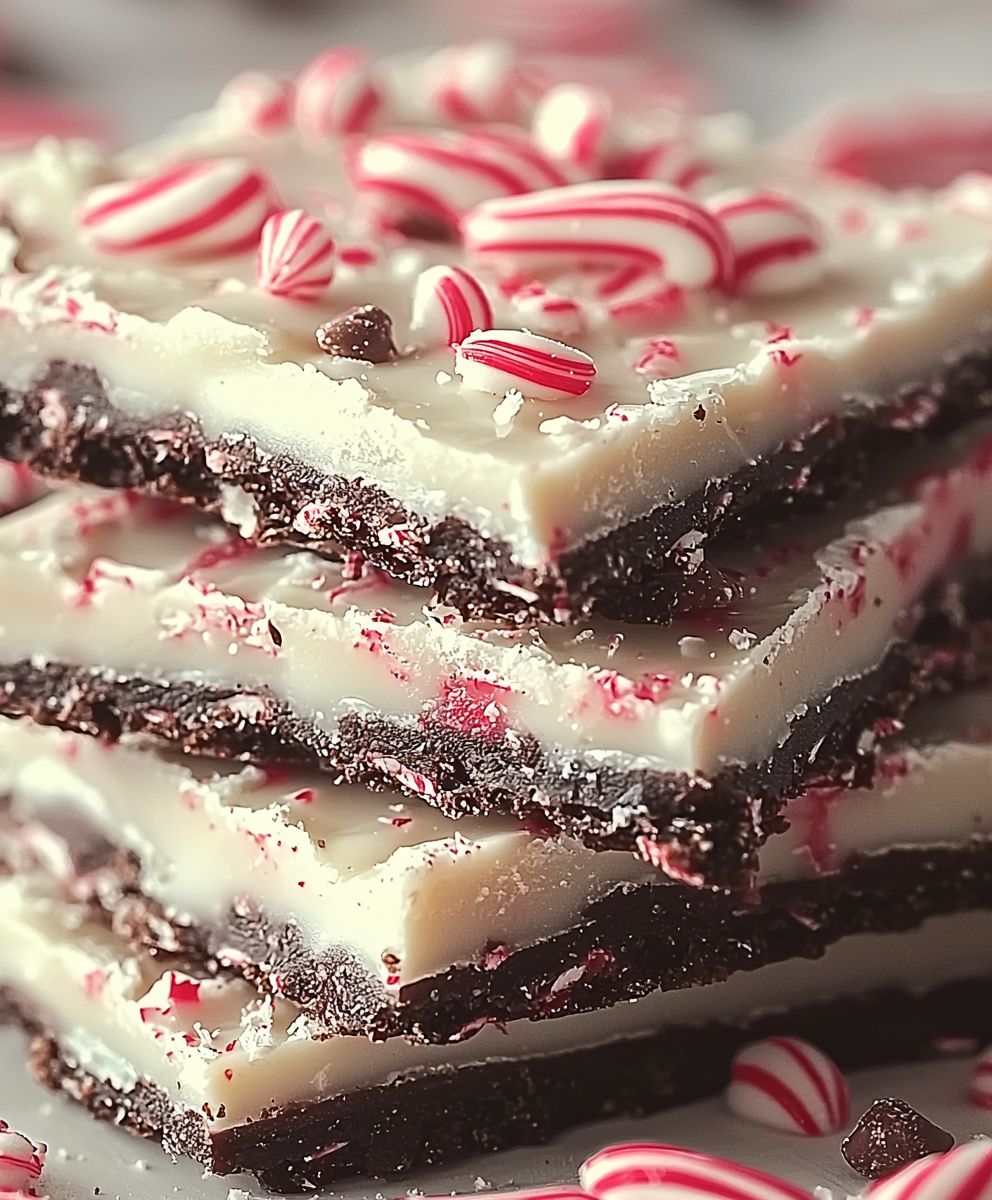
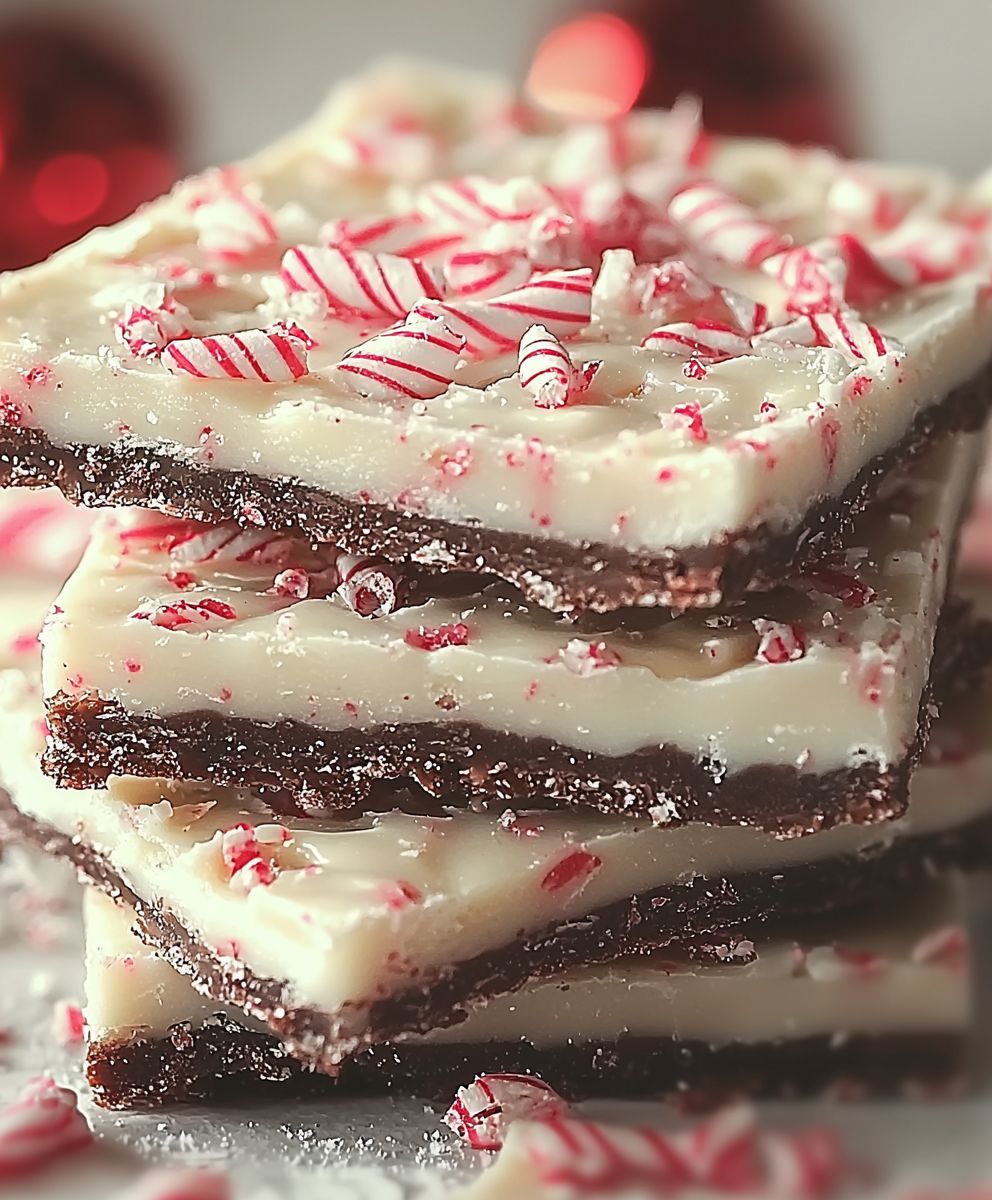
Peppermint Bark: the quintessential holiday treat that’s as visually stunning as it is delicious! Are you ready to transform your kitchen into a winter wonderland with a confection that’s guaranteed to impress? This isn’t just any candy; it’s a symphony of flavors and textures that dance on your palate, leaving you craving more with every bite.
While the exact origins of peppermint bark are debated, its modern popularity can be largely attributed to Williams Sonoma, who popularized their version in the late 20th century. However, the combination of chocolate and peppermint has a much longer history, dating back to Victorian-era candies. The refreshing coolness of peppermint perfectly complements the rich, decadent chocolate, creating a harmonious balance that’s simply irresistible.
People adore this festive treat for so many reasons! The crisp, snappy layers of dark and white chocolate, infused with the invigorating essence of peppermint and topped with crunchy candy cane pieces, offer a delightful textural contrast. Its incredibly easy to make, requiring minimal ingredients and effort, making it the perfect homemade gift or a last-minute addition to your holiday dessert table. Plus, its vibrant red and white colors evoke the spirit of the season, making it a visually appealing and festive treat that everyone will love. Get ready to spread some holiday cheer with this easy and delicious recipe!

Ingredients:
- 1 pound high-quality dark chocolate, finely chopped
- 1 pound high-quality white chocolate, finely chopped
- 1/2 teaspoon peppermint extract
- 1/4 cup crushed peppermint candies (plus extra for topping)
- 1 tablespoon vegetable oil or coconut oil (optional, for smoother melting)
Preparing the Dark Chocolate Layer:
- Melt the Dark Chocolate: Place the finely chopped dark chocolate in a heat-safe bowl. I like to use a glass bowl set over a saucepan of simmering water (a double boiler). Make sure the bottom of the bowl doesn’t touch the water. This gentle heat prevents the chocolate from burning. You can also melt it in the microwave in 30-second intervals, stirring well between each interval, until completely melted and smooth. If you’re using oil, add it now to help with the consistency.
- Temper the Chocolate (Optional but Recommended): Tempering the chocolate will give it a beautiful shine and a satisfying snap. If you skip this step, the chocolate might be a little softer at room temperature. To temper, melt about two-thirds of the chocolate completely. Then, remove the bowl from the heat and add the remaining one-third of the chocolate. Stir constantly until all the chocolate is melted and the mixture is smooth and glossy. The ideal temperature for dark chocolate is around 88-90°F (31-32°C). A candy thermometer is your best friend here!
- Pour and Spread: Line a 9×13 inch baking sheet with parchment paper. This will make it easy to remove the bark later. Pour the melted dark chocolate onto the parchment paper and spread it evenly with an offset spatula or the back of a spoon. Aim for a thickness of about 1/8 to 1/4 inch.
- Chill the Dark Chocolate Layer: Place the baking sheet in the refrigerator for about 20-30 minutes, or until the dark chocolate layer is firm but not completely hard. You want it to be set enough to support the white chocolate layer without the two layers mixing.
Preparing the White Chocolate Layer:
- Melt the White Chocolate: While the dark chocolate layer is chilling, prepare the white chocolate. Place the finely chopped white chocolate in a clean, heat-safe bowl. Again, use a double boiler or microwave in 30-second intervals, stirring well between each interval, until completely melted and smooth. White chocolate is more prone to burning than dark chocolate, so be extra careful and use low heat. Add the remaining oil, if using, to the melted white chocolate.
- Add Peppermint Extract: Once the white chocolate is melted and smooth, remove it from the heat and stir in the 1/2 teaspoon of peppermint extract. Be careful not to add too much, as it can overpower the flavor.
- Temper the White Chocolate (Optional but Recommended): Just like with the dark chocolate, tempering the white chocolate will improve its texture and appearance. Follow the same process: melt about two-thirds of the white chocolate completely, then remove from heat and stir in the remaining one-third until melted and smooth. The ideal temperature for white chocolate is around 84-86°F (29-30°C).
- Pour and Spread: Once the dark chocolate layer is firm, remove the baking sheet from the refrigerator. Pour the melted white chocolate over the dark chocolate layer and spread it evenly with an offset spatula or the back of a spoon.
Adding the Peppermint Candy:
- Sprinkle with Crushed Peppermint: Immediately sprinkle the crushed peppermint candies evenly over the white chocolate layer. Gently press the candies into the white chocolate so they adhere well. You can use a rolling pin very gently to press them in if you like.
- Chill to Set: Return the baking sheet to the refrigerator and chill for at least 1-2 hours, or until the peppermint bark is completely firm.
Breaking and Storing the Bark:
- Break into Pieces: Once the bark is completely firm, remove it from the refrigerator. Lift the parchment paper out of the baking sheet and place the bark on a cutting board. Use a large knife to gently break the bark into irregular pieces. You can also drop the bark (still on the parchment paper) onto a hard surface to break it into pieces.
- Store Properly: Store the peppermint bark in an airtight container in a cool, dry place. It will keep for up to 2 weeks. You can also store it in the refrigerator, but it might become slightly softer.
Tips and Variations:
- Use High-Quality Chocolate: The quality of the chocolate will greatly affect the taste of the peppermint bark. I recommend using a good-quality dark chocolate and white chocolate that you enjoy eating on its own.
- Adjust the Peppermint Flavor: If you prefer a stronger peppermint flavor, you can add a few drops of peppermint oil to the white chocolate along with the peppermint extract. Be very careful with peppermint oil, as it is very potent.
- Add a Touch of Salt: A pinch of sea salt sprinkled over the white chocolate layer before adding the peppermint candies can enhance the flavors and create a delicious sweet and salty combination.
- Use Different Candies: Instead of crushed peppermint candies, you can use other candies, such as M&Ms, sprinkles, or chopped nuts.
- Make it Vegan: Use vegan dark chocolate and white chocolate alternatives. You can find vegan peppermint candies at many health food stores.
- Layered Look: For a more visually appealing bark, you can create multiple layers of dark and white chocolate. Simply chill each layer before adding the next.
- Chocolate Swirl: Before the white chocolate sets, swirl in some melted dark chocolate for a marbled effect.
- Espresso Peppermint Bark: Add a teaspoon of instant espresso powder to the melted dark chocolate for a mocha twist.
Troubleshooting:
- Chocolate Seizing: If your chocolate seizes (becomes thick and grainy), it’s usually because it got too hot or came into contact with water. Try adding a tablespoon of vegetable oil or shortening to the chocolate and stirring vigorously. This can sometimes help to smooth it out.
- White Chocolate Not Melting Smoothly: White chocolate is more delicate than dark chocolate and can be tricky to melt. Make sure to use low heat and stir frequently. If it’s still not melting smoothly, try adding a teaspoon of vegetable oil or shortening.
- Bark Too Soft: If your bark is too soft, it’s likely because it wasn’t chilled long enough or the chocolate wasn’t tempered properly. Place the bark back in the refrigerator for a longer period of time.
- Bark Too Hard to Break: If your bark is too hard to break, let it sit at room temperature for a few minutes before attempting to break it.
Enjoy!
I hope you enjoy making and eating this delicious peppermint bark! It’s the perfect treat for the holidays or any time of year. Happy baking!

Conclusion:
This Peppermint Bark recipe isn’t just another holiday treat; it’s a symphony of textures and flavors that will transport you straight to a winter wonderland. The rich, dark chocolate base, the creamy white chocolate layer, and the invigorating crunch of peppermint candies create an irresistible combination that’s both comforting and festive. I truly believe this is a must-try recipe for anyone who wants to spread some holiday cheer (or just treat themselves!).
But why is this particular recipe so special? It’s all about the quality of ingredients and the attention to detail. Using high-quality chocolate makes a world of difference, resulting in a smoother, richer flavor that elevates the entire experience. And the perfectly balanced ratio of chocolate to peppermint ensures that every bite is a delightful explosion of taste. Plus, it’s surprisingly easy to make! You don’t need to be a professional baker to achieve impressive results.
Beyond the classic recipe, there are so many fun variations you can explore. For a richer, more decadent experience, try adding a layer of salted caramel between the dark and white chocolate. Or, if you’re a fan of nuts, sprinkle some chopped pecans or walnuts on top before the chocolate sets. For a spicier kick, consider adding a pinch of cayenne pepper to the dark chocolate layer. And if you’re looking for a vegan option, simply substitute the dairy chocolate with your favorite vegan alternatives. The possibilities are endless!
Serving suggestions? This Peppermint Bark is perfect on its own as a sweet treat after dinner. It also makes a wonderful addition to a holiday dessert platter, alongside cookies, brownies, and other festive goodies. You can even crumble it over ice cream or use it as a topping for hot chocolate. And of course, it makes a fantastic homemade gift for friends, family, and neighbors. Package it in a pretty tin or cellophane bag, and you’re sure to spread some holiday joy.
I’m confident that you’ll absolutely love this recipe. It’s a guaranteed crowd-pleaser that’s perfect for any occasion. So, gather your ingredients, put on some festive music, and get ready to create some delicious memories.
I can’t wait to hear about your experience making this Peppermint Bark! Did you try any of the variations I suggested? Did you add your own special twist? Please, share your photos and stories in the comments below. I’m always eager to see your creations and learn from your experiences. Happy baking, and happy holidays! Let me know if you have any questions, I’m here to help you every step of the way. Don’t be afraid to experiment and make this recipe your own. The most important ingredient is love, so pour your heart into it and enjoy the process! I promise, the results will be worth it. This recipe is a keeper, and I know you’ll be making it for years to come.
Peppermint Bark: The Ultimate Holiday Recipe and Guide
Festive homemade peppermint bark with layers of dark and white chocolate, topped with crushed peppermint candies. A perfect holiday treat!
Ingredients
- 1 pound high-quality dark chocolate, finely chopped
- 1 pound high-quality white chocolate, finely chopped
- 1/2 teaspoon peppermint extract
- 1/4 cup crushed peppermint candies (plus extra for topping)
- 1 tablespoon vegetable oil or coconut oil (optional, for smoother melting)
Instructions
- Place the finely chopped dark chocolate in a heat-safe bowl set over a saucepan of simmering water (double boiler). Ensure the bowl doesn’t touch the water. Alternatively, microwave in 30-second intervals, stirring well between each interval, until melted and smooth. Add oil, if using.
- Melt about two-thirds of the chocolate completely. Remove from heat and add the remaining one-third, stirring constantly until melted and glossy. Ideal temperature for dark chocolate: 88-90°F (31-32°C).
- Line a 9×13 inch baking sheet with parchment paper. Pour the melted dark chocolate onto the parchment paper and spread evenly to about 1/8 to 1/4 inch thickness.
- Refrigerate for 20-30 minutes, or until firm but not completely hard.
- Place the finely chopped white chocolate in a clean, heat-safe bowl. Use a double boiler or microwave in 30-second intervals, stirring well between each interval, until melted and smooth. Add the remaining oil, if using.
- Remove the white chocolate from the heat and stir in the peppermint extract.
- Melt about two-thirds of the white chocolate completely, then remove from heat and stir in the remaining one-third until melted and smooth. Ideal temperature for white chocolate: 84-86°F (29-30°C).
- Remove the baking sheet from the refrigerator. Pour the melted white chocolate over the dark chocolate layer and spread evenly.
- Immediately sprinkle the crushed peppermint candies evenly over the white chocolate layer. Gently press the candies into the white chocolate.
- Return the baking sheet to the refrigerator and chill for at least 1-2 hours, or until the peppermint bark is completely firm.
- Remove the bark from the refrigerator. Lift the parchment paper out of the baking sheet and place the bark on a cutting board. Use a large knife to gently break the bark into irregular pieces.
- Store the peppermint bark in an airtight container in a cool, dry place for up to 2 weeks.
Notes
- Use high-quality chocolate for the best flavor.
- Tempering the chocolate is recommended for a shiny and snappy bark.
- Adjust the peppermint flavor to your liking.
- Add a pinch of sea salt for a sweet and salty combination.
- Get creative with different candies or toppings.
- For a vegan version, use vegan chocolate and peppermint candies.
- If chocolate seizes, add a tablespoon of oil and stir vigorously.
- If white chocolate doesn’t melt smoothly, use low heat and stir frequently.
- If bark is too soft, chill longer.
- If bark is too hard to break, let it sit at room temperature for a few minutes.


