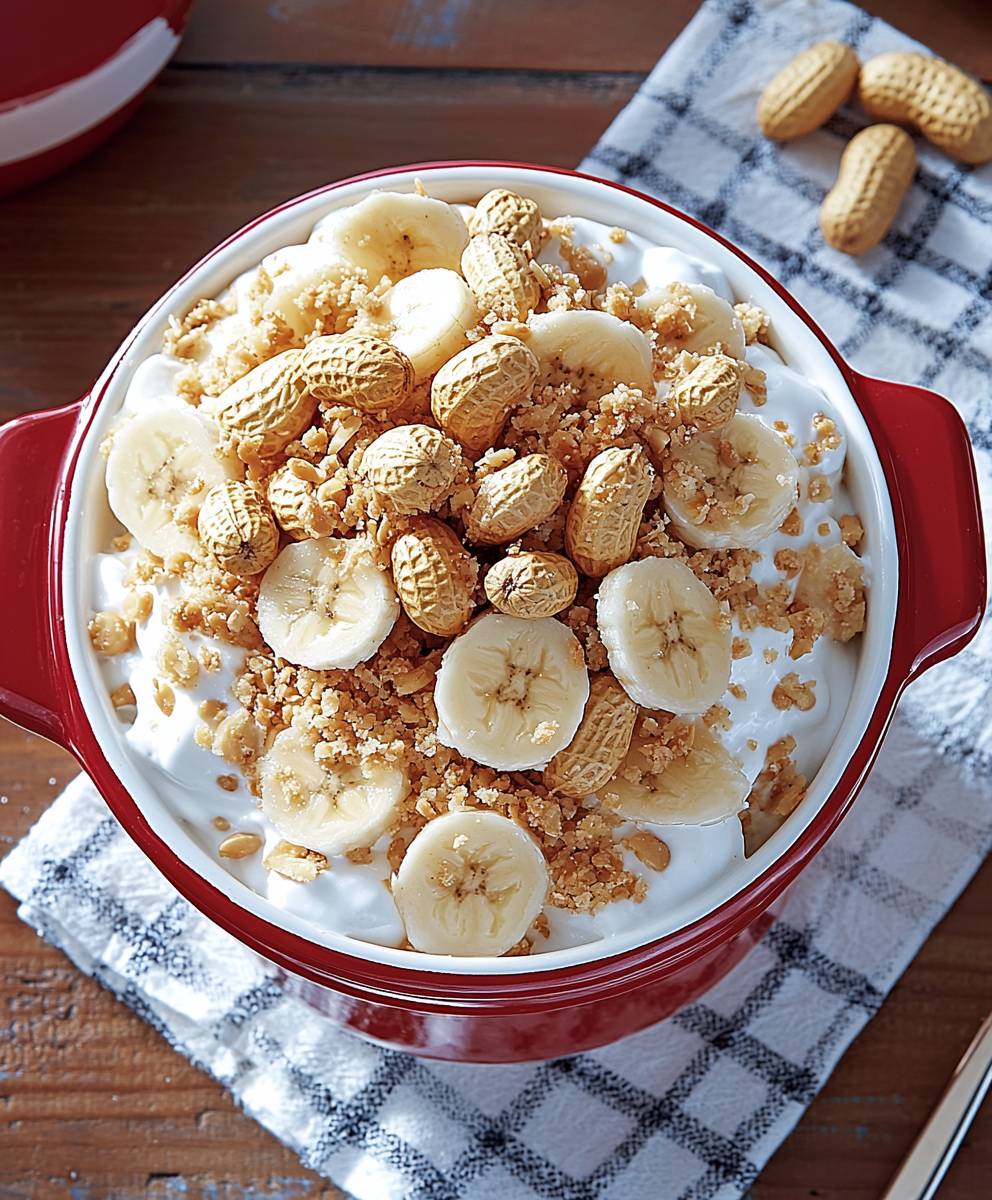
Peanut Banana Pudding: Prepare to be transported to a realm of creamy, dreamy deliciousness! Forget everything you thought you knew about pudding because this isn’t your grandma’s vanilla cup. We’re talking about a decadent, layered dessert that perfectly marries the comforting flavors of ripe bananas with the nutty richness of peanut butter. It’s so good, you might just want to skip dinner and go straight for dessert!
While the exact origins of combining peanut butter and bananas in desserts are somewhat hazy, the pairing has a long and beloved history, particularly in American cuisine. Think Elvis Presley’s legendary love for peanut butter and banana sandwiches! This Peanut Banana Pudding recipe takes that classic combination and elevates it to a sophisticated, yet utterly approachable, dessert. It’s a delightful nod to comfort food with a touch of elegance.
People adore this dish for its incredible texture the smooth, velvety pudding, the soft, sweet bananas, and the satisfying crunch of optional toppings like crushed peanuts or wafers. The flavor profile is equally irresistible. The sweetness of the bananas is perfectly balanced by the salty, savory peanut butter, creating a harmonious blend that will tantalize your taste buds. Plus, it’s incredibly easy to make! Whether you’re looking for a crowd-pleasing dessert for a potluck or a simple treat to satisfy your own sweet tooth, this Peanut Banana Pudding is guaranteed to be a winner.
Ingredients:
- 1 (14 ounce) can sweetened condensed milk
- 1 ½ cups cold milk
- 1 (3.4 ounce) package instant vanilla pudding mix
- 1 cup creamy peanut butter
- 1 (8 ounce) container frozen whipped topping, thawed
- 3 ripe bananas, sliced
- 1 cup vanilla wafers, crushed
- ½ cup chopped peanuts, for garnish (optional)
- Chocolate syrup, for garnish (optional)
Preparing the Peanut Butter Pudding Base
Okay, let’s get started! This Peanut Banana Pudding is seriously addictive, and the first step is creating that luscious peanut butter pudding base. It’s super simple, I promise!
- Combine the Condensed Milk and Cold Milk: In a large mixing bowl, pour in the entire can of sweetened condensed milk. Then, add the cold milk. I like to use a whisk for this step to ensure everything is nicely combined. You want a smooth, even mixture before moving on. This is the foundation of our creamy pudding, so make sure there are no lumps!
- Add the Instant Pudding Mix: Now, sprinkle in the instant vanilla pudding mix. Don’t just dump it all in at once! Sprinkle it gradually while whisking continuously. This helps prevent clumps from forming. Keep whisking until the pudding mix is fully incorporated and the mixture starts to thicken slightly.
- Incorporate the Peanut Butter: This is where the magic happens! Add the creamy peanut butter to the pudding mixture. I recommend using a good quality creamy peanut butter for the best flavor and texture. Now, this step requires a little elbow grease. Whisk the peanut butter into the pudding mixture until it’s completely smooth and there are no streaks of peanut butter remaining. You might need to switch to a spatula towards the end to scrape down the sides of the bowl and ensure everything is evenly mixed. The mixture should be thick and creamy, with a beautiful peanut butter color.
- Fold in the Whipped Topping: Gently fold in the thawed whipped topping. This is important don’t stir it in vigorously! Folding helps to keep the whipped topping light and airy, which will give the pudding a wonderful texture. Use a spatula to gently fold the whipped topping into the peanut butter pudding mixture until it’s just combined. You should still see some streaks of whipped topping, which is perfectly fine. Overmixing will deflate the whipped topping and make the pudding less fluffy.
Assembling the Peanut Banana Pudding
Now for the fun part layering all those delicious ingredients! You can assemble this pudding in a large trifle dish, a 9×13 inch baking dish, or individual serving cups. I personally love using a trifle dish because it looks so pretty, but the choice is yours!
- Create the First Layer of Vanilla Wafers: Spread a layer of crushed vanilla wafers on the bottom of your chosen dish. You don’t need to completely cover the bottom, but aim for a good, even layer. The vanilla wafers will soak up some of the moisture from the pudding and become nice and soft.
- Add a Layer of Sliced Bananas: Arrange a layer of sliced bananas over the vanilla wafers. I like to slice the bananas about ¼ inch thick. Make sure to use ripe bananas, but not overly ripe ones that are too mushy. You want them to hold their shape and provide a nice texture contrast to the creamy pudding.
- Spread a Layer of Peanut Butter Pudding: Spoon a generous layer of the peanut butter pudding mixture over the bananas. Spread it evenly to cover the bananas completely. This layer should be about 1-2 inches thick, depending on the size of your dish.
- Repeat the Layers: Repeat the layers of vanilla wafers, bananas, and peanut butter pudding until you’ve used up all the ingredients. I usually aim for at least three layers of each. The top layer should be the peanut butter pudding.
- Garnish (Optional): If desired, garnish the top of the pudding with chopped peanuts and a drizzle of chocolate syrup. The chopped peanuts add a nice crunch, and the chocolate syrup complements the peanut butter and banana flavors perfectly. You can also get creative with your garnishes and add other toppings like whipped cream, sprinkles, or even a few extra vanilla wafers.
Chilling and Serving the Pudding
Patience is key! This pudding needs some time to chill in the refrigerator to allow the flavors to meld together and the vanilla wafers to soften. Trust me, it’s worth the wait!
- Cover and Chill: Cover the pudding tightly with plastic wrap or a lid. This will prevent it from drying out and absorbing any unwanted odors from the refrigerator.
- Refrigerate for at Least 4 Hours: Refrigerate the pudding for at least 4 hours, or preferably overnight. This will give the vanilla wafers plenty of time to soften and the flavors to fully develop. The longer it chills, the better it will taste!
- Serve and Enjoy: Once the pudding has chilled, it’s ready to serve! Spoon it into bowls or glasses and enjoy. The pudding will be creamy, decadent, and bursting with peanut butter and banana flavor. It’s the perfect dessert for any occasion!
Tips and Variations
Want to customize this recipe to your liking? Here are a few tips and variations to try:
- Use Different Flavors of Pudding: Instead of vanilla pudding, try using banana cream pudding or chocolate pudding for a different flavor twist.
- Add Chocolate Chips: Sprinkle chocolate chips between the layers for an extra dose of chocolatey goodness.
- Use Different Types of Cookies: Instead of vanilla wafers, try using graham crackers or chocolate wafers.
- Make it Healthier: Use sugar-free pudding mix and light whipped topping to reduce the calories and sugar content.
- Add a Rum Flavor: Add a tablespoon or two of rum extract to the pudding mixture for a boozy kick.
- Individual Servings: Prepare the pudding in individual cups or jars for easy serving and portion control.
- Peanut Butter Swirl: Before chilling, swirl a little extra peanut butter on top for a marbled effect.
Storage Instructions
Leftover Peanut Banana Pudding can be stored in the refrigerator for up to 3 days. Make sure to cover it tightly to prevent it from drying out. The vanilla wafers may become a bit softer over time, but the pudding will still taste delicious.
Why This Recipe Works
This recipe is a winner because it’s incredibly easy to make, requires minimal ingredients, and delivers maximum flavor. The combination of creamy peanut butter pudding, soft vanilla wafers, and sweet bananas is simply irresistible. Plus, it’s a crowd-pleaser that everyone will love!
Nutritional Information (Approximate)
Please note that the nutritional information is an estimate and may vary depending on the specific ingredients used.
- Calories: Approximately 350-400 per serving
- Fat: 20-25 grams
- Saturated Fat: 10-12 grams
- Cholesterol: 30-40 mg
- Sodium: 200-250 mg
- Carbohydrates: 40-45 grams
- Sugar: 30-35 grams
- Protein: 5-7 grams
Enjoy your delicious Peanut Banana Pudding! I hope you love it as much as I do!

Conclusion:
So there you have it! This Peanut Banana Pudding is truly a dessert experience you won’t want to miss. It’s the perfect blend of creamy, sweet, and nutty, with that comforting banana flavor we all know and love. I promise, one bite and you’ll be hooked!
But why is this recipe a must-try? Well, beyond the incredible taste, it’s also surprisingly easy to make. We’re talking minimal ingredients and a straightforward process, making it ideal for both seasoned bakers and kitchen novices alike. Plus, it’s a fantastic way to use up those ripe bananas that are starting to brown on your counter. No more banana bread (unless you *want* banana bread, of course!). This pudding offers a refreshing and exciting alternative.
And the best part? It’s incredibly versatile! While I’ve shared my go-to recipe, feel free to get creative and customize it to your liking. For a richer, more decadent experience, try using full-fat coconut milk instead of regular milk. Or, if you’re feeling adventurous, add a tablespoon or two of your favorite peanut butter to the pudding mixture for an extra peanut butter punch.
Here are a few serving suggestions to elevate your Peanut Banana Pudding even further:
* Classic Cool: Serve it chilled, straight from the refrigerator, for a refreshing treat on a warm day. Top with a dollop of whipped cream and a sprinkle of chopped peanuts for a classic presentation.
* Layered Parfaits: Create stunning parfaits by layering the pudding with crushed graham crackers, sliced bananas, and a drizzle of chocolate syrup. This is a great option for a more elegant dessert presentation.
* Frozen Delight: For a frozen treat, pour the pudding into popsicle molds and freeze for a few hours. These peanut banana pudding pops are perfect for kids and adults alike!
* Breakfast Bowl: Believe it or not, this pudding can even be enjoyed as a breakfast treat! Layer it with granola, fresh berries, and a drizzle of honey for a healthy and satisfying start to your day.
* Adult Upgrade: For an adult twist, add a splash of banana liqueur or rum extract to the pudding mixture. This will add a subtle boozy flavor that’s perfect for special occasions.
I’m so excited for you to try this recipe and experience the magic of Peanut Banana Pudding for yourself. It’s a guaranteed crowd-pleaser that’s sure to become a new family favorite.
So, what are you waiting for? Gather your ingredients, put on your apron, and get ready to whip up a batch of this irresistible dessert. And don’t forget to share your creations with me! I’d love to see your photos and hear about your variations. Tag me on social media and let me know what you think. I can’t wait to see your pudding masterpieces! Happy baking (or should I say, pudding-making)! I know you’ll absolutely love this recipe as much as I do. Let me know in the comments what you think!
Peanut Banana Pudding: The Ultimate Guide to Making It
Creamy and decadent Peanut Banana Pudding with layers of vanilla wafers, ripe bananas, and a luscious peanut butter pudding. An easy and irresistible dessert!
Ingredients
- 1 (14 ounce) can sweetened condensed milk
- 1 ½ cups cold milk
- 1 (3.4 ounce) package instant vanilla pudding mix
- 1 cup creamy peanut butter
- 1 (8 ounce) container frozen whipped topping, thawed
- 3 ripe bananas, sliced
- 1 cup vanilla wafers, crushed
- ½ cup chopped peanuts, for garnish (optional)
- Chocolate syrup, for garnish (optional)
Instructions
- Combine the Condensed Milk and Cold Milk: In a large mixing bowl, pour in the entire can of sweetened condensed milk. Then, add the cold milk. Whisk to ensure everything is nicely combined and smooth.
- Add the Instant Pudding Mix: Sprinkle in the instant vanilla pudding mix gradually while whisking continuously to prevent clumps. Keep whisking until the pudding mix is fully incorporated and the mixture starts to thicken slightly.
- Incorporate the Peanut Butter: Add the creamy peanut butter to the pudding mixture. Whisk the peanut butter into the pudding mixture until it’s completely smooth and there are no streaks of peanut butter remaining. Use a spatula to scrape down the sides of the bowl and ensure everything is evenly mixed.
- Fold in the Whipped Topping: Gently fold in the thawed whipped topping using a spatula until it’s just combined. Avoid overmixing to keep the whipped topping light and airy.
- Create the First Layer of Vanilla Wafers: Spread a layer of crushed vanilla wafers on the bottom of your chosen dish (trifle dish, 9×13 inch baking dish, or individual serving cups).
- Add a Layer of Sliced Bananas: Arrange a layer of sliced bananas (about ¼ inch thick) over the vanilla wafers.
- Spread a Layer of Peanut Butter Pudding: Spoon a generous layer of the peanut butter pudding mixture over the bananas, spreading it evenly to cover them completely.
- Repeat the Layers: Repeat the layers of vanilla wafers, bananas, and peanut butter pudding until you’ve used up all the ingredients. The top layer should be the peanut butter pudding.
- Garnish (Optional): If desired, garnish the top of the pudding with chopped peanuts and a drizzle of chocolate syrup.
- Cover and Chill: Cover the pudding tightly with plastic wrap or a lid.
- Refrigerate for at Least 4 Hours: Refrigerate the pudding for at least 4 hours, or preferably overnight.
- Serve and Enjoy: Once the pudding has chilled, spoon it into bowls or glasses and enjoy.
Notes
- Use different flavors of pudding (banana cream, chocolate).
- Add chocolate chips between layers.
- Use graham crackers or chocolate wafers instead of vanilla wafers.
- Use sugar-free pudding mix and light whipped topping for a healthier version.
- Add rum extract for a boozy kick.
- Prepare in individual cups or jars.
- Swirl extra peanut butter on top before chilling.
- Leftover pudding can be stored in the refrigerator for up to 3 days, covered tightly.