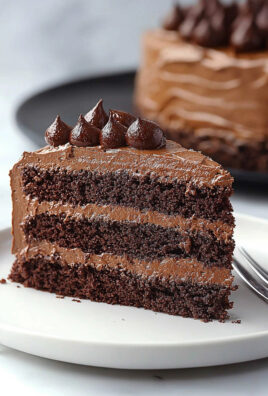
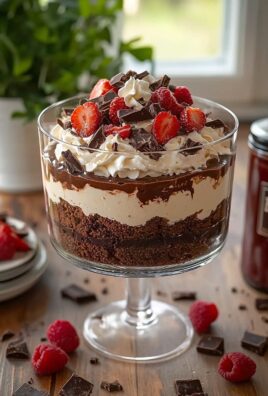
Monster Cookie Cheesecakes: Prepare to meet your new favorite dessert! Imagine the chewy, oat-filled goodness of a monster cookie, but elevated to a creamy, decadent cheesecake. These aren’t your average mini cheesecakes; they’re a delightful explosion of textures and flavors that will have everyone begging for seconds.
While the exact origin of the monster cookie is debated, its popularity exploded in the latter half of the 20th century, becoming a staple at bake sales and family gatherings across America. The beauty of the monster cookie lies in its customizable nature a little bit of this, a little bit of that, all baked into one gloriously oversized treat. We’ve taken that same spirit of fun and abundance and channeled it into these individual Monster Cookie Cheesecakes.
What makes these mini cheesecakes so irresistible? It’s the perfect marriage of textures: the smooth, tangy cheesecake filling, the chewy, oat-filled cookie base, and the bursts of chocolate chips and colorful candies in every bite. They are incredibly convenient for parties or individual desserts, and the combination of familiar cookie flavors with the richness of cheesecake is simply divine. Get ready to impress your friends and family with this unique and utterly delicious dessert!

Ingredients:
- For the Monster Cookie Base:
- 1 cup (2 sticks) unsalted butter, softened
- 1 cup granulated sugar
- 1 cup packed brown sugar
- 2 large eggs
- 2 teaspoons vanilla extract
- 1 teaspoon baking soda
- 1 teaspoon baking powder
- 1/2 teaspoon salt
- 3 cups rolled oats
- 1 1/2 cups all-purpose flour
- 1 cup peanut butter chips
- 1 cup chocolate chips
- 1 cup M&Ms (or other colorful candies)
- For the Cheesecake Filling:
- 32 ounces (4 packages) cream cheese, softened
- 1 1/2 cups granulated sugar
- 4 large eggs
- 2 teaspoons vanilla extract
- 1/2 cup sour cream
- Optional Toppings:
- Whipped cream
- Extra M&Ms
- Chocolate sauce
- Caramel sauce
- Sprinkles
Preparing the Monster Cookie Base:
- Cream the Butter and Sugars: In a large bowl, cream together the softened butter, granulated sugar, and brown sugar until light and fluffy. This usually takes about 3-5 minutes with an electric mixer. Make sure to scrape down the sides of the bowl occasionally to ensure everything is evenly mixed.
- Add the Eggs and Vanilla: Beat in the eggs one at a time, then stir in the vanilla extract. Mix until well combined. The mixture might look slightly curdled at this point, but don’t worry, it will come together as you add the dry ingredients.
- Combine Dry Ingredients: In a separate bowl, whisk together the baking soda, baking powder, and salt. This ensures that the leavening agents are evenly distributed throughout the batter.
- Add Dry Ingredients to Wet Ingredients: Gradually add the dry ingredients to the wet ingredients, mixing on low speed until just combined. Be careful not to overmix, as this can result in tough cookies.
- Stir in Oats and Flour: Add the rolled oats and flour to the batter. Mix until just combined. Again, avoid overmixing.
- Add the Chips and Candies: Stir in the peanut butter chips, chocolate chips, and M&Ms (or other colorful candies). Make sure they are evenly distributed throughout the batter.
Preparing the Cheesecake Filling:
- Cream the Cream Cheese and Sugar: In a large bowl, beat the softened cream cheese until smooth and creamy. Add the granulated sugar and continue to beat until well combined and there are no lumps. This is a crucial step for a smooth and creamy cheesecake.
- Add the Eggs: Beat in the eggs one at a time, mixing on low speed until just combined after each addition. Be careful not to overmix at this stage, as it can incorporate too much air into the batter, which can cause the cheesecake to crack during baking.
- Add Vanilla and Sour Cream: Stir in the vanilla extract and sour cream. Mix until just combined. The sour cream adds a nice tang and helps to create a richer, creamier texture.
Assembling and Baking the Cheesecakes:
- Preheat Oven and Prepare Muffin Tin: Preheat your oven to 350°F (175°C). Line a 12-cup muffin tin with paper liners. You can also use silicone liners, which are reusable and make it easy to remove the cheesecakes.
- Fill Muffin Cups with Cookie Dough: Drop a generous spoonful (about 2 tablespoons) of the monster cookie dough into the bottom of each muffin liner. Gently press the dough down to create a base. You can use your fingers or the back of a spoon to do this.
- Pour Cheesecake Filling: Pour the cheesecake filling over the cookie dough base, filling each muffin liner almost to the top. Leave a little bit of space at the top to prevent overflow during baking.
- Bake the Cheesecakes: Bake for 20-25 minutes, or until the edges of the cheesecakes are set and the centers are just slightly jiggly. The baking time may vary depending on your oven, so keep a close eye on them.
- Cool the Cheesecakes: Turn off the oven and crack the oven door slightly. Let the cheesecakes cool in the oven for 30 minutes. This helps to prevent them from cracking.
- Refrigerate the Cheesecakes: Remove the cheesecakes from the oven and let them cool completely at room temperature. Then, refrigerate them for at least 2 hours, or preferably overnight, to allow them to set completely.
Serving and Storing:
- Remove from Muffin Tin: Once the cheesecakes are chilled, carefully remove them from the muffin tin. If you used paper liners, simply peel them away. If you used silicone liners, they should pop out easily.
- Add Toppings (Optional): Top the cheesecakes with whipped cream, extra M&Ms, chocolate sauce, caramel sauce, or sprinkles, if desired. Get creative and have fun with it!
- Serve and Enjoy: Serve the monster cookie cheesecakes chilled and enjoy!
- Storing Leftovers: Store any leftover cheesecakes in an airtight container in the refrigerator for up to 3-4 days. They can also be frozen for longer storage. To freeze, wrap each cheesecake individually in plastic wrap and then place them in a freezer-safe bag or container. They can be frozen for up to 2-3 months. Thaw them in the refrigerator overnight before serving.
Tips for Success:
- Use Softened Cream Cheese: Make sure your cream cheese is completely softened before making the cheesecake filling. This will help to prevent lumps and ensure a smooth and creamy texture.
- Don’t Overmix the Cheesecake Filling: Overmixing the cheesecake filling can incorporate too much air, which can cause the cheesecakes to crack during baking. Mix on low speed until just combined.
- Cool Slowly: Cooling the cheesecakes slowly in the oven helps to prevent them from cracking.
- Refrigerate Thoroughly: Refrigerating the cheesecakes for at least 2 hours, or preferably overnight, allows them to set completely and develop their flavor.
- Get Creative with Toppings: Feel free to customize the toppings to your liking. You can use any kind of candy, chocolate sauce, caramel sauce, or sprinkles.
- Make Ahead: These cheesecakes can be made ahead of time and stored in the refrigerator for up to 3-4 days, making them perfect for parties or gatherings.
- Freezing for Later: As mentioned above, freezing is a great option for longer storage. Just ensure they are properly wrapped to prevent freezer burn.
Variations:
- Different Candies: Experiment with different types of candies in the cookie dough. You could use Reese’s Pieces, chopped Snickers bars, or any other candy you like.
- Different Chips: Try using different types of chips, such as white chocolate chips, butterscotch chips, or dark chocolate chips.
- Nut-Free Version: Omit the peanut butter chips for a nut-free version. You can substitute them with more chocolate chips or other candies.
- Gluten-Free Version: Use gluten-free all-purpose flour and gluten-free rolled oats for a gluten-free version.
- Add Extracts: Enhance the flavor of the cheesecake filling by adding a few drops of almond extract, lemon extract, or any other extract you enjoy.
- Swirls: Before baking, swirl a spoonful of chocolate sauce, caramel sauce, or peanut butter into the cheesecake filling for a marbled effect.
These Monster Cookie Cheesecakes are a fun and delicious treat that are sure to be a hit with everyone! The combination of the chewy monster cookie base and the creamy cheesecake filling is simply irresistible. Enjoy!

Conclusion:
And there you have it! These Monster Cookie Cheesecakes are truly a must-try dessert. They perfectly blend the fun, colorful, and chewy texture of monster cookies with the creamy, decadent richness of cheesecake. What’s not to love? The combination is simply irresistible, and I guarantee they’ll be a hit at your next gathering, or even just as a special treat for yourself (because you deserve it!).
But why are these little cheesecakes so special? It’s the delightful contrast of textures and flavors. The slightly salty, peanut butter-infused cookie base provides a sturdy and flavorful foundation, while the creamy cheesecake filling adds a luxurious smoothness that melts in your mouth. Then, the colorful candies and chocolate chips scattered throughout bring bursts of sweetness and playful pops of color. It’s a symphony of deliciousness in every bite!
Beyond the incredible taste, these Monster Cookie Cheesecakes are also surprisingly easy to make. The recipe is straightforward, and the individual portions make them perfect for portion control (if you can resist eating more than one!). Plus, they’re incredibly versatile.
Looking for serving suggestions? These cheesecakes are fantastic on their own, chilled straight from the refrigerator. But if you want to elevate them even further, try adding a dollop of whipped cream and a sprinkle of extra chocolate chips. A drizzle of caramel sauce would also be divine! For a more sophisticated touch, consider pairing them with a scoop of vanilla bean ice cream or a few fresh berries.
And speaking of versatility, there are so many ways to customize this recipe to suit your preferences. Don’t have peanut butter? No problem! Substitute almond butter or sunflower seed butter for a nut-free version. Want to add even more color? Throw in some sprinkles or chopped-up candies. Feel free to experiment with different types of chocolate chips, such as white chocolate or dark chocolate. You could even add a layer of fudge sauce to the bottom of the cheesecake for an extra layer of indulgence.
For a truly decadent experience, consider making a larger, full-sized cheesecake using this recipe. Simply adjust the baking time accordingly, and you’ll have a show-stopping dessert that’s perfect for special occasions. You can also make these ahead of time and freeze them for later. Just be sure to wrap them tightly to prevent freezer burn.
I truly believe that these Monster Cookie Cheesecakes will become a new favorite in your household. They’re fun, festive, and utterly delicious. So, what are you waiting for? Gather your ingredients, preheat your oven, and get ready to bake up a batch of these irresistible treats.
I’m so excited for you to try this recipe! Once you do, please come back and share your experience in the comments below. I’d love to hear what you think, what variations you tried, and how much everyone enjoyed them. Happy baking! I can’t wait to see your creations!
Monster Cookie Cheesecakes: The Ultimate Dessert Recipe
Chewy monster cookie base topped with creamy cheesecake filling, candies, and sauces!
Ingredients
- 1 cup (2 sticks) unsalted butter, softened
- 1 cup granulated sugar
- 1 cup packed brown sugar
- 2 large eggs
- 2 teaspoons vanilla extract
- 1 teaspoon baking soda
- 1 teaspoon baking powder
- 1/2 teaspoon salt
- 3 cups rolled oats
- 1 1/2 cups all-purpose flour
- 1 cup peanut butter chips
- 1 cup chocolate chips
- 1 cup M&Ms (or other colorful candies)
- 32 ounces (4 packages) cream cheese, softened
- 1 1/2 cups granulated sugar
- 4 large eggs
- 2 teaspoons vanilla extract
- 1/2 cup sour cream
- Whipped cream
- Extra M&Ms
- Chocolate sauce
- Caramel sauce
- Sprinkles
Instructions
- Cream the Butter and Sugars: In a large bowl, cream together the softened butter, granulated sugar, and brown sugar until light and fluffy (3-5 minutes with an electric mixer). Scrape down the sides of the bowl occasionally.
- Add the Eggs and Vanilla: Beat in the eggs one at a time, then stir in the vanilla extract. Mix until well combined.
- Combine Dry Ingredients: In a separate bowl, whisk together the baking soda, baking powder, and salt.
- Add Dry Ingredients to Wet Ingredients: Gradually add the dry ingredients to the wet ingredients, mixing on low speed until just combined. Be careful not to overmix.
- Stir in Oats and Flour: Add the rolled oats and flour to the batter. Mix until just combined. Avoid overmixing.
- Add the Chips and Candies: Stir in the peanut butter chips, chocolate chips, and M&Ms (or other colorful candies). Make sure they are evenly distributed throughout the batter.
- Cream the Cream Cheese and Sugar: In a large bowl, beat the softened cream cheese until smooth and creamy. Add the granulated sugar and continue to beat until well combined and there are no lumps.
- Add the Eggs: Beat in the eggs one at a time, mixing on low speed until just combined after each addition. Be careful not to overmix.
- Add Vanilla and Sour Cream: Stir in the vanilla extract and sour cream. Mix until just combined.
- Preheat Oven and Prepare Muffin Tin: Preheat your oven to 350°F (175°C). Line a 12-cup muffin tin with paper liners.
- Fill Muffin Cups with Cookie Dough: Drop a generous spoonful (about 2 tablespoons) of the monster cookie dough into the bottom of each muffin liner. Gently press the dough down to create a base.
- Pour Cheesecake Filling: Pour the cheesecake filling over the cookie dough base, filling each muffin liner almost to the top. Leave a little bit of space at the top to prevent overflow during baking.
- Bake the Cheesecakes: Bake for 20-25 minutes, or until the edges of the cheesecakes are set and the centers are just slightly jiggly.
- Cool the Cheesecakes: Turn off the oven and crack the oven door slightly. Let the cheesecakes cool in the oven for 30 minutes.
- Refrigerate the Cheesecakes: Remove the cheesecakes from the oven and let them cool completely at room temperature. Then, refrigerate them for at least 2 hours, or preferably overnight, to allow them to set completely.
- Remove from Muffin Tin: Once the cheesecakes are chilled, carefully remove them from the muffin tin.
- Add Toppings (Optional): Top the cheesecakes with whipped cream, extra M&Ms, chocolate sauce, caramel sauce, or sprinkles, if desired.
- Serve and Enjoy: Serve the monster cookie cheesecakes chilled and enjoy!
- Storing Leftovers: Store any leftover cheesecakes in an airtight container in the refrigerator for up to 3-4 days. They can also be frozen for longer storage. To freeze, wrap each cheesecake individually in plastic wrap and then place them in a freezer-safe bag or container. They can be frozen for up to 2-3 months. Thaw them in the refrigerator overnight before serving.
Notes
- Use softened cream cheese for a smooth filling.
- Don’t overmix the cheesecake filling.
- Cool slowly in the oven to prevent cracking.
- Refrigerate thoroughly to allow the cheesecakes to set.
- Get creative with toppings!
- Make ahead and store in the refrigerator.
- Freeze for longer storage.


