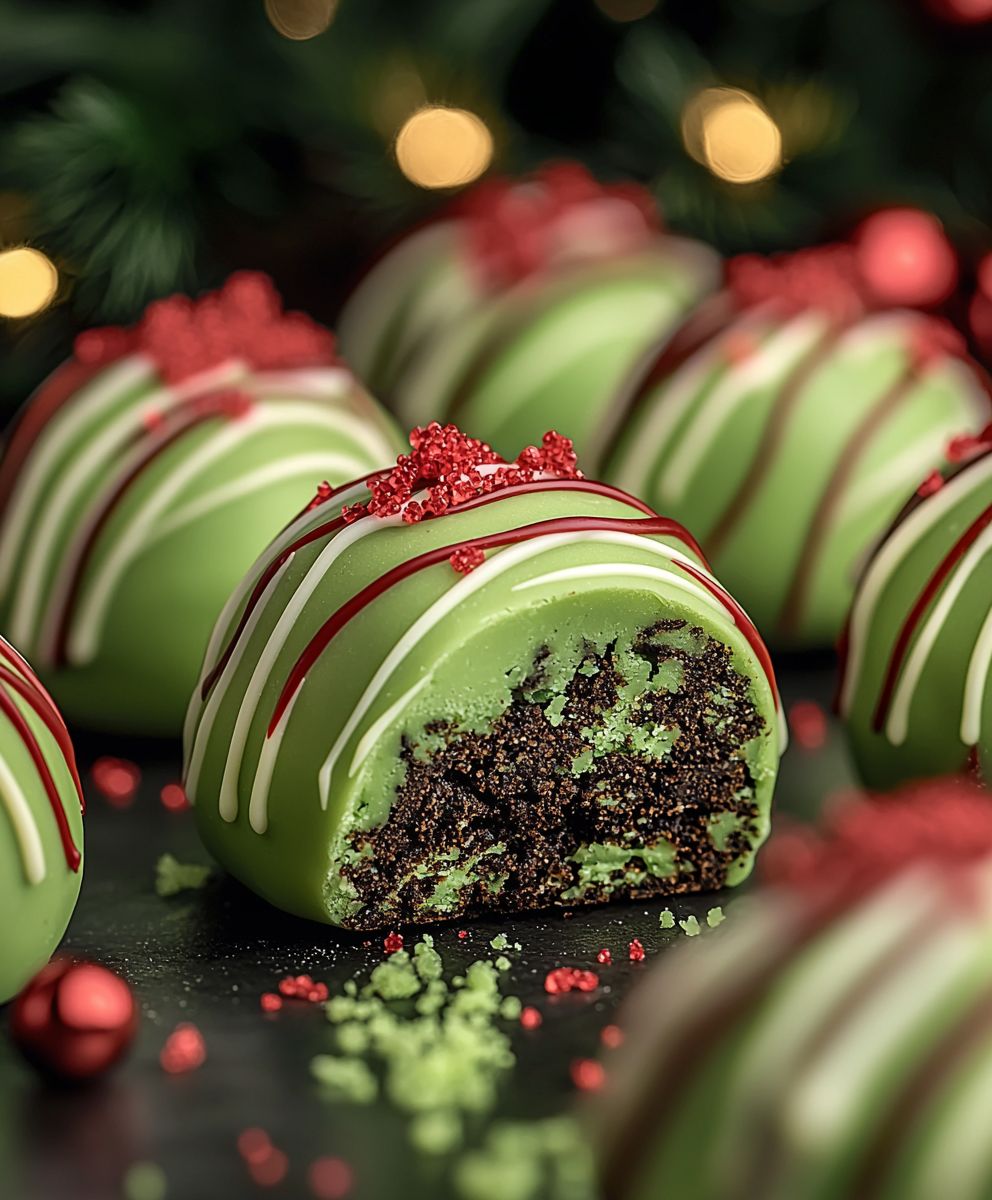
Grinch Oreo Balls are the whimsical, no-bake treat that will steal the show at your next holiday gathering! Imagine biting into a vibrant green sphere of creamy, minty goodness, a delightful twist on the classic Oreo ball that’s as fun to make as it is to eat. These aren’t just desserts; they’re edible decorations, bringing a touch of Dr. Seuss magic straight to your dessert table.
While the Oreo ball itself is a relatively modern invention, its popularity stems from its simplicity and crowd-pleasing flavor. The addition of green food coloring and a touch of mint extract transforms this simple treat into a festive tribute to the beloved Grinch, a character synonymous with holiday cheer (and a little bit of mischief!).
What makes these Grinch Oreo Balls so irresistible? It’s the perfect combination of textures: the crunchy Oreo cookies, the smooth cream cheese filling, and the decadent chocolate coating. Plus, they’re incredibly easy to make, requiring no baking and minimal effort. Whether you’re a seasoned baker or a kitchen novice, you can whip up a batch of these festive treats in no time. Their vibrant color and delicious flavor make them a hit with kids and adults alike, guaranteeing smiles and empty plates wherever they go. Get ready to embrace your inner Grinch (the good kind!) and spread some holiday joy with these delightful, easy-to-make treats!
Ingredients:
- 1 package (14.3 ounces) Oreo cookies, regular flavor
- 8 ounces cream cheese, softened
- 12 ounces green candy melts
- Red heart sprinkles, for decoration
- Vegetable shortening (optional, for thinning candy melts)
- Wax paper or parchment paper
Preparing the Oreo Crumbs:
Okay, let’s get started! The first thing we need to do is turn those delicious Oreos into a fine crumb. Don’t worry, it’s easier than you think!
- Separate the Oreos: Carefully twist apart each Oreo cookie. We want to separate the chocolate wafers from the creamy filling. Don’t throw away the filling! We’ll need that later.
- Crush the Cookies: There are a few ways to crush the cookies. My favorite method is using a food processor. If you have one, simply place the chocolate wafers into the food processor and pulse until they are finely ground into crumbs. If you don’t have a food processor, you can use a resealable plastic bag and a rolling pin. Place the wafers in the bag, seal it tightly, and then roll over the bag with the rolling pin until the cookies are crushed into fine crumbs. Make sure there aren’t any big chunks left!
- Combine Crumbs and Filling: Now, in a large bowl, combine the Oreo crumbs with the cream cheese and the Oreo filling we separated earlier. This is where the magic happens!
Mixing and Rolling the Oreo Balls:
Now comes the fun part getting our hands dirty (in a good way!). We’re going to mix everything together and form those perfect little Grinchy balls.
- Mix Thoroughly: Using a spoon or your hands (my preferred method!), mix the Oreo crumbs, cream cheese, and Oreo filling together until everything is well combined. You should have a smooth, consistent mixture. Make sure there are no streaks of cream cheese left. The mixture should be firm enough to hold its shape.
- Roll into Balls: Take about a tablespoon of the Oreo mixture and roll it between your palms to form a ball. Aim for about 1-inch in diameter. Don’t worry if they’re not perfectly round; a little imperfection adds character!
- Place on Wax Paper: Place each Oreo ball onto a baking sheet lined with wax paper or parchment paper. This will prevent them from sticking later.
- Chill the Balls: Once all the Oreo balls are rolled, place the baking sheet in the refrigerator for at least 30 minutes. This chilling time is crucial! It helps the balls firm up, making them easier to dip in the melted candy. You can even chill them for longer, up to a few hours, if you need to prepare them in advance.
Melting the Candy Melts:
Time to get that vibrant green coating ready! Melting candy melts can be a little tricky, but I’ll walk you through it step-by-step to ensure a smooth and even finish.
- Prepare the Candy Melts: Pour the green candy melts into a microwave-safe bowl.
- Microwave in Intervals: Microwave the candy melts in 30-second intervals, stirring well after each interval. This is important to prevent the candy from burning. Continue microwaving and stirring until the candy is completely melted and smooth.
- Thin the Candy (Optional): If the melted candy is too thick, you can add a teaspoon of vegetable shortening to thin it out. Stir well until the shortening is fully incorporated. This will make the dipping process easier and result in a smoother coating. Be careful not to add too much shortening, as it can affect the candy’s ability to set properly.
Dipping and Decorating:
The final step transforming those plain Oreo balls into adorable Grinch-inspired treats! This is where your creativity can really shine.
- Dip the Oreo Balls: Remove the chilled Oreo balls from the refrigerator. Using a fork or dipping tools, carefully dip each ball into the melted green candy. Make sure the entire ball is coated.
- Remove Excess Candy: Gently tap the fork or dipping tool against the side of the bowl to remove any excess candy. This will prevent the coating from being too thick and messy.
- Place on Wax Paper: Place the dipped Oreo ball back onto the baking sheet lined with wax paper.
- Add the Heart Sprinkle: While the candy coating is still wet, immediately place a red heart sprinkle onto each Oreo ball. This is the Grinch’s signature heart!
- Repeat: Repeat the dipping and decorating process with the remaining Oreo balls.
- Let Set: Once all the Oreo balls are dipped and decorated, place the baking sheet back in the refrigerator for about 15-20 minutes, or until the candy coating is completely set. This will ensure that the candy doesn’t melt or smudge when you handle them.
Storage:
Once the candy coating is completely set, you can store your Grinch Oreo Balls in an airtight container in the refrigerator for up to a week. They’re best enjoyed cold!
Tips and Tricks for Perfect Grinch Oreo Balls:
- Use High-Quality Candy Melts: The quality of your candy melts will greatly affect the final result. Opt for a reputable brand for the best flavor and texture.
- Don’t Overheat the Candy Melts: Overheating can cause the candy to seize up and become unusable. Microwave in short intervals and stir frequently to prevent burning.
- Chill the Oreo Balls Thoroughly: Chilling the Oreo balls before dipping is essential for preventing them from falling apart in the melted candy.
- Work Quickly: The candy coating will start to set quickly, so it’s important to work efficiently when dipping and decorating.
- Get Creative with Decorations: While the red heart sprinkle is the classic Grinch touch, feel free to add other decorations, such as green sprinkles or edible glitter, to make your Oreo balls even more festive.
- Make Ahead: These Oreo balls can be made a day or two in advance. Just store them in an airtight container in the refrigerator until you’re ready to serve them.
Troubleshooting:
- Candy Coating is Too Thick: Add a small amount of vegetable shortening to thin it out.
- Candy Coating is Seizing Up: This usually happens when the candy is overheated or comes into contact with water. Unfortunately, there’s not much you can do to fix seized candy. It’s best to start with a fresh batch.
- Oreo Balls are Falling Apart: Make sure you’re chilling the Oreo balls thoroughly before dipping. You can also add a little more cream cheese to the mixture to help them hold their shape.
Enjoy your adorable and delicious Grinch Oreo Balls! They’re the perfect treat for holiday parties, gift-giving, or simply indulging in a little festive fun.

Conclusion:
So, there you have it! These Grinch Oreo Balls are truly a must-try this holiday season. They’re incredibly easy to make, require minimal ingredients, and deliver a maximum dose of festive cheer. The vibrant green color, the sweet Oreo filling, and the slightly bitter chocolate coating create a delightful flavor combination that’s sure to please everyone, from the biggest Grinch to the most enthusiastic holiday celebrator. I promise, these little bites of joy will disappear faster than you can say “Cindy Lou Who!” But why are these Grinch Oreo Balls so special? It’s the perfect blend of simplicity and deliciousness. You don’t need to be a master baker to whip up a batch of these. The recipe is straightforward, and the results are consistently impressive. Plus, they’re a fantastic make-ahead treat, perfect for holiday parties or potlucks. Imagine bringing a platter of these to your next gathering they’re guaranteed to be a conversation starter and a crowd-pleaser. Beyond their ease and deliciousness, these Grinch Oreo Balls are incredibly versatile. Looking for serving suggestions? Serve them chilled straight from the refrigerator for a refreshing treat. Arrange them on a festive platter alongside other holiday goodies like cookies, fudge, and peppermint bark for a truly decadent dessert spread. Or, package them in small cellophane bags tied with green ribbon for adorable and edible holiday gifts. And don’t be afraid to get creative with variations! Want to add a little extra crunch? Mix some crushed pretzels into the Oreo filling. Prefer white chocolate? Use melted white chocolate instead of semi-sweet for the coating. For an extra touch of Grinchy goodness, drizzle melted green candy melts over the finished balls. You could even add a tiny red heart sprinkle to each ball to represent the Grinch’s growing heart! The possibilities are endless, so feel free to experiment and make them your own. I truly believe that these Grinch Oreo Balls are the perfect holiday treat. They’re fun to make, delicious to eat, and guaranteed to spread some holiday cheer. They are also a great way to get kids involved in the kitchen. Let them help with crushing the Oreos, mixing the filling, or dipping the balls in chocolate. It’s a fun and festive activity that everyone can enjoy. So, what are you waiting for? Gather your ingredients, put on some holiday music, and get ready to create some Grinchy magic in your kitchen. I’m confident that you’ll love these Grinch Oreo Balls as much as I do. And most importantly, I’d love to hear about your experience! Did you try the recipe? Did you make any variations? What did your family and friends think? Share your photos and stories in the comments below. Let’s spread the Grinchy love and inspire others to try this delightful holiday treat. Happy baking, and happy holidays! I can’t wait to see your creations! Print
Grinch Oreo Balls: A Festive Holiday Treat Recipe
- Total Time: 55 minutes
- Yield: 24–30 Oreo balls 1x
Description
No-bake Grinch Oreo Balls: crushed Oreos, cream cheese, and green candy coating, topped with a red heart. Perfect for holiday parties!
Ingredients
- 1 package (14.3 ounces) Oreo cookies, regular flavor
- 8 ounces cream cheese, softened
- 12 ounces green candy melts
- Red heart sprinkles, for decoration
- Vegetable shortening (optional, for thinning candy melts)
- Wax paper or parchment paper
Instructions
- Prepare the Oreo Crumbs: Separate Oreo cookies, keeping the filling. Crush the chocolate wafers into fine crumbs using a food processor or a resealable bag and rolling pin.
- Mix and Roll: In a large bowl, combine Oreo crumbs, cream cheese, and Oreo filling until well combined. Roll into 1-inch balls and place on wax paper or parchment paper.
- Chill: Refrigerate the Oreo balls for at least 30 minutes (or up to a few hours).
- Melt Candy Melts: Pour green candy melts into a microwave-safe bowl. Microwave in 30-second intervals, stirring well after each interval, until melted and smooth. If too thick, add a teaspoon of vegetable shortening.
- Dip and Decorate: Remove chilled Oreo balls. Dip each ball into the melted green candy, remove excess, and place back on wax paper. Immediately add a red heart sprinkle to each ball.
- Set: Refrigerate for 15-20 minutes, or until the candy coating is completely set.
- Store: Store in an airtight container in the refrigerator for up to a week.
Notes
- Use high-quality candy melts for the best flavor and texture.
- Don’t overheat the candy melts; microwave in short intervals.
- Chilling the Oreo balls is essential to prevent them from falling apart.
- Work quickly when dipping and decorating, as the candy coating sets fast.
- If the candy coating is too thick, add a small amount of vegetable shortening.
- If the candy coating seizes up, start with a fresh batch.
- Get creative with decorations!
- Prep Time: 20 minutes
- Cook Time: 5 minutes