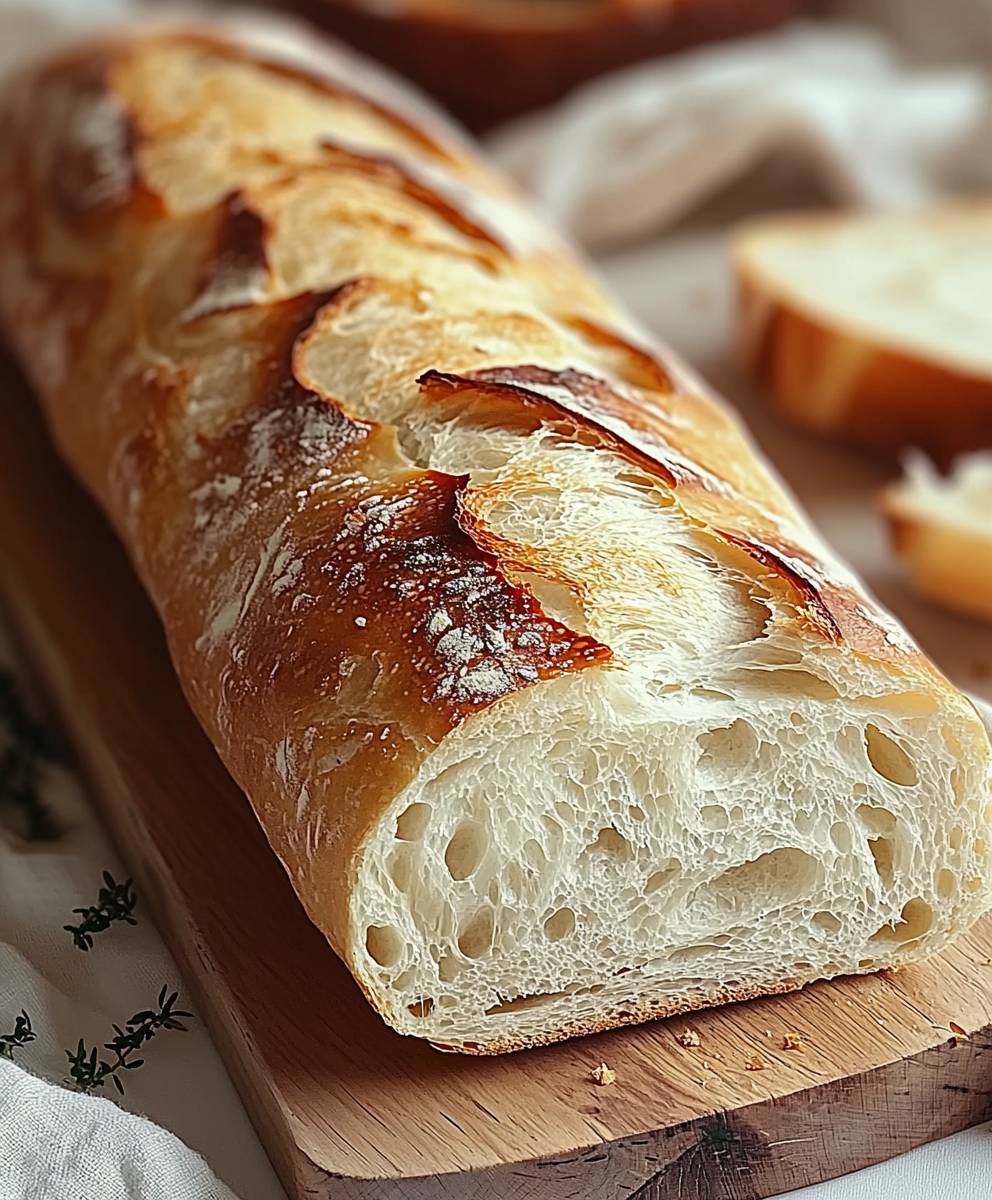
French Bread, oh, the aroma alone is enough to transport you to a quaint Parisian bakery! Imagine sinking your teeth into a crusty, golden exterior, giving way to a soft, airy interior. Is your mouth watering yet? Mine certainly is! This isn’t just bread; it’s an experience, a taste of history, and a staple in cuisines around the world.
The story of French Bread, particularly the baguette, is deeply intertwined with French culture. While its exact origins are debated, many believe it gained popularity in the 20th century, becoming a symbol of French identity and culinary artistry. It’s more than just a loaf; it’s a daily ritual, a companion to cheese and wine, and the perfect vessel for a simple yet satisfying sandwich.
But what makes this bread so universally loved? It’s the delightful contrast of textures, the satisfying crunch followed by the pillowy softness. It’s the subtle tang of fermentation, the simple yet complex flavor that elevates any meal. And let’s be honest, the convenience of grabbing a fresh baguette from the bakery for a quick lunch or impromptu dinner is hard to beat. Today, I’m excited to share my foolproof recipe for baking your own authentic French bread at home. Get ready to impress your friends and family with this classic delight!
Ingredients:
- 1 1/2 cups (360ml) warm water (105-115°F / 40-46°C)
- 1 teaspoon sugar
- 2 1/4 teaspoons (7g) active dry yeast (1 packet)
- 4 cups (500g) all-purpose flour, plus more for dusting
- 2 teaspoons salt
- 2 tablespoons olive oil, plus more for greasing
- Cornmeal, for sprinkling (optional)
- 1 egg white, beaten (for egg wash, optional)
- Sesame seeds or poppy seeds, for topping (optional)
Preparing the Dough:
- Activate the Yeast: In a large bowl, combine the warm water and sugar. Sprinkle the yeast over the top and let it sit for 5-10 minutes, or until foamy. This step ensures your yeast is alive and active. If it doesn’t foam, your yeast might be old or the water too hot/cold. Start again with fresh yeast.
- Combine Dry Ingredients: In a separate large bowl, whisk together the flour and salt. This ensures the salt is evenly distributed throughout the flour, which is important for proper gluten development.
- Combine Wet and Dry Ingredients: Pour the yeast mixture and olive oil into the bowl with the flour mixture. Use a wooden spoon or your hands to mix until a shaggy dough forms. It will be sticky, and that’s perfectly fine!
- Knead the Dough: Turn the dough out onto a lightly floured surface. Knead for 8-10 minutes, or until the dough becomes smooth and elastic. You can also use a stand mixer with a dough hook attachment for this step. If using a mixer, knead on medium speed for about 6-8 minutes. The dough should be slightly tacky but not overly sticky. If it’s too sticky, add a tablespoon of flour at a time until it reaches the right consistency.
- First Rise: Lightly grease a large bowl with olive oil. Place the dough in the bowl, turning to coat all sides. Cover the bowl with plastic wrap or a clean kitchen towel. Let the dough rise in a warm place for 1-1.5 hours, or until doubled in size. This is a crucial step for developing flavor and texture. A warm environment helps the yeast work its magic.
Shaping the French Bread:
- Punch Down the Dough: Gently punch down the dough to release the air. This helps to redistribute the yeast and create a more even texture.
- Divide the Dough: Turn the dough out onto a lightly floured surface. Divide the dough in half.
- Shape the Loaves: Gently shape each half into a long, slender loaf, about 14-16 inches long. To do this, flatten the dough into a rectangle. Then, fold the dough in thirds lengthwise, like you’re folding a letter. Pinch the seam to seal it. Gently roll the loaf back and forth to create a uniform shape. Taper the ends slightly for a classic baguette look.
- Second Rise: Place the shaped loaves on a baking sheet lined with parchment paper or sprinkled with cornmeal. Cover loosely with plastic wrap or a clean kitchen towel. Let the loaves rise for another 30-45 minutes, or until they have puffed up slightly.
Baking the French Bread:
- Preheat the Oven: Preheat your oven to 450°F (232°C). Place a baking stone or pizza stone in the oven while it preheats. This will help create a crispy crust. If you don’t have a baking stone, you can use a baking sheet.
- Create Steam: Creating steam in the oven is essential for a crispy crust. There are a few ways to do this:
- Method 1 (Preferred): Place an empty baking pan on the bottom rack of the oven. Just before you put the bread in, pour 1 cup of hot water into the pan. Be careful, as the steam will be intense!
- Method 2: Spray the inside of the oven with water several times during the first 10 minutes of baking.
- Prepare the Egg Wash (Optional): If using, brush the tops of the loaves with the beaten egg white. This will give them a shiny, golden-brown crust.
- Score the Loaves: Use a sharp knife or lame (a special bread-scoring tool) to make several diagonal slashes across the top of each loaf. This allows the bread to expand properly in the oven and prevents it from cracking unevenly. Aim for slashes that are about 1/2 inch deep.
- Add Toppings (Optional): Sprinkle the loaves with sesame seeds or poppy seeds, if desired.
- Bake the Bread: Carefully transfer the loaves to the preheated baking stone or baking sheet. Bake for 20-25 minutes, or until the loaves are golden brown and sound hollow when tapped on the bottom. The internal temperature should reach 200-210°F (93-99°C).
- Cool the Bread: Transfer the baked loaves to a wire rack to cool completely before slicing and serving. This is important because the bread continues to cook internally as it cools. Cutting into it too soon will result in a gummy texture.
Tips for Success:
- Water Temperature: The water temperature is crucial for activating the yeast. Too hot, and you’ll kill the yeast. Too cold, and the yeast won’t activate properly. Use a thermometer to ensure the water is between 105-115°F (40-46°C).
- Flour Type: All-purpose flour works well for this recipe, but you can also use bread flour for a slightly chewier texture.
- Kneading Time: Don’t skimp on the kneading time. Proper kneading develops the gluten, which gives the bread its structure and chewiness.
- Rising Time: The rising time will vary depending on the temperature of your environment. In a warm place, the dough will rise faster. In a cooler place, it will take longer. Be patient and let the dough rise until it has doubled in size.
- Scoring: Scoring the loaves properly is important for preventing them from cracking unevenly. Use a sharp knife or lame and make clean, confident slashes.
- Steam: Creating steam in the oven is essential for a crispy crust. Don’t skip this step!
- Cooling: Allow the bread to cool completely before slicing and serving. This will prevent it from being gummy.
- Storage: Store the bread in a paper bag at room temperature for up to 2 days. For longer storage, wrap it tightly in plastic wrap and freeze it.
Troubleshooting:
- Dough not rising: Make sure your yeast is fresh and the water is the correct temperature. Also, ensure the dough is in a warm place.
- Dough too sticky: Add a tablespoon of flour at a time until the dough reaches the right consistency.
- Bread too dense: Make sure you’re kneading the dough long enough and that it’s rising properly.
- Crust not crispy: Make sure you’re creating enough steam in the oven.
Variations:
- Garlic Herb Bread: Add 2 cloves of minced garlic and 1 tablespoon of chopped fresh herbs (such as rosemary, thyme, or oregano) to the dough during the kneading process.
- Cheese Bread: Add 1 cup of shredded cheese (such as cheddar, mozzarella, or Parmesan) to the dough during the kneading process.
- Whole Wheat Bread: Substitute 1-2 cups of the all-purpose flour with whole wheat flour. You may need to add a little more water to the dough.
- Seeded Bread: Sprinkle the loaves with sesame seeds, poppy seeds, or sunflower seeds before baking.
Conclusion:
And there you have it! This French Bread recipe isn’t just another bread recipe; it’s an invitation to experience the simple joy of baking, the satisfaction of creating something delicious with your own hands, and the sheer delight of that first bite of warm, crusty bread. I truly believe that once you try this recipe, it will become a staple in your kitchen, a go-to for everything from casual weeknight dinners to special weekend brunches. Why is this a must-try? Because it delivers authentic French bread flavor and texture without requiring years of professional baking experience. The crust is perfectly crisp, the interior is soft and airy, and the aroma that fills your home while it bakes is simply intoxicating. It’s a recipe that’s both achievable for beginners and rewarding for seasoned bakers. Plus, the ingredients are simple and readily available, meaning you can whip up a batch whenever the craving strikes. But the best part? The versatility! This French bread is a blank canvas for your culinary creativity.Serving Suggestions and Variations:
* Classic Sandwiches: Slice it lengthwise and pile it high with your favorite deli meats, cheeses, and fresh vegetables for a truly satisfying sandwich. Think classic ham and Swiss, turkey and avocado, or even a hearty Italian sub. * Garlic Bread Extravaganza: Brush slices with garlic butter and toast them in the oven for a simple yet irresistible side dish. Add a sprinkle of Parmesan cheese for extra flavor! * Bruschetta Base: Top toasted slices with diced tomatoes, basil, garlic, and a drizzle of balsamic glaze for a delightful appetizer. * Croutons Galore: Cube the bread, toss it with olive oil and your favorite herbs, and bake until golden brown for homemade croutons that will elevate any salad. * French Toast Perfection: Soak slices in a mixture of eggs, milk, and vanilla extract, then pan-fry until golden brown for a decadent breakfast treat. * Bread Pudding Bliss: Use stale bread to create a comforting and flavorful bread pudding. Add raisins, chocolate chips, or your favorite fruits for a personalized touch. * Soup Companion: Serve warm slices alongside your favorite soups and stews for a hearty and satisfying meal. * Pizza Crust Alternative: Flatten the dough and use it as a base for homemade pizza. Get creative with your toppings! * Herb Infusion: Add chopped fresh herbs like rosemary, thyme, or oregano to the dough for an extra layer of flavor. * Cheese Incorporation: Mix grated cheese like cheddar, Parmesan, or Gruyere into the dough for a cheesy twist. I’m confident that you’ll love this French Bread recipe as much as I do. It’s a recipe that’s been tested and perfected, and I’m excited for you to experience the joy of baking your own delicious bread at home. So, what are you waiting for? Preheat your oven, gather your ingredients, and get ready to embark on a baking adventure! I encourage you to try this recipe and share your experience with me. Let me know how it turns out, what variations you tried, and what your favorite way to enjoy it is. I can’t wait to hear from you and see your beautiful loaves of homemade French bread! Happy baking! Print
French Bread: The Ultimate Guide to Baking Perfect Loaves
- Total Time: 190 minutes
- Yield: 2 loaves 1x
Description
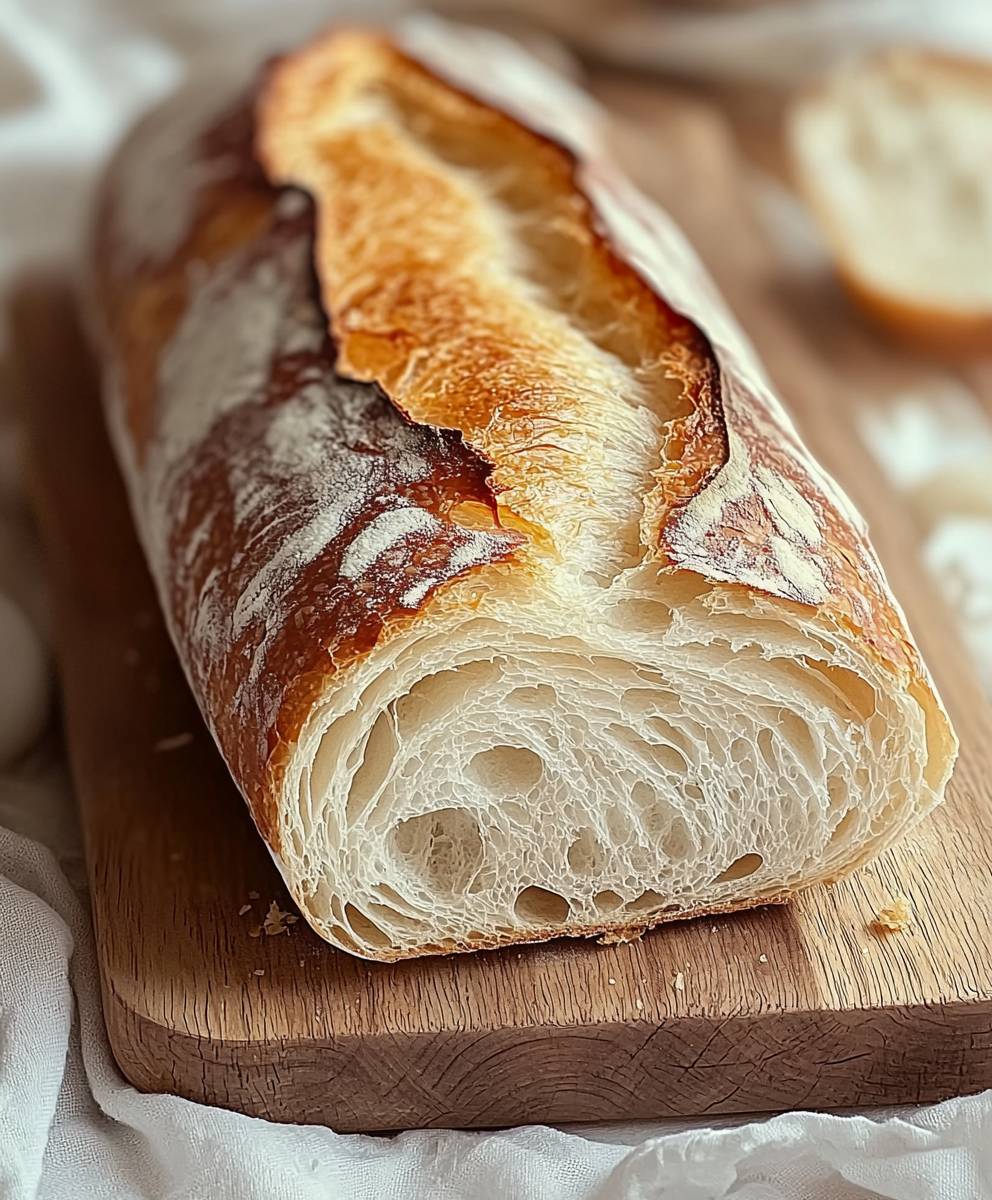
Classic homemade French bread featuring a crispy crust and soft, airy interior. Perfect for sandwiches, dipping, or enjoying plain.
Ingredients
- 1 1/2 cups (360ml) warm water (105-115°F / 40-46°C)
- 1 teaspoon sugar
- 2 1/4 teaspoons (7g) active dry yeast (1 packet)
- 4 cups (500g) all-purpose flour, plus more for dusting
- 2 teaspoons salt
- 2 tablespoons olive oil, plus more for greasing
- Cornmeal, for sprinkling (optional)
- 1 egg white, beaten (for egg wash, optional)
- Sesame seeds or poppy seeds, for topping (optional)
Instructions
- Activate the Yeast: In a large bowl, combine the warm water and sugar. Sprinkle the yeast over the top and let it sit for 5-10 minutes, or until foamy.
- Combine Dry Ingredients: In a separate large bowl, whisk together the flour and salt.
- Combine Wet and Dry Ingredients: Pour the yeast mixture and olive oil into the bowl with the flour mixture. Use a wooden spoon or your hands to mix until a shaggy dough forms.
- Knead the Dough: Turn the dough out onto a lightly floured surface. Knead for 8-10 minutes, or until the dough becomes smooth and elastic. Alternatively, use a stand mixer with a dough hook on medium speed for 6-8 minutes.
- First Rise: Lightly grease a large bowl with olive oil. Place the dough in the bowl, turning to coat all sides. Cover the bowl with plastic wrap or a clean kitchen towel. Let the dough rise in a warm place for 1-1.5 hours, or until doubled in size.
- Punch Down the Dough: Gently punch down the dough to release the air.
- Divide the Dough: Turn the dough out onto a lightly floured surface. Divide the dough in half.
- Shape the Loaves: Gently shape each half into a long, slender loaf, about 14-16 inches long. Flatten the dough into a rectangle, fold in thirds lengthwise, pinch the seam to seal, and gently roll to create a uniform shape. Taper the ends slightly.
- Second Rise: Place the shaped loaves on a baking sheet lined with parchment paper or sprinkled with cornmeal. Cover loosely with plastic wrap or a clean kitchen towel. Let the loaves rise for another 30-45 minutes, or until they have puffed up slightly.
- Preheat the Oven: Preheat your oven to 450°F (232°C). Place a baking stone or pizza stone in the oven while it preheats.
- Create Steam: Place an empty baking pan on the bottom rack of the oven. Just before you put the bread in, pour 1 cup of hot water into the pan. Alternatively, spray the inside of the oven with water several times during the first 10 minutes of baking.
- Prepare the Egg Wash (Optional): If using, brush the tops of the loaves with the beaten egg white.
- Score the Loaves: Use a sharp knife or lame to make several diagonal slashes across the top of each loaf, about 1/2 inch deep.
- Add Toppings (Optional): Sprinkle the loaves with sesame seeds or poppy seeds, if desired.
- Bake the Bread: Carefully transfer the loaves to the preheated baking stone or baking sheet. Bake for 20-25 minutes, or until the loaves are golden brown and sound hollow when tapped on the bottom. The internal temperature should reach 200-210°F (93-99°C).
- Cool the Bread: Transfer the baked loaves to a wire rack to cool completely before slicing and serving.
Notes
- Water temperature is crucial for activating the yeast. Use a thermometer to ensure it’s between 105-115°F (40-46°C).
- All-purpose flour works well, but bread flour can be used for a chewier texture.
- Don’t skimp on kneading time.
- Rising time will vary depending on the temperature of your environment.
- Creating steam in the oven is essential for a crispy crust.
- Allow the bread to cool completely before slicing.
- Store in a paper bag at room temperature for up to 2 days. For longer storage, wrap tightly in plastic wrap and freeze.
- Prep Time: 30 minutes
- Cook Time: 25 minutes