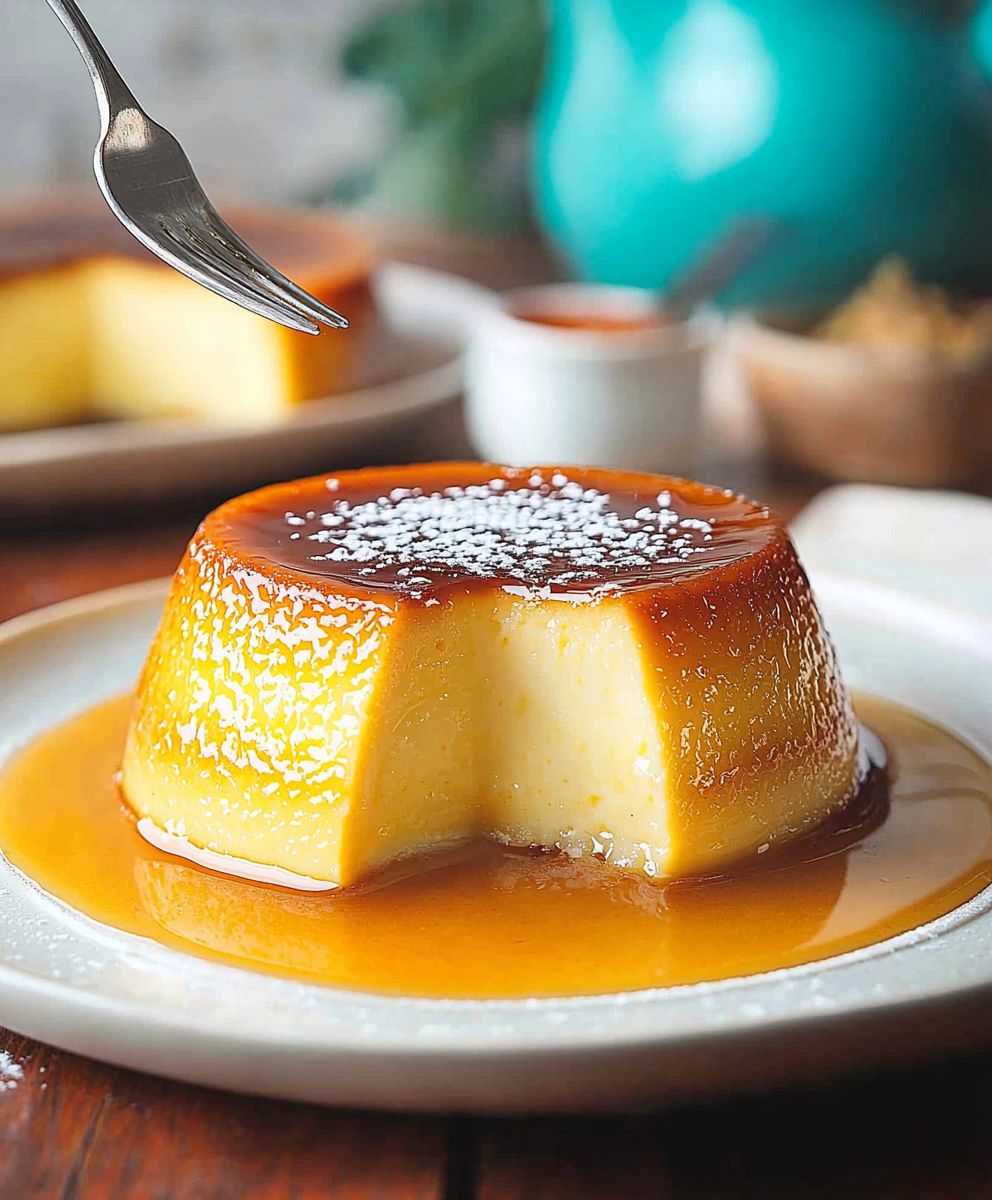
Condensed Milk Flan: a dessert so decadent, so unbelievably smooth, it’s practically guaranteed to vanish in minutes! Have you ever experienced that moment of pure bliss when a spoonful of creamy custard melts on your tongue, leaving behind a trail of sweet, caramelized perfection? That, my friends, is the magic of flan.
Flan, in its various forms, boasts a rich history that stretches back to the Roman Empire. Over centuries, this delightful custard dessert journeyed across continents, evolving with each culture it touched. In Latin America, condensed milk flan became a beloved staple, a symbol of celebration and family gatherings. The addition of condensed milk, a relatively modern ingredient, elevated the flan to new heights of richness and convenience.
What is it about this simple dessert that makes it so irresistible? Perhaps it’s the velvety texture, a testament to the careful baking process. Or maybe it’s the contrasting flavors the sweet, creamy custard perfectly balanced by the slightly bitter, golden caramel. Whatever the reason, condensed milk flan is a crowd-pleaser that’s surprisingly easy to make. I’m excited to share my foolproof recipe with you, so you can experience the joy of this classic dessert in your own kitchen!
Ingredients:
- 1 (14 ounce) can sweetened condensed milk
- 1 (12 ounce) can evaporated milk
- 3 large eggs
- 1 teaspoon vanilla extract
- 1/2 cup granulated sugar
- 1/4 cup water
Making the Caramel:
Okay, let’s start with the caramel. This is the foundation of our flan, and a good caramel is crucial for that rich, sweet flavor. Don’t be intimidated; it’s easier than you think! Just keep a close eye on it.
- Combine Sugar and Water: In a heavy-bottomed saucepan (stainless steel is best), combine the 1/2 cup of granulated sugar and 1/4 cup of water. Stir gently to moisten all the sugar.
- Cook Over Medium Heat: Place the saucepan over medium heat. Now, this is important: Do NOT stir after the sugar has dissolved. Stirring can cause the sugar to crystallize, and we don’t want that.
- Watch the Color Change: As the sugar cooks, it will start to bubble and turn clear. Keep a close watch. The color will gradually change from clear to a light golden, then amber, and finally a rich, dark amber. This process can take anywhere from 5 to 10 minutes, depending on your stove.
- Remove from Heat Immediately: As soon as the caramel reaches a dark amber color (think of the color of a copper penny), immediately remove the saucepan from the heat. The caramel will continue to cook from the residual heat, so you don’t want it to burn. Burnt caramel tastes bitter, and we want a sweet, smooth caramel.
- Pour into Flan Mold: Carefully pour the hot caramel into your flan mold. Swirl the mold gently to coat the bottom and sides evenly. Be careful, as the caramel is extremely hot! If you’re using individual ramekins, divide the caramel evenly among them.
- Let the Caramel Harden: Allow the caramel to cool and harden completely while you prepare the flan mixture. This usually takes about 15-20 minutes. The hardened caramel will create a beautiful layer on top of the flan when it’s inverted.
Preparing the Flan Mixture:
Now that our caramel is setting, let’s move on to the flan mixture. This is where the magic happens! We’re aiming for a smooth, creamy texture, so gentle blending is key.
- Combine Ingredients in a Blender: In a blender, combine the sweetened condensed milk, evaporated milk, eggs, and vanilla extract.
- Blend Until Smooth: Blend on low speed until the mixture is completely smooth and well combined. Avoid over-blending, as this can incorporate too much air into the mixture, which can result in a less smooth flan. A minute or two should be sufficient.
- Pour Mixture into Flan Mold: Gently pour the flan mixture over the hardened caramel in your flan mold. If you’re using individual ramekins, divide the mixture evenly among them.
Cooking the Flan:
The key to a perfect flan is a gentle cooking method. We’re going to use a water bath (bain-marie) to ensure even cooking and prevent the flan from curdling. This method provides a moist environment that helps the flan cook slowly and evenly.
- Prepare the Water Bath: Preheat your oven to 350°F (175°C). Find a baking pan that is large enough to hold your flan mold or ramekins. A roasting pan works well.
- Place Flan Mold in Baking Pan: Place the flan mold (or ramekins) inside the baking pan.
- Add Hot Water: Carefully pour hot water into the baking pan until it reaches about halfway up the sides of the flan mold (or ramekins). Be careful not to splash any water into the flan mixture.
- Bake in the Oven: Carefully transfer the baking pan with the flan mold and water bath to the preheated oven.
- Bake for 50-60 Minutes: Bake for 50-60 minutes, or until the flan is set but still slightly jiggly in the center. The baking time may vary depending on your oven and the size of your flan mold. To test for doneness, gently shake the pan. The flan should be mostly set, with a slight wobble in the center. If you’re using individual ramekins, they may cook faster, so check them after about 40 minutes.
- Remove from Oven and Water Bath: Carefully remove the baking pan from the oven and transfer the flan mold (or ramekins) to a wire rack to cool.
Cooling and Refrigerating:
Patience is key here! Allowing the flan to cool gradually and then chill in the refrigerator is essential for developing its flavor and texture. This step also makes it easier to unmold the flan later.
- Cool to Room Temperature: Allow the flan to cool to room temperature on the wire rack. This usually takes about an hour.
- Refrigerate for at Least 4 Hours: Cover the flan mold (or ramekins) with plastic wrap and refrigerate for at least 4 hours, or preferably overnight. This allows the flan to fully set and the flavors to meld together.
Unmolding and Serving:
The moment of truth! Unmolding the flan can be a little nerve-wracking, but with a little patience and a few simple tricks, you’ll be rewarded with a beautiful, caramel-drenched dessert.
- Loosen the Edges: Run a thin knife or spatula around the edges of the flan to loosen it from the mold.
- Invert onto a Serving Plate: Place a serving plate over the top of the flan mold. Holding the plate and mold firmly together, quickly invert them.
- Gently Shake and Tap: Gently shake and tap the mold to encourage the flan to release. If it doesn’t release immediately, try holding a warm, damp towel around the mold for a few seconds to help loosen the caramel.
- Remove the Mold: Carefully lift the mold away from the flan. The caramel should drizzle down the sides of the flan, creating a beautiful presentation.
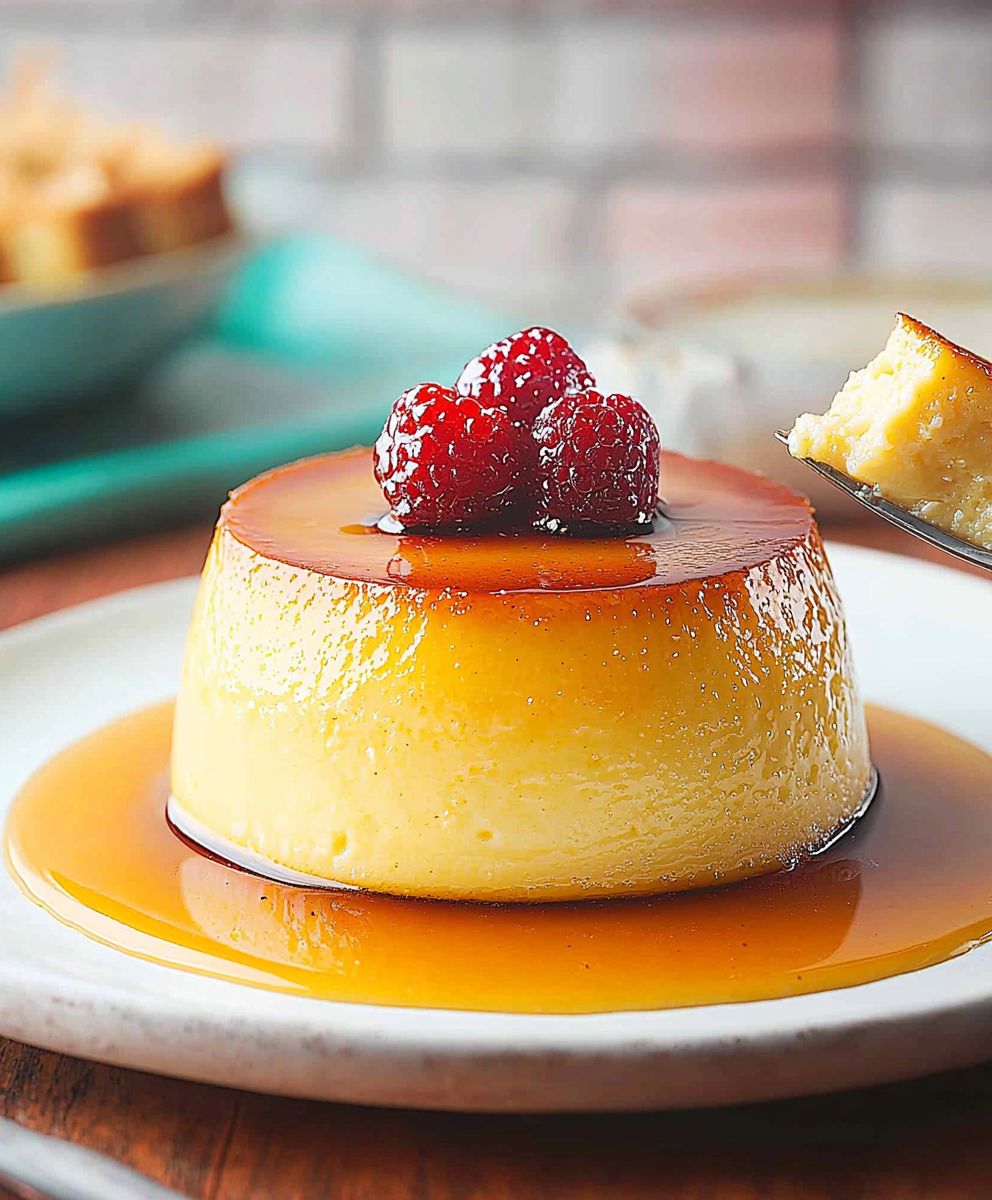
- Serve and Enjoy: Serve the flan chilled. You can garnish it with fresh berries, whipped cream, or a sprinkle of cinnamon, if desired. But honestly, it’s perfect just as it is!
Tips for Success:
- Don’t Overcook the Caramel: Burnt caramel will ruin the flavor of the flan. Keep a close eye on it and remove it from the heat as soon as it reaches a dark amber color.
- Use a Water Bath: The water bath is essential for even cooking and prevents the flan from curdling.
- Don’t Over-Blend the Flan Mixture: Over-blending can incorporate too much air into the mixture, which can result in a less smooth flan.
- Refrigerate for at Least 4 Hours: This allows the flan to fully set and the flavors to meld together.
- Be Patient When Unmolding: If the flan doesn’t release immediately, try holding a warm, damp towel around the mold for a few seconds.
Variations:
- Coconut Flan: Add 1/2 cup of shredded coconut to the flan mixture for a tropical twist.
- Coffee Flan: Add 1 tablespoon of instant coffee granules to the flan mixture for a coffee-flavored flan.
- Chocolate Flan: Add 2 tablespoons of unsweetened cocoa powder to the flan mixture for a chocolate flan.
- Orange Flan: Add the zest of one orange to the flan mixture for a citrusy flavor.
Conclusion:
This Condensed Milk Flan is more than just a dessert; it’s a creamy, dreamy experience that will transport you to dessert heaven. Its simplicity belies its incredible flavor, making it the perfect treat for both seasoned bakers and kitchen novices alike. The rich, caramel-kissed custard is unbelievably smooth, and the subtle sweetness of the condensed milk shines through in every single bite. Trust me, once you try this flan, you’ll understand why it’s a classic! Why is this a must-try? Well, beyond the sheer deliciousness, it’s incredibly easy to make. You probably already have most of the ingredients in your pantry! It requires minimal effort and yields maximum results, making it ideal for those busy weeknights when you crave something sweet but don’t have hours to spend in the kitchen. Plus, it’s a guaranteed crowd-pleaser. Whether you’re hosting a dinner party or simply want to treat yourself, this flan is sure to impress. But the best part? It’s incredibly versatile! While the classic recipe is divine on its own, there are so many ways to customize it to your liking. For a richer, more decadent experience, try adding a splash of vanilla extract or a hint of almond extract to the custard mixture. If you’re a coffee lover, a tablespoon of instant espresso powder will elevate the flavor to a whole new level. Looking for serving suggestions? A dollop of whipped cream and a sprinkle of cinnamon are always a welcome addition. For a more sophisticated presentation, garnish with fresh berries or a sprig of mint. You can also serve it with a scoop of vanilla ice cream for an extra indulgent treat. And if you’re feeling adventurous, try drizzling it with a homemade caramel sauce or a chocolate ganache. For a lighter twist, you can use fat-free condensed milk, although the texture might be slightly different. Another variation is to infuse the milk with citrus zest, like lemon or orange, for a bright and refreshing flavor. You could even add a touch of spice, such as nutmeg or cardamom, for a warm and comforting dessert. The possibilities are endless! I truly believe that everyone should have this Condensed Milk Flan recipe in their repertoire. It’s a timeless classic that’s guaranteed to bring joy to anyone who tries it. So, what are you waiting for? Gather your ingredients, preheat your oven, and get ready to create a dessert masterpiece. I’m so excited for you to try this recipe! And I can’t wait to hear about your experience. Did you make any variations? What did you think of the flavor? What did your family and friends say? Please, please, please share your thoughts and photos in the comments below! I’m always looking for new ideas and inspiration, and I love hearing from my readers. Happy baking! Let me know if you have any questions, and I’ll do my best to answer them. Enjoy your flan! Print
Condensed Milk Flan: The Ultimate Recipe & Baking Guide
- Total Time: 300 minutes
- Yield: 6–8 servings 1x
Description
Classic, creamy flan with a rich caramel topping. This easy-to-follow recipe uses simple ingredients and a water bath for a perfectly smooth and decadent dessert.
Ingredients
- 1 (14 ounce) can sweetened condensed milk
- 1 (12 ounce) can evaporated milk
- 3 large eggs
- 1 teaspoon vanilla extract
- 1/2 cup granulated sugar
- 1/4 cup water
Instructions
- Combine Sugar and Water: In a heavy-bottomed saucepan (stainless steel is best), combine the 1/2 cup of granulated sugar and 1/4 cup of water. Stir gently to moisten all the sugar.
- Cook Over Medium Heat: Place the saucepan over medium heat. Do NOT stir after the sugar has dissolved.
- Watch the Color Change: As the sugar cooks, it will start to bubble and turn clear. The color will gradually change from clear to a light golden, then amber, and finally a rich, dark amber. This process can take anywhere from 5 to 10 minutes.
- Remove from Heat Immediately: As soon as the caramel reaches a dark amber color, immediately remove the saucepan from the heat.
- Pour into Flan Mold: Carefully pour the hot caramel into your flan mold. Swirl the mold gently to coat the bottom and sides evenly. If you’re using individual ramekins, divide the caramel evenly among them.
- Let the Caramel Harden: Allow the caramel to cool and harden completely while you prepare the flan mixture. This usually takes about 15-20 minutes.
- Combine Ingredients in a Blender: In a blender, combine the sweetened condensed milk, evaporated milk, eggs, and vanilla extract.
- Blend Until Smooth: Blend on low speed until the mixture is completely smooth and well combined. Avoid over-blending. A minute or two should be sufficient.
- Pour Mixture into Flan Mold: Gently pour the flan mixture over the hardened caramel in your flan mold. If you’re using individual ramekins, divide the mixture evenly among them.
- Prepare the Water Bath: Preheat your oven to 350°F (175°C). Find a baking pan that is large enough to hold your flan mold or ramekins. A roasting pan works well.
- Place Flan Mold in Baking Pan: Place the flan mold (or ramekins) inside the baking pan.
- Add Hot Water: Carefully pour hot water into the baking pan until it reaches about halfway up the sides of the flan mold (or ramekins).
- Bake in the Oven: Carefully transfer the baking pan with the flan mold and water bath to the preheated oven.
- Bake for 50-60 Minutes: Bake for 50-60 minutes, or until the flan is set but still slightly jiggly in the center. The baking time may vary depending on your oven and the size of your flan mold. To test for doneness, gently shake the pan. The flan should be mostly set, with a slight wobble in the center. If you’re using individual ramekins, they may cook faster, so check them after about 40 minutes.
- Remove from Oven and Water Bath: Carefully remove the baking pan from the oven and transfer the flan mold (or ramekins) to a wire rack to cool.
- Cool to Room Temperature: Allow the flan to cool to room temperature on the wire rack. This usually takes about an hour.
- Refrigerate for at Least 4 Hours: Cover the flan mold (or ramekins) with plastic wrap and refrigerate for at least 4 hours, or preferably overnight.
- Loosen the Edges: Run a thin knife or spatula around the edges of the flan to loosen it from the mold.
- Invert onto a Serving Plate: Place a serving plate over the top of the flan mold. Holding the plate and mold firmly together, quickly invert them.
- Gently Shake and Tap: Gently shake and tap the mold to encourage the flan to release. If it doesn’t release immediately, try holding a warm, damp towel around the mold for a few seconds to help loosen the caramel.
- Remove the Mold: Carefully lift the mold away from the flan. The caramel should drizzle down the sides of the flan, creating a beautiful presentation.
- Serve and Enjoy: Serve the flan chilled. You can garnish it with fresh berries, whipped cream, or a sprinkle of cinnamon, if desired.
Notes
- Don’t Overcook the Caramel: Burnt caramel will ruin the flavor of the flan. Keep a close eye on it and remove it from the heat as soon as it reaches a dark amber color.
- Use a Water Bath: The water bath is essential for even cooking and prevents the flan from curdling.
- Don’t Over-Blend the Flan Mixture: Over-blending can incorporate too much air into the mixture, which can result in a less smooth flan.
- Refrigerate for at Least 4 Hours: This allows the flan to fully set and the flavors to meld together.
- Be Patient When Unmolding: If the flan doesn’t release immediately, try holding a warm, damp towel around the mold for a few seconds.
- Prep Time: 20 minutes
- Cook Time: 60 minutes