Coquito Ice Cream Dessert is a delightful twist on the traditional Puerto Rican holiday drink, coquito, which is often enjoyed during festive gatherings. This creamy, coconut-infused treat captures the essence of the beloved beverage, making it a perfect indulgence for any occasion. As someone who has always cherished the rich flavors of coquito, I can assure you that this dessert brings a refreshing and satisfying experience that is hard to resist.
The history of coquito dates back to the 17th century, with its roots deeply embedded in Puerto Rican culture. Families often gather to share this sweet, spiced coconut drink, creating lasting memories and traditions. People love Coquito Ice Cream Dessert not only for its luscious taste and velvety texture but also for its convenience; it can be prepared ahead of time and served as a delightful finale to any meal. Whether youre celebrating a special occasion or simply treating yourself, this dessert is sure to impress and satisfy your sweet tooth!

Ingredients:
- 1 can (13.5 oz) coconut milk
- 1 can (14 oz) sweetened condensed milk
- 1 can (12 oz) evaporated milk
- 1 cup white rum (optional, adjust to taste)
- 1 teaspoon vanilla extract
- 1 teaspoon ground cinnamon
- 1/2 teaspoon ground nutmeg
- 1/4 teaspoon salt
- 1 cup heavy cream
- 1/2 cup shredded coconut (toasted, for garnish)
- Chocolate shavings or cocoa powder (for garnish, optional)
Preparing the Coquito Base
To start off, I gather all my ingredients and set up my workspace. Its important to have everything ready to go, so I dont have to scramble around while mixing. Heres how I prepare the coquito base:
- In a large mixing bowl, I combine the coconut milk, sweetened condensed milk, and evaporated milk. I use a whisk to blend them together until smooth. This creates a rich and creamy base for my ice cream.
- Next, I add the white rum. If you prefer a non-alcoholic version, you can skip this step or substitute it with a little extra coconut milk for flavor. I stir it in well.
- Then, I add the vanilla extract, ground cinnamon, ground nutmeg, and salt. These spices are what give the coquito its signature flavor, and I make sure to mix everything thoroughly.
- Once the mixture is well combined, I set it aside to let the flavors meld together for about 10-15 minutes. This step is crucial as it enhances the overall taste of the ice cream.
Incorporating the Heavy Cream
Now that my coquito base is ready, its time to add the heavy cream, which will give the ice cream its luscious texture.
- I take a separate mixing bowl and pour in the heavy cream. Using an electric mixer, I whip the cream until soft peaks form. This usually takes about 2-3 minutes. I love watching the cream transform into something fluffy and light!
- Once the cream is whipped, I gently fold it into the coquito mixture. I do this carefully to maintain the airiness of the whipped cream. I use a spatula and fold it in a circular motion until just combined. Its okay if there are a few streaks of white; I dont want to overmix it.
Chilling the Mixture
With the coquito ice cream mixture ready, its time to chill it before freezing.
- I cover the bowl with plastic wrap or a lid and place it in the refrigerator for at least 2 hours. This step is important because it allows the flavors to deepen and the mixture to cool down, which helps in the freezing process.
Freezing the Ice Cream
After the mixture has chilled, Im ready to freeze it. If you have an ice cream maker, this part is a breeze!
- I pour the chilled coquito mixture into the ice cream maker and churn according to the manufacturers instructions. Typically, this takes about 20-25 minutes. I love watching it transform into a creamy ice cream!
- Once it reaches a soft-serve consistency, I transfer the ice cream to an airtight container. I like to use a spatula to smooth the top.
- To ensure it freezes properly, I cover the container with a lid and place it in the freezer for at least 4 hours, or until firm. If Im feeling impatient, I sometimes check it after 2 hours, but I find that letting it freeze longer gives the best texture.
Serving the Coquito Ice Cream Dessert
Now comes the fun partserving and garnishing the coquito ice cream!
- Once the ice cream is firm, I take it out of the freezer and let it sit at room temperature for about 5-10 minutes. This makes it easier to scoop.
- Using an ice cream scoop, I serve generous portions into bowls or
Conclusion:
In summary, this Coquito Ice Cream Dessert is an absolute must-try for anyone looking to indulge in a creamy, coconut-infused treat that captures the essence of the holiday season all year round. The combination of rich coconut milk, sweetened condensed milk, and a hint of rum creates a delightful flavor profile that is both refreshing and comforting. Whether youre serving it at a festive gathering or simply treating yourself on a warm day, this dessert is sure to impress. For serving suggestions, consider topping your Coquito Ice Cream Dessert with a sprinkle of cinnamon or a drizzle of chocolate sauce for an extra touch of decadence. You can also experiment with variations by adding crushed pineapple for a tropical twist or incorporating your favorite nuts for added texture. The possibilities are endless! I encourage you to give this recipe a try and experience the joy it brings. Once youve made it, Id love to hear about your experience! Share your thoughts, any variations you tried, or even a picture of your creation. Lets spread the love for this Coquito Ice Cream Dessert together! Print
Coquito Ice Cream Dessert: A Creamy Twist on the Classic Holiday Treat
- Total Time: 380 minutes
- Yield: 1.5 quarts 1x
Description
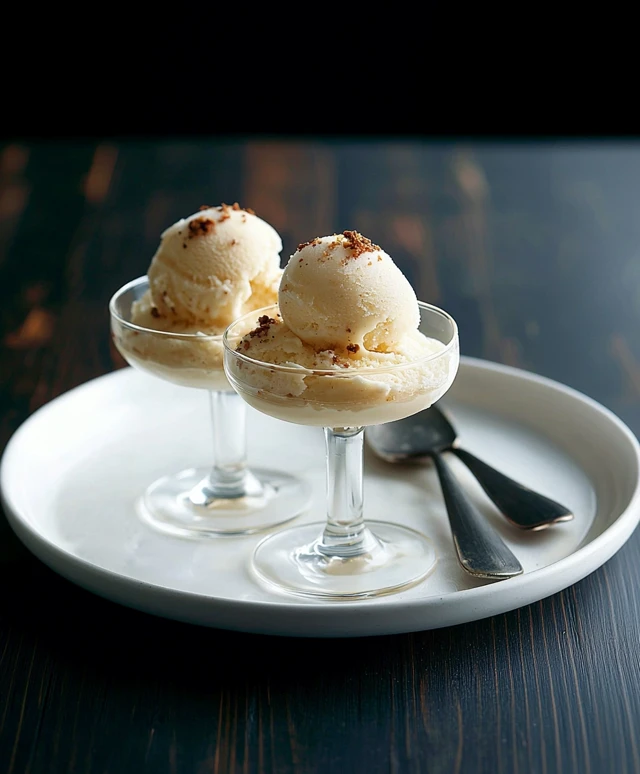
This Coquito Ice Cream is a creamy, tropical treat inspired by the classic Puerto Rican holiday drink. With rich coconut flavors, a hint of spice, and an optional splash of rum, it’s perfect for any occasion. Garnish with toasted coconut and chocolate shavings for an indulgent finish!
Ingredients
- 1 can (13.5 oz) coconut milk
- 1 can (14 oz) sweetened condensed milk
- 1 can (12 oz) evaporated milk
- 1 cup white rum (optional, adjust to taste)
- 1 teaspoon vanilla extract
- 1 teaspoon ground cinnamon
- 1/2 teaspoon ground nutmeg
- 1/4 teaspoon salt
- 1 cup heavy cream
- 1/2 cup shredded coconut (toasted, for garnish)
- Chocolate shavings or cocoa powder (for garnish, optional)
Instructions
- In a large mixing bowl, combine the coconut milk, sweetened condensed milk, and evaporated milk. Whisk until smooth.
- Add the white rum (if using) and stir well. For a non-alcoholic version, substitute with extra coconut milk.
- Mix in the vanilla extract, ground cinnamon, ground nutmeg, and salt until thoroughly combined.
- Let the mixture sit for 10-15 minutes to allow the flavors to meld.
- In a separate bowl, whip the heavy cream with an electric mixer until soft peaks form (about 2-3 minutes).
- Gently fold the whipped cream into the coquito mixture using a spatula, being careful not to overmix.
- Cover the bowl with plastic wrap or a lid and refrigerate for at least 2 hours to chill.
- Pour the chilled mixture into an ice cream maker and churn according to the manufacturers instructions (about 20-25 minutes).
- Transfer the soft-serve ice cream to an airtight container, smoothing the top with a spatula.
- Cover and freeze for at least 4 hours, or until firm.
- Before serving, let the ice cream sit at room temperature for 5-10 minutes for easier scooping.
- Scoop into bowls and garnish with toasted coconut and chocolate shavings or cocoa powder, if desired.
Notes
- For a richer flavor, consider using full-fat coconut milk.
- Adjust the amount of rum based on your preference for alcohol.
- This ice cream can be stored in the freezer for up to 2 weeks, but it’s best enjoyed fresh!
- Prep Time: 20 minutes
- Cook Time: 0 minutes